Last updated: Apr 19, 2026
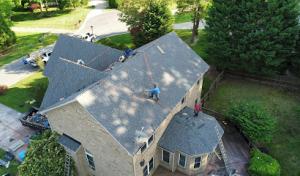
The Mediterranean-influenced pattern of dry winters and hot summers shapes how a full roof replacement unfolds. In a dense postwar tract setting, most crews can stay on schedule during the dry months, but delays in wet season or heat spikes can ripple through neighborhoods quickly. Winter rain in the Southeast Los Angeles County area creates moisture risk if tear-off, deck exposure, or underlayment installation is interrupted mid-project. A well-timed re-roof stays ahead of those interruptions and helps the deck stay dry long enough for underlayment to cure and fastenings to set without backsliding.
Begin planning for a full replacement by aiming to start after the last of the autumn showers but before the first strong late-spring storms. In practice, that means lining up a crew for late spring or early summer when the Santa Ana conditions are less likely to flare into sudden heat waves that pause work. If a project must cross into late summer, arrange for a shaded, shaded-lot staging area and a crew schedule that minimizes long midday heat exposure on exposed underlayment. The key is to avoid long, uninterrupted exposure of deck and underlayment to sun before the new roof is secured, especially when tile or metal systems are involved.
Tile and metal systems come with their own timing nuances. Heavier tile options benefit from a stable, dry period because the underlying deck and underlayment need consistent support during installation. Metal roofs rely on precise fastening patterns and clean, dry substrate surfaces; prolonged exposure of underlayment or deck boards to sun can accelerate material aging and complicate resealing details later. When dry-season windows are available, schedule inspections and scaffold setup to minimize interruptions caused by wind-driven dust or sudden heat spikes that can affect fasteners and sealants. For tile, ensure the deck is swept clean and free of moisture-trapping debris before underlayment is laid, so the moisture barrier can perform as intended once the covering goes on.
If the project timeline inadvertently slides into winter, build in contingencies for rain days. Prewrap and tarping strategies should be ready to deploy the moment a forecast shows rain potential. Consider temporary weather protection around vent stacks and penetrations, and plan for a staged teardown rather than a continuous open-sky exposure when rain is predicted. The goal is to keep the deck and any newly installed underlayment from sitting wet during critical curing periods. In practice, that means prioritizing sections that are most vulnerable to water intrusion during stay-dry windows and sealing gaps promptly once sections are completed.
Hot, dry summer conditions can accelerate aging of underlayment if it sits exposed too long before the roof covering is completed. If a replacement must span into summer, coordinate a tight sequence: remove old material, install underlayment, and immediately place the chosen roof cover. Keep staging shaded when possible and coordinate with local crews who are familiar with the typical afternoon heat patterns. Quick, efficient handoffs between tear-off, prep, and cover-install phases reduce the risk of premature underlayment aging and help the project stay on track without weather-repair delays.
In a neighborhood built for efficiency and standard row-home layouts, small scheduling tweaks can make a big difference. Communicate with neighbors about potential daytime noise, ensure driveways and street access stay clear for roof deliveries, and align start dates with local weather forecasts that emphasize the first half of the dry season. That focus keeps the project moving through Norwalk's typical patterns without getting snagged by unexpected moisture or heat-related delays.
Clay tile and concrete tile are common options in this area, but their added weight makes structural suitability a bigger issue here than with lighter asphalt systems. The postwar tract neighborhoods often sit on rooftops that were designed around lighter assemblies, so replacing an aged roof with a heavy tile stack can push attic joists, load paths, and rafter connections to their limits. Before deciding, you should have a structural assessment focused on roof framing, bearing strength, and the ability to transfer weight safely to exterior walls and the foundation. If the house shows signs of sagging, long truss spans, or previous remodels, the risk of overloading the structure increases quickly and may require reinforcement.
In this jurisdiction, tile or metal roof projects may trigger added plan review tied to wind and seismic requirements rather than being treated like a simple like-for-like shingle swap. That means the project needs a careful evaluation of how the heavier assembly behaves under Santa Ana-driven gusts and local seismic demands. A heavier roof alters the dynamic response of the building during earthquakes and can change how anchor points, connections, and roof-to-wall ties perform in a shaker event. Expect engineering input to verify that rafter cycles, nailing patterns, and edge metal detailing align with current performance expectations for wind uplift and seismic resilience. Quick, low-cost "temporary fixes" are not a substitute for proper engineering or code-considered detailing.
For many Norwalk homeowners replacing an older roof on a postwar house, the key question is not just material preference but whether the existing structure is appropriate for a heavier assembly. The local landscape shows a mix of tile and metal options, each bringing a distinct profile and weight. Clay tiles offer classic durability and a distinctive look, while concrete tiles provide added mass and impact resistance, but both require a frame capable of handling the load and a properly integrated underlayment that supports long-term performance. If the structure cannot safely bear the added weight, alternatives such as lighter synthetic shingles or mechanically lighter metal panels may preserve roof integrity while still delivering the desired aesthetic. In any case, the decision hinges on a careful balance between the project's weight, the framing's capacity, and the anticipated wind and seismic demands.
A practical approach starts with a qualified roofer who accepts the need to involve a structural engineer early in the process. Bring along original roof plans if available, or request a framing assessment that includes joist sizing, bearing conditions, and potential retrofit options. If reinforcement is recommended, understand how, when, and where those structural improvements will be executed to avoid surprises once the old roofing is removed. In this climate, planning around the dry season remains critical, but it should not trump the obligation to verify structural readiness and compliant detailing for heavier roof systems.
Find contractors who specialize in clay and concrete tile roofs, known for their durability and curb appeal.

Allied Roofing
(562) 525-5839 norwalkroofingcontractor.com
11633 The Plaza #24, Norwalk, California
4.9 from 23 reviews
Welcome to Allied Roofing, your trusted partner in elevating rooftops to new heights! Experience excellence in every layer with our expert Roof Installation – a seamless blend of precision and aesthetics. Transform your property with confidence through our dedicated Roof Replacement service, ensuring durability and curb appeal. Count on us for meticulous Roof Repair, restoring your peace of mind. Embrace innovation with our cutting-edge Metal Roofing solutions or the timeless charm of Asphalt Shingle Roofing. For commercial spaces, choose the reliability of Commercial TPO Roofing. From New Construction Roofing to the sleek lines of Flat Roofing, Allied Roofing delivers quality, durability, and a new zenith for your property.

Cassady Roofing
(562) 944-5817 www.cassadyroofing.com
Serving
4.7 from 30 reviews
Cassady Roofing is a family owned and operated business since 1961. RESIDENTIAL, COMMERCIAL, INDUSTRIAL: New - Repairs - Recover. We do ALL TYPES of Roofing, such as Tile, Shingles, Comp, Hot Mop & Rock Specialists. Certified Cool Roof Appli
Shingle Guard Roofs
(562) 545-4906 shingleguardroofs.com
Serving
5.0 from 25 reviews
Shingle Guard Roofs is a trusted roofing company dedicated to protecting homes and businesses with durable, quality roofing solutions built to last. Specializing in roof repairs, replacements, new installations, and preventative maintenance, our team delivers expert craftsmanship and reliable service at fair prices. We work with all major roofing materials asphalt shingles, tile, metal, and flat roofing systems to provide customized solutions that enhance curb appeal while keeping properties safe from the elements. At Shingle Guard Roofs, we stand by our name by offering long lasting protection, honest estimates, and a commitment to excellence that has made us a go to roofing contractor for homeowners and businesses.

Thompson Roofing
(562) 669-3163 www.thompsonroofingca.com
Serving
5.0 from 28 reviews
Thompson Roofing is a reliable roofing contractor providing expert service to homeowners and businesses who want lasting protection and peace of mind. We specialize in roof repairs, full roof replacements, new installations, leak detection, and emergency roofing services, using only top-quality materials designed to withstand tough weather conditions. Our skilled team works with all roof types, including asphalt shingles, tile, flat roofing, and energy-efficient systems, ensuring every project is completed with precision and care. At Thompson Roofing, we pride ourselves on honest pricing, dependable service, and workmanship that adds both safety and value to your property—making us a trusted choice for roofing solutions in the community.

Selah Roofing
(323) 870-7086 www.selahroofingcorp.com
Serving
4.7 from 61 reviews
We bring a passion for efficient results & honest communication to every new project. Put your worries to rest with a roof done right by our experts.
Elevate Roofing
(562) 469-2089 elevateroofingservices.com
Serving
5.0 from 96 reviews
At Elevate Roofing, we're more than just a roofing company we're a close-knit, family-owned business with over 30 years of combined experience in the industry. Picture us as your friendly neighborhood roof experts, committed to treating your home like our own. Here's the deal: we take the time to get things just right, from hand-picking the best materials for your roof to making sure every detail, like ventilation and flashing, is spot on. Our team? They're not just skilled workers; they're like part of the family, dedicated to crafting roofs that not only look great but also stand strong against whatever Mother Nature throws their way. So, if you're ready to give your home the top-notch treatment it deserves, let's chat.
Roofing H Rancho Palos Verdes
Serving
5.0 from 44 reviews
As a premier roofing service, Roofing H Rancho Palos Verdes offers exceptional craftsmanship for all your roofing needs. We specialize in installations, repairs, and maintenance, ensuring the durability and longevity of your home's protection. Our dedicated team uses high-quality materials and proven techniques to deliver results that stand up to the elements and elevate your property's curb appeal. Trust us to provide reliable, professional service that keeps your home safe and secure for years to come.
Baja Roofing
(562) 699-5598 www.bajaroofing.com
Serving
4.8 from 60 reviews
Baja Roofing & Coatings has over 35 years of experience in the roofing industry. We’re fully accredited and offer services to both residential and commercial clients. We provide FARR (fluid applied reinforced restoration) and silicon commercial roof installation, commercial single-ply membrane installation, residential shingle roof replacement, tile roof installation, torch down or roll roofing installation, and more. Call us today at (800) 276-6348!
GreenCal Construction
(714) 790-1750 greencalinc.com
Serving
4.5 from 76 reviews
GreenCal Construction provides high-quality, energy-efficient home improvement solutions: residential and commercial roofing & solar, roof repair, windows, insulation, exterior paint, and patio covers. Focusing on sustainability and durability, their expert team enhances homes with innovative, eco-friendly upgrades. Whether you're looking to improve curb appeal, reduce energy costs, or create a low-maintenance outdoor space, GreenCal offers customized solutions tailored to your needs. Their services combine expert craftsmanship, top-notch customer service, premium materials, and long-lasting performance to ensure customer satisfaction. GreenCal Construction has you covered...and surrounded!
Quality First Roofing Solutions
Serving
5.0 from 11 reviews
Quality First Roofing Solutions stands as a premier roofing supply store in Santa Fe Springs, CA. Located at 12140 Altamar Pl, we are dedicated to providing contractors and DIY enthusiasts alike with an extensive selection of top-tier roofing materials. Discover everything you need for durable, long-lasting roofs, all backed by our commitment to excellence and reliability.
RC Roofing Company
(562) 923-1632 rcroofingcompany.com
Serving
4.5 from 19 reviews
We have been serving Southern California for over 40 years. Our business has flourished for decades due to our high customer referral rate. RC Roofing contractors provide the whole package when it comes to your roof. The owner of RC Roofing will actually come to your home for the consultation and estimate. We have and will maintain Workman Compensation Insurance and Business Liability Insurance for your protection. We deal with cities and their Inspectors all the time, which will help us during your job. Our roofers are professionally trained, with many years of experience working for RC Roofing. We will supply you with a labor guarantee on the workmanship and a material warranty from the material manufacture.
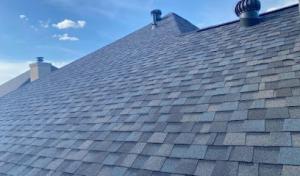
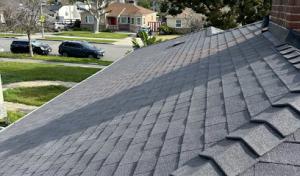
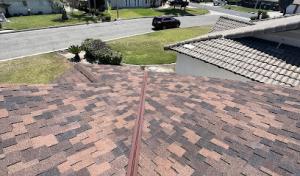
Asphalt shingles remain a practical fit for many homes in this area because they avoid the structural load concerns that can come with tile systems. In Norwalk, the dryness of the long summer and the occasional winter rains pull at fasteners and underlayment alike, and asphalt's lighter weight helps reduce stress on older roof decks. A homeowner with mixed-age framing can often re-roof with asphalt without needing major structural upgrades, which translates to fewer surprises during inspections and a smoother install window. When choosing asphalt, consider a high-quality laminated product with a stout underlayment and a breathable ridge vent system to cope with humidity swings and heat buildup. This pairing helps minimize wind uplift risks while keeping energy costs moderate in warm months. For those who want curb appeal without heavy decking changes, architectural shingles offer texture and depth that mimic more expensive options while preserving service life in the dry-to-wet climate cycle typical of this valley corridor.
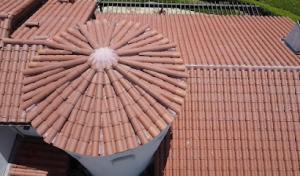
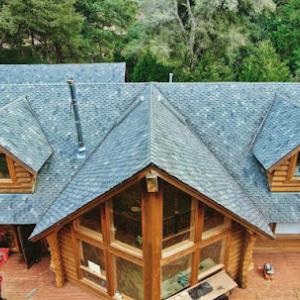
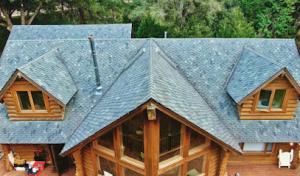
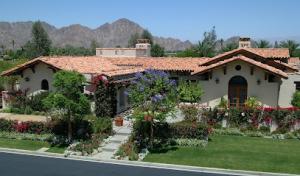
Clay tile brings a distinctive aesthetic that many Norwalk homes have either used or considered, especially on mid-century and postwar tract designs where the architectural language favors a heavier, more Spanish-influenced look. The weight and rigidity of tile demand careful evaluation of the roof structure and fastener plan, as wind-driven rain and seismic considerations in this climate can stress tile and underlayment differently than other materials. Clay tile can deliver excellent longevity when paired with a compatible substrate and a moisture-control underlayment designed to manage movement. Homeowners should anticipate higher installation complexity and ensure that accessories-such as proper flashing at intersections and chimneys-are matched to a tile-specific system. In practice, tile works well on homes with a rigid deck and sufficient attic ventilation to temper the heat that travels through the roof plane during dry seasons.
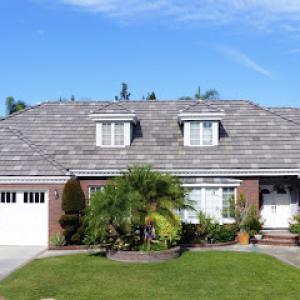
Concrete tile provides a robust, cost-competitive alternative to clay, with similar weight and wind considerations but often greater flexibility for different profiles. In this market, concrete can give a heavier, durable presence that suits many tract neighborhood styles and maintains good impact resistance. The installation approach emphasizes accurate substrate preparation and careful detailing around penetrations, where moisture intrusion is a common risk if flashing isn't executed to tile standards. For Norwalk homes, concrete tile often blends well with existing color schemes and can offer improved acoustics and thermal mass. A well-chosen underlayment and ventilation strategy helps extend life in the face of seasonal humidity bursts and the region's winter rain events.
Metal roofing appeals to homeowners seeking longevity and a modern profile, especially when the look of a metal roof is compatible with the house's architectural cues. Metal's light weight relative to tile reduces deck load concerns, a practical benefit in older trusses and common mid-century framing. In this climate, metal shines when paired with a reflective coating and a ventilated attic to minimize heat gain during dry seasons. Wind resistance is a key strength, but careful fastening and appropriate edge detailing matter in exposed elevations. If the roofline runs long and straight, metal panels can deliver a clean, low-maintenance finish that holds color well and tolerates the region's sun exposure with less thermal expansion stress than some heavier options.
Wood shingles and shakes offer a classic texture that suits certain architectural cues found in this market. They require robust underlayment and a careful maintenance plan to prevent moisture-related issues during winter storms. In Norwalk, wood products tend to perform best when installed with proper ventilation, sealants, and periodic treatments to guard against decay and insect activity. For many homes, wood remains a stylistic choice rather than a first-choice for lifetime resilience, but it can be a desirable option where the aesthetic aligns with the original design language and where local crews have experience with compatible flashing details.
Synthetic and composite shingles appeal in this market when homeowners want the look of heavier or specialty materials without the same weight implications on existing homes. Modern composites can mimic slate, shakes, or tile while offering easier installation, reduced deck stress, and decent longevity. In practice, you can expect consistent performance in varying weather, with lower maintenance needs than natural wood in some cases and better resistance to cracking under sun exposure. For Norwalk homes, composites provide a versatile path to achieve a desired visual impact without triggering structural concerns typical of true tile or stone-look systems, especially where roof spans are long or deck rigidity is a concern.
Fall Santa Ana wind events in this area can lift shingles, move flashing, and drive debris onto roof surfaces. Those gusts are notorious for catching exposed edges and flashing where tiles sit just shy of perfect seal. If you notice loosened shingle tabs, bent or loose flashing around vents, chimneys, or skylights, address them before the next dry spell ends. In Norwalk, roofs are repeatedly tested by sudden, strong air pushes that can expose vulnerable seams, so do a targeted walk of your ridges and eaves after any windy day. If you're unsure about a flashing repair, don't wait-secure the flashing to prevent leaks that will show up with the first heavy rain.
The city's wet-winter pattern means leaks often reveal themselves during the first stronger seasonal rains after a long dry spell. A dry spell can hide small cracks in underlayment or rarely shifted tiles; once rain returns with intensity, you'll see where water finds the path. Look for staining on ceilings, damp spots along interior walls, or musty odors that bloom after a rain. If a ceiling or wall shows any sign of moisture, treat it as a warning-water travels and can undermine roof decks, especially under clay or concrete tiles that don't shed water as smoothly as modern composites. Prioritize attic inspections after the first heavy rain event and after any unusually windy week.
Occasional hail years matter in this part of Southern California even though hail is not the dominant annual threat, so impact checks should not be skipped after unusual storms. Hail can crack tiles, loosen granules on asphalt, or dent metal roofing, leaving micro openings that progress into leaks. After a hail event, perform a physical roof audit: listen for new thumps, feel for loose edges, and examine high-traffic areas for accelerated granule loss. If damage is detected, don't delay. Hail can compromise underlayment and flashing, accelerating deterioration during the upcoming rainy season.
Before the next dry spell ends, walk the roof with care or hire a local pro to check for loose tiles, lifted edges, or damaged flashing. Clear debris from gutters and downspouts so water sheds cleanly away from fascia and walls. Trim overhanging branches that could shed ice or branches onto the surface during wind events. Finally, align prevention with timing: schedule a detailed inspection and repairs during the dry season to minimize weather-related disruption and ensure the roof is sealed before Norwalk's winter rains arrive.
Find local contractors experienced in assessing and restoring roofs after hail, wind, and severe weather events.

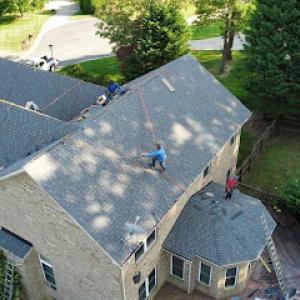
A full re-roof in Norwalk typically requires a permit filed through the local building department rather than being handled as an informal contractor-only job. The permit process starts with a clearly documented scope of work, including roof type, underlayment, and any structural changes. Because Norwalk sits in a dense, postwar tract housing area, expect the plan reviewer to look closely at how the new roof interacts with existing framing, ventilation, and attic access. Submitting complete drawings and a current property survey helps prevent delays. The building department will guide you on which forms, system specifics, and disclosures are needed for approval.
Inspection flow follows a cautious sequence. An underlayment inspection typically occurs after the roof deck and any structural repairs are in place but before the final coverings go on. This step confirms that the chosen underlayment and flashing details align with local expectations for moisture management and wind exposure. A second, final inspection occurs after the roof covering is installed and all penetrations, vents, and valley details are complete. In Norwalk, this final check ensures that the completed system meets both the city's wind and seismic considerations and the terminology used in the approved plan set.
Tile and metal projects in Norwalk may face additional plan review because of local wind and seismic considerations, making paperwork and approval timing more important than for basic re-roof jobs. Expect the reviewers to scrutinize fastening schedules, edge detailing, and how the chosen system will perform under typical Santa Ana wind gusts and seasonal rain. If your project uses heavier tile or metal panels, be prepared to provide calculations or additional drawings showing fastener patterns, uplift resistance, and attachment to existing rafters or purlins. Coordinating with your contractor on these details ahead of submission can smooth the process.
When possible, align permit submission and inspections with the dry season to minimize weather-driven delays. A scheduled sequence that preserves access to attic space, ventilation ducting, and roof edge work helps avoid rework or inspection holds. Communicate anticipated inspection windows with both the contractor and the building department to keep the project on track and to reduce the risk of weather-related setbacks during critical phases.
Provided local cost ranges run from 380 to 750 USD per square for asphalt shingles, 900 to 1500 for metal, 1100 to 1900 for clay tile, 850 to 1300 for concrete tile, 600 to 1100 for wood shingles or shakes, and 700 to 1200 for synthetic or composite shingles. In Norwalk, costs often rise when homeowners move from lighter roofs to clay or concrete tile because structural review and heavier-system detailing can add scope beyond material price alone. That means a tile roof can look like a simple upgrade until the structural and underlayment requirements come into play, pushing the project into the higher end of the range. Asphalt remains the most economical path, but even there, the local market sees price bumps if the attic or ceiling needs upgraded ventilation or additional underlayment for seasonal rain exposure.
Scheduling around the dry season can affect pricing and availability in this market because many homeowners try to avoid winter rain exposure during tear-off and installation. If a Norwalk home already has a lightly loaded roof deck, a late spring or early summer tear-off can keep crews on track and minimize weather-related delays. For heavier tile systems, consider a staggered schedule that prioritizes structural assessment and underlayment upgrades before tile installation. This approach helps prevent mid-project hold-ups that drive up labor costs. When comparing bids, ask how much of the quote accounts for added underlayment, fasteners, and any required reinforcement to meet wind or seismic expectations, since those line items are more likely to appear with clay, concrete, or metal in this market.
Don't let upfront costs delay a critical repair - these contractors offer payment plans to fit your budget.
California's tightened homeowners insurance market is very real for you as a Norwalk homeowner. Insurers increasingly expect thorough roof documentation before approving or renewing coverage, and the clock can run out if files are incomplete. Before any claim or renewal, gather a clear narrative of what was done, when, and by whom, so it sits ready for the insurer's review.
When a claim or renewal hits, expect requests for photos showing roof condition before, during, and after work, detailed contractor estimates, and proof that underlayment and ventilation were installed correctly. In practice, that means organized image folders with dates, labeled angles, and notes about attic ventilation and deck protection. Have installation datasheets from the product manufacturers at hand, plus a brief summary of the roof's structural health.
Regional California wildfire-risk pricing and carrier pullbacks can influence premiums and availability in Norwalk even if the claim centers on wind or rain. A robust, photo-backed record that demonstrates proper underlayment, flashing, drainage, and venting can make a critical difference when carriers re-evaluate risk exposure after a storm or a fast-moving ember event. Expect insurers to scrutinize how a roof was repaired relative to the risk profile of surrounding homes.
Develop a habit of documenting seasonal roof checks. Take fresh photos after major storms, and keep a dated log of any repairs, material substitutions, and ventilation improvements. When the time comes to file or renew, a clean, complete package that tells the roof's history can smooth the path through a sometimes unpredictable insurance landscape.
Connect with contractors who help homeowners navigate the claims process from damage assessment to final approval.
Atlas Roofing of Long Beach
(562) 376-2244 www.atlasroofinglongbeach.com
Serving
5.0 from 18 reviews
In a city with many older residential properties and additions, low-slope sections commonly appear on garages, patio covers, and room additions even when the main house roof is pitched. These add-ons share the weather risks of the main roof but with more acute drainage challenges. In winter, drainage problems show up faster on low-slope sections, so prioritizing them during planning and repairs helps prevent leaks that ripple into nearby ceilings and walls.
Timing a re-roof or retrofit around the dry season is practical here. Aim to complete roofing work before the winter rains begin, so all penetrations and underlayment set before moisture exposure. If a low-slope add-on shares a gutter line or valley with the main roof, coordinate the work so flashing and transitions between systems are continuous. A careful contractor will stagger work to avoid long exposures where water can intrude during a late-season storm.
Homeowners often need contractors who can address mixed roof systems on one property rather than only the main visible front-slope material. Look for crews with experience detailing step-flashings, integrated skylight boot details, and compatible underlayments for low-slope sections. For Norwalk, this means validating that the add-on's deck, insulation, and vapor barrier are matched to the main roof so the entire envelope breathes and sheds water consistently.
When winter arrives, inspect low-slope add-ons for standing water, unusual pooling, or slow drainage. Regularly check sealant joints around penetrations and transitions to the main roof. If you notice recurring moisture or damp spots in the interior near these add-ons, arrange a spot assessment before the next storm season. A proactive approach reduces the chance of widespread interior damage and keeps the add-ons performing with the main roof.
Find specialists in TPO, EPDM, and built-up flat roofing systems for residential and commercial properties.
Allied Roofing
(562) 525-5839 norwalkroofingcontractor.com
11633 The Plaza #24, Norwalk, California
4.9 from 23 reviews
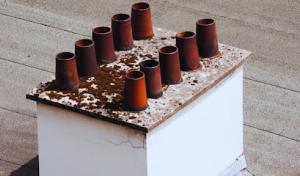
In a dry-summer climate like this area, roof penetrations tied to skylights and solar work deserve close flashing review because leaks often emerge during the first winter storms rather than at installation. Plan reroof timing to maximize dry stretch before the rainy season, but do not rush through penetrations. A careful assessment of every flashing detail, including kick-out angles and step flashing around overlapping planes, helps prevent moisture from migrating under underlayment and into the attic during those first heavy rains.
When a roof is being replaced, existing skylight curbs and surrounding flashing should be evaluated instead of simply roofing around older components. Look for degraded sealant, cracked curb flashing, and uneven curb height that traps water. If the old curb sits on a mismatched substrate or shows differential movement, consider replacing the curb or backing it with upgraded underlayment and a properly bedded counter-flashing. The goal is a continuous waterproof path from the skylight to the exterior without relying on brittle sealants that fail in winter winds.
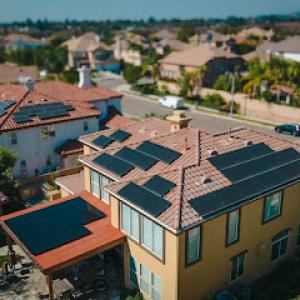
Solar-related roofing coordination matters in this market because reroof timing, attachment points, and waterproofing details can complicate otherwise straightforward replacement projects. Coordinate mounting hardware with the chosen roofing system to avoid through-fastener corrosion and potential penetrations that bypass primary flashing. Ensure flashing sleeves or collars around any conduit and inverter vents are integrated with the underlayment and flashing plan, so roof integrity is maintained across the entire solar array.
After installation, perform a targeted inspection of skylight and solar penetrations from the attic and the exterior. Check for odd gaps, loose fasteners, or flashing that rides up against slate, tile, or metal edges. Make sure any new or modified flashing sits flush against roofing planes and that sealants are compatible with the chosen roofing material and the drying schedule of Norwalk's winter months.
Find contractors experienced in skylight installation, flashing, and leak repairs to bring natural light into your home.