Last updated: Apr 19, 2026
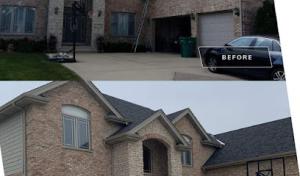
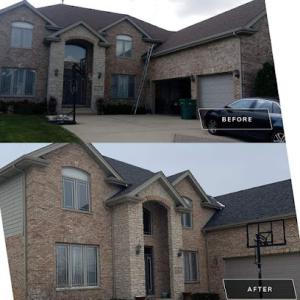
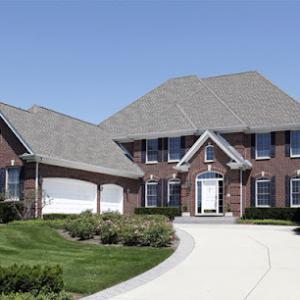
Spring and early summer storms roll through the Chicago-area with predictable speed, and Arlington Heights sits squarely in the hail and wind claim corridor that drives quick inspection requests and replacement decisions. When a severe day hits, you will likely get a knock on the door from an adjuster or a contractor offering a rapid assessment. That timing not only shapes how soon a roof is evaluated but also how aggressively a claim is pursued. The key is to treat every hail- or wind-tinged roof event as a potential renewal trigger, not a one-off repair job. The patchwork character of aging suburban roofs means small impacts can compound, and a wide-eyed adjuster may miss subtle damage without a careful preexisting baseline.
Local insurers increasingly tighten review in recent years, so exterior photo documentation, roof age details, and line-item estimates are not optional add-ons but expected elements of a credible claim package. You should prepare a concise, clearly dated set of photos showing shingles, granule loss, dented metal, and any visible leaks or decking issues. Note roof age, the known roof type, and any prior repairs. When you talk to your insurer, present line-item estimates for replacement components rather than a single lump sum. This practice helps counterstone hammering from adjusters who may challenge scope or material choices. In practice, your documentation should read like a contractor's bid, but you're the one curating the evidence and confirming the validity of the damage with independent checks if needed.
In this market, replacement timing often clusters into spring and fall because winter freeze-thaw conditions and midsummer heat both complicate scheduling after storms. If a storm hits in late spring, you may be pressed to schedule a full replacement before the next round of weather or contractor backlogs. Falling leaves and wind patterns in autumn can similarly slow or accelerate project start dates. The best approach is to align claim documentation with anticipated scheduling windows, not the first available appointment. Have a plan for rapid mobilization if the insurer approves the claim, and maintain flexibility to shift to a fall window if winter conditions threaten delays.
Start with a clear photo log: wide roof shots, close-ups of shingle edges, granule loss, and any denting on flashing, vents, and gutters. Keep a dated record of each observed issue and any leaks inside the attic or ceiling. Gather basic roof age information and any prior repairs so the claim narrative is cohesive. When calling the insurer, present a structured packet: a brief damage summary, your roof age, and a line-item style cost expectation supported by independent quotes or a trusted local contractor's assessment. If contractors propose immediate temporary protection, weigh the risk of further moisture intrusion against the cost and disruption of a quick repair. In Arlington Heights, where storms recur with predictable intensity, staying organized and proactive turns a potential storm claim into a well-supported, orderly replacement process instead of a rushed, poorly documented endeavor.
Connect with contractors who help homeowners navigate the claims process from damage assessment to final approval.
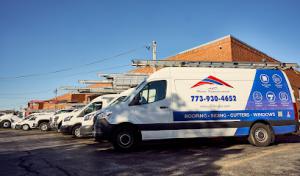
Revived Exteriors,
(847) 305-2866 www.revivedexteriors.com
925 E Rand Rd Ste 207, Arlington Heights, Illinois
4.8 from 255 reviews
Exteriors & More by Carden
(847) 791-2134 www.exteriorsandmorebc.com
1806 E Northwest Hwy #9, Arlington Heights, Illinois
5.0 from 46 reviews

Smart Roofing
(847) 797-0404 www.smartroofers.com
11 W College Dr # J, Arlington Heights, Illinois
4.9 from 65 reviews
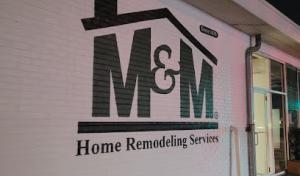
M&M Home Remodeling Services - Arlington Heights
400 W Northwest Hwy Unit A, Arlington Heights, Illinois
4.9 from 428 reviews
M&M Home Remodeling Services provides comprehensive roofing, siding, insulation, and window installation in Arlington Heights. We serve residential and commercial clients, including HOAs, manufacturers, retail, churches, multi-family, healthcare, veterinary, and hospitals. Services include roof repair, installation, inspection, gutter, skylight, and storm damage repair. An annual maintenance program is available for commercial clients.
Revived Exteriors,
(847) 305-2866 www.revivedexteriors.com
925 E Rand Rd Ste 207, Arlington Heights, Illinois
4.8 from 255 reviews
Revived Exteriors: Your Trusted Partner for Roofing, Siding, and Windows At Revived Exteriors, we pride ourselves on being a leading local roofing contractor based in Arlington Heights, Illinois, serving a wide range of areas including (not limited to) Chicago, Elk Grove, Rolling Meadows, Palatine, Mount Prospect, Prospect Heights, Long Grove, Schaumburg, Barrington, Long Grove and Buffalo Grove. Our commitment to excellence is evident in our comprehensive range of services, tailored to meet the unique needs of both residential and commercial properties. Roofing Excellence: Specializing in both commercial and residential roofing, our team offers top-quality installation, repair, and replacement services. Whether you're looking for state-...
NorthCrest Roofing Company
(224) 347-1055 roofing-arlingtonheights.com
823 S Arlington Heights Rd, Arlington Heights, Illinois
5.0 from 48 reviews
When you talk about roofing services in the area of Arlington Heights, we are the roofing contractor that stands out from everyone else. This is because, for 29 years and counting, we have provided quality roofing services with no exceptions. We’ve seen, done, and know almost everything there is when it comes to roofing. Catering to both commercial and residential roofing in Arlington Heights, IL, we install, replace, and repair roofs that are made to last, using the best materials in the market. We employ professionals who are continuously trained in the latest business trends, all aimed at providing our clients with the excellent service they deserve. For quality and affordability, call us.
Exteriors & More by Carden
(847) 791-2134 www.exteriorsandmorebc.com
1806 E Northwest Hwy #9, Arlington Heights, Illinois
5.0 from 46 reviews
Exteriors and More by Carden is a family owned business specializing in roofing, siding, and window services, dedicated to delivering top-notch customer service that will exceed your expectations. Serving, but not limited to; the Palatine, Prospect Heights, Rolling Meadows, Wheeling, Arlington Heights, Buffalo Grove, Des Plaines, and Mount Prospect areas in Illinois. As well as service areas in Lake Geneva, Delevan and Elkhorn Wisconsin areas too!
Smart Roofing
(847) 797-0404 www.smartroofers.com
11 W College Dr # J, Arlington Heights, Illinois
4.9 from 65 reviews
SMART Roofing, Inc. is a full service roofing contractor serving Arlington Heights and its surrounding suburbs. From roof assessments and repairs to installations of virtually every type of new residential roof and commercial roof, our commitment to excellence, stellar customer service and exceptional results are the "SMART" roofing difference. We provide unbiased and customized solutions based on your specific needs along with years of experience in every possible roofing and sheet metal situation. If you need a roof replacement, we can provide you with the right reasons for each roof type and which solution is best for you.
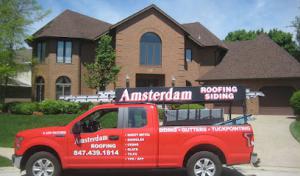
Amsterdam - Roofing, Siding, Windows, Doors & Masonry Contractor
(847) 439-1814 amsterdamcontractor.com
615 E Algonquin Rd, Arlington Heights, Illinois
4.9 from 115 reviews
Amsterdam Enterprises is a trusted roofing contractor in Arlington Heights, IL, serving Chicago and nearby suburbs since 1982. With over 44 years of experience, we provide expert residential and commercial roofing, including roof installation, roof replacement, roof repair, inspections, and maintenance using shingle, cedar, slate, copper, and flat roofing systems. We also specialize in siding installation and siding repair, tuckpointing and masonry restoration, window installation, window replacement, and window repair, gutter installation and gutter repair, soffit and fascia work, and historical building restoration. Every project is completed with skilled craftsmanship, durable materials, and dependable service.
American Building Contractors
3550 Salt Creek Ln #107, Arlington Heights, Illinois
5.0 from 33 reviews
American Building Contractors (ABC) has been helping Homeowners, Property Managers and Board Members since 1998 with their roofing, siding, windows and gutter needs. We believe in always putting the wants, needs and concerns of our customers first. Our team is committed to delivering on our promise of safety and respect for you, your time and your property. We appreciate "It's Not Just a House...It's Your Home!"® Our Insurance Restoration Services Department helps our customers before, during and after mother nature strikes, with understanding the claims process to complete restoration. ABC's headquarters is in Burnsville, MN and we are licensed to do business in 44 states. Our regional offices are in Illinois and Florida.
Fritz Roofing Service
(847) 641-4155 www.fritzroofingservices.com
1508 E Algonquin Rd, Arlington Heights, Illinois
4.4 from 53 reviews
Professional Roofing, Gutters and Siding Contractors Serving Chicagoland for Over 60 Years. Fritz Roofing Service offers an array of exterior services including roofing repairs, siding installation, gutter installation, and more! Our BBB-accredited business was founded in 1953 and has been serving the Chicagoland area ever since. We are a locally and family-owned company. Call us to schedule a service!
Hamler Soffit Fascia Gutters Repair
(224) 490-2116 soffitguttersrepair.com
Serving
5.0 from 43 reviews
We are a trusted name in the realm of exterior maintenance and repair services. Specializing in soffit and fascia repair nearby Mount Prospect, as well as gutter installation and repair, we bring years of expertise to every project we undertake. Our team is dedicated to delivering top-notch craftsmanship, ensuring that your home's exterior not only looks fantastic but also functions optimally. With meticulous attention to detail and a commitment to customer satisfaction, we pride ourselves on exceeding expectations. Whether it's fixing damaged soffits, or ensuring proper drainage with gutter solutions, we are your go-to partner for all your exterior repair needs.
Portillo's Roofing
(224) 775-7770 portillosroofing.com
Serving
5.0 from 122 reviews
Seeking a trusted roofing contractor who treats you like family? Portillo's Roofing is your one-stop solution. Our licensed and insured team of experts is dedicated to providing exceptional service, educate you on your options, and help you understand the process.
Mountain Roofing Contractors
(224) 401-1496 mountainroofingcontractors.com
Serving
5.0 from 49 reviews
When it comes to your roof, you need the experts. Mountain Roofing Contractors is where you’ll find the right roofing contractors in Mount Prospect that have provided outstanding service to countless customers over the years. If you need a leaking roof repair in Mount Prospect, our team is the one you can count on to get it done right and fast. Our years of experience are proof that we go the distance to ensure that you have the roof that keeps your home safe under harsh weather conditions. We stand out from other roofing companies in Mount Prospect for affordability, quality materials, and extensive skill. Contact Mountain Roofing Contractors in Mount Prospect today for service you can trust.
Dynamic Home Restoration
(847) 730-5780 www.dynamichrc.com
Serving
5.0 from 49 reviews
Dynamic Home Restoration is a leading insurance restoration company that specializes in restoring homes and commercial properties back to their pre-damaged condition. With years of experience in the industry, we are committed to providing our customers with high-quality roofing, siding, gutter, and window services. We are your one-stop-shop for all your restoration needs, from smoke and fire damage to water damage claims. Our team of experts will work with your insurance company to ensure that you receive the compensation you deserve. At Dynamic Home Restoration, we take pride in providing exceptional customer service and delivering the best solutions for your restoration needs. Contact us today
In this market, use these local ranges per square: asphalt shingles 350 to 650, metal 600 to 1100, clay tile 1200 to 2000, concrete tile 900 to 1500, wood shingles or shakes 450 to 900, and synthetic or composite shingles 500 to 900. These figures reflect the mix of older Northwest suburban homes and the typical mid-size ranches and two-stories found around the area, where a straight re-roof is common but the exact price moves with material choice and the tear-off scope. When you see a bid, translate the line items into per-square costs using these ranges to spot overages or surprises.
Costs in Arlington Heights can rise after regional hail events when contractor schedules tighten across the northwest suburbs and insurance-funded re-roof demand spikes. In the weeks after a significant hailstorm, you may face shorter lead times and higher labor rates as crews pivot from routine maintenance to storm work. The same storm dynamics can push material availability and disposal fees upward, especially for tile and metal options. If a hail event lands in your neighborhood, expect bids to cluster within a tighter band as crews prioritize insured projects, then broaden as they fill remaining slots.
Many homes in the area are straightforward residential re-roof projects, but costs still move based on tear-off scope, flashing replacement, ventilation corrections, and whether heavier materials like tile or metal require more specialized labor. A full tear-off adds disposal and labor time that a simple add-on job would not; tile and metal often demand extra roof access, specialized fasteners, and more precise mitigation around chimneys and vents. Ventilation corrections-adding or enlarging soffit or ridge vents, or updating attic baffles-can adjust price by a notable margin relative to a basic shingle swap. If the existing deck shows moisture damage or soft spots, expect a higher price tag to cover repair before new coverings go on.
When budgeting, separate the material cost per square from the labor and disposal line items, then add in a contingency for potential hail-related delays or supply gaps. If you're choosing heavier or longer-lasting materials such as clay or concrete tile, plan for a higher installed cost per square and prepare for possible specialty labor needs. For asphalt, you'll typically find a steadier per-square cost, but a full tear-off still adds up once disposal and flashing replacement are included. For metal or synthetic options, verify that the bid accounts for any deck reinforcement or underlayment upgrades that might be necessary to meet the performance expectations of a Northwest suburban winter and spring thaw cycle. In the end, a well-documented bid that breaks out tear-off, flashing, ventilation, and insulation-related adjustments will help you compare apples to apples across contractors.
Get a clear picture of your project costs upfront - no commitment required.
In this market, a full re-roof project in this community typically begins with a building permit through the Village of Arlington Heights Building Department. The local process emphasizes formal permit issuance and plan review by the Village, rather than a contractor-only scheduling sequence. Before any shovel moves, you'll want to submit a code-compliant scope of work, including materials, roof venting strategy, and an updated attic ventilation plan. Expect a back-and-forth on plan review if the shape, size, or roof penetration changes, and factor in the time needed for the village to review and respond. Keeping the submission neat and complete helps avoid delays that ripple into weather windows and storm season.
The plan review centers on structural compatibility, proper underlayment, ventilation details, flashing connections, and overall code compliance. In this climate, attic ventilation choices, intake and exhaust balance, and the underlayment type matter because of freeze-thaw cycles and rapid temperature swings. Make sure your plan specifies vented soffits, ridge vents, and any static or powered vents, with attention to air-flow requirements for your attic space. If renovations touch the schedules for roof penetrations or skylights, attach supporting calculations or manufacturer specs to show the village you're meeting flashing and water-shedding standards. The goal is to demonstrate a durable, weather-resistant envelope that holds up to Midwest winters and hail exposure.
Inspections in Arlington Heights typically occur after tear-off and again after installation. The tear-off inspection confirms the old layers are removed and the roof deck is in sound condition, free of debris and suitable for the new system. The final installation inspection focuses on ventilation, underlayment, flashing, and overall code compliance. Expect inspectors to verify that ridge and soffit vents are properly integrated, that the underlayment is continuous and properly lapped, and that flashing around chimneys, skylights, vents, and transitions is fully sealed and integrated with the chosen roofing material. A clean, properly ventilated attic and a deck free of moisture staining often help the process move smoothly.
Throughout the project, maintain open lines of communication with the Building Department and keep the permit on-site for the inspector's review. Have ready copies of the latest manufacturer installation guidelines for your chosen material and any engineered calculations if the structure required reinforcement. If questions arise around permits, plan modifications, or schedule changes, address them promptly to avoid rework or additional inspections. Clear documentation and adherence to the village's review cadence help ensure the project meets local expectations and delivers a compliant, long-lasting roof.
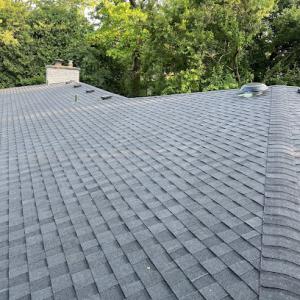
Chicago-area winter freeze-thaw cycling is a major lifespan issue for Arlington Heights roofs because trapped moisture and repeated temperature swings accelerate shingle wear and flashing failure. When dew points rise and fall with late-season warmth followed by sharp cold snaps, tiny gaps open and close at the seam lines, leaving granules loosened and flashing seams stressed. Aging shingles that already show curling or loss of granules will deteriorate faster under those cycles. The risk isn't just cosmetic-you can end up with hidden leaks that sneak into attic spaces, soak insulation, and drive higher energy bills in the coldest months. If you're seeing random patches of missing granules or small sunken areas on the roof surface after a thaw, treat those signs as warnings rather than oddities.
Local inspections commonly focus on ventilation and underlayment because poor attic airflow can worsen ice-related moisture problems during Arlington Heights winters. When the attic is poorly vented, warm indoor air escapes upward, meeting the cold roof deck and creating condensation that drips into insulation and sheathing. Over time, that moisture rots rafters, invites mold, and accelerates deck corrosion around vent pipes and flashing. In practice, you'll want to check soffit and ridge vents for unobstructed flow, ensure baffles are in place where needed, and confirm that attic insulation isn't blocking those pathways. A simple attic moisture reading in late winter or early spring can reveal hidden problems before they escalate into costly repairs.
Replacement and major repair windows in Arlington Heights are often favored in spring or fall to avoid frozen tear-offs, storm interruptions, and extreme summer handling conditions. Planning in those shoulder seasons minimizes the risk that crews encounter ice in the eaves or scorching heat on the roof surface, which can compromise sealants and underlayment. If storm damage hits during winter, a careful assessment is essential: temporary protections may be warranted, but major work should wait until temperatures hold steady above freezing for several days. This approach limits leak exposure and helps ensure flashing and underlayment perform as designed.
Start with a roof-and-ventilation check that focuses on attic airflow, especially near storage spaces and ceiling openings. Look for signs of ice damming, uneven shingle wear, and darkened spots on decking after cold snaps. Have a trusted local roofer photography- and documentation-ready to capture winter damage patterns, which makes spring evaluations more precise. If you're approaching a replacement window, coordinate with your contractor to align tear-off schedules with favorable outdoor conditions, and confirm that the attic is adequately ventilated prior to any roof work.
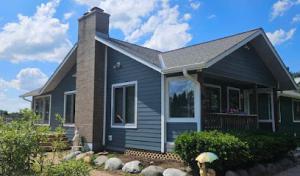
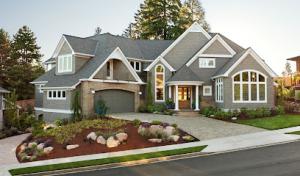
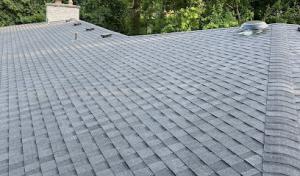
Asphalt shingles dominate Arlington Heights because they fit the area's mainstream suburban housing stock and remain the most common insurance-replacement material after hail and wind events. They're familiar to local installers, respond well to typical freeze-thaw cycles, and can be paired with standard ventilation and underlayment practices used by nearby crews. When choosing asphalt, you'll want to select a higher-end impact-resistant option and ensure the installation follows prevailing weather cycles so shingles seal properly before winter. If the roof has varying pitches or older decking, asphalt can be easier to retrofit with minimal disruption and faster inspection turnover.
Metal roofing is present locally but remains a smaller specialty segment, usually chosen by homeowners prioritizing durability through Chicago-area weather swings. Metal shines in windy seasons and can weather hail with less immediate cosmetic impact, which helps if you want longevity paired with a neat, modern look. The trade-off is that metal requires precise installation and careful flashing details around chimneys, skylights, and transitions. In Arlington Heights, metal is most appealing on homes where the existing structure can support the weight and where the budget allows for a longer-term, lower-maintenance option.
Wood shake, tile, and synthetic products exist in the market but require closer attention to installer experience because they are less common than asphalt in Arlington Heights. Wood shakes provide a rustic curb appeal but can be more prone to weather wear and require proactive maintenance. Tile options (clay or concrete) bring distinct aesthetics and excellent longevity but demand a strong structural backing and meticulous fusion details to handle the Midwest freeze-thaw cycle. Synthetic products aim to mimic natural looks with added durability, yet performance hinges on the installer's experience with local wind uplift and storm loading. If considering these types, verify track record with similar northern climates and confirm warranty terms that cover wind and hail exposure.
In this market, roof selection should align with typical hail and wind storm history, existing attic ventilation, and the likelihood of future insurance-driven replacements. The best choice balances a solid, proven local installation network with predictable performance under Chicago-area weather swings. For aging suburban homes, prioritize systems that can be inspected easily after hail events, maintain effective ventilation, and integrate well with current attic and soffit layouts to minimize long-term maintenance surprises.
The most popular roofing material in the US. Find pros who install, repair, and replace asphalt shingles.
M&M Home Remodeling Services - Arlington Heights
400 W Northwest Hwy Unit A, Arlington Heights, Illinois
4.9 from 428 reviews
In this market, flat and low-slope work on additions, porches, and garage sections shows meaningful demand. Start with a focused site assessment: the low-slope area often butts up against a steep main roof, so compatibility matters. Identify existing drainage patterns, measure runoffs, and note any prior repairs at the transition. This is where leaks tend to begin when a storm interest shifts to the new work.
These sections need separate attention during re-roof planning because drainage, flashing transitions, and membrane details differ from the main shingle roof. Ensure the low-slope deck has adequate slope to move water away from the structure and toward an approved drainage path. Use a compatible flashing plan that transitions cleanly to the main roof system, with step and snake flashing where the wall unfolds into the addition.
Homeowners in Arlington Heights often overlook low-slope tie-ins until leaks appear around transitions where additions meet the original house. Anticipate a dedicated crest seal or integrated membrane at the joint to handle thermal movement and wind-driven rain. Confirm that fasteners, edge metal, and counterflashing align with the adjacent roof covering to minimize seam vulnerabilities.
Choose materials rated for low-slope performance and compatible with the existing roof assembly. Confirm substrate condition, including any rot or moisture-affected decking, before installation. Surface prep should address debris, edge detailing, and consistent adhesion for membranes or roll products. Pay attention to venting near the low-slope area to reduce condensation risks that can mimic leaks.
Create a maintenance plan that includes periodic inspections after ice, snow, or hail events, when the garage and addition seams are most stressed. Document transitions with photos and notes for future storm-damage estimates, since these areas can be the first to show wear in an aging suburban roofscape.
Find specialists in TPO, EPDM, and built-up flat roofing systems for residential and commercial properties.
NorthCrest Roofing Company
(224) 347-1055 roofing-arlingtonheights.com
823 S Arlington Heights Rd, Arlington Heights, Illinois
5.0 from 48 reviews
Amsterdam - Roofing, Siding, Windows, Doors & Masonry Contractor
(847) 439-1814 amsterdamcontractor.com
615 E Algonquin Rd, Arlington Heights, Illinois
4.9 from 115 reviews
Fritz Roofing Service
(847) 641-4155 www.fritzroofingservices.com
1508 E Algonquin Rd, Arlington Heights, Illinois
4.4 from 53 reviews
In this neighborhood, skylights and chimneys are frequent leak points on older suburban roofs, especially after harsh freeze-thaw cycles and wind-driven rain events. The problem isn't only aged shingles; it's how these penetrations interface with the surrounding flashing, underlayment, and vent paths. A small flaw in flashing can cascade into attic staining and interior damage well after the storm has passed. You'll hear neighbors describe new leaks after storms that look minor on the surface but reveal themselves through delayed dripping and interior moisture in the upper rooms.
Flashing transitions around skylights and chimneys are the most common trouble area in Arlington Heights' housing stock. As shingles age and seasonal temperatures swing from freezing to warm, the sealants and metal joints can become brittle or settle out of alignment. Wind-driven rain often angles against the flashing rather than the flat field of shingle surfaces, forcing water toward the home's interior through misaligned seams or inadequately sealed joints. When a full roof replacement is planned, flashing integrity becomes a focal point for the contractor and the inspection team, not a neat-afterthought. If a repair crew focuses only on replacing visible shingles without addressing the flashing transitions, leak complaints are likely to reappear soon after, sometimes requiring rework.
During a routine roof project, insist on a thorough assessment of all penetrations, especially around skylights and chimneys. Look for signs of flashing lift, rusting metal, loose fasteners, or cracked sealant at the base and along side seals. Ensure flashing is continuous and properly integrated with valley and vent flashing as well as with the roof edge termination. In freeze-thaw climates, ensuring a durable, weather-tight transition can prevent a cascade of interior moisture issues after the next big storm. Regular checks after heavy rain or hail can help catch small failures before they become expensive repairs.
Find contractors experienced in skylight installation, flashing, and leak repairs to bring natural light into your home.
M&M Home Remodeling Services - Arlington Heights
400 W Northwest Hwy Unit A, Arlington Heights, Illinois
4.9 from 428 reviews
Exteriors & More by Carden
(847) 791-2134 www.exteriorsandmorebc.com
1806 E Northwest Hwy #9, Arlington Heights, Illinois
5.0 from 46 reviews
Smart Roofing
(847) 797-0404 www.smartroofers.com
11 W College Dr # J, Arlington Heights, Illinois
4.9 from 65 reviews
Claims related to hail and wind are a familiar rhythm for roofs in this area, yet carriers have sharpened their review in recent seasons. The combination of Chicago-area storm history and aging suburban roofs means files can be scrutinized more closely for consistency, documentation, and evidence of wind or hail impact. In practice, this means prepare for a more methodical assessment process rather than a quick settlement, with adjustments tied to the specifics of each storm event and the roof's condition before the event.
Coverage decisions hinge on three practical factors: the age of the roof, the material installed, and how well the claim history mirrors the local weather narrative. A roof that shows preexisting wear or material increasingly prone to storm-related distress can shift the insurer's conclusions about the cause and scope of damage. In Arlington Heights, where older Northwest suburban stock is common, a detailed, consistent story about the roof's condition before the latest event helps the file feel complete and credible.
To align with insurers' expectations, assemble a chronological, date-stamped record of exterior conditions and changes. Keep exterior photos taken after storms, ideally dated, showing hail impact patterns and wind-related concerns. Preserve prior repair records and any notes from previous claims, as well as permit paperwork related to past work. Having this complete file can smooth the evaluation, especially when the history crosses multiple winters and various storm cycles that echo through the neighborhood.
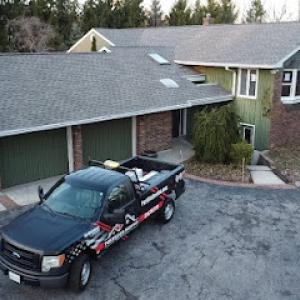
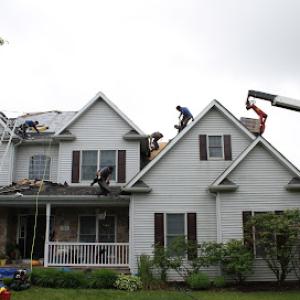
After a storm, you look for a contractor who can respond quickly, secure the property, and keep debris under control. Tarping, temporary repairs, and prompt cleanup are not afterthoughts here; they're part of the first day work plan. Homeowners expect a crew that can stabilize the roof, protect siding and landscaping, and schedule subsequent steps with minimal disruption to daily life. In this market, a clear, written outline for the next seven days helps, so you know when crews will be on site and what will be removed or protected.
The typical Arlington Heights home shows signs of aging that many buyers notice fast, especially with our harsh winters and the frequency of hail-driven replacement. The local market leans toward re-roofing specialists who can assess multiple layers, ventilation, and attic comfort in a single visit. Re-roofing often becomes the most straightforward path when shingles or tiles have reached the point where patching isn't cost-effective. When selecting a crew, prioritize those who can explain how a complete roof replacement improves long-term performance, rather than someone offering a patchwork fix that may not hold up to our freeze-thaw cycles.
Established and family-run firms remain common here, offering a tangible link to neighborhood experience. Homeowners tend to balance price with local tenure and residential know-how. Look for contractors who provide on-site assessments, concrete timelines, and documented cleanup commitments. Ask for recent project references in nearby subdivisions and request a simple, transparent work plan that shows sequencing, material checks, and dust protection practices. A dependable crew will treat the project as a local service, not a distant job.
Clear documentation helps move the process smoothly. Take dated photos from multiple angles, noting any hail patterns and wind-driven damage. A contractor who emphasizes thorough attic inspection for ventilation and moisture signs can spot issues that extend beyond shingles. Expect a practical plan for securing the home, coordinating with your insurer, and confirming that debris removal and waste containment are handled promptly.
Winter freeze-thaw cycles in Arlington Heights can delay tear-off and installation, especially when decking moisture or ice creates inspection and workmanship issues. If a project must continue in colder weather, expect slower progress as crews manage ice buildup, slip hazards, and adhesive performance. Plan for staged work where interior moisture protection and roof access are prioritized first, then finish gutters and flashing when temperatures stabilize. A practical approach is to target a smaller, staged course of work during mid-winter spells, allowing for weather gaps without stalling the entire project.
Spring and early summer bring the highest interruption risk from rain and hail, which can stretch project timelines even when damage has already been approved by insurance. In this period, frequent afternoon storms and quickly changing conditions demand flexible scheduling and reinforced protection of exposed roofing zones. Consider temporary coverings for the ridge and open valleys to minimize wind-driven damage between roofing days, and coordinate material deliveries for early morning installation windows to avoid afternoon downpours.
Autumn is often a preferred local installation window, but wind can complicate material handling as contractors finish the year's backlog across the northwest suburbs. Tighten on-site organization this season: lock down material staging, secure stacks from gusts, and confirm crew rotations to maintain momentum without sacrificing safety. Dry, moderate days commonly yield the most efficient progress, so keep a firm target for milestones and readiness to accelerate before typical cold snaps.
In all seasons, plan for contingency days and sheltered staging spaces, since old suburban roofs with flashings and ventilation respond differently to weather shifts. Document any hail or wind events promptly, and align timelines with how insurance-approved work and delivery windows interact with Arlington Heights' storm cycles.