Last updated: Apr 19, 2026
In Southgate, the postwar neighborhood build and the Southeast Michigan climate collide when a storm hits. Hail and high winds leave roofing openings that can look minor but quickly become major problems once winter snow and ice arrive. Damage documented now saves hassle later, and insurance claims move faster when the homeby-home evidence is clear. This section gives you the straight, action-oriented steps you need to take right after a storm.
After a hail event or strong winds, walk the rooftop only if you have safe, solid footing and no risk of further collapse. If you're unsure, stay off the roof and inspect from ground level, looking for lifted shingles, missing granules, dented metal flashing, and damaged vents. In Downriver, freeze-thaw cycles can turn small openings into active interior leaks within days, especially once snow starts piling up. Even a modest attic or ceiling stain can signal hidden water intrusion. Prioritize stopping additional water entry by covering obvious gaps with a sturdy tarp anchored away from wind-driven edges, then coordinate a professional assessment as soon as daylight allows.
In this market, documentation expectations are higher, so gather thorough evidence. Take wide and close-up photos showing shingles, flashing, gutters, and any interior staining or attic condensation. Note the date, time, wind direction, and hail size if observable. Keep a simple diary of when you first noticed leaks or moisture, plus any rapid changes after subsequent storms. Save all communications with your insurer, including claim numbers, adjuster visits, and estimates. If you can, secure a written estimate from a reputable local contractor that outlines necessary repairs and the sequence of work. Strong, clear documentation reduces back-and-forth and helps prevent delays in the claim process.
Emergency repairs are common in this market because storm damage, storm-dependent leaks, and insurance claims cluster together here. Focus on temporary measures that slow leakage and preserve interior belongings: seal obvious entry points from above with tarps or board patches, divert water away with buckets and temporary flashing, and protect ceilings and walls from further moisture. If you discover active leakage during a cold snap, prioritize stopping the water flow to prevent ice dams from forming on interior surfaces. Coordinate temporary fixes with a trusted contractor that can mobilize quickly, ideally within 24 to 48 hours after storm exposure.
Local contractors understand the temperament of this neighborhood and the realities of Southeast Michigan weather. Look for teams that offer rapid response, transparent documentation, and clear communication about the next steps after a storm. Ask for references from nearby homes with similar roof types, and verify they can provide both emergency repairs and a plan for full replacement if needed after the claim is settled. Prioritize contractors who can help organize or review insurance documentation, photos, and estimates so the process stays efficient through cold snaps and the eventual full-replace window. In this market, the right local partner makes the difference between a quick fix and a lasting, weather-resilient roof.
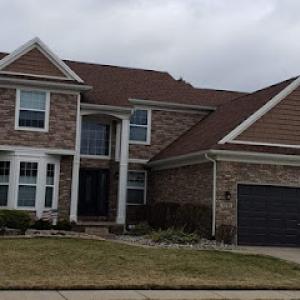
Asphalt shingles remain the practical backbone for the large stock of modest-pitch postwar homes in this area. When you're deciding replacement or an overlay, asphalt is the default choice that aligns with typical roof geometry and existing valleys, vents, and chimney transitions seen on Southgate bungalows and colonial styles. If your roof is near the 4:12 to 6:12 pitch range, asphalt shingles install cleanly and provide a straightforward seal against Southeast Michigan's freeze-thaw cycles. In many homes, an overlay can be a cost- and time-saving option if the existing deck is sound and the flashing has been inspected; however, a full replacement is often favored if the existing roof shows edge deterioration or visible granule loss. Plan around hail season by choosing a shingle with good impact resistance and a robust seal to minimize edge lifting during wind-driven storms.
The winter pattern in Southeast Michigan tests shingles at the edges and around flashing transitions. In Southgate's climate, careful attention to attic ventilation and ice-dam prevention is essential, since trapped heat and moisture can accelerate edge wear and flashing leaks. When selecting asphalt, look for elevated bond strength at the shingle tabs and a laminated profile for better wind resistance. During installation, ensure that all transitions-from step flashing along dormers to the base flash around chimneys-are fully sealed with compatible sealant and proper nail placement. Regular inspections after hail events should focus on exposed edges, ridges, and any compromised sealant at chimney or vent penetrations.
Metal can be appealing if snow shedding and long-term durability are priorities, especially given Michigan winters. Metal panels shed snow more quickly, reducing the likelihood of heavy load accumulation on steep sections; proper underlayment and attic venting remain critical to prevent condensation issues. If choosing metal, ensure panel profiles and fastening patterns suit the modest-pitch geometry common to many Southgate homes, and verify that existing skylight or vent locations won't create condensation or leak pathways. A metal roof responds well to storm exposure and can persist with fewer perforations through the years, but installation quality and proper flashing at transitions are still essential to prevent leaks.
Clay tile, concrete tile, wood shakes, and synthetic options exist in the market but are far less typical here. When these options are found, they usually appear on homes with specific aesthetic goals or existing compatible roof structure. If a non-asphalt choice is considered, expect more attention to substrate rigidity, underlayment compatibility, and local storm performance, since the typical Southgate climate can stress edge areas and flashing differently than flatter, drier climates. For most modest-pitch homes, asphalt remains the default, with metal as a purpose-driven alternative for snow behavior and durability.
Asphalt shingles drive most Southgate reroofs, and the numbers reflect that reality. When a typical home needs a full replacement, you'll see price peaks driven by demand for asphalt-shingle re-roofing after heavy storms. In practice, this means you should expect higher scheduling priority gaps after hail or wind events, and you'll notice crews juggling tight timelines when many roofs fail at once. Pricing tends to cluster around standard shingle installations, with storm surges nudging both material and labor costs upward for a brief period as crews scramble to meet demand.
The calendar matters here more than you might expect. Winter brings snow and ice that slow tear-offs and create tricky debris handling. Spring rain disrupts staging and muds the worksite, delaying start times and complicating underlayment installation. Summer heat can push heat-related safety pauses and impact fastener performance, while autumn wind can accelerate project wrap-ups butincrease staging needs and cleanup. Plan for a window that accommodates slower pace in winter and tighter schedules after storms in late spring and early fall. If a storm hits, expect scheduling to compress in the immediate aftermath, which can also stress material availability.
Given the market's emphasis on asphalt shingles, you'll see the most price transparency here. Typical per-square costs for common roof profiles in this area run within the broad ranges listed in the regional guide, but local pricing often centers near asphalt, with metal and tiles carrying a larger premium. If a home shifts from a basic shingle system to a premium option like concrete or clay tile, weather-related scheduling realities become more pronounced because heavier materials demand more staging and specialized crew logistics. Storm-driven surges can tighten labor availability, which translates into longer wait times and, occasionally, temporary price bumps during peak aftermath periods.
In Southeast Michigan, hail and wind events prompt rapid assessments and documentation needs. You'll want to account for time to gather photos, incident reports, and a clear line of communication with your insurer. After a storm, expect a surge in local demand that can extend project timelines and influence available contractor slots. A practical approach is to obtain several detailed written estimates, align them with your insurer's preferred documentation, and prepare for a staged plan that prioritizes leak control and proper underlayment preparation as you move toward full replacement.

BrightView Construction
(734) 512-6546 brightviewconstruct.com
Serving
5.0 from 58 reviews
BrightView Construction is a trusted roofing company proudly serving Wyandotte, MI and the surrounding Downriver communities. As a skilled roofing contractor, the team specializes in roof repair, roof replacement, and emergency roofing services for both residential and commercial properties. In addition to expert roofing, the company offers siding solutions and professional gutter service designed to protect and enhance every structure. Committed to quality, BrightView Construction uses only premium materials and proven techniques to deliver long-lasting results that clients can rely on.

Crown Pro Construction
(313) 346-4749 www.crownproconstruction.com
Serving
4.8 from 44 reviews
Crown Pro Construction offers a full range of services, including roofing, siding, gutters, windows, gutter protection systems, and specialty roofing throughout the Detroit Metro area.
Hoffman Home Renovations & Roofing
Serving
4.6 from 30 reviews
Hoffman Home Renovations and Roofing is the premier choice for home improvement services in Wayne, Monroe, and Washtenaw counties. Whether you need a new roof or gutter system, Hoffman is committed to providing top-notch workmanship and ensuring the highest quality of materials. Their team of skilled craftsmen specializes in insurance repair, with extensive experience in kitchen, bathroom, and basement remodeling. With an unwavering focus on personalized customer service, Hoffman Home Renovations and Roofing is your trusted partner for any home improvement project.
Napier's Home Improvement
(734) 676-6557 napiersroofing.com
Serving
4.8 from 95 reviews
For over 40 years, Napier’s Home Improvement has been Downriver and Southeast Michigan’s trusted, family-owned roofing company—and the oldest in Downriver. Three generations strong, we’ve built our reputation on quality workmanship, honest pricing, and treating every home like our own. From small repairs to full roof replacements, we always start with a free on-site estimate because we believe in transparency and lasting customer relationships. Your roof protects your family, and we take that responsibility seriously—roofing is our family legacy. Thank you for supporting Napier’s Home Improvement. Contact us today to schedule your free on-site consultation!
Chucks Roofing Company
(313) 386-8962 chucksroofingcompany.com
Serving
4.9 from 184 reviews
At Chuck's Roofing Company, we provide expert roofing and siding services to homes in Lincoln Park, MI, and the surrounding areas. As a trusted roofing contractor, we specialize in roof installations, repairs, and siding solutions designed to protect and enhance your property. Our team is committed to delivering exceptional craftsmanship and durable results that stand up to the elements. Trust our roofing company and siding contractors to keep your home beautiful, secure, and weather-resistant for years to come.
Advantage Roofing & Construction
(313) 986-1877 advantageroof.us
Serving
5.0 from 57 reviews
We are a full service commercial and residential roofing, siding, gutters and general building and home maintenance and installation company.
Avanti Construction
(734) 732-2985 avanticonstruction.org
Serving
5.0 from 14 reviews
We are a licensed and insured residential home improvement company dedicated to exceeding our customer's expectations. Our goal is to work with you in making your home improvement vision become reality. We also have a lot of experiance working with insurance companies and can help you navigate your home insurance claim to make sure you are getting everything you are entitled to. Having a contractor on your side can make all the difference and we are here to help relieve your stress and be your advocate for a fair and honest resolution. We are excited about helping make your home update dream project a reality. Call today 734-732-2985
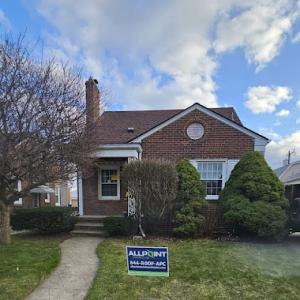
AllPoint Construction
(734) 407-7110 allpointconstructionmi.com
Serving
4.6 from 642 reviews
AllPoint Construction is Metro Detroit’s trusted choice for quality home improvements, from expert roofing and siding to kitchen & bath remodels and custom additions. As a family-owned company, we take pride in craftsmanship, integrity, and creating spaces you’ll love for years to come. Whether you need a reliable roofing contractor after a storm, energy-efficient windows, or a dream kitchen makeover, our team is here to make it happen. Call today for your free estimate and experience why homeowners across Downriver and Southeast Michigan choose AllPoint Construction to build, repair, and remodel with confidence.
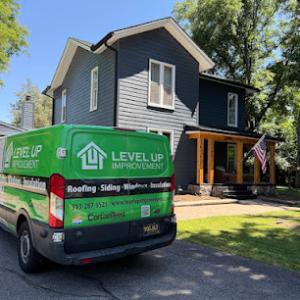
Level Up Improvement
(313) 287-9525 levelupimprovement.com
Serving
5.0 from 128 reviews
We are a family-owned Roofing, Siding, and Window contractor that is local to the Metro Detroit area. We have experience installing and managing projects on homes across Southeast Michigan.
Select Roofing
(519) 563-8926 www.selectroofing.ca
Serving
5.0 from 19 reviews
Homeowners appreciate Select Roofing because we focus on job site and worker safety, the cleanliness of the project, and the steps that we take to protect your home while we’re working. In addition, all completed jobs are given a thorough inspection by our company owner to ensure the highest standards of quality. Serving Windsor, LaSalle, Amerstburg, Tecumseh, Lakeshore, Essex, Leamington, Kingsville and more!
Kincaide Roof Rejuvenate
(734) 407-1213 kincaideroofrejuvenate.com
Serving
5.0 from 73 reviews
Kincaide Roof Rejuvenate offers the best roof rejuvenation service in the area. We have over 30 years of experience with roofing, and our service will extend the life of your roof by up to 15 years. Our rejuvenating formula deeply penetrates the surface of the shingles and brings your roof back to life.

Holbrook's Roofing
(734) 675-3456 holbrooksroofing.com
Serving
4.7 from 27 reviews
Welcome to Holbrook's Roofing, Inc., a trusted name in roofing since 1980. Our commitment to Reputation, Integrity, and Experience sets us apart. Specializing in commercial roofing, we extend our expertise to residential areas too. Our services include roof inspections, replacements, gutter installations, siding, and windows. Proudly serving Trenton, Grosse Ile, Woodhaven, Brownstown, Riverview, MI, and surrounding areas. Elevate your property with Holbrook's Roofing - where quality meets durability.
In this jurisdiction, full roof replacements are typically formal projects that go through the city Building Department rather than being handled informally. The process is designed to ensure proper flashing, ventilation, and attachment methods meet local standards and to align with Downriver winters and wind events. A permit is not something to try to sidestep; it creates a clear record that the work was inspected and approved. This is especially important when hail and freeze-thaw cycles have stressed existing components, because proper permit oversight helps verify that upgraded materials and application methods comply with current code expectations. Plan ahead when scheduling work, as permit review times can influence project timelines, particularly in peak late-summer and fall windows after storms.
In this area, the roofing contractor commonly applies for the permit on the homeowner's behalf. That arrangement can simplify the process, since pros are familiar with the Building Department's required documentation, drainage considerations, and accessible site plan details. As a homeowner, you should expect to review the contractor's permit packet, confirm the scope matches the agreed work, and keep a copy of the issued permit at the job site. If you're handling documents yourself, verify that the plan reflects full roof replacement, venting adjustments if needed, and any code-required upgrades to underlayment or flashing. When the contractor handles the permit, ask for the permit number and the inspection schedule so you can track progress and prepare for the final inspection.
A final inspection is performed after completion, with particular attention to flashing, ventilation, and roof attachment meeting code expectations. Inspectors verify that all penetrations-around chimneys, vents, and skylights-are properly sealed and flashed, that attic or roof deck ventilation is adequate for winter conditions, and that ridge and eave details are correctly fastened and weatherproofed. In a district with postwar housing stock and variable roof lines, expect some projects to require minor adjustments discovered during the final walk-through. Have your contractor present during the inspection or have a clear point of contact ready to address any deficiencies promptly. If a corrective note is issued, routine follow-up visits ensure the deficiencies are resolved before the permit is closed.
Coordinate with the contractor to align the permit-wait period with the weather window that minimizes exposure of open decking. After the project passes final inspection, keep the inspection report in your home records along with warranty documents from the shingles or other materials chosen. Since permit histories stay with the property, keeping digital copies on file helps during future storm damage assessments or insurance discussions. If questions arise during the inspection day, you can refer to the inspector's checklist and confirm that ventilation, flashing, and attachment meet code expectations for the local climate and housing stock.
In this area, full replacements run smoother when winter is behind you. The tear-off and sealing stages benefit from the longer days and workable temperatures that late spring through early fall provide. Winter conditions in Downriver make it tough to keep underlayment dry and sealants setting properly, so scheduling around thaw progression and predictable humidity helps the job stay on track. This timing aligns with the typical spring melt and the steady moisture patterns that follow, making insulation and roof deck work more reliable.
Spring storms and heavy rainfall can interrupt active jobs in this city, so planning buffers is more important than in drier regions. If a frost-free window opens in April, use that to get the initial tear-off done, but be prepared for back-to-back rain that can stall progress for days. Build in a few extra days for material deliveries and staging, since high winds and sudden downpours are not rare in hail season's wake. Clear communication with the crew about rain days, moisture-sensitive tasks, and tarp logistics helps reduce surprises when a spring squall sweeps through.
Summer heat and humidity affect shingle handling and crew conditions. Warm days demand careful material storage on-site to prevent premature curing or warping, and pacing the crew to avoid heat-related slowdowns. Schedule the most physically demanding tasks for cooler morning hours when possible, and designate shaded staging areas for bundles and bundles of shingles. Expect occasional humidity-driven delays, and plan for efficient teardown and wind-safe cleanup as afternoon breezes occasionally pick up. A well-ventilated roof and protective coverings can keep installation quality high without overworking the crew.
Autumn wind can complicate cleanup and material control. As leaves accumulate and winds rise, securing loose shingles, fasteners, and tarps becomes essential to avoid damage and loss during final phases. Use the lull between early October breezes and late-season storms to finalize sealing, ensure proper attic venting connections, and verify that gutters are clear before the last bit of work wraps up. Have a straightforward plan for wind-prone days: pre-staged bundles, anchor points for tarps, and a quick-dump area for debris so cleanups stay thorough despite shifting weather.
Around thaw progression, coordinate with the crew on preferred start times to avoid the cold stiffness of late-season mornings. Build lead times that account for potential spring disruptions, and keep the project buffer flexible enough to absorb a handful of rain days without pushing the schedule into late fall. A practical approach keeps the roof on track while respecting the quirks of this Downriver climate.
In this area, final inspections don't just look at shingles and gutters-they scrutinize flashing and ventilation as well. That makes these details a practical part of passing closeout, not just a buzzword on the punch list. The winter tempering cycle in the Downriver corridor, with freeze-thaw swings, puts extra stress on seams around chimneys, wall penetrations, and roof-to-wall transitions. When a seal fails, the damage can spread quickly and quietly, showing up as intermittent leaks long after a storm. Treat flashing and ventilation as core components of a durable roof system, not optional add-ons.
Chimneys and wall penetrations are the most common leak sources when weather turns cold and windy. Freeze-thaw cycles push water into tiny gaps, then expand and contract, aggravating any weak seal. In homes with older step or boot flashings, or where ventilation stacks aren't properly integrated with the ridge line, leaks often surface after a heavy rain or a windy hail event. A careful inspection after storms should focus on visible signs at penetrations, plus a check for soft or loose flashing around corners and marginal joints. If leaks recur in the same spots, the flashing install or material choice is likely the culprit rather than random chance.
Skylights are a recognized service need around here, with a robust pool of local tradespeople who can handle resealing, flashing upgrades, and pane replacements. The practical takeaway is to address any condensation, drafts, or water trails promptly, since skylight penetrations are a frequent leak path after hail or wind damage. When planning a fix, prioritize improved flashing at the skylight perimeter and ensuring the curb or deck framing remains square and dry. Replacements that match the roof profile reduce stress on surrounding shingles and lower future failure risk.
Seasonal checks should include a close look at all vent stacks, roof jacks, and chimney flashings. Clean gutters and inspect drainage paths to prevent water from pooling near penetrations. If a storm has rattled the neighborhood, schedule a targeted inspection of flashing joints and skylight seals within a week or two to catch small issues before they become bigger problems. Remember, the final outcome often hinges on how well flashing and ventilation are coordinated with the overall roof system.
Find contractors experienced in skylight installation, flashing, and leak repairs to bring natural light into your home.


Gabriel’s Roofing Construction
(248) 383-3449 www.gabrielsroofingconstruction.com
Serving
4.9 from 96 reviews

Dayus Roofing Inc | Best Roofing Company in Windsor (Top-Rated Roofers Near Me)
(519) 737-1920 www.dayusroofing.com
Serving
4.8 from 114 reviews
Southgate homeowners operate in a notable hail- and wind-claim environment, so insurers may scrutinize roof age, condition, and documentation closely. When a storm hits, it is not unusual for providers to question prior repairs, existing wear, and the overall roof history. If your shingles have reached or passed their expected life, or if there are signs of prior hail hits that weren't addressed, claims can stall or be adjusted. Understanding this dynamic helps you approach the process with a clear record and realistic expectations.
Carriers in this region may vary coverage terms and request specific wind or hail endorsements, affecting replacement decisions before damage occurs. Some policies anticipate stricter wind-damage thresholds, while others require documented maintenance or specialized assessments to justify a full replacement. It helps to know what endorsements you hold, and whether your policy includes expedited adjustment language, depreciation waivers, or preferred contractors. When a storm season rolls through, talking with your agent to verify these details before you need them can prevent surprises during a claim.
Detailed before-and-after photos are especially important in Southeast Michigan claims because insurers may expect stronger proof of storm-related loss. Start gathering clear, dated images of the roof from multiple angles after a storm, focusing on missing granules, lifted shingles, hail dents, or professional roofers' notes. Keep a simple, ongoing log of any leaks, attic fogging, or interior staining tied to weather events. If you can, have a trusted roofer conduct a quick, noninvasive inspection after a hail season and document their findings with photos and a written summary. This documentation can make the difference between a straightforward adjustment and a drawn-out dispute.
While the housing stock in Downriver features abundant pitched roofs, notices from local contractors show enough flat or low-slope work on garages, porches, and additions to matter. Flat or near-flat sections are common where the original design added a bonus bay, a breezeway, or a garage with a shallow slope. These areas behave differently under Southeast Michigan weather, so treat them as a separate detail from the main shingle field.
Low-slope sections in this climate are especially vulnerable when snow and ice slow drainage or when spring rain comes in bursts. Pay attention to seam or edge weaknesses where water can pond or back up. Ice dams can form at eaves and transitions, creeping under edge flashing or into deck joints. Inspect after heavy snows for any standing water or discoloration that hints at moisture intrusion. In late winter, verify that drip edges and parapet transitions are intact and free of debris that could trap meltwater.
Mixed rooflines on older Downriver homes create transition points where low-slope tie-ins meet the main shingle field. Those junctions often fail first, revealing signs of wear at flashing strips, counterflashing, or valley intersections. When evaluating a garage or addition, look for crumbly sealant, lifted flashing, or gaps at the base of parapets. Plan for a proactive upgrade of edge detailing, ensuring proper slope continuity to direct water toward outlets.
Schedule a seasonal check focusing on drainage paths, scuppers, and connections between the flat section and the main roof. Clear debris from gutters and scuppers, test for proper slope, and reseal any suspect seams with compatible materials. If a trusted local contractor notes recurrent leaks at a transition, prioritize reinforcing flashing and reworking sealant around joints rather than pursuing cosmetic fixes.
Find specialists in TPO, EPDM, and built-up flat roofing systems for residential and commercial properties.


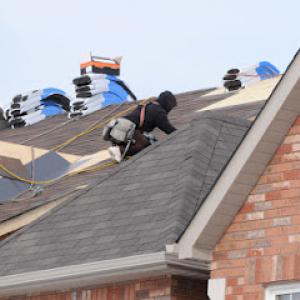
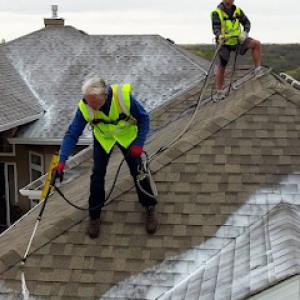
In this Downriver market, a fast response time is a top priority after hail, high winds, or a freezing throat of winter storms. Homeowners seek crews that can be on-site quickly to tarp roofs, secure loose shingles, and start temporary repairs to prevent interior leaks. Reliable contractors in Southgate emphasize triage-stabilizing the situation first, then scheduling full re-roofing or needed repairs when the weather cooperates. Expect crews to arrive with storm-damaged debris removal gear, tarps, and a portable lighting setup for late-day work, so the interior isn't exposed longer than necessary.
Cleanup-focused crews are prized for keeping yards safe and driveways clear after a storm-related visit. Homeowners often favor firms that bundle cleanup with the repair plan, so roofing crews don't leave a mess behind. In practice, this means roofers who pre-lay a plan for debris containment, containment of nails and shingle fragments, and a path to a second pass for final sealing or re-roofing. Long-established, family-owned teams in the area tend to bring a steady workflow, minimizing delays and excessive site disruption, which matters when streets are busy with everyday Downriver life.
Insurance-ready contractors tailor notes and photos to document storm damage clearly-shingle displacement, hail impact patterns, flashing lifting, and water intrusion zones. Homeowners benefit from crews that provide standardized damage reports, color-coded photos, and a clear sequence of work steps to share with adjusters. When leaks appear, trusted crews prioritize accurate leak tracing, then prepare itemized repair plans that align with typical Southeast Michigan coverage expectations, avoiding surprises down the line.