Last updated: Apr 19, 2026
Taylor's cold winters regularly bring snow followed by freeze-thaw swings, a pattern that drives ice dam formation at eaves and refreezing around gutters. That cycle is a real risk on older, low- to moderate-pitch roofs where heat loss from the attic nudges meltwater up against the cold edge of the roof. When water refreezes at the eave, it creates a dam that backs water under shingles, presses against fascia, and seeks paths through any weak spots. In a neighborhood with many aging roofs, repeated cycles compounding damage are common after just a handful of storms.
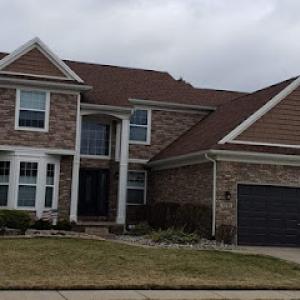
The typical suburban roof in this market leans toward shallow or medium pitches, which makes it easier for meltwater to migrate toward the edge rather than shed cleanly. Attic heat loss and uneven melt patterns mean water can back up under shingles where insulation isn't up to par or ventilation is insufficient. In many homes, gaps around soffits, vents, and chimney flashings become weak points, letting water into the attic or interior ceiling for hours after a storm. These vulnerabilities are not a monthly reminder; they compound with each winter.
If you're facing a fresh ice dam or a suspected leak, act quickly while the weather is safe enough to work safely. Temporary tarping over exposed roof sections can help keep snow and rain off while a proper fix is planned, especially if a storm is on the horizon and roof access is compromised by ice. Inside the home, locate and clear visible interior leaks using towels or buckets to catch water, and place oncoming heat under control by turning down thermostat output toward the living space rather than the attic, if possible. Communication with a trusted local roofer who understands the Downriver freeze-thaw pattern can guide you on when and how to initiate temporary measures without delaying essential repairs.
When roof work is delayed by snow cover or icy conditions, temporary tarps become a practical first step for many homeowners. Secure tarps firmly at the drip edge and along rafters to resist wind, then monitor for tearing after additional snowfall. Inside the attic, minimize heat loss around penetrations by sealing gaps with affordable foam or caulk where feasible, and redirect attic air flow to reduce heat buildup that drives further melt at the eaves. Maintain clear access to the attic so a professional can inspect the roof edge and flashing promptly when conditions improve.
Longer-range planning should address attic insulation and ventilation, which directly influence melt patterns at the eaves. You want a balanced attic temperature that minimizes heat buildup near the roof edge. Flashings around skylights, chimneys, and vent stacks should be inspected regularly for corrosion or loosening, especially after heavy snows. For homes with persistent leaks, consider a roof upgrade that improves edge detailing and snow shedding, paired with exterior improvements like overhangs or enhanced gutter systems to manage ice dam potential. In this market, proactive steps now save the next big headache when the next winter arrives.
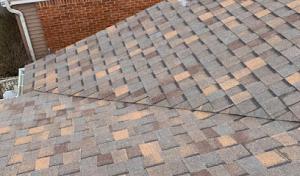
In Taylor, spring thaw and heavy rain commonly expose underlayment failures that stayed hidden during frozen winter conditions. Freeze-thaw cycles can create micro-cracks in decking and loosened underlayment, and once the snow melts, any weak layer becomes obvious with damp attic spaces, small leaks, or staining along ceiling lines. Fall windstorms in southeast Michigan can lift aging asphalt shingles and leave debris concentrated in valleys, gutters, and around roof penetrations. The combination of wind-driven shingle damage and debris buildup around vents, chimneys, and skylights increases the risk of water finding its way inside fast, especially on older roofs that already strained under prior seasons.
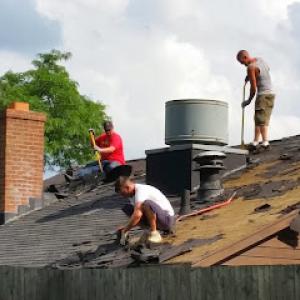
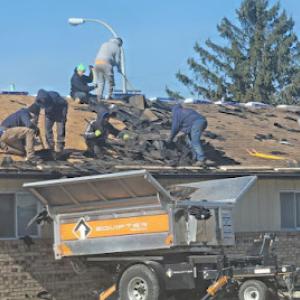
Because storm damage and emergency repair are both common service lines in this market, homeowners here often need rapid post-storm assessment rather than waiting for a full replacement decision. After a wind event or a heavy rain, start with a careful exterior sweep: look for lifted shingles, curled edges, or exposed nails along the eaves and in valleys. Check gutters and downspouts for excessive shingle granules or shingle fragments, which signal edge damage. From the attic, inspect for damp insulation, dark streaks, or light bleeding through decking around roof penetrations. If you notice active leaks or visible daylight through the roof deck, implement quick measures: cover exposed areas with heavy-duty tarps and place buckets under active drips, but avoid delaying professional evaluation. Quick, targeted temporary fixes can prevent further water intrusion while you arrange an urgent assessment.
Look for a contractor who can perform a rapid post-storm assessment with a clear plan for immediate leak control and a scope for repairs or re-roofing as needed. Emphasize the need for a timely inspection after thaw conditions or a wind event, focusing on underlayment integrity, shingle alignment, and valley and penetrations. Request a written assessment that prioritizes safety risks (like loose decking or exposed fasteners) and provides a concrete timeline for temporary protection versus permanent repair. In Taylor, a contractor should be ready to mobilize quickly for emergency repairs and to outline a path from assessment to stabilization, so that the home remains protected while decisions about longer-term roof work are made.
Keep trees trimmed away from the roof to reduce wind-generated debris, and maintain gutters clear so water can shed properly during a thaw. Schedule seasonal inspections that specifically verify the condition of underlayment, flashing around vents and chimneys, and the integrity of attic insulation. For older roofs, combined attention to fastener security, shingle wear, and drainage paths minimizes the risk of progressive damage after the next thaw or wind event. In this market, being proactive with rapid-response readiness is the best defense against recurring spring and fall threats.
Find local contractors experienced in assessing and restoring roofs after hail, wind, and severe weather events.
Pilgrim’s Professional Roof Repair Service
(734) 374-8756 pilgrimsroofrepairservice.com
14684 Mortenview Dr, Taylor, Michigan
4.8 from 60 reviews
Avanti Construction
(734) 732-2985 avanticonstruction.org
Kensington St, Taylor, Michigan
5.0 from 14 reviews
Advantage Roofing & Construction
(313) 986-1877 advantageroof.us
10581 Birch St, Taylor, Michigan
5.0 from 57 reviews
We are a full service commercial and residential roofing, siding, gutters and general building and home maintenance and installation company.
Avanti Construction
(734) 732-2985 avanticonstruction.org
Kensington St, Taylor, Michigan
5.0 from 14 reviews
We are a licensed and insured residential home improvement company dedicated to exceeding our customer's expectations. Our goal is to work with you in making your home improvement vision become reality. We also have a lot of experiance working with insurance companies and can help you navigate your home insurance claim to make sure you are getting everything you are entitled to. Having a contractor on your side can make all the difference and we are here to help relieve your stress and be your advocate for a fair and honest resolution. We are excited about helping make your home update dream project a reality. Call today 734-732-2985
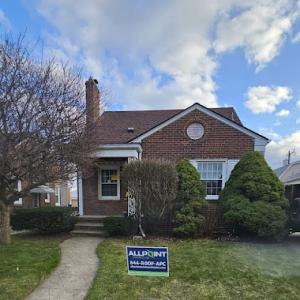
AllPoint Construction
(734) 407-7110 allpointconstructionmi.com
Serving
4.6 from 642 reviews
AllPoint Construction is Metro Detroit’s trusted choice for quality home improvements, from expert roofing and siding to kitchen & bath remodels and custom additions. As a family-owned company, we take pride in craftsmanship, integrity, and creating spaces you’ll love for years to come. Whether you need a reliable roofing contractor after a storm, energy-efficient windows, or a dream kitchen makeover, our team is here to make it happen. Call today for your free estimate and experience why homeowners across Downriver and Southeast Michigan choose AllPoint Construction to build, repair, and remodel with confidence.
Chucks Roofing Company
(313) 386-8962 chucksroofingcompany.com
Serving
4.9 from 184 reviews
At Chuck's Roofing Company, we provide expert roofing and siding services to homes in Lincoln Park, MI, and the surrounding areas. As a trusted roofing contractor, we specialize in roof installations, repairs, and siding solutions designed to protect and enhance your property. Our team is committed to delivering exceptional craftsmanship and durable results that stand up to the elements. Trust our roofing company and siding contractors to keep your home beautiful, secure, and weather-resistant for years to come.
Napier's Home Improvement
(734) 676-6557 napiersroofing.com
Serving
4.8 from 95 reviews
For over 40 years, Napier’s Home Improvement has been Downriver and Southeast Michigan’s trusted, family-owned roofing company—and the oldest in Downriver. Three generations strong, we’ve built our reputation on quality workmanship, honest pricing, and treating every home like our own. From small repairs to full roof replacements, we always start with a free on-site estimate because we believe in transparency and lasting customer relationships. Your roof protects your family, and we take that responsibility seriously—roofing is our family legacy. Thank you for supporting Napier’s Home Improvement. Contact us today to schedule your free on-site consultation!

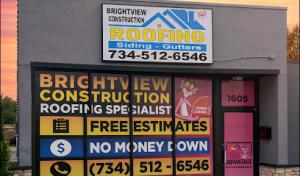
BrightView Construction
(734) 512-6546 brightviewconstruct.com
Serving
5.0 from 58 reviews
BrightView Construction is a trusted roofing company proudly serving Wyandotte, MI and the surrounding Downriver communities. As a skilled roofing contractor, the team specializes in roof repair, roof replacement, and emergency roofing services for both residential and commercial properties. In addition to expert roofing, the company offers siding solutions and professional gutter service designed to protect and enhance every structure. Committed to quality, BrightView Construction uses only premium materials and proven techniques to deliver long-lasting results that clients can rely on.
Level Up Improvement
(313) 287-9525 levelupimprovement.com
Serving
5.0 from 128 reviews
We are a family-owned Roofing, Siding, and Window contractor that is local to the Metro Detroit area. We have experience installing and managing projects on homes across Southeast Michigan.
Crown Pro Construction
(313) 346-4749 www.crownproconstruction.com
Serving
4.8 from 44 reviews
Crown Pro Construction offers a full range of services, including roofing, siding, gutters, windows, gutter protection systems, and specialty roofing throughout the Detroit Metro area.
NorthWest Construction
(313) 277-7676 www.nwconst.com
Serving
4.5 from 99 reviews
Terry Burke has been a Roofing Contractor for over 25 years. His Roofing Company in Dearborn, Michigan has provided a roof over many friends and neighbors heads in Metro Detroit. Northwest Construction is family-owned business and and business and we pride ourselves on our Integrity, Quality Workmanship, and Reputation. We are A+ Certified member of the Better Business Bureau and have received Angie's List "Super Service Award" in each of the last SIX years!
Hoffman Home Renovations & Roofing
Serving
4.6 from 30 reviews
Hoffman Home Renovations and Roofing is the premier choice for home improvement services in Wayne, Monroe, and Washtenaw counties. Whether you need a new roof or gutter system, Hoffman is committed to providing top-notch workmanship and ensuring the highest quality of materials. Their team of skilled craftsmen specializes in insurance repair, with extensive experience in kitchen, bathroom, and basement remodeling. With an unwavering focus on personalized customer service, Hoffman Home Renovations and Roofing is your trusted partner for any home improvement project.
Mill Connection Home Improvement
(313) 215-2186 www.millconnectionhomeimprovement.com
Serving
4.9 from 60 reviews
Experienced and reliable roofing contractor serving Southeast Michigan. We specialize in providing high-quality roofing solutions for both residential and commercial properties. Our team of skilled professionals is committed to providing exceptional customer service and ensuring your roof is protected for years to come.
Kincaide Roof Rejuvenate
(734) 407-1213 kincaideroofrejuvenate.com
Serving
5.0 from 73 reviews
Kincaide Roof Rejuvenate offers the best roof rejuvenation service in the area. We have over 30 years of experience with roofing, and our service will extend the life of your roof by up to 15 years. Our rejuvenating formula deeply penetrates the surface of the shingles and brings your roof back to life.
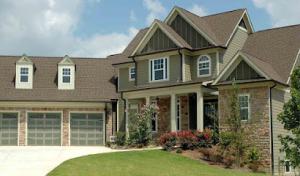
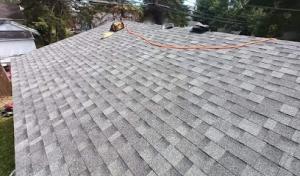
Asphalt shingles remain the dominant practical choice for the typical Taylor home, especially given the town's stock of conventional suburban layouts and the strongest local contractor specialization around this material. The broad installer pool means faster scheduling after a leak notice or storm damage, plus easier compatibility with existing roof decks and common venting layouts. For older roofs, sticking with asphalt shingles reduces the risk of mismatch with flashing details and improves the chance of timely, coordinated repairs after freeze-thaw cycles and wind events. When planning a repair, lean toward standard three-tab or architectural variants that match common surrounding roofs to minimize visible seams and ensure a cohesive repair job.
Metal roofing is available in Taylor, but it represents a smaller specialty segment. Expect a narrower installer pool and longer lead times if choosing metal, which can complicate storm-response timelines. If metal is pursued, verify the installer's experience with older, existing structures and with retrofit underlayment options that address ice dam risk. Tile and cedar systems show up only as limited specialties; this matters in Taylor because repair matching, structural suitability, and installer availability are more constrained than for standard shingle re-roofing. For older roofs, tile or cedar should be reserved for homes with existing roof geometry and framing that can support the weight, plus a clear plan for matching replacement tiles or shakes if damage occurs. In practice, reserve these options for homes where a long-term, high-end aesthetic is a priority and where a reliable specialty contractor can be secured for both initial work and future repairs.
A practical leak-response plan starts with addressing roof drainage and heat-escape pathways that contribute to ice dam formation. For Taylor's freeze-thaw winters, ensure attic insulation and ventilation are sufficient to slow downward ice dam growth. When a leak appears after a storm, keep the affected area protected with a temporary tarp or waterproof sheeting while securing a quick inspection appointment with an experienced local roofer. For older roofs, prioritize flashing integrity around chimneys, vents, and valleys, since damaged flashing is a common entry point for water during rapid thaw cycles. Develop a rapid-response checklist: document leaks with photos, schedule a same-week inspection if possible, and communicate with the contractor about any prior patchwork that might complicate the current repair plan.
Because Taylor relies heavily on asphalt for quick, reliable repairs, seek a contractor with a strong track record in standard shingle re-roofing and proven capabilities in storm-related repairs on older roofs. Confirm clear communication channels for urgent leak calls and verify availability during the high-stress winter-to-spring transition. A contractor who can promptly assess ice dam risk, bring appropriate underlayment solutions, and execute coordinated repairs will minimize disruption and exposure to further damage.
The most popular roofing material in the US. Find pros who install, repair, and replace asphalt shingles.
Advantage Roofing & Construction
(313) 986-1877 advantageroof.us
10581 Birch St, Taylor, Michigan
5.0 from 57 reviews
Pilgrim’s Professional Roof Repair Service
(734) 374-8756 pilgrimsroofrepairservice.com
14684 Mortenview Dr, Taylor, Michigan
4.8 from 60 reviews
Taylor roof replacements are commonly scheduled from late spring through early fall, which can tighten contractor availability and affect pricing during peak season. If you're aiming to minimize delays, start planning as soon as you notice weather windows opening, and be prepared for potential surcharge dates when crews are booked from May through September. Older homes with multiple layers or damaged decking from winter moisture can push timelines further, so factor extra weeks into your project schedule.
Asphalt shingles in Taylor typically run about 350 to 700 USD per square; metal roofing 700 to 1200; clay tile 1500 to 2600; concrete tile 1200 to 2100; wood shingles or shakes 800 to 1400; synthetic or composite shingles 700 to 1200. These ranges reflect common local bids and the way crews price tear-off, decking repair, and disposal in this area. As you compare quotes, note whether the price includes a full tear-off versus a re-cover, since this choice can drastically shift total cost and time.
Local cost swings are often driven by tear-off layers, decking repairs revealed after winter moisture exposure, and the size of the labor pool available for standard re-roofing versus specialty systems. In older Taylor homes, inspectors frequently uncover damaged sheathing once winter moisture has had a chance to soak in, which means a higher likelihood of decking repair or replacement being added to the bill. If a storm season hits and crews are stretched thin, you may see temporary price bumps or expedited scheduling fees.
When budgeting, assume the higher end of the range if the roof has multiple layers or signs of rot, which are common in aging neighborhoods here after long Downriver winters. For ice dam and leak-prone roofs, prioritize material choices with solid warranty coverage and compatibility with existing underlayment. If leak response time is a priority, consider scheduling a mid-season inspection before heavy storm cycles, so potential issues can be caught and addressed before they escalate.
Get a clear picture of your project costs upfront - no commitment required.
In Taylor, the pathway is clear: a full roof replacement usually needs a building permit, not a DIY-friendly permit-free maintenance task. Your project starts with recognizing that the permit protects not just the roof, but the home's structure against the harsh Downriver freeze-thaw cycles and wind exposure you experience here. Before any shingle or panel comes off, you must submit a roofing scope of work that outlines the exact plan and the materials to be installed. That means detailing the roof type, underlayment, ventilation strategy, and any structural work or repairs that accompany the replacement. If asphalt shingles are planned, specify the shingle line, underlayment grade, and ice-dam barriers if applicable. For metal, tile, or synthetic options, include panel profiles, fastening methods, and color or finish details. The city reviews this information to ensure compliance with local codes, potential drainage impacts, and the neighborhood's historic or residential guidelines if they apply to your street. Expect questions about attic ventilation, roof deck condition, and any flashing changes around chimneys, vents, or skylights. Submitting a complete package in advance helps avoid back-and-forth delays once the contractor is ready to begin work.
Inspections in Taylor happen in two main milestones: rough-in and final. The rough-in inspection confirms that the roof deck, underlayment, ventilation, and any required ice-dam protection are installed according to plan and meet code requirements. This is the moment to catch a misalignment between what was approved and what's being installed, especially in older homes where roof decks may show signs of prior damage or uneven sheathing. The final inspection verifies that the entire roof replacement is finished per the approved scope, that all penetrations are properly flashed, and that the roof is watertight with proper drainage and ventilation functioning. The permit is closed only after a successful final inspection, which means the work has been reviewed and deemed compliant. If any deficiencies are found at rough-in or final, the permit remains active and a corrective action report is issued. Address those items promptly to keep your project moving and avoid re-inspections that stall storm-response timelines.
Coordinate with a local contractor who understands the region's wind exposure and the typical aging of older roofing structures in this area. Schedule the permit submission as soon as the scope and material details are finalized, because delays in document accuracy ripple into weather-related setbacks, especially during spring thaw or early winter windows. Keep a copy of all stamped drawings and approvals on the job site, and ensure the chosen materials meet the city's acceptance criteria for residential roofs. If a storm event is forecast during replacement, discuss temporary tarping and secure site management with the contractor in advance to protect interior spaces and minimize the chance of leak-related claims. As the weather shifts, fast-track any required re-inspections by staying in close contact with the building department and providing ready access for inspectors during the scheduled windows.
In Taylor, roof claims commonly involve adjuster inspections focused on separating recent storm damage from older wear on aging suburban roofs. This distinction can determine whether repairs are approved as fixes or if a full or partial re-roof is recommended, so keep your notes organized and ready for the adjuster's questions. Expect patience, because a thorough walk-through often reveals more than a single event.
Michigan claim outcomes can vary with roof age and material, which is especially important in Taylor where many homes are candidates for re-roofing rather than isolated repair. The outcome hinges on what the carrier considers pre-existing wear versus new damage, and the decision can shift based on the roof's current condition, layers of material, and any prior work. Knowing these dynamics helps you set expectations and plan for a practical repair or replacement path.
Taylor homeowners should document wind loss, interior staining after spring thaw, and any emergency tarping because contractors here frequently support claim files with estimates and damage photos. Immediate actions after a wind event or hail can influence the claim's trajectory, so secure critical areas, photograph all affected surfaces, and keep tarps in place until a professional roof evaluation is complete. These records also help distinguish emergency needs from cosmetic issues that may not affect coverage decisions.
A cautious approach during claim conversations pays off. When you speak with adjusters, reference the age of the roof, the material type, and any prior roof work that could affect damage interpretation. If a scope seems unclear, request a second opinion from a licensed contractor who can translate field observations into repair or replacement implications so the file reflects a truthful picture of current condition rather than a best-guess estimate.
Connect with contractors who help homeowners navigate the claims process from damage assessment to final approval.
Avanti Construction
(734) 732-2985 avanticonstruction.org
Kensington St, Taylor, Michigan
5.0 from 14 reviews
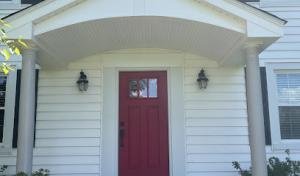
The Downriver climate brings frequent freeze-thaw cycles that stress flat or low-slope sections on garages, additions, and porches. In Taylor, those flatter pockets tend to leak first, even when the main shingle roof looks solid. Expect faster wear on flashing at terminations, parapets, and edge detailing. When a fast leak shows up, prioritize the flat areas first, then trace any interior signs of water to the closest flat surface above. Keep a simple maintenance log for these sections to spot patterns after storms or heavy thaws.
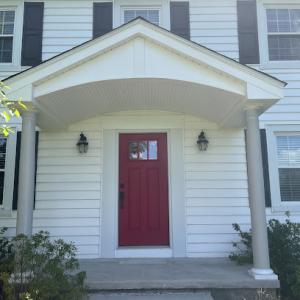
Skylights commonly fail around penetrations, especially after repeated freeze-thaw movement. In Taylor, flashing around skylights and any curb detail weakens sooner than the surrounding roof plane. When a leak appears, check the flashing joints, sealant ages, and the shingles just uphill of the skylight. Reflashing and resealing the curb often produce the most durable fix. Consider adding a secondary drain path if your skylight sits in a low area that traps meltwater.
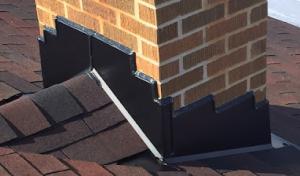
Chimneys are a regular source of Taylor roof repairs due to flashing and masonry transitions. Water tends to work its way under step and counter-flashing where brick or stone meets the roof, especially on older homes. Inspect the chimney flashing after storms and thaw cycles; look for loose mortar, cracked sealant, or rusted step flashing. When repairs are needed, the priority is restoring a continuous, corrosion-resistant seal around the chimney base and ensuring the masonry transition sheds water away from the roof line.
After a wind or ice event, walk the roof with a flashlight at dusk. Focus on flat sections, skylight flashing edges, and chimney flashings. Note any lifted shingles, loose flashing, or water stains on ceilings that align with these features. Address the highest-risk spots first and schedule professional help for penetrations and flashing work to minimize follow-up leaks.
Find specialists in TPO, EPDM, and built-up flat roofing systems for residential and commercial properties.
Taylor homeowners spend in a market where affordability and quick response beat premium branding. When you start calling contractors, track how fast they respond, whether they listen, and if they ask clarifying questions about the roof and the leak timing. Long-established or family-owned shops are common here, so compare not just two big names but a few locals who return calls promptly and show up on schedule.
Re-roofing is more common than niche restoration in this area, so you'll hear broad work scopes. Your job is to push for precise scope language: what exactly will be removed, what exactly will be installed, and how roof vents, underlayment, and flashing will be treated. If a contractor offers a generic plan, ask for a line-by-line sheet that matches your attic layout, roof pitch, and visible damage.
Cleanup standards in practice separate the quick jobs from the careful ones. Ask what debris removal protocol they follow, how waste is contained during the project, and how nails or shingle fragments will be swept from driveways and yards. A contractor that commits to a thorough post-work cleanup is usually a better match for older residential roofs that see more wind-driven debris and freeze-thaw wear.
Because many Taylor homes rely on straightforward re-roofing, the party handling permit closeout and final inspection matters. Make sure the contractor clearly states who completes the final inspection report, who coordinates the city walk-through, and who addresses any punch-list items if the inspector flags issues after the crew leaves.
Ask for recent projects in nearby neighborhoods with similar roof ages and exposures. Request references and, if possible, a brief site visit to a completed job. You'll value a contractor who can demonstrate a predictable schedule, transparent progress updates, and a plan for rapid leak response if a storm hits before the work is finished.