Last updated: Apr 19, 2026
In this region, warm-season thunderstorms routinely roll off Lake Norman, bringing wind-driven rain, hail, and sudden leaks rather than long stretches of snow load. That pattern means roofs face rapid-onset damage you can't see from the ground: bruised shingles, lifted edges, and flashing failures where pipes, vents, and chimneys meet the roofline. The west side of the lake, where the town sits in eastern Lincoln County, endures the brunt of outflow winds that slam onto soffits and ridges, turning a routine afternoon storm into a roof's stress test. The result is a market where post-storm roof assessment is a common homeowner duty, and emergency repairs surge in the immediate wake of severe weather.
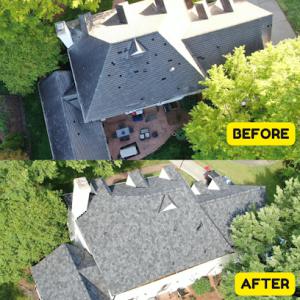
The local contractor signal mix runs heavily toward storm-oriented work, with emergency repairs and insurance-driven claims forming the core cadence after a storm. After a thunderstorm, you should treat any rising risk as time-sensitive. If a hail event or strong wind gust travels through, pay close attention to the roof and attic space for sudden leaks, wind-driven shingle loss, or granule accumulation in gutters and downspouts. Even when the surface looks fine, hidden damage around flashing and near skylights can create leaks that worsen with the next rain. When in doubt, arrange a rapid assessment from a storm-damage specialist who can document impact patterns, identify compromised flashing, and note any ridge or hip-shingle lift that undermines wind resistance.
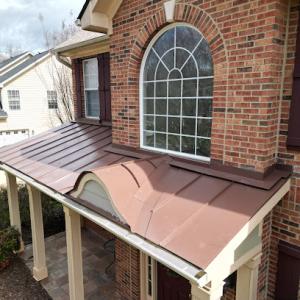
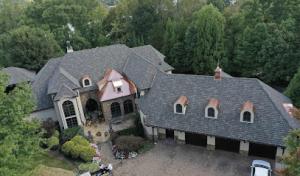
Spring and summer weather here can bruise asphalt shingles, lift ridge and hip shingles, and compromise flashing around penetrations after outflow winds. Hail bruising may not always show on the first pass, but dents and soft spots under shingles can spell trouble once heat cycles deepen the damage. Ridge and hip caps are especially vulnerable because they sit at the wind's highest stress point; lifted edges invite wind-driven water intrusion. Flashing around chimneys, vent stacks, and skylights is a frequent failure point, particularly where sealants have aged or where previous repairs created mismatches. In homes with synthetic underlayment or older two-layer systems, the risk of hidden moisture pockets increases after a strong storm, amplifying the chance of later interior damage.
After the weather clears, walk the perimeter with a flashlight at dusk to catch shimmering reflections on shingles or evidence of lifted edges. If a tree limb or debris sits on the roof, do not climb up to remove it yourself unless confidence and safety gear are assured; call a storm-damage pro for a quick, professional removal, which reduces the risk of further damage. Request an on-roof inspection, a second-angled attic assessment, and a detailed inspection of flashing around all penetrations. Document every area of concern with photos and notes, focusing on hail impact marks, loose or missing shingles, and any signs of water intrusion around vents and chimneys. Keep a written timeline of when the storm occurred, what was observed, and which areas showed changes after subsequent rain events. A swift, documented assessment helps determine whether a temporary leak-stanching repair is appropriate while awaiting an insurance adjustment.
Insurance-driven decisions often govern when a full replacement becomes the prudent course, especially after a serious hail event. The aim is to differentiate cosmetic bruising from structural compromise, because the latter drives expedited replacement plans. If the assessment confirms widespread shingle damage, multiple impacted penetrations, or compromised underlayment, prepare for a claim process that moves quickly through evaluation and adjustment. Your storm-damage contractor can serve as a guide, helping gather the documentation insurers expect, coordinating temporary leak mitigation, and outlining the criteria that indicate replacement rather than patchwork. The key is timely, accurate reporting of the observed damage and a clearly mapped path to either repair or replacement, aligned with the most defensible, wind-resilient materials for Lake Norman's climate.
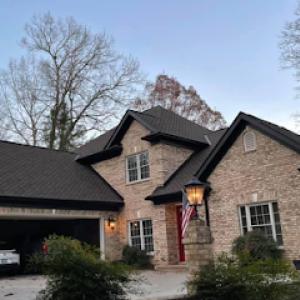
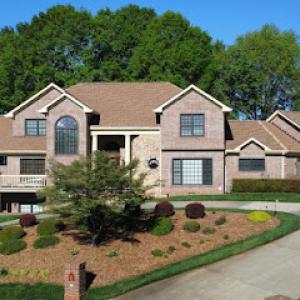
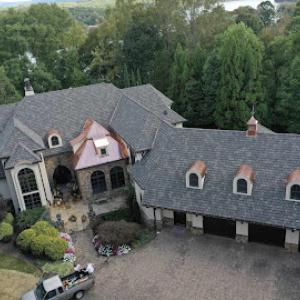
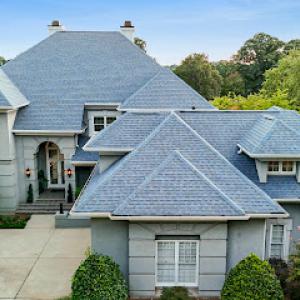
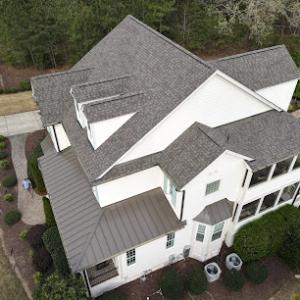
Asphalt shingles dominate the local market, reflecting a practical balance of cost, availability, and familiarity for Denver homeowners. They handle the humidity well enough when installed with quality underlayment and proper ventilation, and they're easy to repair after a hail event. Metal roofing has a meaningful local presence, appealing to homeowners who want wind resistance and long-term performance in a humid subtropical climate. When paired with the right sealant and panel design, metal can resist wind-driven rain and rapid temperature swings, which are common around Lake Norman's storms. Clay and concrete tile appear in the market but are less common, so consider structural load and installer availability on higher-end homes near the lake. If tile is chosen, ensure the roof deck can bear the weight and that local contractors have tile-specific experience for repairs and color matching.
Denver's climate behaves like a moisture-heavy, thunderstorm-prone belt. That means roofing choices must tolerate high humidity, algae growth, and repeated hail exposure. Clay and concrete tiles look striking but demand careful assessment of attic ventilation, roof pitch, and carrying capacity. On homes with limited attic space, look closely at attic access and the potential need for structural reinforcement before tile installation. Asphalt shingles, upgraded with algae-resistant granules and moisture-resistant underlayment, can weather the Lake Norman summer and sudden squalls more predictably. Metal roofs should be matched to wind zones and coastal-style detailing where salt exposure isn't a daily factor; trims and edges must be sealed to prevent moisture ingress at seams.
Wood shakes and synthetic/composite products require scrutiny for humidity exposure and algae staining potential. Hot summers and frequent thunderstorms can accelerate weathering on moisture-sensitive assemblies, so regular inspection after major storms is critical. If choosing wood, select rot-resistant species and ensure a robust ventilation strategy to minimize trapped moisture. For synthetic shingles, verify color stability and UV resistance to reduce surface aging in bright sun and persistent humidity. In all cases, plan for storm-season inspections and be prepared for faster repair cycles after hail events, balancing the desire for authentic texture with the practicalities of Denver's storm-driven maintenance cycle.
Think about how each option ages under Lake Norman's sun and rain: asphalt offers straightforward repairs and broad contractor availability; metal promises longevity and resilience against wind, with attention to flashing and seams. Tile options reward with standout curb appeal but demand careful weight and repair planning on steeper slopes. Wood and synthetic shingles pair well with some architectural styles but require diligent moisture management and potential algae control strategies to keep their appearance and performance consistent through the boom-and-bust storm season.
In this lake-adjacent area, storm-driven demand spikes after severe weather push local reroof projects into tight scheduling windows. When a hail event or a wind-driven rain hits the Lake Norman belt, crews and materials can be in high demand for days or weeks, and labor availability tightens across the broader Charlotte commuter region. For a homeowner, that means you may see higher bid levels and shorter negotiation timelines on those weeks right after a hail storm or intense thunderstorm season. Planning ahead and coordinating with a trusted contractor during calmer weeks can help lock in crew availability and stabilize pricing, even as the market reacts to storm activity.
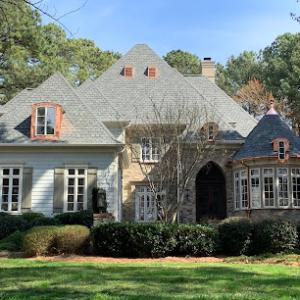
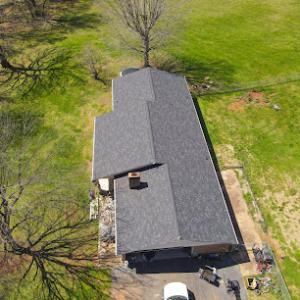
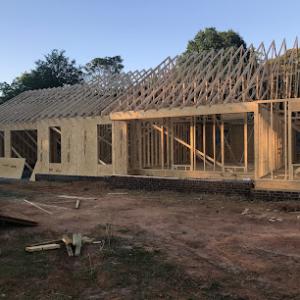
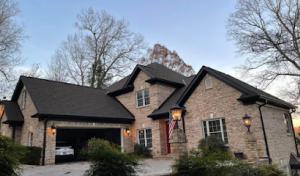
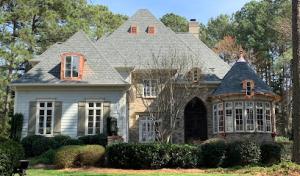
Denver typical homes often feature steep-slope suburban rooflines with hips, valleys, chimney intersections, and ventilation upgrades. Each of these elements adds complexity: hips and valleys require more precise waterproofing, chimney transitions demand flashing and kick-out detailing, and upgraded ventilation can involve additional soffit or ridge work. These complexities push final costs above a simple per-square material price, especially when temporary weather exposure or rapid rain events shorten the installation window. The result is that installation crews may need extra time, specialized detailing, and sometimes temporary protection to keep the roof watertight during the work.
Material choice matters sharply here, because the market supports everything from standard asphalt shingles to metal, tile, wood, and synthetic systems, each with different installation complexity and crew specialization. Asphalt shingles remain the most economical starting point, but metal, clay tile, and concrete tile bring added weight, fasteners, underlayment needs, and precise flashing. Wood shingles or shakes introduce fire- and moisture-sensitivity considerations and may require more ventilation attention. Synthetic or composite shingles can offer a balance of ease and durability but still benefit from experienced crews for steep pitches and complex transitions. The right choice hinges on local weather exposure, roof slope, and the ability to secure timely, skilled labor during storm-season demand spikes.
From the Lake Norman market perspective, costs are driven by both material and labor timing. Asphalt shingles commonly fall in the lower end of the spectrum, while metal and higher-end tile approaches push toward the upper end, especially with steep or intricate rooflines. Concrete tile and clay tile, while durable, often carry the heaviest installation load and can require additional structural or fastening considerations. In practice, the local pricing landscape reflects both the per-square material cost and the added labor needed for hips, valleys, chimneys, and ventilation upgrades. When insurance-driven replacements occur after storms, expect a tighter window for bids and possible premium on expedited schedules, particularly for more complex roof designs.
Campbells Precision Roofing
(704) 280-5996 www.cprhomepros.com
7730 Campground Rd, Denver, North Carolina
5.0 from 127 reviews
Campbells Precision Roofing is locally owned and operated roofing company currently serving the area of Denver, NC and surrounding areas. Campbells Precision Roofing prides our selves on our products and services we provide. Campbells Precision Roofing has become a highly respected contractor in the roofing industry. Our services include: Metal Roofing, Shingles Roofing, Commercial Roofing (TPO, EPDM, Rolled) , Residential and Commercial Gutters It is important to use a Roofing company that is reliable, trustworthy, and most importantly, knowledgeable about the products available and how to use them accordingly for their customers.
Falcon Roofing of the Carolinas
(704) 707-5523 falconroofs.com
4104 Cindy Ln, Denver, North Carolina
5.0 from 39 reviews
Falcon Roofing of the Carolinas is a locally owned and operated roofing contractor serving both the residential and commercial roofing needs of the Carolinas Region. Our roof installation services are tailored to fit the needs of each individual customer, no matter how large
Empire Roofing Claim Services
(704) 966-4112 www.empirercs.com
3380 Denver Dr unit a, Denver, North Carolina
4.8 from 111 reviews
We are Lake Normans premium shingle roofer. We specialize in all types of shingle roofing applications and are an Ownes Corning Platinum Preferred Contractor. We can assist with insurance claims for wind and hail damage. We have a full general contractor of roofing license through the state of NC and SC
MBA Roofing of Denver
1814 Woods Ln, Denver, North Carolina
4.9 from 39 reviews
MBA Roofing proudly serves the Denver area with expert residential and commercial roofing and gutter solutions. As an Owens Corning Platinum Preferred Contractor, we provide top-tier workmanship, materials, and service—whether it’s a repair, replacement or new build.
A Plus Roofing - Denver
(828) 851-6440 www.aplusroofingnc.com
7472 Waterside Loop Rd #114, Denver, North Carolina
5.0 from 9 reviews
Roofing contractor providing installations and repairs for residential and commercial properties, plus gutter services. We also offer standing seam metal services.
Rick Earnhardt Builders
Denver, NC
5.0 from 1 review
Rick Earnhardt Builders specializes in framing, roofing and custom homes.
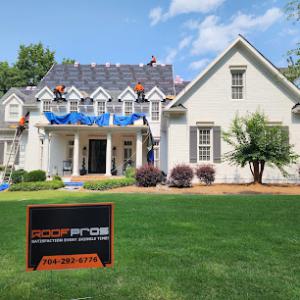
Roofpros
(704) 292-6776 www.roofprosknows.com
Serving
5.0 from 115 reviews
Roof Pros is your trusted local roofing contractor, proudly BBB Accredited with an A+ rating. Whether you need a small repair, storm damage service, or a full roof replacement, our experienced team delivers quality craftsmanship backed by honesty and integrity. We treat every project—big or small—with the same dedication, ensuring your home or business is protected for years to come. From shingles to metal roofing, we’ve got you covered. Roof Pros offers free roof inspections and clear, upfront guidance so you know exactly what to expect before work begins. Our commitment is simple: reliable service, dependable results, and customer satisfaction every single time. 📞 Call or email Roof Pros today to schedule your free inspection and disco
Catawba Valley Roofing & Restoration
(828) 962-0617 www.catawbavalleyroofing.com
Serving
5.0 from 158 reviews
Is your roof ready to stand the test of time? Catawba Valley Roofing & Restoration, serving Hickory, NC, and surrounding areas since 2019, provides top-tier roofing solutions for homes and businesses. We specialize in complete roof replacements using durable CertainTeed Asphalt Shingles. Our team offers FREE roof inspections to assess your roof's condition, identify potential storm damage, and assist you through the insurance claim process. Experience the peace of mind that comes with knowing your property is protected by a roof built with quality and integrity. At Catawba Valley Roofing, we treat every project with the utmost care and attention to detail.
Sutherlands Exteriors
(704) 784-0043 www.sutherlandsexteriors.com
Serving
5.0 from 102 reviews
With nearly two decades of dedicated service, Sutherlands Exteriors stands as a cornerstone of quality craftsmanship in the Cornelius area. As a family-owned business, they take immense pride in protecting and enhancing your home's exterior. Their expert team specializes in roofing, siding, and gutters, offering comprehensive solutions to safeguard your property against the elements. Trust Sutherlands Exteriors to provide reliable, professional service and lasting results that elevate your home's curb appeal and structural integrity.
All American Restoration & Roofing
Serving
4.8 from 256 reviews
All American Restoration & Roofing, based in Mooresville, NC, specializes in roofing, metal roofs, gutter installation, and painting services. We are committed to delivering top-notch craftsmanship and reliable service to enhance and protect your property.
Phoenix Exterior Solutions
(704) 706-3270 www.phoenixexterior.com
Serving
5.0 from 116 reviews
Phoenix Exterior Solutions is Lake Norman's most innovative General Contractor that specializes in roofing, siding, exterior, and storm restoration.
Goliath Roofing
(704) 997-6165 callgoliathroofing.com
Serving
4.9 from 143 reviews
At Goliath Roofing, we specialize in high-quality roofing, gutters, windows, and siding services for both residential and commercial properties. With a commitment to craftsmanship and customer satisfaction, our team delivers durable, energy-efficient, and visually appealing exterior solutions that protect and enhance your home or business. From full roof replacements and storm damage repairs to seamless gutter installations, energy-efficient window upgrades, and premium siding systems — we handle every project with precision and professionalism. Our goal is simple: to provide dependable exterior improvements that add long-term value, curb appeal, and peace of mind.
Denver is an unincorporated Lincoln County community, so residential reroof permitting is handled through the local building department serving the county rather than a separate large-city permitting bureaucracy. That means your project rides under the same umbrella as other county homes, with guidance and inspections coordinated through the county's building services. When a reroof is planned after hail exposure or storm damage, the same channel is used, and the emphasis remains on code-compliant attachment, proper ventilation, and reliable flashing details.
A permit is commonly required for a full reroof, and the process is designed to ensure a durable roof that can withstand Lake Norman's moisture and the area's thunderstorm patterns. Central to the permitting review are flashing details around chimneys, vents, and valleys, as well as how roof decking is fastened and ventilated to prevent moisture buildup. Ventilation checks help avoid mold-prone stagnation in the attic, while flashing inspections guard against leaks driven by wind-driven rain.
Inspections during and after installation focus on three core areas: flashing integration, attic ventilation provision, and secure roof attachment. The inspector will look for continuous, properly sealed flashing around roof penetrations, as well as confirm that ridge and soffit venting aligns with the roof's design to promote adequate air flow. After installation, the final inspection ensures all components meet code requirements and that any repairs or replacements harmonize with the existing roofing system, particularly in regions where hail exposure can stress fasteners and sealants.
Typical approval timing runs about 1-2 weeks, but more complex roof designs or specialty materials can trigger additional inspection steps before final sign-off. If the project features unusual roof geometry, multiple elevations, or nonstandard fastener patterns to address hail impact concerns, anticipate a longer review window. Having contractor stamps, warranty notes, and a clear material list ready can help streamline the process and reduce back-and-forth with the county. Seasonal demand, such as after severe storms, can also influence turnaround times, so plan milestones with a contingency for inspection scheduling gaps.
For homeowners responding to hail exposure, coordinating with both the insurance claim process and the county permit workflow pays off. Prepare to present a sequence of material selections, roof deck condition notes, and venting strategy to the building department if requested. When hammering out the installation plan, emphasize proper attachment to withstand wind uplift and ensure flashing transitions are continuous around dormers or skylights. Clear communication with the roofer about inspection expectations helps prevent rework and keeps the project on track for a code-compliant, durable roof that stands up to Denver's seasonal weather.
North Carolina carriers generally cover standard roof replacements, but Denver homeowners should expect requests for roof age records, scope documentation, and attic or roof photos after storm events. The claim process hinges on proving what happened and when, and that proof often arrives in the form of labeled photos, dated shingles, and a clear timeline of storm impact. If a prior roof exists, be ready to document any noticeable age-related wear or previous repairs. Misalignment between what is documented and what the adjuster observes can slow the claim or invite disputes, so accuracy matters from the outset.
Because this market shows strong contractor specialization in insurance claims, homeowners should be prepared for adjuster-driven inspections after hail or wind events common to the Lake Norman area. An adjuster will pair with a contractor or a roofer's scope notes, and that collaboration can push the project from a routine replacement to a line-by-line assessment of decking, underlayment, and ventilation efficacy. In practical terms, expect questions about attic insulation,Ventilation, and any water intrusion reported inside the attic or ceilings. Having a prepared set of photos and a written list of observed issues can help both sides move toward a clear, fair scope.
Wind- and hail-mitigation credits may be available for certain materials or upgraded fastening patterns, making replacement specifications relevant beyond the immediate claim. When talking with your roofer or an insurance adjuster, focus on how the chosen materials perform under Lake Norman's typical wind bursts and hail exposure. Credits or allowances tied to upgraded fasteners, underlayment choices, or roof ventilation upgrades can shift the project's long-term resilience, not just its sticker price. This is especially true after a major hail event or a sequence of windstorms that hits older roofs hard. Keep the goal in view: a replacement that withstands repeated storms while aligning with the scope documented for the claim, and with the homeowner's long-term protection in mind.
Begin by gathering recent roof documentation, including any permits, photos, and notes from neighbors who witnessed the storm. After a hail or wind event, promptly schedule a professional inspection and coordinate a transparent photo portfolio that clearly shows damaged areas and any signs of water intrusion. When the adjuster arrives, present your documentation calmly and seek agreement on a shared scope that covers necessary decking, underlayment, and ventilation enhancements where appropriate. If a dispute arises, request a written explanation of the scope decision and consider a second, independent opinion to validate the recommended repairs and associated credits.
Connect with contractors who help homeowners navigate the claims process from damage assessment to final approval.
Campbells Precision Roofing
(704) 280-5996 www.cprhomepros.com
7730 Campground Rd, Denver, North Carolina
5.0 from 127 reviews
Empire Roofing Claim Services
(704) 966-4112 www.empirercs.com
3380 Denver Dr unit a, Denver, North Carolina
4.8 from 111 reviews

MBA Roofing of Denver
1814 Woods Ln, Denver, North Carolina
4.9 from 39 reviews
Lake Norman's moisture-rich environment means algae streaking, moss growth, and damp attic spaces can show up sooner than you expect. In practice, moisture from lake breezes can keep roof decks damp longer after rain, which slows drying and can extend the time shingles sit under moisture stress. That persistence makes attic ventilation more important than in drier inland markets. If you notice greenish streaks on shingles, especially on north-facing slopes or shaded areas, address ventilation first-before chasing cosmetic fixes on the roof surface. A quick check is to stand in the attic after a rain and verify that warm, humid air is moving out and not pooling around the soffit or chimney chase.
Summer heat and humidity here accelerate shingle aging and stress underlayment, particularly on darker roof colors that absorb more sun. If the attic is poorly vented, you may see faster curling, whitening, or softening at the edges of shingles. Practical steps include ensuring intake at soffits isn't blocked by insulation and that exhaust vents-ridge or high-velocity vents-have an unblocked path to the outside. In homes with limited attic space, consider adding baffles to keep insulation off the underside of the roof deck, which helps air movement without large, intrusive alterations. You want a steady 50-60 feet per minute of airflow across the attic cross-section during warm afternoons.
Fall leaf buildup from the area's tree cover can trap moisture at valleys and behind chimneys, obscuring inspection needs until leaks appear. Inspect valleys, flashing, and transition points after leaf fall, paying attention to any moisture-blackened decking or softened underlayment in those hidden spots. Clean gutters and downspouts early in autumn to reduce debris-packed moisture pockets. If moss or algae appears on shaded sections after leaf drop, treat carefully to avoid undersurface penetration, and plan a mid-fall ventilation check to ensure damp areas aren't lingering behind joints or flues. Regular, targeted inspections right after storm season help keep interior leaks from catching you off guard.
You know storms around Lake Norman punch through more than once. In Denver, inspection attention should focus on flashing at chimneys, valleys, skylights, and roof-to-wall transitions because storms often exploit these details before field shingles fully fail. A careful eye after every heavy wind event can save a larger leak later, especially if attic vents show moisture.
Winter freeze-thaw cycles are not the dominant regional hazard, but they can still affect exposed flashing and decking after moisture intrusion from earlier storm damage. When you see peeled shingle edges or lifted tabs near transitions, treat it as a warning sign that moisture has found a path inside. Pay attention to flashing around skylights during hail season; damage there tends to recur.
The local contractor market shows meaningful chimney and skylight service activity, suggesting these penetrations are recurring repair points for area homeowners. If a repair was done last year, re-check to ensure flashing sealants and metal kick-out joints are still sound. Hail-exposed valleys deserve periodic inspection for metal or TPO failures, not just shingle wear.
Keep the attic dry by tracing any new damp spots to their source, and look for corrosion on metal flashing edges. Roof-to-wall transitions often hide under shingles; gently pull back at least a few tabs to inspect sealant lines and mortar or mortar-like flashing. Schedule targeted checks after severe storms to catch problems before they migrate to the interior.
After a hail event, document the damage with photos from multiple angles, then compare notes with neighbors who share the same contractor network. Reports on flashing, not just shingles, indicate a need for a reinspection.
Find contractors experienced in skylight installation, flashing, and leak repairs to bring natural light into your home.
Campbells Precision Roofing
(704) 280-5996 www.cprhomepros.com
7730 Campground Rd, Denver, North Carolina
5.0 from 127 reviews
A Plus Roofing - Denver
(828) 851-6440 www.aplusroofingnc.com
7472 Waterside Loop Rd #114, Denver, North Carolina
5.0 from 9 reviews
Catawba Valley Roofing & Restoration
(828) 962-0617 www.catawbavalleyroofing.com
Serving
5.0 from 158 reviews