Last updated: Apr 19, 2026
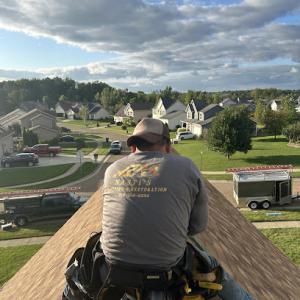
When a wind or hail event rattles shingles and flashing, the fastest path from risk to protection is immediate, targeted assessment. In Bedford, storm activity often hides interior leaks behind a few damaged shingles, nailed flashing, or lifted edges-especially if a follow-up freeze-thaw cycle or heavy rain hits. A swift, careful check of the roof line, attic spaces, and ceiling spots can reveal fresh water tracking from a small breach before it becomes a full-bleed issue inside walls. If you notice shingles cracked, granule loss in the gutters, or damp spots on ceilings, treat it as urgent and document it right away. The goal is to prevent a minor shingle or flashing issue from turning into widespread interior damage during the next rain.
Ohio roof claims commonly require photo documentation and weather-event history, and Bedford-area homeowners may also be asked to show that underlayment or ventilation was updated during replacement work. Start a clear record: date, time, and a concise description of each affected area, paired with close-up photos of shingles, flashing, and any interior staining. Keep receipts and notes about any temporary tarps, tarping placements, or emergency repairs you initiate. If outdoor fixtures or gutters show impact marks from hail, photograph those as well-insurance reviewers look for evidence that the event caused the observed damage and that it was not simply wear over time. A simple, organized file now reduces back-and-forth later and speeds the claim through.
Your first move when leaks appear is to limit interior exposure. Place buckets under drips, protect flooring with plastic or drop cloths, and remove valuables from affected areas. If attic insulation shows moisture, dry out with fans or dehumidifiers, but avoid running heavy electrical devices in wet spaces. Next, arrange a temporary patch for exposed roof areas only if it's safe to do so. Do not delay in getting professional input-unresolved leaks can compromise insulation, sheathing, and the ceiling structure, especially if temperatures swing after a storm. A rapid on-site assessment by a reputable local roofer with storm-damage experience helps determine whether a full replacement, targeted shingle repair, or flashing fix is warranted.
Contractor activity in Bedford is strongly concentrated around storm damage, emergency repair, and insurance-claim help, indicating homeowners here commonly need post-storm roof service rather than only planned replacements. When selecting a contractor, prioritize response time, a clear scope of work, and documentation capabilities. Insurers will request weather-event history and a detailed claim narrative, so a contractor who can provide a written, itemized assessment aligned with photos and dates will streamline approval. If an adjuster visits, ensure your contractor is prepared to explain how underlayment or ventilation was updated during replacement work, since that proof frequently affects payout and long-term performance. Stay proactive: rapid reporting, precise photo records, and a plan for prompt permanent repair minimize the risk of lingering leaks and secondary damage.
Nasti's Roofing & Restoration
(216) 650-4334 nastisroofing.com
7650 1st Pl Suite F, Bedford, Ohio
5.0 from 79 reviews
Nasti’s Roofing & Restoration is a top-rated roofing contractor serving Cuyahoga, Geauga, Lorain, Medina, and Summit County. We specialize in asphalt and metal roofs, roof installations, replacements, gutter installation, siding, window installations, and all exterior restorations. As storm damage experts and insurance specialists, we help guide you through the claims process. We offer free emergency roof repairs and free roof inspections, available 24/7. As a CertainTeed Shingle Master, licensed, and insured, we provide fast, reliable service. Contact us today for a free estimate!
AA Metal & Dimensional Roofing
(216) 412-1347 aamdroofing.com
Bedford, Ohio
5.0 from 24 reviews
Our mission is to meet the needs of our communities by helping educate homeowners on the best choice for their largest asset. We do roofs (RESIDENTIAL & COMMERCIAL)! We do gutters! We do siding! We do window!! If its quality you seek then speak to your AAMD representative and ask them about our preferred products list. They will help you proceed to get your project what it needs. FINANCING AVAILABLE.
Tri-Kote Roofing
(440) 635-6285 www.trikoteroofing.com
5118 Richmond Rd, Bedford, Ohio
5.0 from 3 reviews
"We understand a roof affects much more than just what’s overhead. We believe in high-quality commercial roofing that’s designed to not just protect you from the elements, but free you from the burden of worry and costly energy inefficiency. We know roofing, of all things, does not have a one-size-fits-all solution, which is why we tailor our services to large commercial facilities throughout Northeast Ohio and their specific needs. We specialize in green commercial roofing solutions (Spray Foam roofing, cool roofing, reflective roofing, energy efficient flat roofing, and more) that help businesses increase energy efficiency, durability, and longevity and decrease costs and waste."
YICN Roofing (aka Your Insurance Claims Network)
(216) 999-4342 yicnroofing.com
Serving
5.0 from 118 reviews
YICN Roofing is a trusted, locally owned roofing company based in Cleveland, OH, proudly serving homeowners and businesses throughout Northeast Ohio. We specialise in roof repair, roof replacement, storm damage restoration, siding, gutters, emergency tarping, and skylight upgrades. Backed by years of experience and a 5-star reputation, our team delivers high-quality craftsmanship, honest inspections, and full insurance claim support. Whether you need emergency roof repairs or a complete exterior renovation, YICN is committed to protecting what matters most - your home and your peace of mind. Our licensed and professional team is committed to quality, reliability, and customer satisfaction. Call us today for a free estimate or storm damage
Link Exteriors
(330) 302-2069 linkexteriors.com
Serving
4.9 from 154 reviews
At Link Exteriors we are roofing, siding, gutter, and window specialists! When it comes to roofing contractors in Northeast, OH, we know you have a lot of choices. So why should you choose Link Exteriors for your residential or commercial roofing needs? Quality Materials + Superior Workmanship = Outstanding Value. We’ve worked hard since our founding to build a reputation for excellence that has allowed us to continue to grow over the years. We are committed to customer satisfaction, and sincerely hope that every customer finds our team to be a great partner in turning their house into a home. We provide free storm damage inspections.
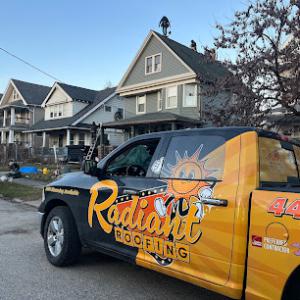
Radiant Roofing
(440) 840-4382 www.1radroof.com
Serving
5.0 from 53 reviews
Radiant Roofing is a family-owned roofing business in Northeast Ohio. We are your destination for help with insurance claims, and any residential or commercial roofing solution. Our experienced team specializes in crafting stylish and durable roofing structures, ensuring your property's protection from the elements year round. We are an Owens Corning certified contractor, and offer the best warranties in roofing. We can install traditional asphalt shingles, or metal roofing. We also install siding, windows, gutters and rooftop solar systems. We deliver unmatched quality and customer service for all your exterior needs!

Great Lakes Home Remodeling
(216) 483-7741 greatlakeshomeremodeling.com
Serving
5.0 from 8 reviews
With over two decades of experience in the home improvement and Stone Coated Metal Roofing industry our Team has the knowledge, skills, and licensing to handle many different home renovations and permanent home solutions for our customers. Our goal is to offer you dependable and permanent home improvement services and craftsmanship. We provide premium roofing and siding products such as Stone Coated Metal Roofing, insulated siding and architectural fiberglass shingles for customers throughout Ohio, Michigan, and Indiana.
EGC Roofing & Siding
(330) 265-5573 www.egcroofingandsiding.com
Serving
4.6 from 10 reviews
EGC Roofing and Siding, is a premium company, serving your roofing, siding, window, and door installation and repair needs, in Canton Ohio, and the neighboring cities. We also do skylights, gutters, and hardie boards.
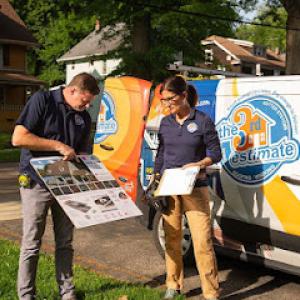
The Third Estimate Corporation
(216) 937-2030 thethirdestimate.com
Serving
4.8 from 1260 reviews
The Third Estimate has served our community in Northeast Ohio since 1996. We are a family-owned and locally operated business in Solon, Ohio. Our company strives to provide superior customer service, integrity, and trust. We take pride in our top-notch craftsmanship, so we only offer the best high-quality products in the exterior home improvement market for roofing, windows, siding, and gutter systems. Our professional team strives to ensure budget-friendly prices and options while listening carefully to our customers to meet their needs and wants.
Mr. Roof Cleveland
Serving
4.8 from 476 reviews
Mr. Roof Cleveland is the premier roofing contractor in Cleveland, Ohio, serving homeowners with premium exterior solutions since 1962. We specialize in high-quality roof replacement and roof repair, often completing installations in just one day. As an Owens Corning Platinum Contractor, we offer industry-leading Lifetime Warranties on labor and materials. Beyond roofing, our team is expert in vinyl siding, replacement windows, gutters, and masonry. Whether you need emergency storm damage repair or a full exterior makeover, trust our licensed and insured team for honest pricing and free estimates. Experience why we are Cleveland, Caton, & Akron's top choice for residential roofing. Call today!
Trophy Home Restoration
Serving
5.0 from 35 reviews
Trophy Home Restoration provides roofing, solar, siding and gutter services to the Northfield, OH and surrounding areas.
MK Roofing & Construction
Serving
5.0 from 9 reviews
MK Roofing & Construction is a premier roofing contractor based in Chagrin Falls, Ohio, dedicated to providing outstanding roofing solutions for residential and commercial properties. We specialize in a wide range of services, including roof repair, installation, maintenance, restoration, and replacement. We proudly serve areas such as Bainbridge, Solon, Hunting Valley, Novelty, and Orange. As a locally owned and established business, we prioritize building lasting relationships with our clients in Chagrin Falls and the surrounding communities. Our reputation for reliability, integrity, and professionalism has made us a trusted choice for all roofing needs. Let MK Roofing & Construction provide you with a roof that stands the test of time!
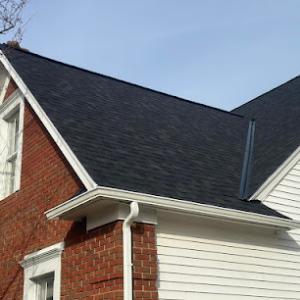
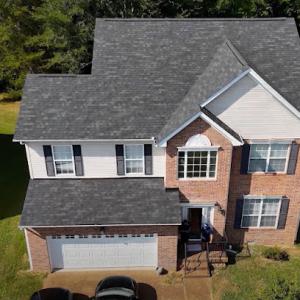
Asphalt shingles remain the dominant practical choice in Bedford. The typical winter-to-spring freeze-thaw cycle in this part of Northeast Ohio quickly tests aging roofs, and granule loss can accelerate when shingles are past their prime. If a roof has endured several harsh winters, brittle tabs and more exposed nail lines around penetrations become common leak paths. For homeowners replacing or upgrading, a solid underlayment and proper ventilation are essential, especially since inspectors scrutinize these details during full replacements. When a storm hits and hail scrapes the surface, asphalt can show impact damage in ways that aren't always obvious from the ground, so a careful attic inspection after wind events helps confirm whether shingle integrity is still solid or if fasteners and flashing need attention.
Metal roofing is active in this market and can perform well against snow shedding and moisture, but careful detailing is still required. Bedford installations should emphasize ventilation to avoid condensation buildup in the attic space and within the roof cavity, because inspectors review those assemblies during replacement work. Fastener placement, corrosion protection, and proper transitions at edges, chimneys, and skylights matter a lot on Northeast Ohio houses. If metal is chosen after a storm, plan for a thorough check of hips and ridges, where wind uplift can expose seams. Metal shines in rain and snow, yet a thoughtful installation mindset-especially around attic exhausts and vent pipes-minimizes risks of leaks that can echo through an older, heavier structure.
Tile, wood shake, and synthetic products appear in the Bedford market but are more selective choices because heavier or specialty systems can complicate structural planning, flashing details, and replacement logistics on older Northeast Ohio housing stock. Clay and concrete tiles add weight; older attics and ceiling joists may not be prepared for that load without reinforcement. Wood shakes bring a distinctive look, but they require regular maintenance to guard against rot and insect intrusion, and their lighter-weight knockoffs can still need meticulous installation to perform well in freeze-thaw cycles. Synthetic shingles offer a compromise in weight and ease of installation, yet attention to flashing details and venting remains critical, particularly in a climate where wind-driven rain from storms can exploit marginal seals.
Weather in this region often arrives as gusty wind and hail events that trigger quick damage assessments. After a storm, you should document all exterior surfaces, flashing seams, and penetrations from multiple angles, especially around vents, chimneys, and skylights. Take timestamped photos before making temporary emergency fixes, if any, and keep a simple log of repairs or tarping. When talking to your insurer, photograph the interior and attic spaces to show potential hidden damage, such as moisture intrusion into underlayment or decking. Having a clear record of the roof type installed, the age of the roof, and the exact points of concern helps the claim process move more smoothly and supports future decisions about whether a full replacement or targeted repairs are appropriate. Bedford homes with older structures that have endured several severe weather cycles benefit from a trusted local roofer who understands where wind and hail tend to exploit vulnerabilities, and who can translate those findings into a precise documentation packet for the insurer.
Bedford roof work is strongly seasonal, and the calendar itself can shape the outcome of a repair. Winter snow load and ice dams can delay tear-offs when temperatures are stubbornly below freezing, and soft freezes followed by thaws create unexpected work stoppages as crews chase melting and refreezing cycles. Spring storms arrive with their own schedule-shaking effects, often bringing back-to-back calls and tighter windows to complete projects. In the dog days of summer, heat can slow adhesive curing and ventilation checks, pushing crews to pause during peak heat hours or to adjust timelines for safety and workmanship quality. Autumn winds add a final layer of disruption, sometimes narrowing installation windows just as the roofers are stepping into the heart of a project. The practical takeaway is clear: plan for flexibility, and build in buffers that anticipate these seasonal ebbs and flows rather than assuming a straight line to completion.
The cold winters followed by thaw periods in this area magnify ice-dam risk, making ice-dam prevention a central part of any replacement or major repair plan. When meltwater churns through repeated freeze-thaw swings, it can back up under shingles if attic ventilation isn't doing its job. That backflow not only creates surface staining and moisture migration, it can also compromise decking and underlayment before a contractor's ladder even comes down for the season. Good attic intake and exhaust ventilation, coupled with a properly sized underlayment system, matters more than ever. If moisture intrusion has already shown up before replacement, addressing it promptly avoids locking in a faulty roof that will struggle through a future freeze-thaw cycle.
Ventilation and underlayment are not afterthoughts in Bedford's climate; they're part of the safety net that keeps a roof healthy through winter. When a full replacement is pursued, the crew will inspect attic ventilation, confirm airflow paths, and ensure the underlayment chosen aligns with the local freeze-thaw dynamics. Weak ventilation is not merely an inconvenience-it can set up a cycle of trapped moisture that leads to longer-term deterioration and repeated repairs, especially after the first severe storm season. Expect that attention to attic air movement will be a deciding factor during the permitting and staging discussions that follow a full roof replacement.
Replacement timing is often driven less by age alone and more by whether a roof enters winter with existing moisture intrusion, storm damage, or weak ventilation. If a shingles-only fix would leave gaps or hidden damage exposed to a brutal January, delaying may create bigger problems later. Conversely, a project that enters summer heat with compromised adhesives can suffer from slow cure times and uneven fastening. The practical approach is to align project timing with a window that minimizes exposure to extreme cold and heat, while ensuring the roof is watertight before the next freeze. In other words, the best plan is one that anticipates the Northeast Ohio rhythm, not one that fights it.
Bedford's Building Department requires a permit for most full roof replacements, making permit status a practical first check when planning a re-roof rather than an afterthought. Before any shingles come off, verify that the permit is filed, assigned, and clearly scoped with the contractor. A missing or delayed permit can stall the project and complicate insurance documentation after a storm event. In this climate, where wind and hail are common, securing the permit up front helps lock in required inspections and ensures the work aligns with local code expectations for attic ventilation, underlayment quality, and proper nailing patterns.
Local inspectors review work at multiple stages, including underlayment and ventilation, before a final inspection at completion. Plan your timeline around these checks, because passing each stage is essential to moving forward. The early-stage evaluation focuses on weather-ready preparation, including roof deck integrity and proper installation of the underlayment. Midstream inspections drill into ventilation details-an area that carries particular importance in this area's freeze-thaw cycles and storm-driven wear. Expect the inspector to confirm that soffit vents, ridge ventilation, and any attic baffles are correctly placed and balanced to maintain airflow. A thorough review at these points helps prevent moisture buildup, ice dam risk, and accelerated shingle deterioration.
Because a bishopric emphasis on ventilation exists during reroofing, homeowners should expect replacement scope to include more than just visible shingles when deficiencies are found. If the inspection uncovers inadequate ventilation, repairs will be expected as part of the replacement package. This means some crews may need to add or reposition vents, tighten baffles, or adjust attic insulation to meet code and the climate realities of Northeast Ohio's seasonal cycles. A well-ventilated roof not only satisfies inspection criteria but also extends the life of the new surface by reducing heat and moisture buildup in attic spaces.
Maintain clear records of permit approvals, inspection numbers, and any corrective work identified by inspectors. When storm damage triggers a claim, having a well-documented permit history and a transparent, staged inspection record makes insurance documentation smoother and supports a faster, more accurate assessment of what was replaced and why. Communicate openly with the contractor about the inspection schedule and any findings that could affect the replacement scope, especially around ventilation and underlayment.
Typical Bedford pricing runs about $350-$700 per square for asphalt shingles, $800-$1,400 for metal, $1,000-$2,200 for clay tile, $900-$1,900 for concrete tile, $600-$1,100 for wood shingles or shakes, and $450-$900 for synthetic or composite shingles. This range reflects the mix of old Northeast Ohio homes with steeper pitches, plus the region's brisk fall wind and hail events that push up material and disposal costs after storms. In practice, whichever material you choose, you'll see the per-square figures translate to the broader roof area carried by 10-by-10-foot squares.
In Bedford, costs can rise after regional storm events because demand spikes for emergency repairs and full reroofs at the same time insurers are processing wind- and hail-related claims. When a hailstorm hits, crews and material suppliers can be booked solid for days, and temporary patch work gives way to full replacements for multiple homes. If you're navigating a claim, expect some pressure on availability and scheduling, which can push labor dates into the busy parts of the season.
Clay tile and concrete tile sit at the higher end, often driven by material weight, handling needs, and specialized installation moves. Metal can also scale up quickly if the roof has complex detailing or a very steep slope, while asphalt remains the most budget-friendly path for a Bedford attic with standard eaves. Wood shingles or shakes, while offering a classic look, can bring higher labor costs in areas with tighter stair access for crews. Synthetic or composite shingles provide a midrange option that balances durability with a moderate price. Each option carries its own profile of long-term performance under freeze-thaw cycles common to Northeast Ohio.
Local pricing is also affected by permit requirements, inspection scheduling, ventilation or underlayment upgrades identified during Bedford's inspection process, and the complexity of reroofing older Northeast Ohio homes. If the roof line exposes more of the deck to cold air or requires a full underlayment refresh, you'll see a corresponding bump in the project total. Conversely, simpler pitches and uniform decking typically keep costs nearer the lower end of the ranges.
When planning, map out a realistic storm-season window for receiving estimates, as nearby projects can accelerate timelines. For a typical asphalt job, budget on the lower end if the deck is straightforward and ventilation checks pass without upgrades. If a reroof involves clay or concrete tiles, prepare for heavier freight, longer installation times, and more waste disposal, all of which lift the per-square price. In any scenario, confirm the expected square count and factor in protective underlayments and venting needs identified during the local inspection process to avoid surprises on invoicing.
Don't let upfront costs delay a critical repair - these contractors offer payment plans to fit your budget.
In Bedford, wind- and hail-driven roof claims are common enough that how documentation is handled can actually influence claim results. Insurers often look beyond whether shingles were replaced to assess whether underlayment and ventilation meet current expectations. A storm that just overcomes the shingles can still trigger a larger hail- or wind-damage assessment if the attic and roof deck are not properly inspected and documented.
After a storm, you should start with dated photos that capture the roof edge, flashing, vents, and any visible damage from multiple angles. A contractor's inspection notes add concrete, professional observations about underlayment condition, ventilation, and any moisture concerns that aren't visible from the ground. Keep records of weather events that coincide with the damage-wind speeds, hail size, and timing matter to insurers when reconciling the claim. Store these files in a simple, organized folder that you can share quickly with the adjuster.
Coverage decisions increasingly hinge on whether replacement work brings underlayment and ventilation up to current standards, not just whether the shingles were swapped. If the claim focuses on a partial repair, make sure the documentation notes any gaps in the roof's barrier systems and how those gaps could affect long-term performance and energy efficiency. A claim file that shows a comprehensive scope-shingles plus underlayment and proper venting-helps establish a durable restoration, not a temporary fix.
When meeting the adjuster, present the most complete package first: the storm-day photos, the contractor's inspection notes, and the weather-event record. Be explicit about what failed and why, and tie each finding back to the potential impact on insulation, moisture, and indoor comfort. If there's any ambiguity about underlayment or ventilation, request a joint assessment or a second opinion to prevent gaps in the documentation that could slow or complicate the claim.
Skylight investigations in this area often uncover issues at the curb, flashing, or where the surrounding shingle transitions rather than the field shingles themselves. In damp winters and thaw cycles, small flashing gaps can open up quickly, letting wind-driven rain infiltrate the roof deck and slide under shingles. Begin by inspecting the skylight curb from the attic, looking for condensation, staining, or soft spots near the edge of the skylight cabinet. If you see moisture along the flashing, the most reliable fix starts with resealing or replacing the flashing flange and ensuring a tight transition to the shingles around the base.
Chimneys sit on masonry penetrations that frequently develop flashing and moisture-entry trouble spots here. The most telling signs are dampness at the chimney foot, stained or peeling interior ceilings near the chimney, and loose or lifted shingles adjacent to the chimney step flashings. In Bedford's climate, repeated freeze-thaw cycles push the flashing apart and widen small gaps before spring rains arrive. Start by inspecting the chase cap, crown for cracks, and the metal flashings where the chimney meets the roof. If flashing shows corrosion or separation, plan for replacing damaged sections and resealing the transition to eliminate seepage pathways.
Storm-driven events in Northeast Ohio often push water toward these penetrations first. After a heavy rain or a windy day, check the attic for damp insulation or dark streaks along the skylight perimeter and chimney area. Document any moisture, noting the date and observed location. This documentation helps when coordinating with an insurer or a contractor for targeted repairs rather than broad, unnecessary fixes.
Begin with a visual from the attic, then move to the roof edge, focusing on curb corners, flashing laps, and shingle step overlaps near skylights and chimneys. If the flashing is intact but stains persist, inspect the sealants and joint compound for cracks or dried-out edges. Replace or re-seal only the compromised components to minimize disruption and keep the rest of the roof undisturbed.
Flag suspect areas during the first inspection, capture photos, and outline a repair plan that prioritizes flashing replacement, curb sealing, and proper shingle transitions. Keep a log of weather events that coincide with leaks to support targeted, permanent fixes. In many Bedford homes, addressing these penetrations promptly curbs recurring moisture intrusion through successive thaw-and-rain cycles.
Find contractors experienced in skylight installation, flashing, and leak repairs to bring natural light into your home.

Nasti's Roofing & Restoration
(216) 650-4334 nastisroofing.com
7650 1st Pl Suite F, Bedford, Ohio
5.0 from 79 reviews
YICN Roofing (aka Your Insurance Claims Network)
(216) 999-4342 yicnroofing.com
Serving
5.0 from 118 reviews

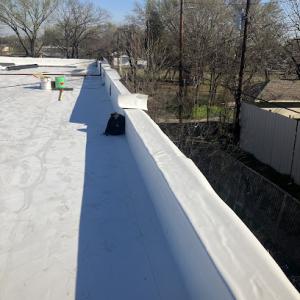
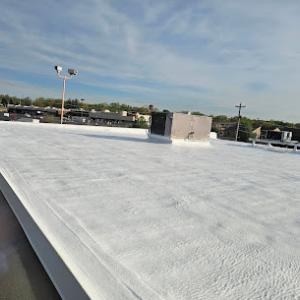
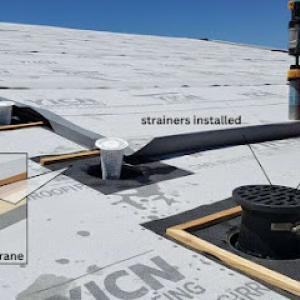
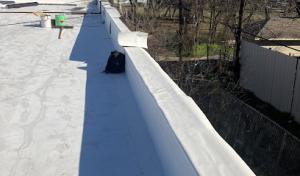
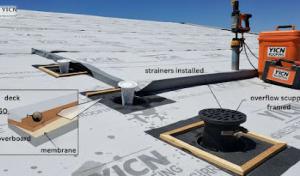
Flat-roof specialization is active but not dominant in Bedford, indicating low-slope sections matter mainly on additions, porches, garages, and mixed-roof homes rather than as the city's primary roof type. Those areas are more exposed to standing moisture and snow retention, and freeze-thaw cycling can reveal drainage and membrane-detail weaknesses faster than on steeper roofs.
After a wind or hail event, start with the low-slope portions first: examine the garage roof and any porch or addition roofs for pooled water, torn membrane, or lifted edges. Look for loose flashing along parapets or penetrations, and inspect drip edges and termination bars where water can back up. If you see standing moisture that doesn't drain within 24 hours, mark it clearly and plan a closer inspection with a professional who understands Bedford's climate.
If a leak appears inside, track the path of water to its likely source-often a failed edge detail or a seam on a low-slope section. Document the date, location, and severity with photos from multiple angles. Keep rain-caused samples or debris as physical references. Schedule temporary mitigation (tarps or quick-dry patches) only if advised by a roofer to prevent interior damage while awaiting a full assessment.
Prepare a concise damage timeline: event date, sections affected, and any prior wear noticed before the storm. Collect contractor estimates, material spec sheets, and installation dates for attached low-slope areas to help tracing leaks and future repairs back to the original roof ages. Maintain a file of all correspondence with the insurer and any adjuster visits, including contact names and times.
Find specialists in TPO, EPDM, and built-up flat roofing systems for residential and commercial properties.

Tri-Kote Roofing
(440) 635-6285 www.trikoteroofing.com
5118 Richmond Rd, Bedford, Ohio
5.0 from 3 reviews
In this market, a crew's actual workflow matters more than flashy sales talk. You want a team with a clear tear-off plan, a thorough deck review, and documented ventilation corrections before any new shingles go on. Ask for a written sequence that covers damage assessment, deck repairs, and moisture checks.
A responsible crew begins with controlled removal to avoid secondary damage. Look for how they protect surrounding areas, how they handle underlayment exposure, and how they verify the deck is sound for installation. If the deck shows soft spots, they should outline a repair plan and timeline before proceeding.
Bedford's climate requires proper attic ventilation to prevent future leaks and heat damage. Your contractor should demonstrate a plan for correcting ventilation while the roof is open, including how vents will be re-seated or upgraded and how any insulating gaps will be sealed to maintain energy efficiency and moisture control.
Storm-driven repair needs demand fast mobilization and immediate temporary protection when wind or hail hits. The right crew offers a reliable response window, clear communication about arrival times, and a cleanup protocol that leaves the yard and gutters clear of debris as the project wraps, not just when the last shingle lands.
Because many crews are long-established, family-owned firms, Bedford homeowners often weigh responsiveness and neighborhood reputation as heavily as price. Ask for recent references in your area, verify local service history, and observe how the crew handles small post-installation details, warranty follow-ups, and neighbor questions.