Last updated: Apr 19, 2026
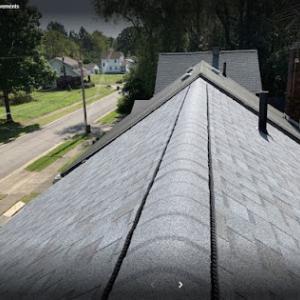
Snow accumulation and repeated freeze-thaw cycles hammer aging roofs in this area. Asphalt shingles, especially ones that have already aged, lose granules and become brittle as patches of ice push against edges and penetrations. When a roof in this climate falters, the risk isn't only leaks-it's accelerated wear from thawing and refreezing that can push shingles up and dislodge sealants. For homeowners facing Northeast Ohio winters, the clock on a marginal roof ticks faster than you expect. The goal is to catch trouble early, before a small leak becomes a major water intrusion during a mid-winter storm.
Ice dam formation is a telltale sign that heat loss and roof ventilation aren't keeping up with winter demand. When snow on the roof begins to melt and refreeze at the eave, a dam forms and forces water to back up under shingles. In Aurora, where heavy snows coincide with cold snaps, such damming can lift shingles, cause water to back into attic spaces, and damage ceiling drywall and insulation. If you notice ridges of icicles hanging from the edge of your roof or damp spots along interior walls after a thaw, take it seriously. Temporary protection-tarps, plastic sheeting, and quick tarps over vulnerable seams-buys time, but it is not a substitute for a proper roof that handles freeze-thaw stress.
Winter conditions can delay tear-off and installation in this market, making proactive leak prevention and temporary protection crucial once a roof begins failing. The window for a quality replacement typically peaks in spring through early fall, when temperatures are moderate, days are longer, and crews can work without the extra hazards of deep snow and ice on the ground. If your roof is nearing the end of its life, plan for that spring-to-fall slot and gear up for potential weather interruptions. Waiting through a harsh January or February not only risks more interior damage but also can complicate the install with weather-related delays and limited daylight hours.
If aging shingles show curling edges, missing granules, or visible granule wash-down in gutters after a storm, treat those as urgent warnings. Begin by protecting interior spaces with quick tarps over vulnerable attic penetrations and sealing any obvious gaps around vent stacks or skylights with temporary flashing tape and roofing cement. Clean gutters and downspouts as soon as you can after a heavy snowfall to prevent ice buildup along the eaves. Inside the attic, seal obvious air leaks around penetrations and ensure insulation is evenly distributed to reduce heat loss that drives thawing on the roof surface. In addition, inspect flashing around chimneys and vent pipes; loose or damaged flashing invites water intrusion when meltwater refreezes at the edge.
With a roof that's near failure, delaying a replacement can invite escalating damage once spring thaws arrive. If you own an aging roof, prepare for a full replacement when conditions permit, and coordinate a plan that aligns with the typical spring-to-fall window. Prioritize a contractor who can demonstrate a clear, phased approach: safe containment for winter, rapid temporary protection as needed, and a solid long-term installation plan that addresses ventilation, insulation, and proper shingle alignment to withstand repeated freeze-thaw cycles. The right crew will respect the seasonal constraints, communicate clearly about weather-related postponements, and ensure that temporary measures do not compromise structure or interior space during a winter storm.
Spring in this area brings sudden hail and brisk storms that can slam roofs in a matter of minutes. In Aurora, those events often interrupt ongoing roofing work and force crews to pause for safety checks, staging, and weather windows. A small dent orGranular shingle lift from a hail event can complicate the claim narrative later if it's not documented promptly, so you should plan for a quick on-site assessment after any visible impact event. When a storm passes, walk the roof carefully from ground level, note any new granule loss, lifted shingles, or dented flashing, and photograph from multiple angles on clear days. Weather delays aren't just inconvenient-they can shift inspection timelines and push back any promised progress, so set expectations with your roofer and insurer about possible rain days and rescheduling. In Aurora, quick communication with the adjuster about what is new versus what was already worn is essential to keep the claim moving and to avoid disputes about coverage.
Summer thunderstorms arrive with heat that can make materials behave differently and slow crews as the days heat up. In this region, tarping and temporary protection matter just as much as the permanent roof, because afternoon deluges can flood sections not yet completed. High temperatures can affect asphalt shingles and underlayment, so your crew may stagger installations to avoid heat-related warping or premature aging while the claim is in process. If a storm hits mid-project, expect temporary hold points for roof safety, worker shifts, and material loading delays. For homeowners racing to finish storm-related replacements before the next cold snap, this means you should maintain flexibility in scheduling, keep a close eye on material stock levels, and know that delays outside a crew's control can extend timelines. Aurora's summer pattern makes it critical to maintain a visible, updated project board that both you and the insurer can review, so there's no confusion about what stage the roof is in once the weather window reopens.
Ohio insurers commonly require strong photo documentation that clearly separates old wear from new storm damage and may request post-repair inspections before closing the claim. In Aurora, this needle-to-thread documentation is especially important because the local climate accelerates certain wear patterns-granule loss, weathered flashing, and ice-dam vulnerability-so the distinction matters. Before any claim is filed, compile a concise photo log: wide shots of the whole roof, close-ups of damaged areas, and a sequence showing before, during, and after the repair. Keep a written timeline noting each storm event that appears on the roof and every work stoppage caused by weather. After work is completed, request a final walkthrough with the insurer to review the repairs, verify that new material aligns with the claim, and address any lingering concerns. If inspectors question the workmanship, have the contractor present the test results, warranty terms, and material specifications that confirm performance under the local freeze-thaw cycles Aurora endures. Acting quickly on documentation helps guard the claim against delays and reduces the chance of a later dispute.
Connect with contractors who help homeowners navigate the claims process from damage assessment to final approval.


Victors Home Solutions
1245 Danner Dr, Aurora, Ohio
4.9 from 659 reviews
From our free 21-Point Roof Inspection to our 50-Year Leak Free Guarantee, we’ll protect your home and family for years to come. With almost two decades of roofing experience and a BBB Accredited A+ rating, Victors Home Solutions is the superior roofing and home improvement company across Ohio, Michigan, Kentucky, and Indiana. We provide the highest quality workmanship for residential roof repairs and replacements, seamless gutters, and attic insulation services.
New View Roofing & Restoration
Aurora, Ohio
4.4 from 9 reviews
New View Roofing & Restoration, LLC is a contractor working out of Chardon, OH and surrounding communities. We are a top rated roofing service provider, and from the first nail to the final creative touches our contractor and crew will turn your home into a modern, unique, and comfortable place to live. We proudly offer roofing service, siding service, and window service.

Home Genius Exteriors
(216) 208-6373 homegeniusexteriors.com
Serving
4.7 from 702 reviews
Elevate your home with Home Genius Exteriors, setting the standard in Cleveland by offering full-service solutions for roofing, siding, windows, doors, gutters and insulation. We support our veterans and communities by supporting local and national charitable organizations through our Home Genius Cares initiative. With an Owens Corning® Platinum Preferred designation, we also offer flexible payment options, industry leading warranties and a wide range of premium products tailored for your home. It’s time for a different experience, entrust your next home project to a genius and schedule your free inspection today!
Campo Roof
(330) 425-1285 www.camporoof.com
Serving
4.8 from 374 reviews
Since 1978, Campo Roof has provided Greater Cleveland and Akron with reliable roofing, siding, and gutter guard solutions. We install durable shingle, metal, steep-slope, and low-slope systems to protect and enhance your home year-round.
KC Roofing
Serving
4.9 from 170 reviews
KC Roofing, LLC is Northeast Ohio’s home, retail & insurance roof restoration expert. As a locally owned and locally operated business, we care about each customer we work with inside the community. Quality craftsmanship is important to us as we want each home to have long-lasting Roof Replacement. After working in the Roofing industry for years, we have successfully restored hundreds of roofs throughout Northeast Ohio. Our team of experts provides various services to help with insurance storm restoration. By using our experience, proper equipment, and dedication to each customer, we will ensure that you are left happy with the results of our work.
The Captain
(216) 816-2000 www.callthecaptain.com
Serving
5.0 from 83 reviews
Local business. Family owned. We offer windows, roofing, siding, gutters, fencing, and decks. Superb quality. Impeccable service. If you're looking for a home exteriors contractor near you, look no further! Call the Captain!!
The Third Estimate Corporation
(216) 937-2030 thethirdestimate.com
Serving
4.8 from 1260 reviews
The Third Estimate has served our community in Northeast Ohio since 1996. We are a family-owned and locally operated business in Solon, Ohio. Our company strives to provide superior customer service, integrity, and trust. We take pride in our top-notch craftsmanship, so we only offer the best high-quality products in the exterior home improvement market for roofing, windows, siding, and gutter systems. Our professional team strives to ensure budget-friendly prices and options while listening carefully to our customers to meet their needs and wants.

A & B Roofing & Construction
(330) 405-9055 www.aandbroofing-ohio.com
Serving
4.4 from 100 reviews
A family-owned and operated business, A & B Roofing and Construction is committed to providing top-quality services with unmatched customer care. We offer competitive pricing and free estimates.

Lake Erie Metal For Shingles
(216) 777-4000 lakeeriemetalforshingles.com
Serving
4.9 from 77 reviews
Lake Erie Metal for Shingles is proud to service Cleveland, Solon, Boston Heights, Chagrin Falls, Aurora, Westlake, Hunting Valley, Macedonia, Cuyahoga Falls, Moreland Hills, Gates Mills, Strongsville, Akron, and greater Northern Ohio with Metal Roofing Services, offering Rib Metal, Standing Seam Metal, and Metal Shingles for both Residential and Commercial Properties, Family Owned, Amish Installed. Our Metal is Class 4 Rated for Fire, Wind, and Hail. With a 40+ Year Guarantee and 24 Colors to Choose From.
Certified Roofing
(216) 336-1205 www.certifiedroofing.site
Serving
4.8 from 29 reviews
Certified Roofing is a trusted local roofing contractor serving Hudson, Ohio and the surrounding communities. We specialize in roof repair, roof replacement, storm damage restoration, and high-quality asphalt shingle roofing. Our team is dedicated to honesty, craftsmanship, and protecting your home with durable, long-lasting roofing solutions. Whether you’ve experienced a roof leak, wind damage, or you’re ready for a full roof replacement, Certified Roofing provides fast estimates, professional installation, and reliable service. Proudly serving Hudson, Stow, Streetsboro, Twinsburg, and all of Summit County.”

Busy Bee Restoration
(844) 766-3233 letsreviveyourhive.com
Serving
4.5 from 35 reviews
Busy Bee Restoration, Inc. specializes in all facets of storm restoration construction. Destructive weather does not only affect residential homes, it also damages small businesses, retail stores, apartments, condos and houses of worship. We have an excellent, knowledgeable and supportive team that is able to walk you and/or your business through the process from beginning to completion. Contact us to receive a free inspection today.
Pro Home Improvements
(330) 787-6014 www.getprohomeimprovements.com
Serving
5.0 from 7 reviews
At Pro Home Improvements, we specialize in providing high-quality roofing, siding, and gutter services to homeowners and businesses. With years of experience in the industry, we have developed a reputation for delivering exceptional results that exceed our clients' expectations. Our team of skilled and experienced professionals is dedicated to providing you with the best possible service. We use only the highest quality materials and advanced techniques to ensure that your roofing, siding, and gutters are installed or repaired to the highest standards. Whether you need a new roof installed, siding replaced, or gutters repaired, we have the knowledge and expertise to get the job done right. We take pride in our work and stand behind it.
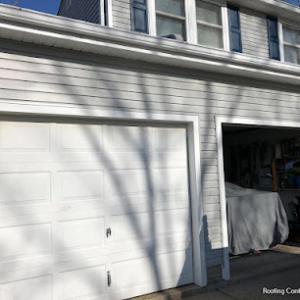
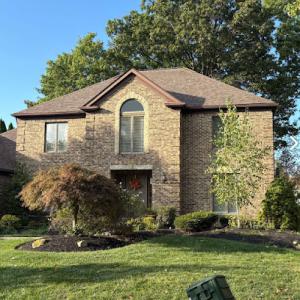
In this market, asphalt shingles and metal roofing dominate typical Aurora homes. Clay tile, concrete tile, wood shakes, and synthetic/composite shingles appear less often but still show up with distinct maintenance needs and long-term behavior. The mix reflects Northeast Ohio's winter rhythm: heavy snow, ice load concerns, and recurring freeze-thaw cycles that stress fasteners, seams, and material edges. When choosing a roof, balance availability and cost with how each option ages under repeated cold snaps and seasonal warming.
Asphalt remains the most common, because it handles the freeze-thaw cycle without overreacting to small shifts in temperature. You'll want to look for shingles with good granule retention and a strong underlayment, plus staggered seams to minimize edge exposure to wind-driven moisture. In practice, that means choosing a heavier-grade shingle and ensuring the roof has proper attic insulation and ventilation to reduce ice formation along eaves. For homes in areas with significant snowfall, a roof that sheds snow predictably and avoids risky ice dam formation is a practical choice. Maintenance focuses on inspecting for loose or curling tabs after winter storms and keeping gutters clear to prevent backups.
Metal roofs handle snow shedding well and resist cracking from cold snaps. They also tolerate freeze-thaw cycles with minimal warping when installed with correct underlayment and adequate ventilation. The key is paying attention to panel seams and fasteners; singed or loose fasteners can create leak paths as temperatures swing. If choosing metal, consider a finish that reduces ice adhesion in the coldest months and ensure proper attic venting. Metal systems can be excellent long-term performers in Aurora, especially on homes with exposed or difficult-to-inspect roof areas where snow tends to linger.
Clay and concrete tiles exist in the market, but they behave differently in winter. They are heavy and require a solid structural assessment to handle snow load. Cracking risk increases with freeze-thaw cycles if water seeps into microcracks and refreezes. Maintenance involves careful inspection after ice storms and prompt replacement of cracked tiles to prevent water intrusion. Wood shakes bring a natural look but are the most sensitive to moisture and temperature swings; they require diligent sealing, periodic treatment, and more frequent re-caulking around penetrations. If choosing tile or wood, plan for higher ongoing maintenance and potential snow-removal considerations.
Synthetic or composite shingles can offer good resistance to cracking and often come with favorable warranties. They tend to be lighter than tile or wood and can perform well under cold-weather expansion and contraction when installed with proper allowances for movement. Ensure the selected product has proven performance in freeze-thaw environments and compatible underlayment.
Begin with your roof's current structure and climate exposure: eaves, valleys, and any shading that affects snow load. Prioritize materials that shed snow predictably and resist ice dam formation, while ensuring the system accommodates Northeast Ohio's alternating temperatures. For most Aurora homes, pairing asphalt or metal with solid underlayment and balanced ventilation delivers reliable performance through many winters. If choosing tile or wood, plan for enhanced maintenance and structural checks, and be prepared for more frequent inspections after severe winter events.
Typical Aurora pricing runs about $320 to $520 per square for asphalt shingles, $700 to $1200 for metal, $900 to $1800 for clay tile, $900 to $1700 for concrete tile, $500 to $900 for wood shingles or shakes, and $350 to $700 for synthetic/composite shingles. When planning a full re-roof, you'll want to map the square footage you expect to cover and compare these ranges against the current weather window. In the Northeast Ohio climate, small differences in material choices add up quickly because labor for large steep paths or complex roof lines is the dominant cost driver. If you're replacing an older roof with a similar profile, even a small upgrade in underlayment or venting can influence long-term performance under winter freeze-thaw cycles.
Aurora costs can rise when storm seasons create demand spikes, especially after spring hail or summer thunderstorm damage when quick-response crews are booked out. If hail or wind events hit your neighborhood, anticipate higher material availability challenges and accelerated scheduling pressure. A common tactic is to secure a preferred contractor early in the season and request a fixed-start window. As the crew arrives to address wind- or ice-related damage, you may see temporary protection needs and tarp setup that add to the daily rate but reduce weather-related risk. Planning ahead helps keep a repair portion from ballooning into a full-scale roof replacement in the middle of a busy season.
Scheduling outside winter is especially important in Aurora because snow, ice, and cold-weather delays can extend labor time and temporary protection needs during a full re-roof. If you must proceed in colder months, confirm crew availability for temporary shoring, de-icing considerations, and material handling in icy conditions. For many homeowners, coordinating a spring or early summer start aligns best with milder days and more predictable timelines. A clear, written sequence with weather contingency helps keep both costs and disruption to a minimum during the project.
Get a clear picture of your project costs upfront - no commitment required.

In this area, a roofing permit is typically required for a full re-roof. The permit is generally pulled by the contractor through the City Building Department, not by the homeowner. This means choosing a licensed contractor who has a solid track record with the Building Department can help keep the process smooth. Your contractor should confirm that all materials, methods, and flashing details meet the city's code expectations for a complete tear-off and re-cover. Expect the permit to document the scope of work, the venting plan, and the type of underlayment used, along with confirmation that proper shingle installation angles and nailing patterns align with code.
Inspections in this area follow a two-checkpoint rhythm: after tear-off and after installation. The Building Department typically schedules these inspections once the debris has been cleared and the roof deck is exposed for the first look, then again when the new roof is in place and ready for final approval. Plan your project calendar around these checkpoints, since weather delays or scheduling bottlenecks can extend timelines. Your contractor should coordinate the inspection dates and ensure access for the inspector, including providing any required documentation such as a deck condition report or photos of the underlayment and nailing pattern.
During the initial tear-off inspection, the Building Department will verify that the roof deck is sound, clean, dry, and free of rot or damage that would compromise the new system. They will also check that ventilation and flashing details meet current requirements to prevent moisture buildup and ice dam risks in the freeze-thaw cycles typical to this area. After installation, the finalist inspection focuses on the correctness of shingle installation, flashing around chimneys and skylights, hip and ridge detailing, and the alignment of drip edges. Proper attic venting and an appropriate underlayment system are common focal points, as these influence performance during harsh winters.
Coordinate closely with the chosen contractor from the start, ensuring that the tear-off date aligns with material delivery and temporary weather windows. Request copies of all permit documents and inspection approvals as work progresses, and keep them accessible for future reference. If delays occur, communicate promptly with the Building Department and the contractor; a clear line of contact helps prevent miscommunications that could stall the permit or the inspections. Ensure that debris disposal and safety measures are planned, since the city's permit process emphasizes both code compliance and community safety during a full re-roof.
Snow, ice build-up, and the freeze-thaw cycle wear roofs quickly around here, and carriers in Ohio often scrutinize whether damage is recent or pre-existing. Before the season's next storm, take clear photos of your roof's condition from ground level and from any accessible attic views. After a storm, add fresh images that show any new dark spots, lifted shingles, or ice dams forming along the eaves. This baseline helps you tell a precise story to the adjuster and protects you from ambiguous conclusions about timing.
Adjusters in this market may ask for photos, repair records, and post-repair inspection evidence. That means the first site visit should be a joint effort: communicate clearly with your contractor about what the insurer will expect, and ensure the contractor notes the exact areas inspected, what measurements were taken, and what, if anything, was replaced or repaired. Keep copies of every photo, date-stamped, and organize them by storm date and condition. When you relay findings to the contractor, emphasize that documentation will travel with the claim and will influence the final scope.
Some insurers in Ohio push for permanent repairs through approved contractors or apply depreciation, which makes accurate documentation especially important for claims. Be deliberate about what work is proposed and why, and insist on a detailed, itemized scope that matches observed damage. A clear before-and-after narrative, plus post-repair inspection notes, reduces back-and-forth and helps prevent delays in settlement.
Maintain a simple storm log with dates and notable roof observations. Photograph from multiple angles, including gutters and drip edges, and keep repair invoices organized. After any repair, obtain a written confirmation from the contractor that the work matches the documented scope and includes any necessary warranty statements. If a disagreement arises, reference the original condition photos and the post-storm images to establish a consistent timeline.
Snow and ice create real safety and weatherproofing challenges on active roofing jobs. When temperatures trend below freezing, tear-offs and installations may pause until a solid forecast shows a clear stretch. Plan around stiff winds, drifting snow, and icing on ladders and scaffolding. If a storm dumps a heavy load, design a quick safety check: clear access paths, remove loose debris from the ground, and secure all materials to prevent wind damage. Communication with the crew should emphasize short, frequently updated weather outlooks, so rescheduling minimizes downtime and keeps projects moving when a thaw arrives. Consider prioritizing critical tasks that can be completed before a new cold snap or after a rate-limiting thaw, to reduce the risk of repetitive freeze-thaw cycles weakening freshly installed components.
Spring in this area brings hail and strong storms that can both create new damage and interrupt already scheduled replacements. After a storm, schedule a rapid damage assessment to identify missing shingles, lifted underlayment, or dented panels. Weatherproofing must be verified before any work resumes; a single delayed start can cascade into a longer sequence of weather-driven delays. If a storm hits mid-project, document conditions carefully for insurance documentation and plan a revised sequence that prioritizes tarping, temporary protection, and a prioritized follow-up window for more extensive repairs. Keep debris containment tight during windy days to protect landscaping and neighboring homes.
Autumn winds and fallen leaves in this area affect site cleanliness and scheduling, especially for homeowners trying to finish projects before winter weather returns. Leaf litter can clog gutters and valleys, creating moisture traps that complicate roof work. Schedule a thorough cleanup ahead of any decked-out scoping tasks, and designate a daily end-of-work checklist to prevent leaf and twig buildup. As temperatures drop, thin the work week to avoid late-day cold snaps that reduce sealant performance. Align material deliveries with dry, wind-stable days, and buffer the calendar for a potential push to complete before the first deep freeze settles in.
Keep a rolling calendar with weather windows, storm alerts, and contingency buffers. Track both the crew's preferred rhythm and the homeowner's availability for access and inspections. In all seasons, document site conditions, safety protocols, and progress notes so storm-related documentation is straightforward for insurance and scheduling follow-ups. This local approach helps maintain momentum through the typical Aurora cycle of snow, hail, and shifting weather.
You'll notice in Aurora that skylight leaks surface after heavy snow or rapid thaw cycles. Start with a thorough crown-and-flash inspection after a storm. Look for white crusty mineral deposits around the skylight frame, granule loss near the shingles, and any visible gaps where the curb meets the roof. If flashing looks wrinkled, loose, or rust-stained, plan for resealing or flashing replacement before the next freeze. When replacing a skylight, choose a model with a rigid curb and proven low-temperature sealants to stand up to Northeast Ohio winters. Have the contractor verify that the surrounding shingles lap properly over the skylight to shed meltwater away from the curb.
Chimney work shows up regularly in this market, and flashing transitions are a common source of winter moisture problems. Inspect the chimney saddle and step flashing where the brick, mortar, and roof meet. Look for hairline cracks in the mortar joint, rust on metal step flashings, and any bulging roofing felt near the base. In cold months, ice buildup along the chimney can push flashing out of position. If you see staining, damp patches, or efflorescence on brick near the roofline, plan a flashing refresh or reseal. Ensure the counterflashing is sealed to prevent water from backing up under shingles during sleet and freeze-thaw cycles.
A smaller but real segment of Aurora contractors handles flat or low-slope roofing, which requires different drainage and membrane detail than pitched roofs. For low-slope roofs, check edge drains, seams, and any surface ponding after snowfall. Confirm that drainage paths from skylight or chimney penetrations remain unobstructed by snow, ice, or debris. If a low-slope area feels soft or shows fast-acting blisters in the membrane, prioritize timely membrane patching or resealing to avoid freeze-thaw damage.
Find contractors experienced in skylight installation, flashing, and leak repairs to bring natural light into your home.

Lake Erie Metal For Shingles
(216) 777-4000 lakeeriemetalforshingles.com
Serving
4.9 from 77 reviews
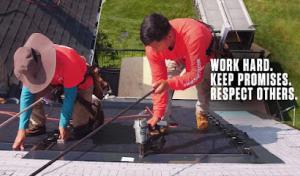
In this market, response speed matters as soon as winter storms bite and meltwater refreezes. You'll notice Aurora homeowners place a premium on contractors who can show up promptly after a storm, secure loose shingles, and set expectations for a safe, orderly project site. Cleanliness on the job is not an afterthought-yard debris, stray nails, and plastic sheeting should be handled with a plan for fast cleanup at the end of each day. A residential re-roofing experience that minimizes disruption to daily life-especially for families and multi-generational households-tends to win trust. Look for crews that assign a dedicated on-site lead and use a clear, written sequence of work so neighbors aren't left guessing what comes next.
Aurora homeowners appear to prioritize long-standing, family-owned companies that deliver consistent service and a local touch. The neighborhood familiarity matters: crews that know the typical shingle wear patterns from freeze-thaw cycles, the way snow loads affect attic ventilation, and how gutters interact with a new roof after a heavy season. A company with a multi-decade presence often brings practical know-how, a stable crew roster, and a track record of honoring previous work-factors that reduce anxiety when a storm test comes again next winter. In this environment, reputation isn't just about the color of the shingle chosen; it's about accountability, neighborhood referrals, and a steady, low-ego approach to problem-solving when weather complicates a project.
Free inspections are common, so you can expect someone to walk the roof and provide a candid assessment without upfront charges. What matters more is how the contractor documents the findings: a precise scope of work, clearly labeled damaged areas, and photo or video records that you can rely on for your insurance claim. In practice, Aurora homeowners look for documentation that translates into an actionable plan, not just a high-level summary. Additionally, consider whether the contractor routinely coordinates city scheduling and keeps you informed about any timing that could affect access to your home or driveways during a snow day. A transparent inspector who lays out the sequence of steps and anticipated timelines helps you compare options with confidence.