Last updated: Apr 19, 2026
Warminster roofs are stressed by cold-winter freeze-thaw cycling followed by warm summers, a pattern that accelerates cracking, fastener movement, and flashing fatigue. When temperatures flip from freezing nights to warm afternoons, the roof expands and contracts. Over years, those micro-movements loosen nails, degrade sealant joints, and widen existing cracks. By the time spring rolls around, a seemingly minor hazard can cascade into a leak or sudden failure during a heavy rain. This is not theoretical-it's the daily reality of local homes with aging shingles, worn metal, or aging flashing that have already weathered multiple winters. If your attic shows frost on the morning sides of rafters or you notice hairline cracks on shingle edges, treat it as a warning sign, not a cosmetic issue.
Spring in this part of southeastern Pennsylvania brings hail and high-wind storm risk, which can turn an aging but serviceable roof into an insurance-driven replacement project. The combination of ice-pushed gutters, dented metal, and loose granules on shingles signals accelerated deterioration. Hail can fracture protective granules and oversize minor gaps into real leaks, while sustained gusts can pry shingles loose and bend flashing around vents and chimneys. The window for addressing these vulnerabilities is narrow: once hail season hits, small repairs may no longer hold long enough to weather the wind-driven onslaught. If you're approaching the end of the roof's expected life, treat the next hail event as a trigger to reassess the entire roofing envelope rather than punt repairs.
Winter snow and ice can delay tear-offs and emergency work in Warminster, while fall wind events can disrupt scheduling and material staging before winter sets in. Frozen ground, slick ladders, and shorter daylight hours push major projects into a tight seasonal squeeze. If a snowpack lingers on the roof, crews must wait for thaw cycles or risk slip hazards and improper shingle seating. This means a late-season storm can force a rushed repair plan that isn't fully executed, leaving lingering vulnerabilities that become costlier to fix once spring storms resume. Planning ahead for winter windows-anticipating potential snow days and aligning a crew with pre-ordered materials-reduces the risk of a half-dinished job that leaves vulnerable flashing and vents exposed.
If a significant storm is predicted, walk the roof with a flashlight and note any lifted shingles, damaged flashing, or granule loss. Do not climb onto a slick roof during icy or windy weather. Call a local contractor who understands Warminster's freeze-thaw cycles and the season's storm patterns. Early action protects your home from accelerated damage and helps keep the roof structure intact through spring, summer, and the next cycle of storms.
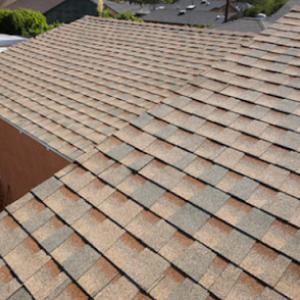
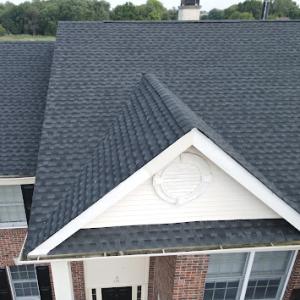
Asphalt shingles dominate the local market, with a broad contractor base and solid performance for typical Warminster roofs. You'll also see metal, slate, clay tile, concrete tile, wood shakes, and some flat-roof work where a specialty crew is involved. When planning a replacement, start by matching your home's roof type to the most common local substitution patterns. If your house came with standard 3-tab or architectural shingles, you're likely to find straightforward guidance from local installers. For those with more distinctive profiles, like slate or tile, expect a longer lead time and more careful deck inspection before a swap to any new material. The practical takeaway: pick a material that your contractor is comfortable installing in this climate and on your roof's existing structure.
Older Warminster homes can carry heavier legacy materials such as slate or clay tile. These materials often require structural checks because their weight places more demand on the deck and framing. If your house has a salvage or inherited roofing from decades past, plan a thorough assessment of rafters, joists, and any underlying sheathing before design decisions are finalized. A replacement that underestimates deck capacity can introduce long-term risk, especially in a freeze-thaw cycle that accelerates stress in the attic and roof plane. In practice, that means permitting a more conservative approach to weight and fastener patterns, and allowing for a possible retrofit of the structure to support a heavier material if the existing framing isn't up to modern loads.
The local climate makes moisture shedding and movement a central concern. Freeze-thaw cycles during winter push materials to expand and contract. Asphalt shingles handle this well enough when installed correctly, but repeated cycles can reveal weak spots around valleys, penetrations, and edges. Metal roofs respond well to moisture shedding and uplift but can develop thermal movement sounds in extreme swings. Clay and concrete tiles resist moisture well but add significant weight and require precise substructure and underlayment to avoid micro-movement problems under winter load. Wood shakes offer a natural look but are more sensitive to moisture and need routine maintenance to prevent swelling and cupping after heavy precipitation. The practical approach: choose a system that aligns with how the roof sheds water and how well the deck can tolerate movement, especially after a heavy snow or ice event.
Warminster's seasonal patterns reward installations that account for movement and moisture management. If a roof sits under a lot of wind-driven rain or fast-moving spring storms, the edge details and flashing become critical contact points for water entry. For families with flat-roof sections or lower-slope areas, consider how drainage and membrane compatibility will handle winter moisture. Your contractor should design with explicit details for seam security, flashing at chimneys and skylights, and a robust edge system to resist wind uplift and driving rain. The mindset here is proactive rather than reactive: plan for freeze-thaw resilience at the earliest design stage.
Before replacing a heavier material on an older structure, expect a detailed deck and attic inspection. If any sagging or soft spots appear in the deck, replacement materials may need shoring or alternate framing strategies. For houses with slate or tile, deck repair or reinforcement may be more extensive than a standard asphalt upgrade. Your plan should include a realistic evaluation of how long the project will take, given any necessary structural work and the potential for staged removal and installation around cold snaps and storm windows.
Flat or low-slope roofs appear less frequently, but when present they follow a different logic. Flat-roof work tends to rely on specialized membranes and insulation assemblies that respond differently to freeze-thaw stress. If a Warminster home includes this configuration, temper expectations about timing and installation sequence, and ensure the chosen material and flashing details are compatible with the rest of the roof system. The practical path is to align material choice with the roof's slope and local weather exposure, and to confirm that the crew has experience with the chosen flat-roof assembly.
Typical local pricing runs about $350-$650 per square for asphalt shingles, $700-$1200 for metal, $1000-$1800 for clay tile, $900-$1500 for concrete tile, $500-$900 for wood shingles or shakes, and $1300-$2600 for slate. These ranges reflect Warminster's mix of aging roofs, exposure to freeze-thaw cycles, and the way seasonal demand edges the job to the front of the calendar. When a project is just a routine replacement, the price sits within the lower end of the band; when constraints push a crew to juggle multiple emergency requests or a tight window after a wind event, the price can nudge higher due to expedited scheduling and material hold times.
Storms in spring and after wind events tighten contractor availability. Scheduling pressure means fewer days on the calendar to fit in a full replacement, which can push some homeowners into back-to-back projects or require after-hours work. The result often shows up as a higher mobilization fee, a premium for expedited delivery of materials, or a premium for crews who have to pivot away from other jobs. In practice, if a wind event leaves a few roofs damaged in the same neighborhood, crews may book out weeks or months, and delays can cascade into higher costs not just for asphalt shingles but across higher-end systems like tile or slate where specialists are needed. This dynamic is particularly noticeable in late spring when storms cluster and repairs spike in demand.
Costs also move with material weight and the complexity common to the area's mixed housing stock. For older homes that need deck repairs, flashing updates, chimney tie-ins, or structural review, the job gets more hands-on and more material. Slate and clay tile, for instance, require careful handling, additional scaffolding, and possibly roof deck reinforcement, all of which add to the bottom line. In a neighborhood with a lot of older caps and varying roof pitches, expect a wider spread in bids as contractors assess deck condition, potential plywood replacement, and drainage alignment. Concrete and clay tiles carry heavier installation demands, which can translate to longer labor hours and higher waste disposal costs if old materials are brittle or deteriorated.
When spring storms are forecast, it helps to line up options early, knowing that the lowest acceptable price may require a longer wait or a narrower selection. For beveled options like asphalt, metal, and wood, timing can keep costs nearer the base range, while premium options such as slate and high-end tile push closer to the top of their ranges, especially if structural work is needed. If the roof is older and shows signs of hidden damage-wobbly decking, compromised flashing, or chimney tie-ins-budget a contingency for deck repair or reinforcement, as these steps can be decisive for a durable, weather-tight result during Warminster's freeze-thaw cycles.
Pro Storm Repair
(833) 344-7767 www.prostormrepair.com
680 Louis Dr, Warminster, Pennsylvania
5.0 from 334 reviews
Need roof repair? Has your home recently had hail damage and needs storm damage repair? Pro Storm Repair is locally owned and operated with an A+ rating on BBB, insured in PA, NJ, DE, NY, & CT, and is the roof repair company that can offer 50-year roofing guarantees on materials and labor as a prestigious Owens Corning Platinum Preferred Contractor. Pro Storm Repair is committed to and specializes in one-day roof repair, vinyl siding repair, or replacement of any part of your home which may have storm damage by a hail or wind storm. Our hard work, use of quality materials, integrity, reliability, quality craftsmanship, and desire to become the best storm repair specialist make us stand out from the rest. Call today for a free assessment!

Sangiuliano Roofing
(267) 547-5146 sangiulianoroofing.com
272 York Rd, Warminster, Pennsylvania
5.0 from 116 reviews
Voted Best in Bucks County. Roofing company servicing Bucks and Montgomery county. Specializing in Insurance Roofing we offer free inspections! We offer Full Roof replacements, Metal, Shingles, Flat, Slate and Cedar Shake. If you have any storm damage make sure to get your free inspection! Ask about our Siding and Gutter replacements! A+ rating BBB accredited business.
M. Green Construction
(267) 810-2681 mgreenconstructionllc.com
1183 Cambridge Rd, Warminster, Pennsylvania
5.0 from 89 reviews
M. Green Construction specializes in Roofing, Siding, Exteriors, and Remodeling. We are here to help guide you through the process from start to finish with choosing between products, designing, and completing your projects professionally with someone you can trust. We are GAF Certified which is only offered to 5% of companies in the US. We go above and beyond to make our customers feel happy, comfortable, and informed throughout the entire process. We offer high quality work for very reasonable prices. We believe that our customers are lifetime customers. Contact us today to schedule a free estimate and get started with the the project you have always wanted!
Als Roofing, Installation & Repair
1079 Brennan Dr ste 102, Warminster, Pennsylvania
5.0 from 24 reviews
AL’S UNION ROOFING is fully licensed and insured company. Our goal is to satisfy every customer. We do residential and commercial roofing. We install and service all types of roofs, windows, siding and gutters. We work hard to find and repair roof leaks, install new roofing system if needed. We provide up to 20 years of written warranty. Please feel free to contact us for free roofing consultation and estimate.

Lemus Construction
(215) 996-9966 lemusconstruction.com
680 Sycamore Dr, Warminster, Pennsylvania
4.1 from 87 reviews
Lemus Construction is a full-service contracting company based in Warminster, PA. Specializing in roofing, siding, windows, decks, and gutters, we offer top-notch services for all your home improvement needs. Our team of skilled professionals is dedicated to delivering high-quality workmanship and exceptional customer service. Whether you need a new roof, a fresh coat of siding, or a custom deck, Lemus Construction is here to bring your vision to life. Contact us today for a free estimate and let us transform your home into a beautiful, functional space.
Rosengarten Roofing
Serving
4.1 from 133 reviews
Family-run company offering roofing repairs and replacements, as well as siding services.
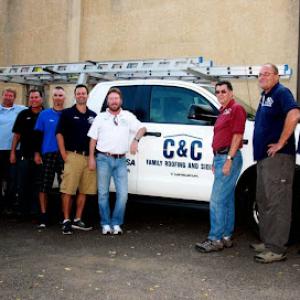
C&C Family Roofing & Siding
(215) 322-8687 www.candcfamilyroofing.com
Serving
4.8 from 645 reviews
With over 30 years of experience, C&C Family Roofing has proudly served Hatboro and nearby towns including Horsham, Warminster, Willow Grove, Upper Moreland, and Abington. As a trusted, family-owned business, we specialize in roofing, siding, gutters, and window installations. Our team is known for top-quality work, integrity, and customer-first service. We are GAF Master Elite Contractors offering lifetime roof warranties and 24/7 emergency service across Bucks, Montgomery, Chester, Delaware Counties, and NJ. BBB accredited and award-winning, we're here for everything from roof repairs to seamless gutters.
Roofworks Construction
(888) 606-6260 philadelphiaroofworks.com
Serving
4.8 from 35 reviews
ROOFWORKS CONSTRUCTION IS A COMPETENT ROOFING COMPANY AND EMPLOY THE BEST ROOFERS WITH OVER 24 YEARS OF EXPERIENCE IN ROOF REPAIR AND NEW ROOF INSTALLATION IN THE PHILADELPHIA AREA AND SURROUNDING COUNTIES
Economic Roofing & Siding -- Lowest resonable estimate
(215) 420-7403 economicroofs.com
Serving
4.8 from 70 reviews
Whether a storm has damaged your roof and siding or you’re just ready to update the look of your exterior, you can turn to the experts at Economic Construction for phenomenal work. We’re a roofing contractor serving residential and commercial clients in the Willow Grove, PA area. You can turn to us for a variety of siding and roofing services, like roof replacement, roof repair, stucco remediation, stucco removal, siding installation, gutter replacement, and gutter repair.
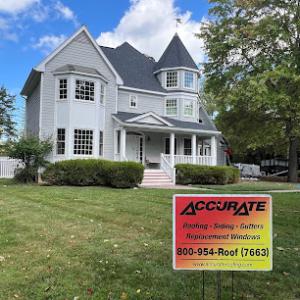
Accurate Roofing & Siding Unlimited
(215) 493-7818 accurateroofing.com
Serving
4.9 from 71 reviews
Accurate Roofing and Siding Unlimited, LLC., is a top-rated roofing and siding contractor serving Pennsylvania homeowners and businesses. Our services include roofing and gutters installation and repairs, siding and trim installation, windows, skylights and doors installation and replacement. Our long-term success is based on honesty, excellent workmanship and dedication to our customers.
Guardian Roofing & Siding
(855) 766-3911 www.guardianroof911.com
Serving
4.9 from 145 reviews
At Guardian Roofing & Siding we provide quality craftsmanship and materials for a reasonable price on all of our roofing, siding, and home improvement projects! With a strong belief that we should treat others as we would like to be treated, we focus on providing a superior experience leaving customers fully satisfied.
Proper Roofing
Serving
5.0 from 140 reviews
Proper Roofing is a company specializing in shingle roofing, flat roofing, siding, windows, decks, gutters, and exterior remodeling. We service Bucks County, Delaware County, Montgomery, Chester, South Jersey and Philadelphia. Call today for your free, no obligation inspection & estimate! Financing options available!
A full roof replacement in Warminster is not a no-paperwork job. The township's Code Enforcement process governs the permit you need, and skipping this step can lead to delays or failed inspections later in the project. Your contractor should prepare the typical permit package, including structural details if there is any framing work to update, and submit it well before the planned start date. Treat the permit as a critical timeline component rather than an afterthought, especially during busy weeks in late spring when inspections backlog can loom.
Warminster requires a post-installation inspection after the roof is in place, and an intermediate inspection may be triggered if structural work is part of the project. That means your project needs to align with the township's inspection windows, not just your preferred finish date. Expect site visits at key milestones: initial permit approval, mid-course checks if rafters or sheathing are touched, and the final post-installation review. Planning around these checkpoints helps avoid rework or scheduling conflicts that push a replacement into unfavorable weather.
Permit processing can take about 1-2 weeks in peak season. If you are trying to replace before winter or after spring storms, build township timing into the schedule. Weather windows in Bucks County can be unpredictable, and delays at the permit desk compound risks of weather-related damage if work is stalled. Communicate clearly with your contractor about the anticipated inspection dates, and confirm who is responsible for scheduling each inspection. If a reinspection is needed, that adds another layer of time you'll want to cushion in your planning to prevent last-minute shifts in the project timetable.
Coordinate with the contractor to have debris removal and waste management aligned with inspection days to avoid doubling back on visits. Keep a ready-to-audit set of approved plans and any structural notes from the permit package so inspectors can review quickly. Remember that a well-timed permit and predictable inspection cadence can prevent winter-into-spring delays and keep your project on track despite Warminster's seasonal weather quirks.
In Pennsylvania, Warminster roof claims are generally handled under standard homeowners policies, but carriers commonly want photo evidence, contractor estimates, and timely adjuster access. When spring hail or a winter ice event leaves streaks or dings, start by documenting the roof from multiple angles across different days if possible. Keep a dated log of observed changes and note any temporary tarping or patches that alter appearance. Because local damage often follows spring hail, wind, or winter ice events, homeowners should document conditions immediately before temporary repairs change the roof's appearance. This early record helps distinguish pre-existing wear from storm-induced damage and avoids disputes later on.
Claim timelines can vary by insurer and complexity, so pre-repair and post-repair records are especially important when emergency tarping or partial stabilization happens before full replacement. A clear sequence helps avoid surprises when adjusters review the file. If a contractor can provide a detailed scope with photos and material specs, that helps move things along, especially during the busy spring window when Warminster crews are in demand. Be prepared for follow-up requests and keep correspondence organized by date, topic, and contact person to reduce back-and-forth.
Immediately after a storm, arrange for a licensed roof inspector to verify damage that is not obvious from the ground. Take close-up photos of shingle edges, flashings, valleys, and gutters, and document any sagging or water staining inside attic spaces. If a tarp is placed, note the date and installation contractor. When weather improves, schedule a comprehensive assessment and preserve any temporary fixes as evidence of the condition at that time. In Pennsylvania, the timing of a full replacement may hinge on the insurer's assessment of whether damage is isolated or widespread across the roof line, so structured documentation reduces misinterpretation and helps ensure the claim progresses without unnecessary delays. This careful approach can prevent extended exposure to further weather risk during the claim process.
Connect with contractors who help homeowners navigate the claims process from damage assessment to final approval.
Pro Storm Repair
(833) 344-7767 www.prostormrepair.com
680 Louis Dr, Warminster, Pennsylvania
5.0 from 334 reviews

Sangiuliano Roofing
(267) 547-5146 sangiulianoroofing.com
272 York Rd, Warminster, Pennsylvania
5.0 from 116 reviews
M. Green Construction
(267) 810-2681 mgreenconstructionllc.com
1183 Cambridge Rd, Warminster, Pennsylvania
5.0 from 89 reviews
Local contractor demand shows meaningful volume for skylight work and chimney-related roofing tie-ins, indicating these penetrations are common decision points for Warminster homeowners. Skylights sit on the edge of the roof's expanse, where the cold winds can force cycles of expansion and contraction on seals. In spring, hail and wind can nick edges, and freeze-thaw cycles make the surrounding flashing work harder to hold. If a skylight leaks after a storm, the first check should be the flashing around the curb or curb-mounted unit, not just the glass. Look for hairline cracks in sealant, loose nails, or gaps where the flashing meets the roofing material. Replace worn sealant with a compatible, elastomeric product, and ensure the flashing is properly bedded and mechanically secured. A small adjustment now can prevent a larger interior leak when March thaws hit.
Chimneys create a natural fault line where two roof planes meet. In Bucks County homes, the brick or stone mass expands and contracts with temperature shifts, stressing counter-flashing and the chimney cricket or saddle. Local job sheets show a steady stream of chimney-related tie-ins during replacement projects, often paired with new shingles or tiles. The key is to ensure the base flashing along the chimney pot, along with the step flashing at the roof slope, remains continuous and watertight. If mortar is spalling or the chase flashing shows any rust or separation, plan for repair or replacement as part of the roof work. Delays here can lead to recurring leaks after a thaw.
Freeze-thaw cycling in Warminster increases the importance of flashing around skylights, chimneys, and roof transitions where expansion and contraction repeatedly stress seals. Inspect abutments at the eave line and dormers for gaps where moisture can travel between roofing layers. Any sign of lifted shingles, torn underlayment, or micro-leaks behind interior walls deserves immediate attention. Matching flashing materials to the chosen roofing product and confirming their alignment with the drip edge is essential to prevent future failures.
On older homes in this Bucks County market, replacement planning often needs to address these details at the same time as the field roofing to avoid repeat leak callbacks. If the roof is reaching the end of its life, plan for concurrent skylight or chimney work rather than piecemeal repairs. This approach minimizes disruption, reduces the chance of forgotten flashing, and ensures the overall roof system remains cohesive as temperatures swing from winter to spring. A thoughtful sequence-first address structural and field integrity, then seal penetrations-yields the most durable outcome for long-term performance.
Find contractors experienced in skylight installation, flashing, and leak repairs to bring natural light into your home.
Pro Storm Repair
(833) 344-7767 www.prostormrepair.com
680 Louis Dr, Warminster, Pennsylvania
5.0 from 334 reviews

Lemus Construction
(215) 996-9966 lemusconstruction.com
680 Sycamore Dr, Warminster, Pennsylvania
4.1 from 87 reviews
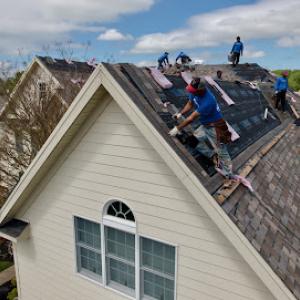
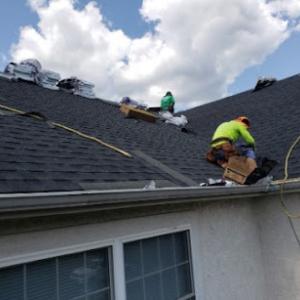
The local contractor market is built around re-roofing, matching the needs of established neighborhoods and aging roof systems. That means you'll often find long-standing, family-owned operators who understand the region's typical shingle lifespans, attic condensation tendencies, and winter freeze-thaw cycles. A smaller but meaningful portion advertises drone inspections, manufacturer certification, and formal warranty support, giving you options if you want deeper technical validation of the work.
Given the climate and storm exposure, you want an outfit that can respond quickly after a hail or wind event and that can deliver a clean, thorough cleanup after every job. Look for contractors who provide a clear project timeline, practice careful debris containment, and communicate concrete steps for protecting landscaping and driveways during replacement. Ask about crew supervision, daily progress updates, and the plan for protecting or replacing ventilation, skylights, and flashing to preserve insulation and avoid leaks during the winter thaw.
In practice, you'll notice that many established teams prioritize steady, repeat customer service-because word of mouth and property condition matter after a storm. The strongest candidates will demonstrate a track record of neat, professional job sites, with minimal disruption to neighbors and easy post-job follow-up for inspection or tweaks. A fully certified crew should be able to discuss material compatibility with common local underlayments and attic ventilation needs, as well as how their warranty covers seasonally stressed components.
A homeowner-friendly approach features upfront communication about potential storm timing challenges, flexible scheduling for peak season, and a transparent plan for protecting landscaping, gutters, and nearby siding during removal and installation. Prefer contractors who offer a clear, no-nonsense cleanup commitment-including storm debris removal, proper disposal of old roofing, and a final walkthrough to verify all penetrations and flashings are secure before leaving the site.