Last updated: Apr 19, 2026
Cold snowy winters in this neighborhood are followed by rapid freeze-thaw cycling that relentlessly tests the edges of shingles, eaves, flashing lines, and gutter attachments. After a heavy snow, as temperatures rise and meltwater refreezes at night, you'll often see hairline cracks widening and potential ice dam formation along the gutter line. If flashing around chimneys or vents isn't properly backed, those seams can start leaking first as meltwater finds a path. Pay close attention to any sign of granule loss, curling shingles, or dark staining along the eaves after a thaw. Early detection here can prevent mid-winter leaks that leave attic spaces damp and rotted sheathing.
Spring weather in this area brings gusty winds and the risk of hail, often after winter wear has already weakened components. Shingles with exposed edges are particularly susceptible to lift and accelerated granule loss when wind pressures spike. Flashings that have aged or been poorly sealed can peel back under pressure, creating vulnerable seams above soffits and along ridge lines. At the same time, gutters that have accrued ice dam damage or are bent from snow weight can misalign, allowing water to back up against fascia boards and eave edges. The combination of weakened materials and sudden wind or hail exposure means a routine inspection in late winter or early spring should be non-negotiable.
Warm, humid summers push asphalt shingle seal strips to their limit if installation spared insufficient ventilation. When attic air isn't circulating, moisture accumulates, elevating the risk of rot beneath shingles and around roof penetrations. Look for signs of attic condensation on sheathing, musty odors, or peeling paint inside attic spaces. Poor ventilation compounds seasonal stress by making even minor leaks feel urgent, since moisture can travel along rafters and into insulation, reducing R-value and inviting mold growth. If you notice attic humidity spikes during hot days, that's a signal to re-evaluate vent placement, intake-to-exhaust balance, and insulation depth.
Older stock here often features steeper slopes with slate, concrete and metal options mixed in. Freeze-thaw cycles can cause slate and concrete tiles to crack under pressure, while metal roofs may experience fastener movement or panel seam stress if underlayment or backer plates have degraded. Roof lines with complex transitions-along valleys, dormers, or chimney setbacks-tend to accumulate more ice and water runoff, increasing exposure to flashing joints. Inspect these high-stress zones after heavy snows and again after storms to ensure sealants remain flexible and fasteners firmly anchored.
If you notice curling at shingle edges, loose flashings, or signs of water staining near ceiling joints after a thaw, do not delay. Remove debris that holds meltwater at the gutter line and re-seat any loose shingles with proper roofing adhesive or fasteners as appropriate for your material. Clean gutters to prevent ice dam formation, ensuring downspouts discharge freely away from the foundation. For signs of attic moisture, address ventilation gaps promptly: add or reposition soffit vents, upgrade insulation, and verify that vented attic space is balanced for the climate's extremes. If damage is suspected on difficult-to-access portions of the roof, consider a professional assessment focused on eaves, flashing lines, and cresting along ridgelines where stress concentrates. A proactive approach now saves larger, more disruptive repairs later.
When planning a full roof replacement, you should target the late spring through early fall window. In this area, winter weather and freeze-thaw cycles add stress to tear-off, fastening, and sealing, making a winter project unproductive or risky. By waiting for the firmer, warmer months, the new layers can settle correctly, seams can seal properly, and the risk of winter damage during construction is minimized. This seasonal constraint is especially important for older, steep-sloped homes where roof access is often tighter and more technical to navigate safely.
Spring in this part of Montgomery County brings rapid changes in weather and a natural backlog as homeowners respond to winter damage. Trees are beginning to bud, but frequent cool-to-warm spells can create unpredictable conditions on the roof. Scheduling becomes a balance between avoiding late-season storms and not waiting too long into spring, when rain can interrupt progress. If a storm hits, crews may pause work briefly to protect newly exposed segments, and material deliveries can stall behind other projects that were accelerated by winter damage notices. Plan for a few weather-related stand-downs and keep a flexible start date within the spring window so the project can adapt without losing momentum.
Summer brings humidity and the risk of strong convective storms, which can impact timeline and site cleanliness. On older, steeper roofs, surge-driven wind and blowing debris during storms can complicate temporary protection strategies. If a replacement begins in late spring, the early portion of summer often proceeds with the most steady days for installation, but the crew may need to adjust around afternoon thunderstorm patterns. Clear communication about daily weather forecasts helps prevent misaligned expectations. Have a plan for securing open edges and gutters during sudden storms to avoid damage to newly installed underlayment or fasteners.
Fall brings deliberate leaf drop that can trap moisture around gutters and attic vents. Late-season projects require meticulous cleanup to prevent moisture buildup at critical points, such as under eaves, around rolls, and at vent penetrations. Drainage checks become essential as gutters become clogged with leaves, potentially affecting the performance of the roof system after installation. If a late-season replacement is necessary, prioritize a thorough post-installation walkthrough focused on debris removal, gutter flushing, and ensuring that all ventilation outlets remain unobstructed.
Coordinate with a reliable contractor to identify a precise start and finish window within the late spring through early fall period. Build in a buffer for weather delays, especially in spring, and set expectations for possible backlogs once winter damage reports surge into early summer. For fall projects, arrange a post-install cleanup and gutter clearance service as part of the final punch list. Consider timing the strongest weather forecasts to secure windows with extended dry spells, and arrange a contingency plan for moisture control near attic vents during late-season work. This approach helps ensure a durable, properly sealed roof that will withstand Ambler's seasonal stresses.
Get a clear picture of your project costs upfront - no commitment required.


Reliance Roofing & Siding
(215) 515-5385 relianceroofingandsiding.com
300 Brookside Ave Bldg 4, Ste 125, Ambler, Pennsylvania
4.8 from 79 reviews
Reliance Roofing and Siding is a professional home exterior remodeling company that takes pride in delivering top-quality work at a fair price. We offer services for homes of all sizes, from small to large, and provide various services like roof and Siding installations, siding repair, window installations, , and much more. Our team is experienced with different materials, including fiber cement, vinyl siding, cedar shake shingles, and asphalt shingles. We work quickly and cleanly, paying close attention to detail to protect your home from all elements while enhancing its curb appeal. When you choose Reliance Roofing and Siding for your home remodeling needs, your satisfaction is guaranteed!
Shelby Roofing Services
(215) 847-3522 www.shelbyroofingservices.com
Serving
5.0 from 91 reviews
We are a top-rated roofing company in Pennsylvania, specializing in comprehensive roofing services. At Shelby Roofing and Exteriors, we offer expert roof replacement, repair, and maintenance tailored to your needs. Our skilled contractors are adept in handling everything from copper roof installations to skylight solutions, ensuring high-quality craftsmanship. We also provide reliable gutter and downspout repair, home siding repair, and replacement services. Trust us for detailed roof inspections and consultations free of charge. Choose us for durable, efficient, and aesthetically pleasing exterior solutions in Pennsylvania. Partner with Shelby Roofing for exceptional roofing and exterior services across Pennsylvania.
Dexteriors Roofing & Siding
(215) 995-2887 www.dexteriors.co
Serving
5.0 from 48 reviews
Dexteriors Home Remodeling is the premier choice for Roofing, Siding and Gutters in Montgomery County, PA and surrounding areas. Trust your home to the exterior experts with over 15 years in custom residential construction. Experience the Dexteriors Difference with our customer-centered process to bring a pleasant experience to all your outdoor remodeling services. Connect with our team today to schedule your free consultation to begin elevating your outdoors.
J & S Family Roofing
Serving
5.0 from 225 reviews
At our full-service roofing company, we genuinely care about our customers and are committed to enhancing your home. With our expertise in new shingle roofing, re-roofing, vinyl siding, James Hardie siding, and all types of flat roofing and repairs, we prioritize your needs in every project. Contact us today to begin your home transformation!

Apex Roofing & Exteriors
(267) 360-2739 www.apexroofingandexteriors.com
Serving
4.8 from 69 reviews
Apex Roofing and Exteriors is a medium sized exterior company specializing in roofing, windows, and additions. Andy and James started Apex 14 years ago with the main focus on building relationships, quality products and customer service. Our motto is "You're Our Top Priority". We have grown to be the elite contractors in Maryland and Pennsylvania. Apex's achievements are from the efforts of the entire Apex team and our incredible customer base.

McBrien Contracting
(267) 787-1218 mcbriencontracting.com
Serving
4.8 from 53 reviews
McBrien Contracting provides roofing, gutter, and siding services in Glenside, PA and surrounding areas.
Nealman Construction
(215) 834-1587 nealmanconstruction.com
Serving
5.0 from 126 reviews
Nealman Construction is a Roofing Contractor in Lansdale, PA serving all of Montgomery County, Bucks County, Delaware County & Philadelphia PA. Your Local Roofer providing roofing installation, roof repairs, seamless gutter system installation, siding installation, roof inspections, metal roofing, chimney repairs, window installation, door installation and more! Commercial TPO and EPDM Roofing also available. If you’re looking for Roofer Near Me with excellent reviews, extensive experience, competitive prices and outstanding customer service, trust the experts at Nealman Construction. The #1 roofer near me in the area! Better Business Bureau Accredited GAF Certified Weather Stopper Contractor HIC#135858

East Coast Elite Roofing
(215) 954-5781 eastcoasteliteroofing.com
Serving
5.0 from 34 reviews
At East Coast Elite Roofing, we provide reliable roof replacements, roof repairs, flat roof systems, and emergency storm damage service across Philadelphia, Bucks County, Delaware County, and South Jersey. We specialize in shingle roofs, torch down, EPDM, custom metal work, vinyl siding, gutters, and full exterior home protection. Our crew doesn’t cut corners — we get it done right the first time with clean work and honest communication. Call today for a free roof inspection and same-day estimates.
G. Fedale Roofing & Siding
(215) 515-8260 www.gfedale.com
Serving
4.8 from 214 reviews
G. Fedale Roofing & Siding has been a competitive leader in the home improvement and commercial roofing industry since 2002. Gaining a major market share through the specialized talents of our employees, we pride ourselves on the success of our rapidly growing company. We are dedicated to the highest install and repair standards and our extended workmanship warranties guarantee coverage long after work is completed. Our mission at G. Fedale is to provide the best value and craftsmanship for our customers and the communities we serve through service, education and commitment.
Towers Roofing
(717) 419-4258 towersroofing.com
Serving
4.9 from 169 reviews
Towers Roofing is a family-owned business with more than 23 years of experience in Phoenixville, PA. We specialize in roof replacements, roof repairs, and gutters. The owner of Towers Roofing (Enrico) is present at every job from start to finish because he believes in quality over quantity. We only take on a certain number of jobs so that he is able to oversee each and every project to completion. Enrico will be the person to go and meet you at your home to evaluate and measure your project, then he will send your estimate within a couple days with all the links to colors, extended warranties from the manufacturer and his workmanship warranty, along with a full description of the items that will be replaced. We are licensed and insured!
Russell Roofing - Roofing in Philadelphia
(888) 567-7663 www.russellroofing.com
Serving
4.4 from 179 reviews
Russell Roofing & Exteriors was founded in 1992 by owner and president, Russell "Kip" Kaller. Russell Roofing is well known for being a commercial and home exterior contractor that services all aspects of your exterior needs from roofing, windows and doors to siding, gutters, skylights and masonry. Russell Roofing is fully licensed and insured, which makes us the contractor of choice. We are a certified installer for some of the top manufacturers: CertainTeed, GAF, Velux, DaVinci, and many more. Our goal is to ensure our customers have a positive construction project. We offer the best quality warranties, workers, and communication. Give us a call today for a free consultation!
Guard Dog Roofing & Siding
Serving
5.0 from 27 reviews
Guard Dog Roofing & Siding, LLC is your one-stop, go-to, for all of your roofing, siding, gutter, & storm damage needs.
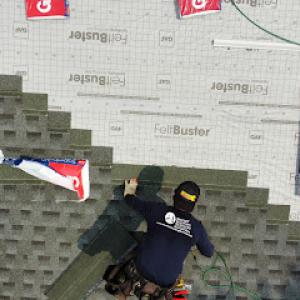
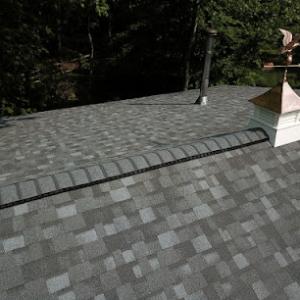
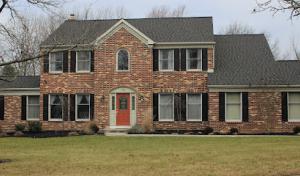
Asphalt shingles continue to be the dominate choice for many Ambler roofs because they fit the common steep residential rooflines found in this neighborhood and they sit comfortably in a wide range of budgets. In a climate with freeze-thaw cycles and summer humidity, asphalt shingles offer practical resilience when installed with proper underlayment and ventilation. Look for architectural or thicker saturated shingles that shed snow more predictably and resist uplift during windy summer storms. The key when selecting asphalt is matching the shingle profile to the roof's slope and ensuring the flashing around chimneys, skylights, and dormers is meticulous. Regular checks after winter thaws and spring storms help catch edge lifting or underlayment exposure early. If a roof still carries a high proportion of older, lower-quality shingles, plan on a careful upgrade to a mid- or high-grade option that improves sealing against moisture and reduces long-term wear from freeze-thaw cycles.
Slate remains locally relevant in this area, often seen on older southeastern Pennsylvania homes or on architecture that favors a refined, historic look. For homes with genuine slate, the weight and nail pattern matter most. Slate can offer exceptional longevity, but when it does fail, it tends to fracture near points of poor support or where roof framing and flashing details are stressed by movement and freeze-thaw cycles. If the existing slate is intact, routine inspection should focus on delaminating tiles, slipped slates after heavy snows, and the integrity of joints around ridges and penetrations. Replacement slate should be matched not only for appearance but for weight, thickness, and the substrate's capacity. For homes that are modernized with slate-like alternatives, consider how the new material interacts with traditional flashing details and valley configurations to prevent water intrusion during humid summers and heavy rain events.
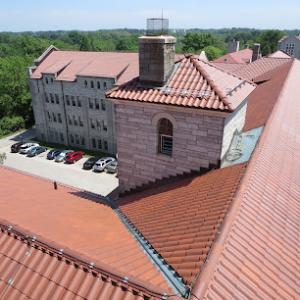
Clay tile and concrete tile are visible on several Ambler homes and bring a distinctive profile, but their performance hinges on proper support and careful detailing. Both tile types shed snow less predictably than asphalt and can crack under freezing conditions if unsupported or if substructure deflects. Before selecting tile, verify that the roof deck and framing can bear the added weight, and ensure the flashing around hips, valleys, and chimneys accommodates the tile's geometry. Metal roofing offers a strong, long-lasting option that handles rapid snow shedding and storm-driven moisture well, but compatibility with older framing, underlayment, and flashing details is essential. In addition, metal overlaps and paneled seams should be carefully sealed to prevent ice damming and water intrusion during cold months. Synthetic or composite shingles provide a modern substitute that mimics the look of higher-end materials without some of the heavier maintenance concerns. They can perform well under freeze-thaw stress and humid summers when installed with a compatible underlayment and ventilation strategy, and they often align better with older roof shapes and flashing patterns than some natural materials.
In homes with steep slopes and a long service life, aligning material choice with existing flashing details, gutters, and drainage patterns is as important as the material itself. Consider how each option will behave under repeated freeze-thaw cycles and a summer of thunderstorms, especially where shading is uneven and roof planes meet at complex angles. A thoughtful selection also accounts for the likelihood of future repairs or partial replacements, ensuring that the roof remains watertight as your home ages and the surrounding climate continues to push materials to perform under stress.
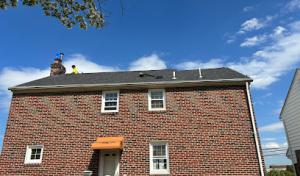
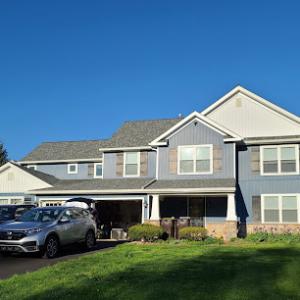
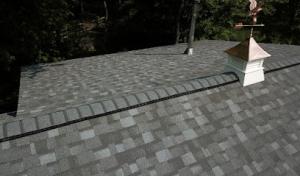
In older homes along the Montgomery County landscape, the roof edge is less a simple cutoff and more a fortress of small failures waiting to happen. Shingles may still look intact, but the drip edge, fascia, and gutter line are where water first tests its patience during freeze-thaw cycles and summer downpours. The moment ice forms or gutters back up, moisture can creep under shingles near the edge, travel along the eave, and find its way into the sheathing. Ambler roofs built decades ago often hide these edge vulnerabilities behind a veneer of sturdy appearance; a seasoned eye will spot tiny gaps where flashing has shifted or where the edge metal has corroded.
The chimney intersections and roof valleys deserve extra scrutiny because those are prime routes for water entry when aging flashing loses its seal. In the fall, as leaves accumulate and hold moisture near the chimney flashing and along the valley pans, the risk of slow leaks increases. If flashing has bent corners, or if sealant has dried out from repeated freeze-thaw cycles, you might notice damp spots in ceilings or attic rafters long after a storm. Aging flashing on sloped roofs in this area can also fail silently, with hairline gaps that widen over a season of freezing temperatures and spring rains.
Leaf accumulation in fall isn't just a curbside nuisance; it actively alters roof performance. When leaves clog gutters and downspouts, water backs up and sits against vulnerable joints, especially near attic vent openings. This stagnation can shorten the life of roof components by prolonging moisture exposure at critical junctions and near the edges of ventilation cutouts. The consequence is not only staining or minor leaks, but accelerated deterioration of underlayment, flashing, and even sheathing if the backup persists through multiple wet seasons.
Skylights are a meaningful service category here, given how often recurring leaks trace back to the curb, flashing, and the transitions between skylight frames and surrounding shingles. The curb must be solid, with proper flashing on every side, because a small lapse in the transition area can channel water inward during heavy rains or rapid snowmelt. If recurring leaks surface around a skylight, the culprit is frequently less about the glass and more about the perimeter sealing and the way surrounding shingles have crowned against the frame over time.
Watch for staining near edges after storms, damp attic patches that don't correspond to a single rain event, and felt or flashing that has visible puckering or corrosion. In Ambler's climate, the window of opportunity to address minor issues before they become significant leaks is narrow between winter and summertime storms. Addressing edge flashing, checking chimney and valley flashing, clearing fallen leaves, and inspecting skylight surrounds are practical moves that protect the roof's integrity without waiting for a dramatic failure.
Find contractors experienced in skylight installation, flashing, and leak repairs to bring natural light into your home.
Reliance Roofing & Siding
(215) 515-5385 relianceroofingandsiding.com
300 Brookside Ave Bldg 4, Ste 125, Ambler, Pennsylvania
4.8 from 79 reviews

A full roof replacement in Ambler typically requires a building permit, with review handled through the local borough or township building department depending on the property location. Before any work starts, confirm you have the correct permit type for tear-off, underlayment, and full replacement, and ensure your contractor is submitting the right documents. This keeps the project moving and minimizes mid-process holdbacks when weather tightens up.
Submit plans that show the chosen roofing material, penetrations, flashings, and drainage changes. Homeowners should confirm that these plans align with local code expectations and stormwater-related requirements, especially when replacement work changes drainage behavior. Ambler's older housing stock means councils often scrutinize slope protections and potential runoff impacts on neighboring properties and public rights-of-way. Have the plan stamped if required and keep a copy accessible on site.
In Ambler-area roof jobs, inspections commonly occur during underlayment and again after installation. Coordinate with the building department and the contractor to lock in these inspection windows before tear-off work begins. If the underlayment passes, it streamlines the sequence toward final inspection and reduces delays from weather or material delivery issues. Plan for a clear on-site path for inspectors to verify attic ventilation, flashing details, and proper underlayment wrap.
Keep all permit documents, plan reviews, and inspection notices on-site for easy access. A well-coordinated schedule reduces trips to the township office and helps align weather gaps with the narrow replacement season here. Communicate with neighbors about potential noise and temporary access restrictions if decking or attic work requires storage space or staging areas.
After the final inspection, ensure any required certificates or punch-list items are completed promptly. Retain the inspection record and warranty documents with your homeowner files. If drainage or gutter work accompanies the replacement, verify post-work drainage directs water away from foundations and into appropriate channels, and keep an eye on stormwater considerations through the first heavy rain after completion.
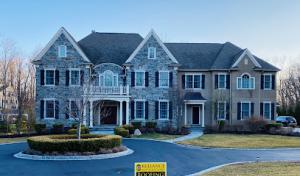
In Ambler, cost ranges for roof replacement reflect older Montgomery County stock and a mix of steep-sloped shingles and slate. Typical pricing sits around 350 to 700 USD per square for asphalt shingles, 700 to 1400 for metal, 900 to 1500 for clay tile, 800 to 1200 for concrete tile, 350 to 650 for synthetic/composite shingles, and 1200 to 2000 for slate. Seasonal demand spikes after winter damage and spring storms can tighten contractor availability, while permit fees remain modest but still add to full-project budgeting.
Costs rise when the job involves careful tear-off, decking repairs, or flashing replacement around chimneys and dormers. In older homes with alluvial roof lines or limited access, crews may spend extra time to protect interior spaces and neighbor lawns. Slate and tile systems demand specialty handling, which pushes price into the higher end of the slate and tile ranges and can extend project timelines.
If the goal is to balance cost and performance, synthetic or composite shingles offer a midrange option, typically 350 to 650 per square, with better resistance to freeze-thaw cycles than some lower-end alternatives. Asphalt shingles remain the most common, but when a roof has real slate or clay zones, anticipate higher substitution and labor costs. Metal roofs can appear attractive for long life but may carry higher start-up costs, especially on steeper sections.
Expect tighter schedules and higher bids after harsh winter seasons and during spring storms. Allocate a buffer for potential decking repairs and specialty flashing around irregular roof lines, dormers, or chimney attachments. While not the only factor, these elements frequently determine final project totals in Ambler.
Don't let upfront costs delay a critical repair - these contractors offer payment plans to fit your budget.
In Pennsylvania, Ambler homeowners rely on standard homeowners insurance, but regional wind and hail claim frequency can influence underwriting and premium sensitivity. The area's older, steep-sloped roofs-often slate, clay, or concrete tiles alongside asphalt shingles-face unique vulnerabilities when spring storms roll through. Sudden gusts can lift loose edges or tiles, while hail can chip or crack surfaces, exposing underlying decking to moisture. That combination makes the spring window a critical time to review the roof's condition and to prepare for possible weather-driven claims. The typical Ambler roof profile means damage can be subtle at first, hiding behind flashing or in eaves, then show up as leaks after a heavy thaw or a summer thundershower.
Because spring storms are a real local risk, homeowners should document damage quickly with photos, dates, and contractor assessments before temporary repairs obscure evidence. Clear, dated images of exterior impact marks, displaced shingles, dented flashing, or granule loss help establish a claim trail. Inside, capture any signs of leaks-staining on ceilings, damp insulation, or drips near penetrations-along with a rough timeline of when those symptoms appeared. Keep copies of any emergency tarping, noting when it was placed and by whom. The more precise the record, the easier it is to demonstrate the storm's impact to an adjuster.
Adjusters in this market commonly expect timely reporting and supporting estimates, so homeowners should keep records of emergency tarping, interior leaks, and visible exterior impacts. When arranging a contractor assessment, favor those with experience on steep-sloped and historic roof assemblies common to the area. Honest, detailed estimates that break down material and labor for each affected roof section help prevent disputes and support a smoother claim review. Stay vigilant for secondary damage that can appear after a few warm, windy days.
Connect with contractors who help homeowners navigate the claims process from damage assessment to final approval.
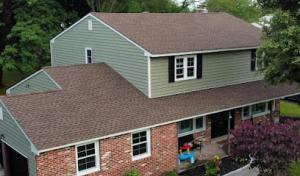
Although the neighborhood mix leans steep-slope, many additions, porches, and some mixed-use buildings in Ambler feature flat or low-slope sections. Local contractors report steady demand for these areas, driven by practical needs like outdoor living spaces or garage-to-house transitions. The low-slope portion often sits in the shadows of the main roof, where snow and ice linger longer and spring storms bring sudden downpours. This combination creates a unique wear pattern: faster aging of any membrane or coating, and more pronounced edge deterioration where water paths converge. Planning with this in mind saves trouble later.
In Ambler, snow piles and meltwater tend to pond on flat transitions if drainage isn't designed for the seasonal load. Check for standing water after storms, and inspect for signs of edge uplift or seam failure near valleys and penetrations. The most telltale issues aren't always visible from the ground: a damp ceiling in an interior room, staining along interior walls, or bubbling paint can signal hidden problems. Early detection is especially critical on older homes where a single compromised section can affect adjacent roof planes and attic space.
Maintenance in this market often centers on protective coatings or restoration strategies for low-slope areas that qualify. A well-chosen coating can extend life between full recoveries, buy time after harsh winters, and reduce the risk of leak-driven damage during spring storms. If a low-slope area has multiple repair points, prioritize weatherproofing around penetrations, flashings, and seams. Regular inspections after heavy snowfall and during early spring storm cycles help catch slow leaks before they harm insulation or interior finishes.
When considering material choices, think about compatibility with the adjacent steep-slope roof. A cohesive transition reduces wind uplift and drainage challenges at the interface. For additions or porches, select a system that tolerates freeze-thaw cycles and humid summer shifts, with attention to edge details and drainage grading. InAmbler properties with heritage slate or old shingles nearby, matching or harmonizing the low-slope section can minimize aesthetic disruption while maintaining performance.
Find specialists in TPO, EPDM, and built-up flat roofing systems for residential and commercial properties.