Last updated: Apr 19, 2026
Snohomish sits in the lower Snohomish River Valley, where persistent damp air and frequent cloud cover keep roofs wet longer than in inland, sunnier parts of the county. That lingering moisture shapes every decision from material choice to ventilation strategy. The roof must handle longer wet spells, higher dew points, and the way fog and mist cling to north-facing slopes. In practical terms, you'll notice more frequent moss outbreaks, quicker algae growth on shaded surfaces, and a higher demand for effective drainage to prevent where water sits after storms. When planning repairs or a replacement, expect longer drying times in between rain events, and plan installation tasks around windows with reliably dry weather.
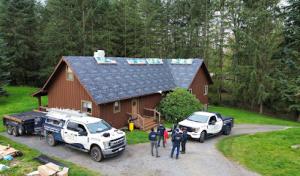
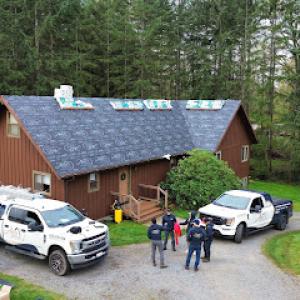
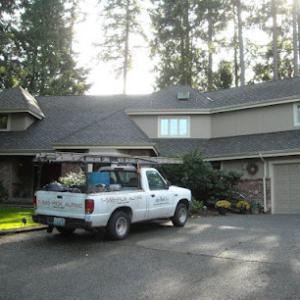
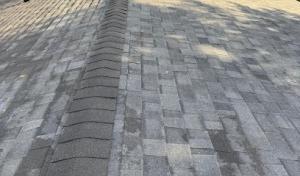
Older neighborhoods near the historic core and many established residential streets have mature trees that increase shade, debris loading, and moss pressure on north-facing roof slopes. Moss isn't just a cosmetic concern here; it grabs onto shingles and underlayment, holds moisture against the deck, and can lift shingles over time if left unchecked. The typical moss pressure is greatest where oaks and maples cast thick shade and where gutters are clogged with needles and leaves. You'll want to pair a moss-control plan with regular debris removal and a roof-cleaning rhythm that respects the local climate: gentle brushing or low-pressure washing followed by preventive measures, not aggressive scrubbing that can damage older shingle granules. If you have shaded, north- or west-facing sections, consider moss-resistant underlayment and enhanced ventilation in those zones to keep moisture moving through the roof deck.
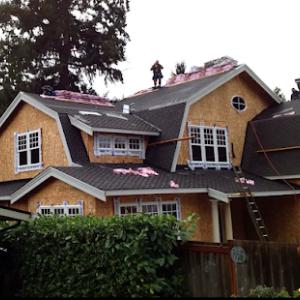
In western Washington, roof replacement timing is heavily influenced by the need for dry installation windows from late spring into early fall because underlayment, flashing, and ventilation details are harder to execute reliably during prolonged wet periods. In Snohomish, a clogged gutter or delayed flashing installation during a wet spell can stall the entire project and leave a vulnerable deck exposed to late-season rain. Plan projects so the bulk of roof work-underlayment, flashing, and vent installation-occurs in a stretch of dry weather, with contingencies for unseasonal showers. If a project must span a shoulder season, have a clear plan for rapid tarping and temporary weatherproofing so the roof remains protected between dry spells. Keeping crews on a tight, weather-aware schedule reduces the risk of moisture intrusion during critical stages.
Ventilation is not a luxury here; it's a core performance driver. North-facing slopes and shaded eaves can trap moisture, leading to condensation within the attic and accelerated wear on decking and fasteners. A practical approach is to pair a well-sealed underlayment system with continuous soffit intake and ridge or high-venting exhaust that suits the roof's pitch and layout. If the home has a history of attic condensation, add balanced fan-assisted ventilation or confirm existing vents are not obstructed by insulation or debris. In areas with significant moss activity, ensure that ventilation pathways stay clear even after leaf fall and seasonal debris storms. An effective ventilations plan reduces heat buildup in summer and slows moisture accumulation during rainy months, extending the life of shingles and underlayment.
Mature trees overhead mean more debris loading, which translates to gutters filling faster and more organic matter pressing against the roof line. A maintenance routine that aligns with Snohomish's damp season makes a real difference. Schedule seasonal cleanouts before the wettest months arrive, and inspect for moss regrowth and shingle lift after heavy rains or wind events. When inspecting, pay special attention to north- and shaded-facing sections that often show moss first, then progress to adjacent slopes. Address any staining or inconsistent drying patterns promptly, because early intervention preserves ventilation effectiveness and helps avoid costly repairs later on. By staying ahead of debris buildup and moss expansion, you keep drainage efficient, attic moisture controlled, and the roof's life expectancy on a steadier track.
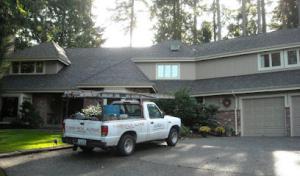
Winter Pacific storms push rain horizontally across the valley, not the hail that folks in drier regions worry about. In Snohomish, roofs are routinely stressed by wind-driven rain that tests shingles, seals, and gutters from multiple directions. The mix of mature trees shading many streets means branches swing into roofs during storm gusts, sometimes far more than homeowners expect. When storms roll through, valleys clog with debris and water backs up at the roof-to-wall transitions where flashing and drip edges meet the siding. This combination-wind, rain, and tree debris-creates the most common, sneaky leak patterns in this city.
Water follows the path of least resistance, and on roofs with mixed age shingles or aging flashing, small gaps become big problems as the wet season wears on. The frequent wind helps loosen fasteners and lifts edges in places that look solid on a sunny day. Valves and valleys that get clogged with needles, leaves, and moss slow drainage, so even moderate rain can pool and find seams you didn't notice last fall. Because rain can continue for days, you end up with saturated underlayment and interior pressure that push moisture further inside, especially at roof-to-wall transitions where ventilation runs thin and daylight is scarce in winter.
If a storm hits and you hear dripping inside, act fast. Temporary tarping should cover the most exposed sections while you clear accessible gutters and downspouts from the ground level. Use plastic or heavy-duty tarps anchored with weighted bags to resist wind, and secure underlayment or plywood over damaged or missing shingles to slow further intrusion. Pay attention to attic vent openings-blocked or back-venting can force moisture deeper into the ceiling plane. If you notice water behind the wall, place a bucket or towel under the leak and keep it visible so you don't forget a hidden drip while you arrange a longer-term fix.
After dry weather returns, inspect tree clearance around the roof line and trim branches that could strike the roof during the next storm. Reassess drainage paths: ensure valleys and scuppers stay free of debris and that flashing at the chimney, vent stacks, and roof-to-wall transitions is sealed and intact. Improve air flow in the attic to reduce condensation, especially when days stay damp and cool. In areas with persistent leaks at joints or transitions, upgrade flashing to corrosion-resistant metal and consider moss control measures that won't damage shingles, since moisture and shade invite biological growth that accelerates wear. Regular checks after winter storms help catch creeping leaks before they become widespread.
Find local contractors experienced in assessing and restoring roofs after hail, wind, and severe weather events.
Amor Roofing
(425) 229-2198 www.amorroofing.net
1924 Bickford Ave Ste. 101, Snohomish, Washington
5.0 from 103 reviews

Elite Roofing & Remodel
(425) 482-0676 www.eliteroofingnw.com
16510 WA-9 Suite #D, Snohomish, Washington
4.9 from 603 reviews
Klim Roofing & Construction
(425) 485-5546 www.klimroofing.com
618 Maple Ave, Snohomish, Washington
4.9 from 132 reviews
Amor Roofing
(425) 229-2198 www.amorroofing.net
1924 Bickford Ave Ste. 101, Snohomish, Washington
5.0 from 103 reviews
From the start, family has been the heart of Amor Roofing. Our founders are cousins whose fathers, uncles, and grandfathers began roofing over 40 years ago. We take pride in the fact that our family has been providing quality roofing services for generations. We deeply understand the industry and the importance of a robust and reliable roof. We use the best materials and techniques to ensure that each job maintains the highest standards. Our customers trust us to protect their homes and families, and We take that responsibility very seriously. Working in roofing has been more than just a job for us - it's a family legacy and a source of pride. We are honored to carry this tradition and provide the best roofing services to our community.

Elite Roofing & Remodel
(425) 482-0676 www.eliteroofingnw.com
16510 WA-9 Suite #D, Snohomish, Washington
4.9 from 603 reviews
Elite Roofing & Remodel is a Snohomish-based Roofing Company. We offer a full line of roofing services including roof replacement, roof repair, roof cleaning, and gutter installation. Our services also include siding repair and installation. We have been in business for over 25 years and have many happy referrals as reference per request. Accredited by the Better Business Bureau and Members of the Master Business Association. Our Service area covers the majority of Snohomish and King County. We offer Elite Service, Elite Quality and the Elite Experience. Financing options available.
Klim Roofing & Construction
(425) 485-5546 www.klimroofing.com
618 Maple Ave, Snohomish, Washington
4.9 from 132 reviews
We are a locally-owned, family-operated roofing company serving the greater Puget Sound area. We specialize in both pitched and flat residential and commercial roofing. Our dedicated, company employed, factory-trained team of installers deliver top quality installations every time. We embrace a low pressure, consultative sales approach that prioritizes our clients best interest. You can enjoy peace of mind with our Zero Money Down Guarantee and explore our flexible financing options for a seamless roof purchasing experience. To learn more about our roof repair or replacement services or to get a hassle-free roof consultation, contact us today. KLIM proudly covers the North End, South End, East Side, Seattle and the surrounding areas. Our...

Snohomish Roofing Company
(360) 913-2021 www.snohomishroof.com
4828 Bickford Ave, Snohomish, Washington
5.0 from 40 reviews
At Snohomish Roofing Company, we proudly provide expert shingle & metal roof replacement services throughout Snohomish County & parts of King County. As a 2nd-generation, family-owned company, we’re deeply rooted in our local community and committed to delivering 5-star quality & long-term reliability. We specialize in serving homeowners in Snohomish, Monroe, Everett, Lake Stevens, Marysville, Mill Creek, Bothell, Arlington, Granite Falls, Sultan, Gold Bar, & Index — we’re proud to extend our trusted roofing services into nearby King County communities, including Woodinville, Duvall, Redmond, Kirkland, Kenmore, Carnation, Fall City, & North Bend. Whether you're looking for shingles or metal, we bring experience, integrity, & craftsmanship.
Alpine Roof Care
(425) 487-2884 alpineroofcare.com
502 Maple Ave, Snohomish, Washington
4.8 from 116 reviews
Locally owned and operated, Alpine Roof Care is your trusted roofing contractor, providing professional, quality roofing services to keep your home safe and sound. From spot repairs to full roof replacements, our roofing experts provide free estimates based on thorough examinations of your home’s current state. We proudly serve the greater Seattle area, including Snohomish, Everett, Bellevue, Kirkland, and Renton, WA. Our comprehensive services include roof repair and maintenance, roof replacement, cedar roof cleaning, roof cleaning, moss removal, and asphalt shingle roof repair. Looking for experienced asphalt shingle roofers in Snohomish? Our team is here to help with expert craftsmanship and reliable service.
Allied Construction, Roofing, Re-roofing & Repair
(425) 276-7415 www.eastsideroofingcontractor.com
8716 176th St SE, Snohomish, Washington
5.0 from 29 reviews
Allied Construction offers expert roofing, creative decks, & durable fences, for homeowners & contractors in Washington: Bellevue, Bothell, Kenmore, Kirkland, Lynnwood, Sammamish, Snohomish & Woodinville. Allied Construction is a small, flexible, local company simply providing the highest quality roofing, deck & fence construction services in Bellevue, Redmond & the Eastside. Our roofing services include skylights, solar tubes, ice & water barriers, custom flashing, ridge & soffit venting, solar-powered attic fans, gutter covers & leaf filters, & high-performance underlayment. Feel free to browse our website & read about the roofing, deck & fence contracting services we offer. Call us or visit the "Contact Us" page on our website today!
Nordic Roofing
(425) 866-7300 www.nordicroofing.com
127 Ave A ste 201, Snohomish, Washington
4.9 from 33 reviews
Nordic Roofing Company is a family-owned and operated roofing business that provides quality services for roof replacements, roofing dry rot, deck replacements and repairs, siding replacement, patio covers, and more! Our core expertise lies in roofing, offering exceptional quality and craftsmanship that restores your home roof. We utilize high quality roofing shingles from Malarkey and EuroShield to ensure a robust, weather-resistant, and visually pleasing residential roof. Our contractors provide a detailed roofing inspection service and estimate that includes checking for dry rot and structural integrity. We also specialize in exterior home improvements like siding replacements, custom decks, and patio roof and awning installations."
Cornerstone Roofing, Inc. (CSR)
(425) 485-0111 cornerstoneroofing.com
8805 206th St SE, Snohomish, Washington
4.6 from 61 reviews
Cornerstone Roofing, Inc. is a licensed, bonded, and insured Roofing Contractor specializing in Composition (Asphalt Shingle) Residential and Commercial Roof Replacements, Roof Repairs, Gutters, Skylights, and Roof Maintenance. Now located in the Maltby area of Snohomish, WA (previously in Bothell), we have been servicing King and Snohomish counties since 1996. We employ all of our knowledgeable, certified roofing crews and are dedicated to providing our clients with a dependable roof system through high quality workmanship, superior materials, and a premium level of customer service. We offer No Payments, No Interest for 12 months (OAC). For more information or to request a Free Estimate, please visit our website or call our office.
Sherpa Roofing & Construction
(425) 485-7663 sherparoofing.com
16312 WA-9, Snohomish, Washington
4.7 from 23 reviews
At Sherpa Roofing, we take pride in our exceptional workmanship and are excited to showcase our expertise on your next roofing project. We maintain an unwavering commitment to excellence while specializing in the replacement of Cedar Shake, Asphalt Shingles, Tile, and Metal Roofing. When you choose Sherpa Roofing, you can rest assured that your project will be completed using only the highest quality materials. We stand behind our work and are pleased to offer a Lifetime Warranty for your peace of mind. * Expertise in Cedar Shake, Asphalt Shingles, Tile & Metal Roofing * Lifetime Warranty for added assurance * Unmatched customer service and professionalism Contact us today for a free consultation.

Eastside Roof Cleaning
(425) 462-1765 www.eastsideroofcleaning.com
16312 WA-9, Snohomish, Washington
4.4 from 27 reviews
We've been Cleaning roofs in Snohomish and King Counties since 1991 ! Eastside Roof Cleaning has the most experienced team and superior roofing services, no matter your situation. We also clean driveways and building exteriors. No matter the size of the job, trust our locally owned company to deliver. And as a cherry on top, we're known for cleaning up after the job's done, so you won't even know the crew was ever there.
Pro-Long Roof Care
(425) 822-2345 www.prolongroofcare.com
15920 Roosevelt Rd, Snohomish, Washington
4.0 from 61 reviews
Pro-Long Roof Care is a Snohomish-based company that cleans roofs and repairs roofs and installs gutters. We are a family-owned small business and have enjoyed working from Arlington to North Renton for more than 12 years. Our specialty is compressed air roof cleaning, manufacturers recommended method of cleaning roofs safely. We have specially designed pressure washing equipment for gentle washing your roof if you need it pressure washed, or if you need your home or hardscapes pressure washed. We also install continuous seamless gutters in K5 and K6 ( standard) sizes. The K-Style gutter is the most commonly seen installed homes in the Western Washington area.
Heritage Roofing
(360) 799-6445 www.heritageroofingwa.com
17825 WA-9, Snohomish, Washington
5.0 from 3 reviews
Heritage Roofing, LLC was founded in 1993 by owner Dewayne Garner. Today, with over 27 years experience, Heritage Roofing provides the greater Puget Sound area with unequaled quality workmanship at competitive pricing. We are called the "Best Damn Roofer in Town" for a reason. Let us install your new roof and you'll understand the reason why we have been given that nickname.
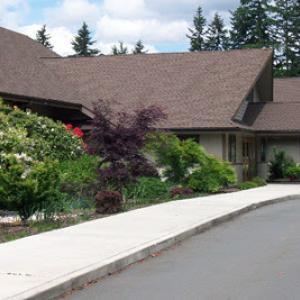
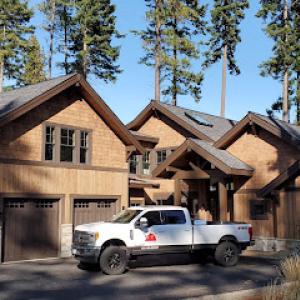
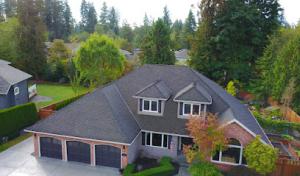
In a damp Snohomish River Valley climate with mature tree cover and a mix of historic in-town homes and hillside developments, the right roof choice hinges on moisture management, moss control, and effective ventilation. The roofs you see around town facing steep, gabled lines need materials that shed water quickly, resist moss buildup, and tolerate long, wet seasons without compromising underlayment or flashing details. Asphalt shingles remain a practical staple for many detached homes, while metal offers a growing niche for areas with frequent debris and heavy rain. For specialty looks like tile and slate, or modern composites, careful planning around structure and flashing is essential to withstand prolonged moisture exposure.
Asphalt Shingles
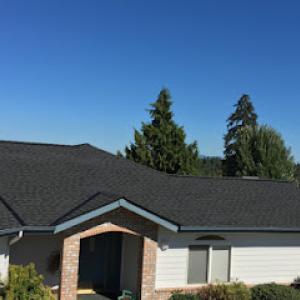
Asphalt shingles are well suited to the large stock of detached houses that characterize the valley's roads and neighborhoods. Their ease of replacement, familiarity to local roofers, and forgiving installation on steep, gabled roofs are significant advantages here. In the Snohomish environment, where shade from mature trees slows drying between rain events, proper attic ventilation and a robust underlayment become critical to keep moisture from lingering. Look for shingles with good granule adhesion and algae resistance to curb moss spread on north-facing slopes. A well-sealed drip edge and properly flashed valleys help prevent leaks where branches and debris gather. Because roofs may experience extended damp periods, routine gutter maintenance and a proactive moss-control plan should accompany asphalt installations to maximize longevity.
Metal Roofing
Metal roofing has a strong local niche because it sheds water and debris well in the wet Puget Sound climate and is increasingly considered on rural and semi-rural properties around Snohomish. The fast shedding of moisture and resilient seams reduce the chance of water backing up into eaves during long wet spells. Metal panels also resist moss colonization when installed with appropriate coatings and proper ventilation underneath. For homes with complex or irregular rooflines, ensure the installation includes precise flashing around chimneys, vents, and skylights to maintain a continuous, watertight barrier. Attention to panel overlaps and snow guards (where applicable) helps manage debris and keeps you from saturating the underlayment in heavier storms. A metal roof can be a long-term option that aligns with hillside properties where rooflines intersect with trees and wind-driven debris.
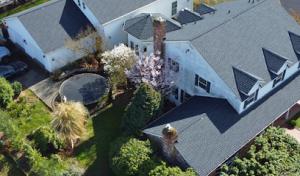
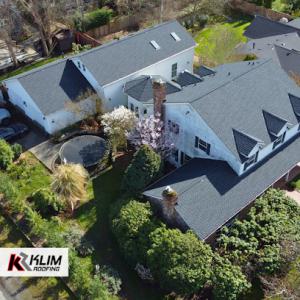
Tile, Slate, and Composite Systems
Tile, slate, and composite systems demand careful structural and flashing planning in this market because prolonged moisture exposure punishes weak underlayment and penetration details. Historic in-town roofs and newer hillside designs may have the structural capacity to support heavier weight, but every penetrations detail must be engineered for the wet climate. Underlayment quality becomes a pivotal line of defense against hidden moisture that can compromise framing over time. Flashing around chimneys, vents, and transitions must be meticulously executed to prevent seepage in shaded, moss-prone zones. If choosing these materials, verify roof framing support, ensure drainage paths that minimize standing water, and plan for proactive maintenance to address moss growth before it impacts sealants and fasteners. These options can deliver distinctive looks and long lifespans, but require a neighborly understanding of Snohomish's moisture rhythms and careful installation practices.
Historic Snohomish homes near the preserved district often present rooflines that aren't simple planes. Chimneys punctuate the skyline, dormers tuck into steep slopes, and irregular geometry demands precise detailing. When planning a reroof, the presence of these features means every cut, ridge line, and junction must be considered in the same breath as the house's character. A bare-bones replacement can ruin curb appeal on a block where neighbors value a cohesive, historic streetscape. Expect that flashing around chimneys and dormers will require careful integration with brick or woodwork, and that choosing materials with a complementary profile helps protect the home's visual authenticity over time.
Older construction in this city commonly hides decking, ventilation, and flashing needs beneath their surface. A tear-off can uncover soft or damaged decking, insufficient cross-ventilation, or flashing that has deteriorated in places not visible from ground level. Discoveries like these can shift the scope of work mid-project, affecting timelines and the sequence of steps. The lesson is simple: anticipate a broader, staged assessment once the old roof is exposed, and plan for addressing any structural or ventilation gaps that become evident. In practice, this means budgeting for an expanded scope and coordinating replacement components that ensure a robustly ventilated, weather-tight attic and roof assembly.
Snohomish's damp river-valley climate, combined with substantial tree cover, creates persistent moisture and moss pressures. A roof that overlooks mature deciduous and conifer can experience quicker moss growth, more frequent staining, and higher dew point concerns in fall and winter. This environment elevates the importance of drainage details, underslung gutters, and properly pitched gutters that direct water away from vulnerable eave edges. Additionally, faster-curing underlayment choices and compatible ventilation strategies help combat condensation on inside attic surfaces. Architectural compatibility matters here too: the materials chosen should harmonize with the age and style of the home while delivering reliable moisture control. A well-matched roof not only protects the structure but preserves the home's original silhouette, a key consideration in a city celebrated for its historic character.
Find contractors experienced in skylight installation, flashing, and leak repairs to bring natural light into your home.
Amor Roofing
(425) 229-2198 www.amorroofing.net
1924 Bickford Ave Ste. 101, Snohomish, Washington
5.0 from 103 reviews
Elite Roofing & Remodel
(425) 482-0676 www.eliteroofingnw.com
16510 WA-9 Suite #D, Snohomish, Washington
4.9 from 603 reviews
Klim Roofing & Construction
(425) 485-5546 www.klimroofing.com
618 Maple Ave, Snohomish, Washington
4.9 from 132 reviews
Using the provided ranges, homeowners should expect broad pricing variation by material. In this damp river-valley climate, the ongoing maintenance mindset affects upfront choices more than in drier markets. A roof replacement can swing widely from the low end for asphalt shingles to the high end for premium composites or tiles. Local costs are especially driven by tear-off complexity on older homes and by moisture-related decking replacement discovered during removal. If rotten decking is found, expect that line item to budge the total upward, sometimes significantly, before any underlayment or final finish is installed. Plan for a realistic contingency in your budget for those discoveries.
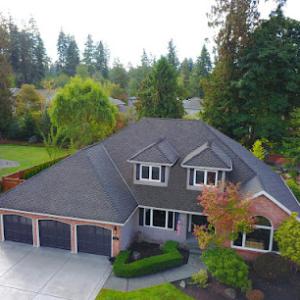
Steep pitches, multiple dormers, chimneys, and accessory structures are common in this area. Each feature adds labor time, equipment needs, and potential scaffold risk, which pushes labor costs above a simple square-foot estimate. Dormers require precise flashing and ventilation detailing to prevent future leaks, especially when moss and shade encourage moisture pooling. Chimneys and skylights create additional seam work and can demand more custom metal flashing. With these factors, two roofs of the same square footage can cost noticeably more if the design includes complex geometry or several protrusions.
Moisture-related decking issues are a frequent driver in Snohomish. If moisture has penetrated to the structural deck, you're looking at extra material and labor for replacement or treatment. The presence of moss and persistent dampness also heightens the need for proper ventilation and a robust underlayment choice. Synthetic or composite underlayments and better attic ventilation strategies can add value, but they come at a higher initial cost that may pay off in longer-term performance. Expect this to influence the total price when the roof is opened and the decking is inspected.
Seasonal demand spikes occur after winter leak events and during the late spring through early fall dry window. Scheduling windows can tighten, and pricing can shift as contractors balance urgent repairs with planned re-roofs. If your project starts in a busy week, you may see accelerated labor rates or limited availability for crews who handle complex, moss-prone jobs. Building a little flexibility into your timeline can help stabilize costs.
When you combine material selection, roof geometry, decking condition, and seasonal demand, the final price becomes a function of local realities rather than a simple per-square estimate. For a realistic budget, start with the material cost ranges, then add a clear allowance for potential decking replacement and the extra labor tied to dormers, chimneys, and other structures. Plan for a window when dry weather supports efficient work, but be prepared for price movement if a winter leak event triggers urgent scheduling.
Get a clear picture of your project costs upfront - no commitment required.
Snohomish Roofing Company
(360) 913-2021 www.snohomishroof.com
4828 Bickford Ave, Snohomish, Washington
5.0 from 40 reviews
Alpine Roof Care
(425) 487-2884 alpineroofcare.com
502 Maple Ave, Snohomish, Washington
4.8 from 116 reviews
Cornerstone Roofing, Inc. (CSR)
(425) 485-0111 cornerstoneroofing.com
8805 206th St SE, Snohomish, Washington
4.6 from 61 reviews
When planning a full reroof, the path hinges on parcel location rather than mailing address. For homes within the City of Snohomish limits, permit intake and plan review flow through the city's building function. Properties outside the city but with Snohomish mailing addresses may fall under Snohomish County jurisdiction instead. This city-versus-county split is a real local quirk, so you need to confirm the actual parcel jurisdiction before applying because permit intake, fees, and inspection scheduling depend on where the parcel sits, not what the mailbox says. Check your project address in the official records or call the relevant office to confirm the correct path before submitting any documentation.
Reroofs in this area routinely require plan review that highlights underlayment, flashing details, and ventilation strategy. The climate-wet, with a damp valley influence and dense tree cover-makes these elements critical. Expect reviewers to scrutinize attic and eave ventilation plans, ridge ventilation adequacy, and flashing continuity around chimneys, vent stacks, and transitions to walls. If a project includes skylights or dormers, have details ready on membrane seams, drip edges, and roof-to-wall flashing. Prepared, code-compliant drawings and a labeled ventilation diagram can smooth the process and reduce back-and-forth during plan review.
Inspections typically follow the sequence: pre-roof inspection (where underlayment type and nail pattern may be checked visually), mid-roof inspections (confirming underlayment coverage, flashing installation, and penetrations), and final (confirming ventilation and overall weather-tightness). Because Snohomish's wet climate increases moss and moisture concerns, inspectors pay close attention to attic vent balance, ridge vent continuity, and drip-edge alignment. Have all ventilation hardware and underlayment products readily identifiable by brand and specification in case the inspector asks for documentation or manufacturer data during the visit.
You'll notice claims here hinge less on dramatic hail and more on wind-driven rain, fallen limbs, and the subtle intrusion of leaks. When a claim is filed, insurers scrutinize entry points and interior damage captured in photos. If you can show when and how water entered, and what it did inside, the path to recovery becomes clearer. Moisture penetration often travels along roof lines, around penetrations, or through compromised flashing, so clean, well-lit images of suspected damage are a practical first step.
Weather-claim markets mean proof matters. Insurers commonly want documentation of roof age, maintenance history, and prior repair records before approving sizable payouts. Keep a simple registry: dates of inspections, what was repaired, and by whom. Photos should capture worn shingles, moss growth, and any signs of ventilation trouble, plus the roof's condition at the attic access with visible moisture staining. In Snohomish, a well-organized file can translate into a smoother claim review when the weather turns wet and the paperwork becomes the deciding factor.
Older roofs can face tougher reimbursement terms, and the line between storm-damaged areas and gradual aging can blur. Contractors should document moisture hotspots with clarity and separate storm-induced leaks from long-term wear. Photos taken after a rain event, showing the exact entry point and its relation to surrounding roof features, help establish a clear narrative. If a claim hinges on a single incident, a concise report that connects the interior damage to the roof's impaired moisture management and moss growth will support stronger outcomes.
While the market remains dominated by pitched roofs, many homes in Snohomish feature low-slope sections over additions, porches, garages, and rear extensions where drainage problems show up first in prolonged rain. These transitions are especially vulnerable in a wet western Washington climate because ponding, debris buildup, and failed edge flashing can create chronic leaks even when the main roof still looks serviceable. Pay attention to where the low-slope meets walls, chimneys, skylights, or other roof edges, and inspect after heavy rains for standing water or staining along the edge.
Drainage on low-slope sections must be prioritized because water movement is slower and debris collects easily in the valley between a garage roof and a larger home roof. Ensure a continuous, properly lapped membrane or approved flashing system from the edge into the main roof transition, with a clear path for water to exit at the eave line. Edge flashing should be caught by a drip edge or metal pan, sealed thoroughly at wall intersections, and inspected after winter storms when debris is most likely to clog the gutter path.
On older homes, low-slope tie-ins often sit beside chimneys, skylights, or wall intersections that need more careful waterproofing than a standard shingle field. Use integrated flashing at all penetrations, and consider a dedicated boot or sealant regime for any non-flat surface transitions. Avoid relying on field shingles alone to seal these joints; a well-flashed memorial seam or a taped, watertight membrane can prevent seepage along edges.
Proactively clear leaves and needles from carryover gutters and parapet lines tied to additions and garages. After heavy rain, run a visual check along the edge flashing and around any penetrations for early signs of moisture intrusion. Address any soft spots, staining, or odor promptly, since small leaks here can propagate into the primary roof over time and complicate long-term repairs.
Find specialists in TPO, EPDM, and built-up flat roofing systems for residential and commercial properties.
Amor Roofing
(425) 229-2198 www.amorroofing.net
1924 Bickford Ave Ste. 101, Snohomish, Washington
5.0 from 103 reviews
Klim Roofing & Construction
(425) 485-5546 www.klimroofing.com
618 Maple Ave, Snohomish, Washington
4.9 from 132 reviews
Allied Construction, Roofing, Re-roofing & Repair
(425) 276-7415 www.eastsideroofingcontractor.com
8716 176th St SE, Snohomish, Washington
5.0 from 29 reviews