Last updated: Apr 19, 2026
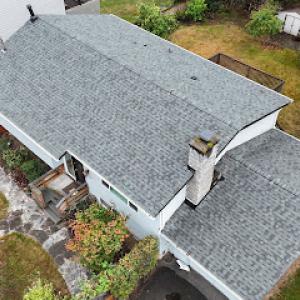
Mukilteo sits on Puget Sound and regularly sees marine air, fog, and prolonged damp conditions that keep roof surfaces wet longer than inland areas. The constant moisture gnaws at flashing, underlayment laps, and roof-to-wall transitions long before any freeze-thaw cycle arrives. In a neighborhood perched near shoreline bluffs or open water, wind-driven rain penetrates more readily around penetrations and edges, turning minor imperfections into stubborn leaks. This is not a hypothetical worry: the combination of persistent wetness, salty air, and frequent coastal winds means your roof lives with dampness as a constant pressure. Treat moisture management as a primary line of defense, not an afterthought.
The winter weather pattern here is defined by repeated rain events rather than deep freezes, so long-duration moisture exposure wears on margins and joints. Look at the roof deck, flashing laps, and transitions to walls with a critical eye after every storm cycle. Over time, small gaps widen, sealants dry out, and fasteners loosen as they endure dozens of wetting and drying cycles under marine air. These stresses accumulate and can produce recurring leaks even on seemingly well-installed roofs. Understanding that this is the baseline experience-wet, windy, and relentlessly damp-puts you in a better position to catch problems early.
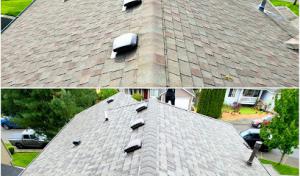
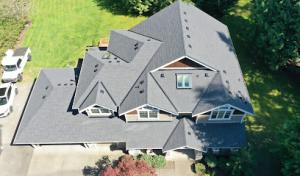
Edges and penetrations are your high-risk zones. Around chimneys, vent pipes, skylights, and vent stacks, moisture can creep in where flashing laps aren't continuous, or where sealant perishes under salt-laden air. Roof-to-wall transitions are especially stressed because water sits at the seam between horizontal and vertical planes, and any thermal expansion can loosen fasteners or misalign flashing. In exposed shoreline areas, wind-driven rain reaches the underside of eaves and overhangs first, so soffits and fascia deserve direct attention. If your home sits on an exposed bluff or near open water, expect stronger, more persistent wind-driven rainfall; this accelerates wear on edge metal and ridge lines.
Develop a brisk inspection routine that prioritizes moisture pathways. After a heavy rain, look for:
Create a seasonal checklist and tackle issues before the next season's wet pattern begins. Pay special attention after nor'easter-like coastal storms and high-wind events, when moisture intrusion signatures tend to show up first at the roof edges and around penetrations.
Roofing systems here must prioritize robust flashing details and continuous edge protection. Choose flashing profiles that resist salt corrosion and maintain tight laps through a full range of temperatures and humidity levels. Edge metal should be properly sealed to prevent capillary action from bringing moisture under tiles or shingles. Regular re-caulking of critical motion joints, especially around dormers and vent stacks, is a proactive move to stop leaks before they start. If a roof has aged sealants or brittle mastics, plan targeted resealing or flashing replacement in the next upgrade cycle rather than waiting for a visible leak to appear.
If you notice recurring damp spots near transitions, persistent staining along interior walls beneath the eaves, or a pattern of moisture around penetrations after storms, a local roofer with marine exposure experience should assess the system. They will check the integrity of underlayment, confirm continuous flashing laps, and verify roof-to-wall interfaces for long-term moisture resistance. In this coastal climate, a proactive, moisture-first approach saves more than just water damage; it protects structural longevity and indoor air quality against a damp, marine environment.
In this coastal Northwest pocket, timing a re-roof should be driven less by heat and more by rain patterns and drying conditions. Replacement scheduling tends to skew toward the drier part of the year, so the work can proceed with minimal weather interruptions. The goal is a clean tear-off, solid decking assessment, and a reliable dry-in sequence before the next wet spell. Think of a window where you can comfortably get layers off, inspect underlayment, and stage materials without back-to-back rain forcing extended delays. That tends to align with Mukilteo's blend of marine moisture and moderate temperatures, rather than forcing work through peak winter downpours or the heat of late summer.
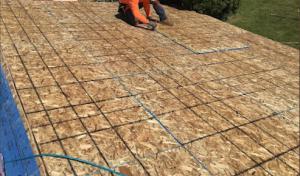
A practical approach is to front-load the critical steps when the forecast shows multiple dry days in a row. Start with removing old shingles and exposing the decking only as weather permits, not for the sake of a calendar date. Once the deck surface is revealed, verify there are no soft spots or moisture-induced issues that require repair before covering. The aim is a continuous dry-in phase: underlayment, flashing, and ridge ventilation can proceed only after decking integrity is confirmed. In areas with hillside neighborhoods and ferry traffic, wind-driven rain can reach vulnerable roof edges quickly, so schedule the initial phase during periods of predictable, light-to-moderate wind rather than peak gusts.
Autumn and early winter downpours in the north Puget Sound region heighten the risk of exposed decking and delayed installation sequences during active projects. If a reroof begins in late fall, build in buffer days for rain events and potential overnight moisture on decks. A common pattern is to advance as much of the materials staging as possible before a front moves through, then pause briefly if high rainfall becomes likely. By the time early winter arrives, crews should be focused on completing the dry-in and trimming details, not chasing intermittent leaks that started to soften during a protracted storm cycle.
A disciplined weather watch becomes part of the weekly routine. Use a reliable forecast window to lock in tear-off days, with flexible contingency plans for shifts due to extended rain. In Mukilteo's climate, a few consecutive dry days can be the difference between a tight, efficient sequence and a drawn-out, weather-worn project. If a mid-project cold snap or unseasonal wet spell appears, be prepared to pause at a logical milestone-after the deck is inspected and flashing is in place, but before a prolonged dry-in is completed-to avoid exposing vulnerable surfaces.
Coordinate with neighbors who may be affected by ladder access or debris containment along hillside exposures. Consider staging materials in a sheltered spot to minimize exposure to marine moisture during transport and early installation steps. When possible, align your project to avoid the late autumn rush of rainstorms and the first heavy seasonal fronts, so that the dry-in phase lands in a reliably dry stretch. The overarching objective is a controlled, weather-informed rhythm that keeps decking protected and flashing reliable from day one through to completion, with minimal interruptions from rain-driven delays.
Get a clear picture of your project costs upfront - no commitment required.
ShieldPro Roofing
12303 Cyrus Way, Mukilteo, Washington
4.9 from 27 reviews
ShieldPro Roofing provides durable, eco-friendly roofing solutions built to handle the toughest weather in Mukilteo, Everett, Lynnwood and across Washington. Our experienced team combines craftsmanship with sustainable practices to deliver roofs that protect your home for decades. We stand out by focusing on energy efficiency, long-lasting results, and personalized service tailored to every project. Locally trusted for our commitment to quality and customer care, we help homeowners safeguard their investment while reducing environmental impact. Whether you’re upgrading or replacing your roof, ShieldPro Roofing is here to provide dependable protection and lasting peace of mind.
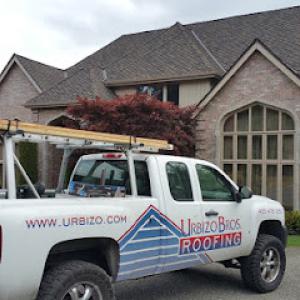
Urbizo Roofing - Mukilteo Roofing Experts Serving the Greater Seattle Area
(425) 276-7831 www.urbizoroofing.com
12515 Evergreen Dr, Mukilteo, Washington
4.3 from 35 reviews
Urbizo Brothers Roofing offers residential & light commercial roofing, rain gutter replacement, skylight installation, & more for home and business owners in Washington: Edmonds, Seattle, Lynnwood, Mill Creek, Mercer Island, Mukilteo & South Everett. Owned & operated by three brothers who are all committed to doing the very best work on each roof installed, our company’s primary focus has always been on customer service with 100% satisfaction. We use only the highest quality roofing materials & the most up-to-date installation techniques. Feel free to browse our website and read about the roofing services we offer. We’re happy to answer any questions via a phone call or email. Call us or visit the "Contact Us" page on our website today!
SQI, Inc. Roofing & Restoration
(425) 348-0115 www.sqiroofing.com
3821 S Rd, Mukilteo, Washington
3.6 from 20 reviews
With nearly fifty years of dedicated service, SQI, Inc. brings expertise in roofing and restoration to the Mukilteo area. Specializing in both residential and commercial projects, they offer professional new roof installations, re-roofing, and comprehensive maintenance programs to keep your property protected. Their skilled team also provides 24-hour repair services and essential fire and water damage restoration, ensuring your home or business is in capable hands. They also offer waterproofing and sheetmetal services for a complete solution.

J&J Roof Cleaning Services
(425) 371-6924 jandjroofcleaningservices.com
Serving
4.9 from 70 reviews
Since 2011 J&J Roof Cleaning Services, LLC has been helping homeowners with their roof maintenance in Everett and surrounding areas. We’re committed to provide the best quality of service. Cleaning is our passion!
True Shield Roofing
(206) 800-7663 trueshieldroof.com
Serving
5.0 from 57 reviews
At True Shield Roofing, Your Protection is Our Priority. ✅ Family-owned and operated for over 20 years. ✅ Certified by CertainTeed & Malarkey. ✅ Licensed, bonded, and insured. ✅ We handle repairs, replacements, and more. ✅ Serving King, Snohomish, and Pierce counties. ✅ Focused on quality, safety, and great service.
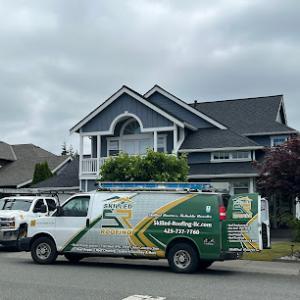
Skilled Roofing
(425) 737-7760 skilledroofingllc.com
Serving
5.0 from 64 reviews
We are a family-owned business that offers personalized roofing services that treat your home with the care and respect you deserve. Our expertise, commitment to quality and dedication have earned us the trust of homeowners and made us the most trusted roofing company serving North King & Snohomish counties with a 100% customer satisfaction.
Rain State Roofing
(206) 650-2943 www.rainstateroofing.com
Serving
5.0 from 23 reviews
Your roof is one of the most important parts of your property. Not only does it protect your building from the elements, it also increases its value. Pacific Evergreen Roofing, LLC offers professional roofing services in Everett, WA. From roof installation services to roof repair services, we can do it all. With over 10 years of industry experience, you can trust us to deliver exceptional results. Schedule an appointment with our local roofing contractors today by calling.
Ruiz Roofing
(425) 344-5219 ruizroofing4.wixsite.com
Serving
4.9 from 86 reviews
Ruiz Roofing is a family owned & operated company locate in Everett, wa. Our #1 goal is a satisfied customer Contact us today for a free, NO-obligation quote on your next project! everything from new construction to tear-off's, we do it all! licensed bonded insured 425 515 8337
Axiom Division 7
(360) 354-3100 www.axiomd7.net
Serving
4.6 from 33 reviews
Axiom Division 7 is a large-scale, full-scope commercial and industrial roofing, waterproofing contractor passionate about providing our customers with the highest quality work and customer service. Our roofing and waterproofing contractors provide service, maintenance, and specialize in unique challenging projects. The company’s expertise in low slope roofing is a standout feature, addressing the unique challenges and requirements of this roofing type. Low slope roofs, common in commercial buildings, require specific materials and installation techniques to ensure effective water drainage and prevent leaks. Axiom Division 7 employs advanced technologies and materials to deliver roofing solutions in Everett, Washington.
Erie Home
Serving
4.9 from 24 reviews
Since 1976, Erie Home has manufactured, supplied, and installed the best-performing roofing on the market. By providing ironclad warranties and convenient financing, we ensure that every homeowner we work with receives top quality service and value for their homes and properties. Erie Home professionals are the roofing company of choice in the greater Everett, WA area. Whether you need roof inspections or roof damage repair services, Erie Home has been the go-to roofing contractor for nearly 50 years because of our attention to detail and dedication to making sure our customers are satisfied with their results. Contact us today for a quote and see why we're the trusted roofing company Everett counts on.
Blitz Roofing
(425) 900-4828 roofbyblitz.com
Serving
5.0 from 36 reviews
At Blitz Roofing, we understand the stress of roofing issues. Whether it's leaks threatening your home or an aged roof affecting curb appeal, our experienced team is here to help. We use only the highest quality materials, ensuring every project meets our standards for durability and excellence. Don't let roofing concerns weigh you down. Choose Blitz Roofing for solutions that secure your home and enhance its aesthetic value, potentially boosting its market worth. Our commitment includes transparent pricing and professional advice. Contact us today for a FREE estimate and start your journey towards a safe and attractive home. With Blitz Roofing, your roof is in expert hands.

PNW Roofing & Crawl Space Insulation
(425) 585-4391 pnwroofinginsulation.com
Serving
4.9 from 98 reviews
PNW Roofing & Crawl Space Insulation, your trusted roofing company in Everett, WA, excels in residential roofing with expertise in shingle, metal, slate, flat, and green roofing. We prioritize your home's safety and efficiency with top-quality roof repair and replacement services. Also specializing in crawl space insulation, we're GAF-certified and BBB+ accredited, ensuring professional excellence. Benefit from our exclusive 5% discounts for seniors and military members. For expert roofing solutions in Everett, WA, choose PNW Roofing & Crawl Space Insulation Your trusted choice for a safer, more comfortable, and energy-efficient home.
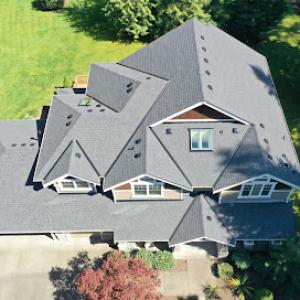
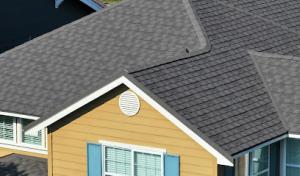
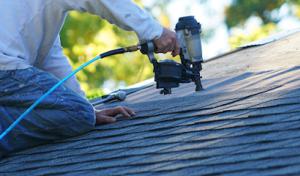
Asphalt shingles are common in Mukilteo, but persistent moisture means algae staining, sealant aging, and ventilation performance deserve more attention than sun-baked shingle issues seen in hotter climates. When selecting or replacing an asphalt roof, prioritize shingles with algae resistance and a strong, flexible asphalt binder that can handle the frequent cycles of dampness and occasional drying. Pay close attention to the underlayment and to the attic space: adequate venting reduces dew and helps keep the shingles from taking on moisture before it can escape. Ensure attic baffles are in place so intakes don't become blocked by insulation, which often happens in hillside homes where ceiling heights and attic access vary. Routine inspection should focus on sealant lines around penetrations, where moisture tends to accumulate and aging sealants fail first.
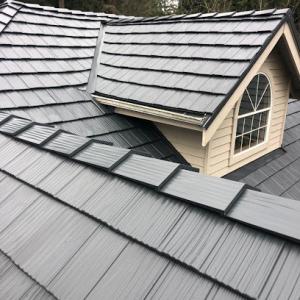
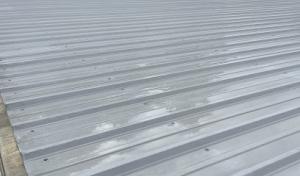
Metal roofing is a meaningful local specialty and fits the wet climate because it sheds rain efficiently, but detailing at fasteners, trim, and dissimilar-metal contact matters in marine air. In Mukilteo's marine exposure, choose a roof with corrosion-resistant fasteners and a robust sealant strategy at all terminations, including where the panels meet the ridge and where they abut vents, chimneys, or skylights. Aluminum and galvalized steel options fare well, but avoid bare-fastener layouts in areas with salt exposure unless the fasteners receive protective coatings and proper continuous sealing. Pay attention to panel overlaps and the edge detailing at eaves and rakes; wind-driven rain can exploit any small seam. For projects on hillside homes, ensure the roof deck is uniformly solid and free of loose fasteners that could loosen under windborne spray.
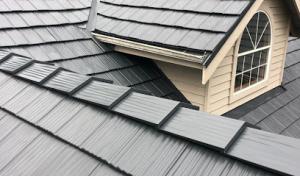
Wood shakes and shingles remain relevant in the region's housing stock, yet damp conditions can shorten service life if roofs stay shaded or poorly ventilated. Choose woods treated for rot resistance and install with adequate ventilation to prevent moisture from lingering in the attic and underlayment. In shaded yards or deeply wooded lots, routine cleaning of moss and lichen is essential; left unchecked, surface moisture invites decay and can compromise fastener stability. For re-roofing, consider thicker shakes or engineered wood products that resist warp in humid climates, and ensure the roof geometry promotes rapid drainage away from the eave lines. Regularly inspect for cupping, splitting, or soft spots near gutters, vents, and transitions to masonry.
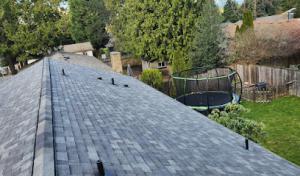
Across all roof types, the Puget Sound corridor demands a focus on flashing reliability and sealing against wind-driven, moisture-laden rain. Inspect step and giant juncture flashings where walls meet roof planes, and replace compromised sealant with a product rated for coastal exposure. In marine air, metal-to-metal contact regions require careful treatment to avoid galvanic corrosion; use compatible metals or barrier coatings at joints. Maintain soffits and ridge vents free of obstructions to encourage continuous airflow, especially in hillside homes with complex roof lines. Regular, proactive maintenance-clean gutters, trim encroaching vegetation, and re-seal penetrations-extends roof life in this climate and reduces the risk of unseen leaks after long wet seasons.
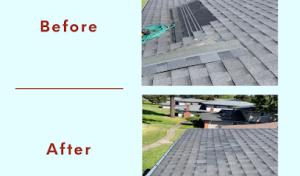
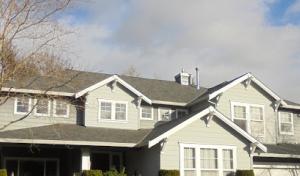
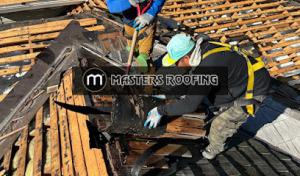
The persistent sea breeze in this harbor area pushes rain into roof joints with more force than inland markets expect. Flashing around chimneys, sidewalls, valleys, and roof penetrations takes a steady beating from wind-driven spray lifting moisture into seams. In practice, that means any small defect-lifted shingles, a loose counterflashing, or a misfit boot-can become a steady drip that travels along a ceiling joist. The best defense is thorough inspection after storms, especially around joints and transitions that face the prevailing gusts. If flashing looks bent, cracked, or weathered, treat it as a high-priority fix rather than a cosmetic concern. A single compromised detail can turn a rainy season into a slow-mo fountain into the attic.
Skylights are a meaningful local service category, and in Mukilteo they need careful curb and flashing integration because prolonged wetting can expose small installation defects. Look for any evidence of staining, damp insulation, or peeling sealant around skylight frames. The curb height and flashing must be coordinated with the neighboring roof plane to shed water smoothly rather than trap it at a seam. If a skylight was installed years ago or by a non-specialist, re-sealing and re-flashing may be prudent even without visible leaks. Poor curb-to-roof transitions, mismatched flashing angles, or deteriorating sealant are common sources of creeping moisture that eventually find their way into the attic structure.
Coastal humidity and fog can hide slow leaks until decking, sealants, or attic materials have already absorbed moisture. A roof can feel dry to the touch while dampness works its way through plywood seams or the underside of roof decking. Regular attention to attic ventilation and a cautious eye for soft spots or musty odors can reveal trouble before it worsens. When foggy conditions persist, consider a targeted moisture check in areas where gutters meet the fascia, around dormers, and at any long, flat roof runs where water may linger.
Find contractors experienced in skylight installation, flashing, and leak repairs to bring natural light into your home.
Urbizo Roofing - Mukilteo Roofing Experts Serving the Greater Seattle Area
(425) 276-7831 www.urbizoroofing.com
12515 Evergreen Dr, Mukilteo, Washington
4.3 from 35 reviews
Before lifting any roofing materials, know that a building permit is typically required for roof replacement work in this area, within the Snohomish County jurisdictional framework. The process is grounded in project details rather than purely over-the-counter contractor paperwork, so you'll want to assemble a clear scope: roof type, underlayment choices, flashing details, venting plan, and any alterations to attic or vertical penetrations. Because Puget Sound exposure and wind-driven rain demand reliable moisture management, your plan should emphasize code-compliant flashing, continuous underlayment, and ventilation strategy.
Applications are submitted through the local permit center with project details rather than handled as purely over-the-counter contractor paperwork. Expect to provide a mapped roof layout or sketches, roof sheathing condition, and the proposed ventilation and flashing approach. In this jurisdiction, review can take a little longer when the plan requests more explicit connections between the roof assembly and exterior walls, soffit intake, and ridge vents. If you have hillside terrain or unique alignment of eaves, include a note about how snow and rain flow will be guided away from vulnerable joints. The permit folder should clearly reference weather exposure factors that affect moisture control and flashing detail.
Line up your contractor's schedule with the inspection milestones to avoid rework. Inspectors will look for adherence to approved drawings, with special attention to underlayment seams, drip edge, and proper flashing at valleys, chimneys, and skylines. Ventilation must meet code requirements to prevent condensation and mold risk in a marine climate. If any changes arise on site-like a different underlayment or vent type-document them and secure a permit amendment if needed. Keep visibility clear around the eave lines and flashing transitions so the inspector can verify continuity of moisture protection.
Multiple milestones trigger inspections, culminating in the final inspection focused on code compliance for underlayment, flashing, and ventilation. The final walk-through confirms that the roof assembly integrates smoothly with wall flashing, a continuous moisture barrier, and an effective ventilation strategy. Have all documentation ready: approved drawings, material specs, and any amendments. If the inspector flags issues, address them promptly with your contractor and request a follow-up check to finalize permit closure.
When planning a roof replacement, you'll see local price ranges align with the typical Puget Sound climate. For asphalt shingles, expect about $350 to $550 per square. Metal roofs typically run $700 to $1200 per square. Clay tile clocks in at $1000 to $2100 per square, concrete tile at $1200 to $2300 per square, wood shingles or shakes at $450 to $1100 per square, and synthetic or composite shingles at $400 to $750 per square. These figures reflect common material choices in hillside and bluff neighborhoods where weather exposure and a memorable marine moisture load matter.
Rain delays can push a project timeline into wetter stretches, and that can bump costs indirectly. Extra dry-in protection, tarps, heated enclosures, or extended crew hours may be needed to keep interior spaces dry during wet season installations. In practice, a project that runs long due to persistent rain tends to absorb additional staging and labor charges, so plan with a contingency in mind for those bay-area weather windows.
Steeper, view-oriented homes with exposure to wind and spray demand careful staging, additional safety measures, and sometimes more time for material handling. On slopes or bluff areas, crews may need specialized equipment to minimize disturbance and to protect landscaping and walkways. Those factors tend to increase labor complexity and cleanup demands versus flatter sites, which shows up as higher per-square costs in the final estimate.
In this climate, leak resistance, venting, and flashing reliability can be more important than extreme-heat or hail performance. Synthetic or composite shingles often balance cost and moisture resistance well, while metal offers durability against wind-driven rain. Clay and concrete tiles provide long life but demand careful substructure strength and can elevate installation complexity on steeper lots. Consider how each option handles moisture management in your specific Mukilteo hillside setting, and then compare the realistic installed costs within the ranges above.
Don't let upfront costs delay a critical repair - these contractors offer payment plans to fit your budget.
For homeowners in Mukilteo, Washington policies generally cover warranted roof damage, but the claims process hinges on careful documentation of wind and rain-related loss with photos and a licensed contractor estimate. The emphasis is on showing how moisture entered and how the roof failed to keep it out, not just that a storm happened. Clear, timestamped images of missing shingles, lifted flashing, and interior signs of leakage strengthen the file.
Adjusters may ask for a roofing condition report and maintenance history. In this coastal corridor, insurers may distinguish sudden storm damage from long-term moisture deterioration. A well-kept record showing proactive maintenance-prompt repairs after leaks, record of venting checks, and any previous water intrusion-can influence coverage decisions. Be prepared to provide both the current assessment and year-by-year trends.
Statewide policy language increasingly emphasizes wind and hail terms, even though the more common stresses are winter storms, prolonged rain, and leak development in this area. This means that mitigation measures taken after a loss, such as resealing flashing and addressing hidden moisture, can matter as much as the visible damage. Expect questions about how the roof was maintained prior to the claim and whether any preexisting issues were disclosed.
Take multiple photos from ground level and from the attic showing the point of entry and any signs of moisture behind ceiling materials. Gather contractor estimates that itemize labor, flashing, underlayment, and ventilation components. If possible, obtain a written note from the contractor describing how wind-driven rain breached the system and what remediation is proposed to prevent recurrence. This adds credibility to the claim and supports a timely resolution.
Connect with contractors who help homeowners navigate the claims process from damage assessment to final approval.
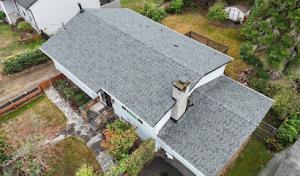
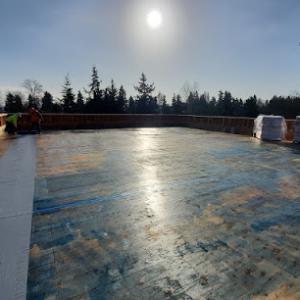
Flat and low-slope roofing is an active local specialty, relevant for homes with additions, porches, garages, and mixed rooflines common in suburban coastal neighborhoods. The Puget Sound air brings persistent moisture, and these low- or flat sections sit at the edge of the main roof strategy. Because water tends to linger on the surface longer than on steep pitches, any moisture intrusion there shows up sooner as edge flashing edges or membrane laps wear out. The goal is to understand how these areas behave under prolonged rain and how they connect to the rest of the roof system so that long-term performance isn't sacrificed by a missed detail.
In Mukilteo's rainy climate, proper drainage is critical for low-slope sections. Ensure the deck is solid and free of debris that can impede flow toward primary gutters or scuppers. Membrane laps must be continuously watertight, with attention to field seams that can creep open over time. If the roof uses a ply or single-pply system, confirmar that membrane edges overlap properly and that any transitions to steeper roof planes seal securely. Consider where snow and seasonal rain intensify standing water around parapets, penetrations, and penetrations through skylight flashing. An integrated drainage plan-catch basins, scuppers, and clear downspout paths-reduces the risk of ponding that forces water toward flashing details.
Edge flashing takes the brunt of wind-driven rain on low-slope roofs. In coastal layouts, wind exposure can pry flashing corners loose if fasteners fail or sealants degrade. Inspect toe kicks, drip edges, and counterflashing at penetrations such as vents, drains, and skylights. Terminations along walls and at transitions to steeper sections require careful detailing to maintain continuity of waterproofing. When edges show chalking, cracking, or loose metal, address them promptly to prevent water from migrating beneath the membrane.
Proactive checks before winter rains begin pay off. Look for standing water after a typical rain event, especially near package connections, gutter inlets, and parapet terminations. Maintain a regular schedule of cleaning debris from drains and scuppers, and re-seal any aged joints that exhibit dry-out or silicone creep. If a low-slope area shows recurrent moisture marks on interior ceilings near the corresponding exterior wall, treat it as a priority repair area rather than a candidate for a temporary patch. A thoughtful, focused approach to these sections keeps the main steep roof functioning as intended while minimizing edge leakage.
Find specialists in TPO, EPDM, and built-up flat roofing systems for residential and commercial properties.
PNW Roofing & Crawl Space Insulation
(425) 585-4391 pnwroofinginsulation.com
Serving
4.9 from 98 reviews
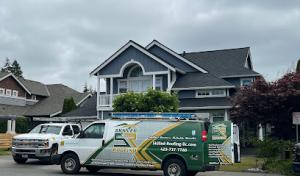
In this coastal corridor, homeowners value re-roofing crews who bring solid installation experience, rapid response when issues pop up, and a clean finish with debris removal included. A crew that can show you a track record of completed jobs on hillside homes with ocean moisture exposure tends to translate to better moisture control at vents, flashing, and transitions. Look for teams that emphasize both proper underlayment placement and reliable flashing detailing rather than flashy marketing claims about broad performance. The emphasis is practical reliability: results you can see after the first heavy rain, not just during a sales pitch.
When you reach out, ask for references from locally completed projects that faced similar exposure and roof configurations. Confirm that the crew uses manufacturer-certified flashing and ventilation details, and that their installers are current with standard flashing techniques for dormers, chimneys, and valley intersections. Inquire about their typical response time for weather-related setbacks and whether their scope includes thorough site cleanup after tear-off and install. If the crew struggles to provide specific examples or longer-term maintenance notes, you may want to keep looking among neighbors who've had recent installs in comparable neighborhoods.
Because many local hires focus on occupied homes, prioritize crews that describe protective measures for landscaping, driveways, and entryways during rain or wind. Ask how tarps, plywood walkways, and ground protection are arranged, and whether temporary barriers will be used to keep debris out of entryways and garden beds. You want a plan that minimizes disruption on a wet day and reduces the chance of damage to delicate shrubs or mulch beds surrounding the home.
Verify the crew's commitment to meticulous ventilation details and tested flashings, with a clear timetable that accommodates worsening weather without rushing critical connections. Confirm who will supervise the project, how coordination with your existing attic or crawlspace ventilation will occur, and the process for addressing any warranty questions after installation. A practical, well-communicated plan reflects a trustworthy local team.