Last updated: Apr 19, 2026
In Richmond, the Mediterranean pattern and hillside/shoreline mix shape when a full roof replacement best happens. Winter rain can expose open roof decks to moisture during tear-off, so most full replacements are best scheduled in the dry season. This keeps interior spaces drier during the most vulnerable phase and reduces the chance of moisture-related delays once installation starts. The goal is to keep the roof dry during the worst weather, while aligning the project with crews who can move efficiently through a tight schedule.
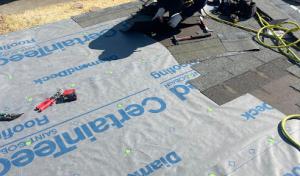
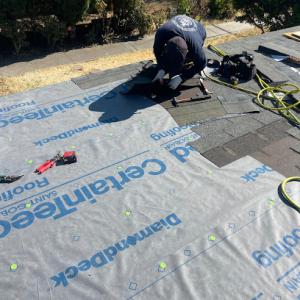
During the dry months, the objective is to lock in an installation window that minimizes exposure risk at every stage. Start with a detailed plan from the contractor that sequences tear-off, deck protection, underlayment, and flashing ahead of time. In Richmond, dry-season work typically runs more smoothly when the crew can keep deck areas covered and protected during removal, installation, and weather checks. A well-organized sequence reduces the chance of rain-induced complications and helps keep interior spaces dry as shingles, tiles, or panels are brought onto the roof. Expect careful coordination around any dormant interior moisture concerns, such as attic ventilation and ventilation-driven condensation, to avoid staging issues that can ripple into the sequence.
Winter storms in the East Bay can bring both rain and strong winds, which raises the risk of active leaks and can interrupt shingle, tile, and flashing installation sequences. If a replacement must occur in late fall or early winter, insist on a robust weather contingency plan. This includes tarp protection for exposed areas, temporary seals for critical flashings, and a clear plan for shutting down work quickly if a sustained rain event begins. In this climate, wind-driven rain can吹 through imperfect seals and accelerate moisture intrusion, especially around roof penetrations and valley flashings. Contractors should stage flashing and underlayment in weatherproof order, so a sudden downpour doesn't force a partial tear-off to linger unfinished. Clear, day-by-day communication about forecasted rain and risk tolerance helps you decide whether to pause work or adjust the scope temporarily.
If the calendar compels a spring or fall start, use the shoulder seasons to gain extra dry-weather windows without the peak summer scramble. Shoulder-season work benefits from cooler temperatures and lower humidity, which help sealants and underlayment cure properly. In Richmond, these periods can still deliver tight timelines, but you'll want to maintain flexibility for minor weather interruptions. A small buffer in the schedule can catch unexpected storms, especially when west-to-east wind shifts push moisture into attic or eaves areas. A practical plan includes a ready-to-deploy catchment system for unexpected leaks and a pre-inspection at completion to confirm all penetrations are properly flashed and sealed.
Dry-season installations often allow crews to move faster, which can shorten the project window and lower the chance of weather delays. However, the compressed replacement season can tighten contractor availability in Richmond and surrounding Contra Costa markets. To navigate this, secure your primary crew with a firm start date and a contingency plan for alternative crews if demand spikes. Maintain open lines of communication with the contractor about window preferences, weather-related contingencies, and anticipated critical milestones-tear-off completion, underlayment installation, flashings, and final inspections. Document any design changes or material substitutions promptly to prevent misalignment later in the schedule.
Regardless of timing, moisture control remains the core safety net. Ensure the roof deck is dry and clean before laying any underlayment. Confirm that flashings around chimneys, vents, dormers, and skylights are pre-fitted and tested for leaks before shingle exposure. For projects set during storm-prone periods, insist on a layered moisture plan: cover exposed areas, maintain dry ventilation in the attic, and verify interior seals around penetrations daily during the course of installation. A well-executed moisture-control plan protects not only the new roof but the home's structure and interiors during the replacement.
This Bay-front setting exposes roofs to moisture cycles that stress flashing, penetrations, and underlayment details more than the average inland home. The San Francisco Bay air carries sea moisture that arrives with winter storms and lingers in the attic and eaves if drainage paths aren't clear. You will notice that the best-protected roofs in hillside neighborhoods rely on coordinated flashing at chimney joints, vent stacks, and transitions to the wall. When the rain returns, a small, overlooked seam can become a leak source if the sealant has aged or the mortar around penetrations has weakened. In practice, that means checking and resealing every year, paying attention to joints where roof material ends and wall, chimney chase, or vent piping begin. If you've delayed maintenance, you'll see the consequence first as damp spots along interior ceilings, then more pronounced stains after a season of wet weather.
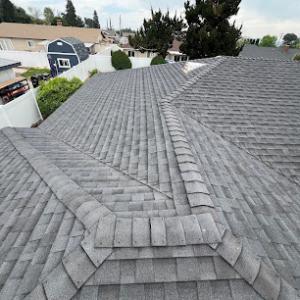
Strong winter winds common around the Bay shoreline can lift vulnerable edges and worsen failures at ridges, hips, and older roof-to-wall transitions. Edge detailing is not cosmetic here; it's structural. A gust can peel back a loose edge metal, unseat a shingle, or pry flashing away from the roof deck. Ridge lines and hip quads are particularly exposed and prone to micro-movements that create tiny gaps over time. The practical signal is simple: if you notice wind-driven debris under the eaves, loose cap shingles, or visible daylight along the ridge, take action before the next storm season. Refastening, resealing, and in a few cases replacing compromised sections with properly lapped, weathered flashing can prevent a slow drip from turning into a major interior leak.
Seasonal humidity swings in the East Bay can affect wood-based components and sealants, making deferred maintenance more likely to show up as leaks once winter storms arrive. The wood deck, fascia, and trim adjacent to roof planes expand and contract with moisture changes, stressing caulk and sealants that already sit at the edge of their life. If sealants feel soft or crack easily, or if wood shows any signs of swelling or cupping, plan for timely resealing and, where needed, replacement of compromised wood. Proactive attention to vented crawl spaces and attic humidity can reduce the risk of moisture migrating through penetrations during the wet season, keeping waterproofing layers intact and the overall roof system more durable against the bay breeze.
Find local contractors experienced in assessing and restoring roofs after hail, wind, and severe weather events.
Pablo Restorations Roofing
(510) 671-6161 pabloroofingca.com
2124 Hellings Ave, Richmond, California
5.0 from 23 reviews
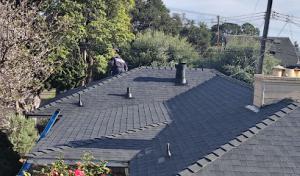
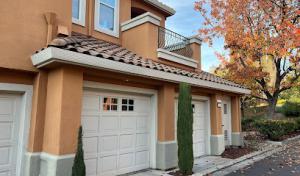
Richmond's active local market supports asphalt shingles, metal, clay tile, concrete tile, wood shakes, and synthetic shingles, so homeowners are choosing among several established systems rather than a single dominant roof type. That mix is shaped by the Bay-front setting, hillside wind exposure, and the wet winters that test every material differently. The right choice hinges on how well the system handles moisture control, flashing details, and the ability to weather both frequent storms and Pacific winds without frequent maintenance. If a roof is visible from the street and blends with nearby homes, you gain curb appeal alongside practical performance, but you still want a system whose installation details are well proven for the climate and neighborhood street drainage.
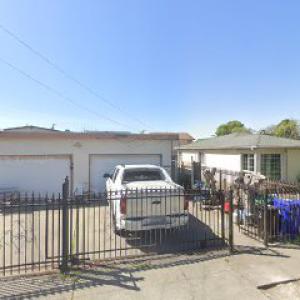
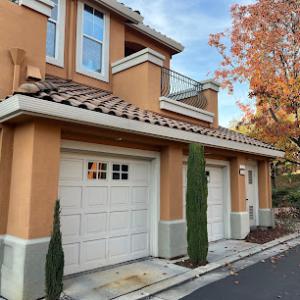
Tile remains relevant in parts of the East Bay but its weight can trigger added structural and installation considerations on older Richmond homes compared with lighter asphalt or metal systems. If contemplating clay or concrete, a careful assessment of rafter span, bearing, and the potential need for reinforcement is essential before planning replacement. In older structures, the extra load can impact attic ventilation, crawlspace access, and even chimney flashing. Lighter options, such as asphalt or metal, often allow a more straightforward retrofit with fewer retrofits to the underlying structure, while still delivering durable weather resistance when installed with proper underlayment, moisture barriers, and accurate flashing details around skylights and chimneys.
Wood shingles and shakes fit some older Bay Area housing styles, but Richmond owners have to weigh moisture wear in wet winters against appearance and maintenance expectations. Wood can deliver a classic lay of texture and tone that complements aging siding and classic trim, yet it requires ongoing treatment for rot, mold, and insect exposure in damp conditions. If choosing wood, plan for regular inspections of ridge caps, eave overhangs, and porch gaps where standing water can persist. In contrast, synthetic or composite shingles can mimic wood while offering improved resistance to moisture and less seasonal upkeep, though you should still deliver robust flashing around transitions and penetrations to prevent slow moisture ingress.
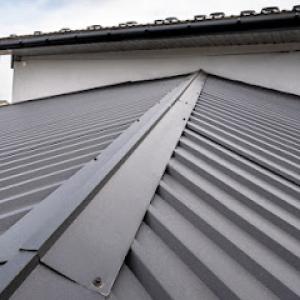
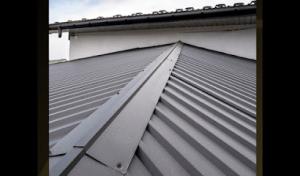
Metal roofing provides excellent wind performance and quick shedding of rain, a practical advantage in exposed hillside areas. When paired with proper underlayment and a well-sealed flashing strategy, metal systems can outlive many traditional roofs with lower maintenance overhead in the long term. Clay and concrete tiles continue to be favored where a heavier, more stately look is desired, especially on newer homes or remodels that accommodate the load and required substructure. Synthetic shingles offer a middle ground, delivering dimensional appearance, good moisture resistance, and simpler installation compared to some traditional products. The best choice balances climate demands, the house's architectural language, and how much labor you're willing to invest in ongoing care.
Because the Bay Area experiences a wet-winter and dry-summer cycle, selecting a roof type with predictable performance through alternating moisture and heat matters. The timing of a replacement matters in Richmond: you want a roof that can be sealed and drying quickly after the rainy season ends, reducing the risk of exposure during the wet months. Ensure flashing around valleys, dormers, chimneys, and skylights is integrated with the chosen system, and consider moisture-sensitive components like underlayment and ventilation paths that can trap humidity if not properly addressed. A well-chosen system paired with precise installation helps prevent leaks during sudden winter squalls and long, dry periods that can stress any roofing surface.
When planning a roof swap, you'll see a clear price ladder tied to material choice. Asphalt shingles sit at the core of typical Richmond projects, with per-square costs commonly ranging from about 350 to 700 USD. If you're choosing tile, metal, or synthetic systems, expect higher ballparks. Tile (clay or concrete) and metal roofing push into the mid to high range, typically 650 to 1700 USD per square for tile and 650 to 1100 USD per square for metal, while synthetic shingles generally run 650 to 1050 USD per square. These figures reflect Richmond's Bay-front climate, hillside wind exposure, and the region's demand during busy seasons. Wood shingles and shakes sit in the 550 to 900 USD per square neighborhood, while concrete tile trails just behind clay in many bids. In practical terms, the visible covering is only part of the total; flashing, underlayment, and attic or ventilation work can add noticeable scope.
Because winter rain and coastal winds can expose leaks quickly, the dry-season window matters here more than in some inland markets. Work scheduled during the dry season often comes with smoother logistics and lower exposure to moisture-related delays, which translates into tighter schedules and fewer extended interruptions. If a project is bid to occur during the dry months, the quoted per-square ranges above are typically more representative of actual final costs than winter bids that face rain-forecast disruptions. For homeowners weighing asphalt against higher-end systems, plan for the same ordering and procurement cadence that East Bay neighbors expect in a dry-season rush, since crews and materials move fast and demand peaks then.
Beyond the shingles or panels, several lines of work influence final pricing. Flashing expectations usually come up in older homes or those with hillside exposure, and the attic or subroof can require more robust ventilation or moisture-control measures. Underlayment choices, and any necessary adjustments for seismic considerations, also contribute to the bottom line. In practice, the worst case is when these elements are overlooked or deferred, only to surface as moisture or wind-driven leaks after a storm. Planning with a focus on comprehensive moisture control-flashing integrity, correct slope, and proper drainage-will pay off in reduced risk and fewer callbacks across the lifetime of the new roof.
Pablo Restorations Roofing
(510) 671-6161 pabloroofingca.com
2124 Hellings Ave, Richmond, California
5.0 from 23 reviews
Pablo Restorations Roofing is your trusted roofing contractor serving Richmond, CA, and surrounding areas. Specializing in asphalt shingle roofs, flat roofing, and metal roofing, we provide tailored solutions to meet your roofing needs. Whether you need expert roof leak repair, a thorough roof inspection, or a full roof installation, our experienced team delivers exceptional craftsmanship and reliable results. Committed to quality and customer satisfaction, we ensure durable, long-lasting roofs that protect your home or business. With Pablo Restorations Roofing, you can expect prompt service, competitive pricing, and peace of mind. Contact us today to secure your property with a roof built to last!
Frontline Roofing
(530) 402-3246 frontlineroofing.com
12669 San Pablo Ave Suite 107, Richmond, California
4.8 from 20 reviews
Frontline Roofing, located at 12669 San Pablo Ave Suite 107, is your trusted roofing contractor providing top-notch roofing services in Lake Elsinore, California. Specializing in both residential and commercial roofing, our dedicated team excels in roof repair, replacement, and maintenance, ensuring lasting durability and aesthetic appeal. We proudly offer diverse solutions including metal roofing, flat roofing, and energy-efficient commercial systems. Rated 4.9 stars by our clients, our expert craftsmanship, prompt service, and free quotes make us the go-to choice for "roofing near me." Contact us today for reliable roofing solutions tailored to your needs.
VRC Roofing
615 13th St, Richmond, California
5.0 from 9 reviews
VGR Roofing is your local and family operated roofing contractor and we are here to serve you as you deserve. We are specializing in metal roof, torch down roof, asphalt shingles, roof tiles, slate. etc etc, we are professional, clean. we love the work we do and will always strive to provide the best customer experience with best quality possible
Sunshine Gutters
(510) 525-0880 www.sunshinegutters.com
4934 McBryde Ave, Richmond, California
5.0 from 5 reviews
We offer Seamless gutter installation, repair, and maintenance in Contra costa county, San Francisco , Alameda county, Marin County and the surrounding areas. We offer a 5 year workmanship guarantee! Our gutters are guaranteed not to leak for as long as you own your home. The Bay area , Northern California is full of trees of all types, deciduous and fir. Leaves, needles, and debris are constantly falling into your gutters. Before the rain starts have us come out and inspect your gutter system and clean out the gunk in your gutters, this will allow them to flow smoothly and keep rain water away from damaging your house, foundation and landscaping.

Atlas Roofing
(415) 625-4567 atlasroofingpro.com
Serving
5.0 from 83 reviews
Atlas Roofing is your trusted roofing expert in the San Francisco Bay Area. We specialize in new roof installations, roof replacements, roof repairs, and re-roofing services. Our team of skilled professionals is dedicated to providing top-quality craftsmanship and exceptional customer service. Whether you need a new roof for your home or a repair to extend the life of your existing roof, we have the expertise to get the job done right. At Atlas Roofing, we use only the highest quality materials to ensure your roof stands the test of time. Contact us today for a free estimate!

Advanced Roofing El Cerrito Works
(341) 230-1042 advancedroofingelcerritoworks.com
Serving
5.0 from 36 reviews
Advanced Roofing El Cerrito Works proudly serves El Cerrito, CA with reliable roofing and professional plumbing solutions, available 7 days a week. We handle roof inspections, leak repair, new roof installations, and long-term maintenance to keep homes protected. Alongside our roofing expertise, we provide complete plumbing services, including leak detection, pipe repair, drain cleaning, water heater service, faucet and fixture work, and full system troubleshooting. Our team focuses on honest service, quality workmanship, and fast response, helping local homeowners stay safe, comfortable, and stress-free. If you need trusted roofing or plumbing in El Cerrito, we’re here to help.

Planchon Roofing
(510) 235-4056 www.planchonroofing.com
Serving
4.5 from 30 reviews
Planchon Roofing is a reliable roofing company in San Pablo, CA, providing fast and professional solutions to protect your home or business. We specialize in emergency roofing service, responsive roof repairs, and comprehensive maintenance to prevent future damage. Our licensed team works with quality materials and proven techniques to ensure lasting results on every project. Unique advantages include rapid response times, honest estimates, insurance assistance, and craftsmanship backed by experience. From minor leaks to major repairs, we prioritize safety, durability, and customer satisfaction. Contact Planchon Roofing today for prompt, dependable roofing support when you need it most.
Apex Line Roofers Service
Serving
4.9 from 7 reviews
Apex Line Roofers Service, located at 13728 San Pablo Ave, San Pablo, CA 94806, United States, stands as a premier roofing supply store. We are dedicated to providing top-quality materials for all your roofing needs. From durable shingles to essential accessories, our extensive inventory ensures professionals and DIY enthusiasts alike find exactly what they require for a successful project. Trust Apex Line for reliable products that build lasting roofs.
Roof City
(916) 540-6876 roofcityprofessionals.com
Serving
5.0 from 23 reviews
At Roof City, we are trusted roofing contractors serving Rio Linda, CA, providing expert solutions for both residential roofing and commercial roofing needs. From minor roof leak repair to full roof replacement, our skilled team ensures your property stays safe and protected. We specialize in emergency roof repair, flat roof repair, and shingle roof replacement, delivering fast, reliable service when you need it most. Our comprehensive roof maintenance programs help extend the life of your roof and prevent costly damage. Whether it’s routine inspections, repairs, or complete installations, Roof City provides professional, high-quality roofing services tailored to your home or business. Contact us today for more information and
Jimenez Roofing
Serving
4.4 from 7 reviews
Jimenez Roofing has worked hard to rise to the top of the roofing and waterproofing industry in our local area. Over the years, our company has installed hundreds of roofs, facing every roofing challenge imaginable with dedication, professionalism, and commitment. Our services are guaranteed because we work with premium materials to ensure top-quality solutions and durability.
Bay Area Roofing Master
(510) 373-3161 www.bayarearoofingmasters.com
Serving
5.0 from 45 reviews
Bay Area Roofing Master has been recognized as a top Roofing Contractor in the Bay Area. We provide a wide range of services for all kinds of roofing needs. Whether you’re looking to work on an existing space or undertake a bigger project, we guarantee that we can help you achieve the results you seek. Our number one priority is happy customers through quality work. Contact your friends at Bay Area Roofing Master for a quote.

ELM Roofing Contractors
(510) 737-0883 elmroofingcontractor.com
Serving
5.0 from 22 reviews
ELM Roofing Contractors - Trusted Roofers in San Mateo Since 2018 ELM Roofing Contractors has been providing top-quality roofing services in San Mateo, CA, and surrounding areas since 2018. Fully licensed and insured (C39 license), we specialize in roof replacements, repairs, and inspections for all roof types. Our skilled team works with leading roofing materials, ensuring durable results backed by a warranty. Each project is overseen by a dedicated manager to provide updates and ensure safety and quality. We offer free on-site consultations to assess your needs. Contact ELM Roofing Contractors today for reliable, professional roofing services you can trust!
Roof replacement requires a building permit through the City of Richmond rather than being treated as informal maintenance. The process is designed to capture moisture control, flashing integrity, and ventilation details that matter in hillside and shoreline neighborhoods where winter rain and wind can expose leaks quickly. The typical sequence starts with a formal submission, moves through permit review and fee processing, and ends with inspections as the project progresses.
Begin by preparing a precise scope of work that lists the roof area, existing conditions, and the planned roofing material. The city's review team will want to see the exact material type and ensure compatibility with the underlying deck and existing structural components. Include notes on underlayment, flashing around dormers and chimneys, and any ventilation upgrades that may be needed to meet current codes. Since moisture control is a priority in this climate, provide a clear plan for weather shutdowns, temporary protection during storms, and a method for diverting roof runoff during installation.
After the permit is issued, the job proceeds with staged inspections. The rough stage typically occurs midway through the installation, and the final inspection follows completion. Plan ahead for inspection timing to align with a drier window in the Bay-front climate, avoiding the wettest weeks when possible. Expect the building department to verify that the installed underlayment, flashing details, ventilation openings, and seismic considerations meet local requirements before sealing the permit.
Inspection checkpoints commonly include evaluating underlayment coverage and overlapping details to prevent moisture intrusion, the integrity of flashing around penetrations and transitions, and proper ventilation to mitigate heat and moisture buildup. Seismic compliance may be reviewed for systems that tie the roof to the shear structure, especially on hillside lots where movement and wind loads can stress connections. Documentation such as product data, installation methods, and any required permits for structural alterations should be readily available for review.
Have the project folder organized with the scope of work, material specifications, and any engineering letters or seismic provisions. Keep a running log of weather-related delays and interim protection measures for the roof deck. On inspection days, ensure access is clear, all penetrations are sealed as required, and temporary weather protection is in place if rain is forecast. This neighborhood often prioritizes thoroughness and timely communication with the building department to minimize rework and keep moisture control front-and-center during the replacement.
Richmond homeowners are navigating California's tighter insurance market, where wildfire exposure statewide has driven stricter underwriting and more documentation requests even outside the highest-risk inland zones. This means the moment a storm rolls through, insurers may scrutinize your roof with more scrutiny and demand clearer proof of durability and upkeep. The consequence is that a well-timed, well-documented roof condition can be the difference between a smooth claim and multiple delays or disputes.
After storms, insurers may ask for roof age, recent replacement records, photos, and condition documentation before approving repairs or renewals. If you do not have those items ready, expect longer response times and potential frustration during a renewal cycle. For a community that endures winter rain, having organized records is not a luxury-it's a practical shield against delays that can leave interior spaces exposed longer than necessary.
Because winter rain can turn minor defects into interior leaks quickly, you benefit from documenting damage immediately and preserving inspection records from any recent roof work. Take clear photos of flashing, joints, valley intersections, and any signs of wear as soon as you notice them. When a contractor performs work, request a detailed inspection report and keep a labeled folder with dates, notes, and contractor contact information. This practice helps you demonstrate proactive maintenance and can streamline the process if a claim or renewal arises.
Establish a routine for seasonal roof checks before the first winter storms, focusing on moisture intrusion pathways, vent seals, and flashing integrity. Maintain a simple, layered file system for receipts, warranties, and annual inspection notes. If any questions surface about the age or condition of components, address them promptly with a licensed professional who can provide formal documentation that stands up to insurer review. These steps reduce the risk of extended exposure to rain and wind and support steadier coverage decisions.
Connect with contractors who help homeowners navigate the claims process from damage assessment to final approval.
In the Bay-front setting, flat and low-slope roofs demand careful attention to drainage paths and membrane terminations. Drainage should be addressed before the wet season arrives, with attention to where water tends to pond near parapets, drains, and transitions to steeper sections. Edge detailing, scuppers, and downspout routing must be coordinated with any parapet coping to prevent slow leaks that can migrate into attic spaces or wall assemblies.
The region's moisture cycles make ponding on low-slope sections a frequent point of failure if not proactively managed. Choose a roofing system with compatibility for extended wet periods and verify guarantees cover ponding conditions. When planning replacements, ensure the chosen membrane type provides robust seam integrity and UV resistance at terminations where sun exposure pairs with winter rain.
Skylights are a notable specialty locally, and in the wet season these openings become a common point where flashing and curb details need close attention. Verify curb flashing continuity around the skylight perimeter, with secure attachment to the curb and counterflashing that resists wind-driven rain. Consider reinforcement at least where sealants are exposed to temperature swings and moisture buildup.
Solar installations introduce penetrations that must be coordinated with the reroofing plan to avoid rework. Plan for roof penetrations to align with future reroof timing, ensuring flashing assemblies accommodate array wiring and sealants remain accessible for future maintenance. Discuss sequence with the installer to avoid overlapping trades that could compromise waterproofing during contingencies like heavy winter storms.
This contractor market shows meaningful demand for flat-roof and low-slope work, so the quality of drainage details, membrane transitions, and ponding control is a practical, neighborhood-facing conversation. Durable flashing details and careful sequencing reduce nuisance leaks and support longer roof life in the bay-facing climate.
Find specialists in TPO, EPDM, and built-up flat roofing systems for residential and commercial properties.
Pablo Restorations Roofing
(510) 671-6161 pabloroofingca.com
2124 Hellings Ave, Richmond, California
5.0 from 23 reviews
Frontline Roofing
(530) 402-3246 frontlineroofing.com
12669 San Pablo Ave Suite 107, Richmond, California
4.8 from 20 reviews
During winter storms, a fast response can mean the difference between a minor dry-out and a widespread soak. Look for local crews that offer 24/7 triage, clear phone triage, and on-site arrival within a few hours if possible. Ask how they handle tarps, temporary coverings, and ventilation during storms to keep damage contained.
In this market, you'll see more re-roofs than new builds. Check a contractor's portfolio for actual replacement projects-roofs that involved stripping, underlayment, flashing, and resealing to handle Bay-front humidity and hillside wind. Prioritize crews with documented replacement work and a track record of managing moisture-driven failures, not just new-install showcases.
Local homeowners value straightforward cleanup that leaves a neat yard and no lingering debris, along with predictable, upfront communication. Ask for references from nearby neighborhoods with similar homes and a sense of what the crew considers "clean" re-roof completion. Favor family-owned or small residential-focused outfits that stick to clear scopes, dependable scheduling, and transparent invoicing over glossy, premium branding.
With moisture and wind driving wear, verify that the crew contracts comprehensive moisture-control measures: proper underlayment, flashing at intersections and vents, and secure, corrosion-resistant fasteners. Request a walkthrough of the planned sequence-from tearing off the old roof to final flashing and interior protection-so you can confirm every moisture-control step is covered.
Choose a contractor who provides thorough documentation: before/after photos, material specs, warranty details, and a clear plan for post-install checks. In this market, a reliable crew will set up a follow-up visit to address any lingering concerns after a rain event.