Last updated: Apr 19, 2026
Sycamore homeowners face elevated roof attention after spring hailstorms and thunderstorms, which are a stated seasonal risk in this market. The moment you hear hail or watch a storm roll through, assume you could be staring at unseen damage. Pelted shingles can crack, granules can shed, and flashing joints can bend without obvious signs on a quick once-over. If you notice loose granules in gutters, dimples on asphalt shingles, or curling edges, act fast. A quick, careful inspection from ground level can identify obvious bruising or lifted edges, but the real danger is inside the attic: damp insulation, dark streaks, or musty odors signal leaks that will worsen with every freeze-thaw cycle.
Insurers in this market commonly see wind and hail claims, so Sycamore roof decisions often start with photo documentation and a replacement-cost estimate before scope approval. Gather clear photos from multiple angles-seasoned professionals want both sunlit close-ups and wider views that show surrounding trees, gutters, and dormers. Include attic shots if you can access the space safely, focusing on any staining, mold, or moisture trails. When you have a contractor or public adjuster lined up, request a detailed estimate that explains shingle type, underlayment, and any flashing or vent work you anticipate. This documentation is a force multiplier: it shortens back-and-forth with the insurer and helps you move from assessment to action without delay.
Local contractor signals show strong demand for emergency repair, storm damage work, and insurance-claim help, indicating storm-driven roofing is a primary homeowner concern here. If a leak is actively dripping, you should tarp the area to prevent interior damage and call a trusted contractor who can initiate temporary mitigation while the claim is processed. Do not wait for a complete replacement if damage is isolated; a timely cover-up buys you weather protection while you pursue an approved scope. In parallel, request prompt roof scans from professionals who use drone or infrared methods to detect hidden damage along ridges, hips, and valleys where hail impact can be most severe yet least visible from the ground.
Once documentation is in hand, align with a contractor who understands local climate stresses-the freeze-thaw cycles coupled with spring hail create unique wear patterns. Expect insurers to scrutinize the replacement-cost estimate, so ensure the plan accounts for wind resistance, proper underlayment, and reinforced flashing around penetrations. If multiple layers exist, evaluate whether a full replacement is necessary or if a targeted repair could hold through the next storm season. In Sycamore, the goal is to compress the timeline from damage recognition to a durable, code-respecting fix, so prioritize crews with strong insurance claim experience and a track record of clear, timely communication. Stay vigilant for signs that the scope has expanded after initial assessment, and push for a written, itemized plan before authorizing work.
Tip Top Roofing & Construction
(815) 899-7663 tiptoproofing.com
2030 Coltonville Rd, Sycamore, Illinois
4.8 from 114 reviews
Tip Top Roofing & Construction is a trusted roofing contractor in St. Charles, IL, providing expert residential and commercial roofing services. We handle new construction, tear-offs, re-roofs, flat roofs, roof repairs, roof maintenance, inspections, and seamless gutter installation. Our team delivers prompt, professional service. Every project is assessed and backed by a detailed proposal within days. From minor roof repairs to complete system installations, we ensure high-quality workmanship with every job. Proudly serving St. Charles, IL, and surrounding areas. Call Tip Top Roofing & Construction today for a quote and see why we're a leading roofing contractor in St. Charles, IL.
C & R Roof Restoration
(815) 970-4288 www.crroofrestoration.com
439 Borden Ave, Sycamore, Illinois
4.9 from 42 reviews
At C&R Roof Restoration, we understand that you want to protect your building from water damage. To achieve that, you need a long-lasting, watertight roofing solution. The problem is, a total roof replacement can deplete your budget, leaving you apprehensive about contacting a professional. We believe that getting a leak-free roof shouldn't drain your resources, which is why we've helped thousands of business owners, just like you, save millions of dollars by restoring and waterproofing their existing roofs instead of replacing them.
A&G Exteriors
1146 Rose Dr, Sycamore, Illinois
5.0 from 2 reviews
10 years ago we started taking our direct contracts with clients and the recommendations made us solidify our goal of being a big company. Thanks to our hard work and dedication we decided to register our company in 2021 and since then we are 100% committed to our clients doing all kinds of work in roofing, siding, and gutters.
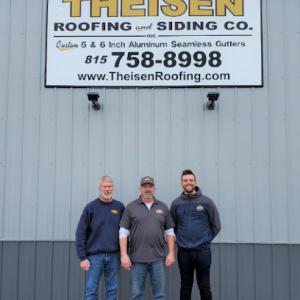
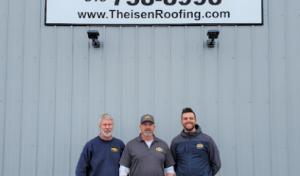
Theisen Roofing
(815) 758-8998 theisenroofing.com
Serving
4.9 from 92 reviews
Locally owned and operated since 1971, Theisen Roofing & Siding provides quality, professional roofing, gutter, and repair services in DeKalb and the surrounding areas. As third generation roofers, owners Jeff and Brian Theisen have over 30 years of experience in the industry, servicing residential homes, condominiums, apartment complexes and more.
Responsive Roofing
(815) 901-8860 www.responsiveroofing.com
Serving
5.0 from 220 reviews
For over 20 years, Responsive Roofing has been providing DeKalb and the surrounding areas with exemplary customer service and results that last.
Boss Roofing - Siding Experts
(815) 446-1564 bossroofingsiding.com
Serving
5.0 from 24 reviews
At Boss Roofing – Siding Experts in DeKalb, IL, we provide top-quality residential and commercial roofing, roof repairs, and full replacements using trusted materials like GAF. From storm damage restoration to updated shingles and routine maintenance, our licensed, insured team delivers dependable results. We also offer siding, seamless gutters, and gutter protection systems to keep your home protected and looking its best. With over 25 years of experience and a reputation for honest pricing and 5-star service, we’re DeKalb’s go-to exterior contractor. Free Estimates | Flexible Financing | GAF-Certified | Emergency Repairs Call or book online today!
DeKalb Roofing
(815) 501-3282 dekalbroofingil.com
Serving
4.7 from 35 reviews
For over 30 years, our roofing company has earned DeKalb's trust with hard work and care. We make sure to go above and beyond to protect your home, making sure to do everything right the first time so your roofing service lasts. We work around your schedule or what best fits your needs because we understand the importance of your investment. Our greatest concern is your home and satisfaction. When you need a professional and caring local roofing contractor, you can email, call or text any time.

SW Roofing
(815) 754-7663 www.sw-roofs.com
Serving
4.8 from 29 reviews
SW Roofing provides professional roof repair, roof replacement, and storm damage restoration for homeowners. Our experienced team specializes in hail damage inspections, insurance claim assistance, and high-quality roofing installations. We are fully licensed, insured, and committed to reliable workmanship and honest service.
MG Roofing & Siding
(815) 508-2233 www.mgroofing-siding.com
Serving
4.7 from 15 reviews
Founded in 2018, we are a fully insured and bonded contractor specializing in roofing, roofing repair, siding, and window installation for both residential and commercial properties. Our team is known for quality craftsmanship, clear communication, and dependable service from start to finish. Customer satisfaction is at the core of everything we do. We work closely with each client to understand their needs, provide honest recommendations, and deliver results that meet exact specifications. Whether you need a full roof replacement, storm damage repair, new siding, or updated windows, you can count on our attention to detail and commitment to excellence. Ready to get started? Contact us today for reliable service you can trust.
Pinkston-Tadd, Inc. Roofing Services
Serving
4.6 from 8 reviews
Pinkston-Tadd, Inc. Roofing Services provides residential and commercial roofing, sheet metal fabrication, welding, custom gutters and downspouts, and maintenance plans to the Chicagoland area and northern Illinois.
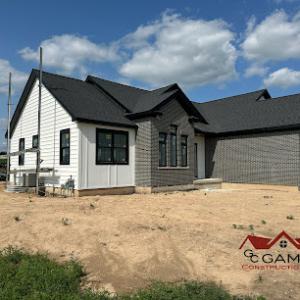
GC Gamez Construction & Roofing
(815) 766-1145 gcgamezconstruction.com
Serving
4.6 from 20 reviews
Gamez Construction is a trusted local contractor serving DeKalb, Sycamore, and surrounding areas. We specialize in roofing, siding, gutters, windows, and exterior renovations, delivering top-quality craftsmanship with every project. Our experienced team handles both residential and commercial work, always using premium materials and providing a 5-year workmanship warranty. Count on us for honest service, clear communication, and results that last. Call for a free estimate today!
Mullis Construction
Serving
5.0 from 3 reviews
Mullis Construction, in DeKalb, IL, is the area's leading roofing company serving DeKalb and all surrounding areas since 1991. We offer roofing, new construction, remodeling, additions, siding, farm building repairs and more. For all your roofing needs, contact Mullis Construction in DeKalb.
Cold winters with snow and repeated freeze-thaw cycles are a defining performance issue for roofs in this area. When temperatures swing above and below freezing, water trapped in shingles, underlayment, and joints freezes and expands, then contracts as it thaws. Over several seasons, that subtle creeping stress compounds, particularly around edges, penetrations, and valleys. In practice, this means small, almost invisible leaks can become noticeable after a thaw, and small soft spots can appear years earlier than homeowners expect. The risk isn't a single storm-the pattern is the enemy, wearing at the roof's fabric year after year.
The local climate stresses underlayment and roof joints during winter, making leak paths and flashing failures a bigger concern after thaw periods. When snow sits on a roof or windy conditions wick moisture toward seams, the cycle of freezing and thawing drives moisture under materials that aren't fully sealed. Flashing around vents, chimneys, and along valleys can loosen or crack under repeated stress, creating pathways for water that you don't notice until a warm day reveals a trickle inside. In Sycamore, where roofs commonly bear the brunt of heavy spring precipitation followed by rapid drying, those concealed weak spots are worth a cautious eye. After ice damming seasons, take note of any staining along eaves or attic condensation patterns-these can signal moisture migrating through the joints rather than from direct roof surface exposure.
Replacement scheduling is typically best from late spring to early fall in Sycamore because moderate conditions reduce weather-related installation complications. That timing aligns with the season when thaw cycles have largely settled, temperatures are steady, and crews can work with fewer weather-induced delays. If a thaw reveals a new water stain or if shingles show curling or lifting along ridges after a winter, consider a professional inspection before the next cold front. The goal is to address structural weaknesses before another harsh winter rolls in and compounds the existing stress on underlayment and flashing.
Keep routine inspections focused on the most vulnerable zones: valleys, step joints, and around penetrations. After heavy snows melt, a careful exterior check for soft or spongy spots can prevent an unnoticed leak from turning into ceiling damage. If you do see shingle edges puckering or a flashing seam lifting, plan a targeted repair rather than waiting for a full roof refresh. In this climate, timely inspection-driven maintenance often preserves the roof's integrity longer, reducing the chance that winter's freeze-thaw rhythm will push a small issue into a larger problem. Being proactive about spring-time checks helps you navigate the season without letting minor stress become a costly consequence.
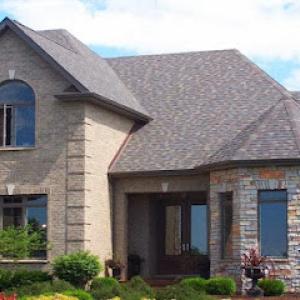
The dominant roof materials in Sycamore include asphalt shingles, metal roofing, clay tile, wood shingles or shakes, synthetic or composite shingles, and slate. In this market, every material must perform across a cycle of heavy winter snow, rapid freeze-thaw movement, spring hail, and summer sun. Your choice isn't only about curb appeal; it's about resilience to that steady mix of seasonal stressors. When evaluating options, start by matching a material's fundamental strengths to the way your roof experiences weather here: snow loads, ice dam risk, hail exposure, and UV aging.
Asphalt remains a go-to for many homes because it handles freeze-thaw cycles well and offers reliable performance under hail. In practical terms, it absorbs less heat than metal on sunny days, which can help with attic temperature control. Look for asphalt options with good impact resistance ratings if spring hail is a concern. If your roof has complex geometry or limited attic ventilation, asphalt can be a forgiving choice that balances protection with straightforward maintenance. For homes that see frequent temperature swings, consider architectural or thicker 3-tab varieties that tend to hold up better under repeated freezing and thawing.
Metal roofing is well suited to Sycamore's winter and spring pattern because it sheds snow efficiently and resists hail damage with minimal denting when installed with the right gauge and underlayment. It also ages more gracefully under UV exposure than some darker asphalt profiles. If you expect heavy snowfall or want a roof that lasts longer between major overhauls, metal offers a compelling benefit, though it comes with higher upfront install complexity and cost. Proper installation to seal seams and ensure good snow shedding flow is essential in this climate.
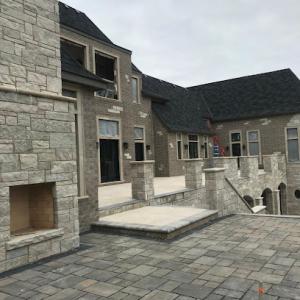
Clay tile and slate are present in the market but carry much higher installed cost ranges than asphalt and composite options in this city. They provide exceptional longevity and a timeless look, but their weight requires careful structural assessment. In snow-prone winters, these materials demand solid support and attention to freeze-thaw movement around fasteners and bedding. If the house already has compatible structure, these options can be resilient and aesthetically striking, but expect a longer lead time for installation and potential reinforcement needs.
Wood shingles or shakes bring a classic texture that some homeowners love, yet they can be more susceptible to moisture and hail scarring unless properly treated and maintained. Synthetic or composite shingles aim to blend a natural look with improved durability, offering better resistance to hail and UV aging than traditional wood in many cases. When considering these options, factor in local maintenance history and how the material behaves under freeze-thaw cycles alongside its ability to resist hail impact.
In the end, the best roof type for a given Sycamore home balances local weather realities with structural compatibility and maintenance expectations. Heavier systems such as clay tile and slate are present but require careful assessment of existing framing and budget for longer installation timelines. For most homes, asphalt, metal, or synthetic options provide a practical path forward, delivering robust performance across winter snow, spring hail, and summer sun without compromising on the long-term value of the roof.
Typical Sycamore pricing runs about $350 to $650 per square for asphalt shingles, $700 to $1100 for metal, $900 to $1800 for clay tile, $500 to $900 for wood shingles or shakes, $450 to $800 for synthetic or composite shingles, and $1100 to $1900 for slate. Those ranges reflect local crews balancing available labor, material sourcing, and the northern Illinois climate. In practice, a homeowner often sees the widest spread on metal or clay tile projects, where rapid demand shifts after a hail event can push both material availability and crew schedules. The base cost is only part of the picture; the total can move when a project has unusual details or extra components.
Storm-driven demand spikes after hail events can affect scheduling pressure and replacement pricing in Sycamore. After a hail storm, most homeowners call around in a short window, and many reputable roofers line up urgent inspections. If you're in the path of a spring storm, expect a tighter window for decision-making and more movement in lead times. Insurance-driven work tends to compress timelines even further, as adjusters aim to close claims within a reasonable season. The effect shows up not just in the price per square foot, but in the overall project timeline and the availability of preferred shingle profiles or specialized underlayment options.
Costs in Sycamore can also move based on material type, the need to coordinate permit review and inspections for full replacement, and whether the home has details like skylights or low-slope sections that complicate labor. Skylights, chimneys, and venting can add to both material and labor costs, particularly for ridge and valley work where precision matters. A straightforward attic-to-eave installation on a standard slope will run more predictably, while intricate roof lines or multiple penetrations can push the final figure upward. If a project requires more cutting, custom flashing, or enhanced wind mitigation, the per-square price climbs accordingly.
Get a clear picture of your project costs upfront - no commitment required.
In Sycamore, a building permit is required for a full roof replacement. That means you cannot start substantial roof work until the city has issued the permit. The moment you commit to a full replacement, your chosen contractor should prepare the necessary plans and submit them to the city building department. Expect a review window that checks for material compatibility with existing structures, ventilation considerations, and drainage alignment. This step helps ensure the new roof will perform through another round of northern Illinois freeze-thaw cycles and spring hail storms. If you're coordinating a storm-damaged roof, remind your contractor that the permit and plan submission still apply to a full replacement, not just a patch job.
The permit review in Sycamore is a collaborative step, not a formality. The city building department may request details such as roof deck integrity, attic ventilation adequacy, and flashing configurations around chimneys, skylights, and at intersections with exterior walls. Your contractor should respond promptly to any questions and supply revisions when needed. By the time work begins, you should have a clearly documented scope of replacement, including the chosen roofing system and underlayment, to align with code requirements. This process protects both you and the property by ensuring the roof can withstand the region's spring hail events and the winter freeze-thaw cycle.
Sycamore conducts inspections during the job and again after completion. Inspections during construction verify that the installation adheres to building codes and the approved plans, with particular attention to nailing patterns, underlayment installation, and proper venting. The final inspection serves as the official code compliance verification, confirming that all elements-from fascia to ridge cap-meet local standards. It's common for inspectors to walk the roof, check penetrations around vents and chimneys, and review attic ventilation to prevent future moisture issues. Planning for inspections means coordinating access with the contractor and having the on-site supervisor readily available to address any questions the inspector may raise. If a discrepancy is found during final review, timely corrections are typically required to secure the certificate of occupancy for the roof work.
Keep your contractor's permit submission and inspection schedules aligned with weather forecasts, because spring in this area can swing from sun to hail with little warning. Retain all permit documents, plan sheets, and inspection notices in a single project folder you can share if the building department requests them. Before starting, confirm who will accompany the inspector on the site and ensure access routes to the attic and roof are clear. A well-documented process helps protect your investment and reduces the risk of delays as you replace a roof that can stand up to Sycamore's climate and housing stock.
Sycamore sits in an Illinois insurance environment where wind and hail claims are common, so roof replacements often involve adjuster review of scope and materials. After a storm, the clock is ticking on getting a claim paid, but the adjuster's focus is not only on whether shingles are worn. They scrutinize whether the proposed repair or replacement aligns with the policy's stated terms. This can mean the difference between a partial settlement and a full, clear path to repairs that restore confidence in your home's protection during freeze-thaw cycles.
Insurers may require detailed photos and replacement-cost estimates before approving payment. Detailed photos should show the extent of missing, cracked, or accelerated wear, plus close-ups of damage to valleys, decking, fascia, and chimneys or vents. A quiet spring hailstorm can leave a mosaic of cosmetic marks that still trigger legitimate claims; the adjuster will compare these images to the policy's covered perils and limits. Replacement-cost estimates should come from a reputable roofer and clearly itemize materials, underlayment, and any auxiliary work. Keeping a pre- and post-storm archive helps show the progression of damage when negotiations stretch into weeks.
Coverage decisions can hinge on whether the documented damage and proposed materials align with policy terms, not just on whether the roof is old. For instance, the selected materials should be suitable for local wind loads and hail exposure, and the scope should reflect actual observed damage rather than an overly aggressive or undercautious reconstruction. When presenting documentation, emphasize how the plan meets durability needs for typical Illinois winters and the spring hail pattern. A consistent, professional file-photos dated by storm events, a clear scope of work, and matched material specs-reduces back-and-forth and helps move the claim toward a timely resolution that protects the home's integrity.
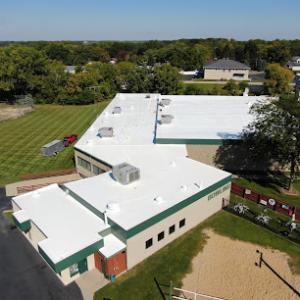
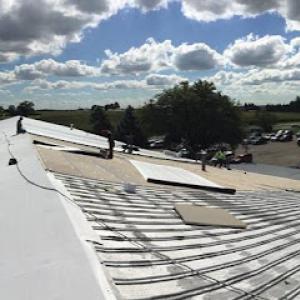
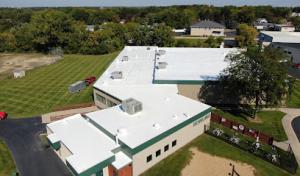
Active local contractor signals show meaningful demand in flat-roof work, indicating a notable share of homes or additions have low-slope sections needing different detailing than standard pitched roofs. In Sycamore's freeze-thaw winters and spring storm cycles, those low-slope areas are especially vulnerable to membrane wear, seam failures, and edge rust. When inspecting a flat or low-slope roof, focus on the membrane seams, flashing at vertical walls, and any field patches that look aged or sunlit. A suspected issue should trigger a closer look at drainage transitions and edge termination, where water can linger and creep under substrate if detailing isn't solid. A practical approach is to methodically check for blisters, loose ballast (if applicable), and any ponding that doesn't drain within 48 hours after a heavy thaw or rain.
Skylight-related roofing work is a meaningful local specialty signal, suggesting leak-prone roof penetrations are a recurring homeowner issue in this market. Skylights introduce two high-risk zones: the curb flashing where the unit sits and the interface between the skylight flange and the surrounding roofing material. In Sycamore, freeze-thaw cycles stress these joints between seasonal temps, and spring hail can drive granular damage right into the curb. When resealing or replacing a skylight, ensure the new flashing is continuous around the curb, with a properly sloped curb top and reinforced sealant at all edges. If the skylight is older or exhibits moisture trails in the attic, consider replacing the flanged unit with a model that has a thicker curb and upgraded flashing.
Freeze-thaw cycling and storm exposure in Sycamore make transitions, penetrations, and low-slope drainage details more consequential than on simple gable roofs. Retrofit considerations should emphasize improved edge drains, thicker underlayment at transitions, and properly sealed pipe-vent penetrations. For homeowners with attic access above a skylight or low-slope wing, verify that insulation does not impede drainage paths and that airflow around the skylight area remains unobstructed. Regular seasonal checks after winter thaws and spring hailstorms help catch capillary wicking or micro-leaks early, before they become interior damage.
Find specialists in TPO, EPDM, and built-up flat roofing systems for residential and commercial properties.
Tip Top Roofing & Construction
(815) 899-7663 tiptoproofing.com
2030 Coltonville Rd, Sycamore, Illinois
4.8 from 114 reviews
C & R Roof Restoration
(815) 970-4288 www.crroofrestoration.com
439 Borden Ave, Sycamore, Illinois
4.9 from 42 reviews
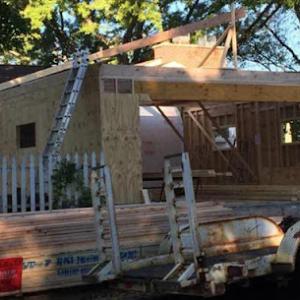
Re-roofing is the strongest market-character signal in Sycamore, showing that most homeowner demand centers on replacing aging roofs rather than pursuing specialty new-construction systems. After harsh northern Illinois winters and spring hail, many rooftops reach a point where repair proofs fail to hold, making a full replacement the practical path. Homeowners should expect the decision to re-roof to come from a practical assessment of long-term performance, not just cosmetic updates.
Spring hail and seasonal storms create debris challenges that matter in established neighborhoods. Cleanup is a common hiring priority, because tear-off debris management affects neighbor satisfaction and street cleanliness. When selecting a contractor, emphasize a crew that can contain and haul off shingles, nails, and underlayment quickly and safely. A well-organized cleanup plan minimizes street hazards and keeps driveways clear during the replacement window, which is especially critical in areas with mature trees and dense lot lines.
Warranty offerings appear in the market but are less prevalent than storm-response services, so homeowners should treat warranty terms as a differentiator rather than a baseline assumption. Look for coverage that complements local exposure to freeze-thaw cycles and hail impact. A solid warranty should address roof deck protection, underlayment performance, and finish integrity against wind uplift. In practice, compare the duration, transferability, and what specifically is covered after the crew departs, so the warranty provides real reassurance beyond initial installation.