Last updated: Apr 19, 2026
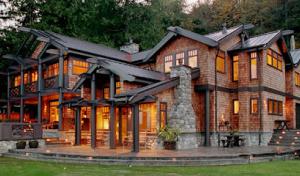
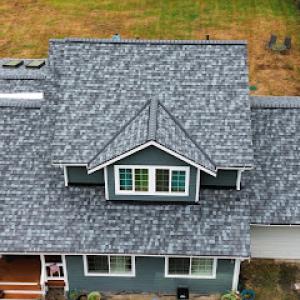
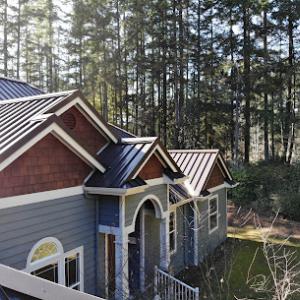
Bainbridge Island sits in central Puget Sound, so roofs are exposed to long damp seasons, frequent morning moisture, and slower drying than sunnier inland areas. That persistent dampness keeps a thin, waiting layer of moisture on shingles, shakes, and flashing, especially during the shoulder months. Over time, that pattern invites algae and moss to establish footholds on shaded roof planes. The island's mature evergreen canopy creates shaded roof planes where moss and algae persist, especially on north-facing slopes and under overhanging branches. When moss takes hold, it isn't just a green blemish; it acts like a sponge, holding moisture against the roofing material and accelerating wear, rot, and edge deterioration if left unchecked.
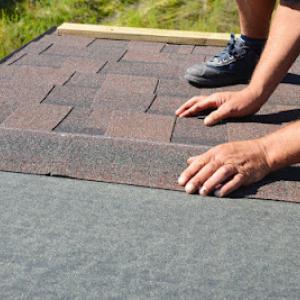
Cedar shakes are especially vulnerable here because repeated wetting can accelerate rot, splitting, and debris retention in a climate already known for moss pressure. That rot isn't always obvious at first glance: fibers weaken from the inside, gaps widen, and water can seep into underlayment and fasteners. The result can be early panel failure or nail-backout in wet years. Understanding this cycle helps you plan a preventative rhythm rather than chasing repairs after a water breakthrough.
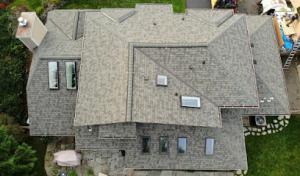
Signs of trouble show up where moisture lingers: north slopes remain damper, overhanging branches deposit shade and debris, and moss colonies take hold in crevices, joints, and at the ends of shakes. Look for a ragged, dark-green or black carpet-like growth, but don't ignore the meter-wide halo of lighter green around it-from algae that loves damp, shaded bark-adjacent surfaces. Check for granule loss on asphalt shingles, which can indicate aging under persistent moisture. On cedar shakes, inspect for curling, cupping, or soft boards under the moss, which signal accelerated rot from repeated wetting. If debris traps moisture against the surface, it compounds the problem, inviting more moss and slower drying.
Start with a seasonal inspection routine that respects the island's microclimate. In late winter or early spring, after the wettest months, walk the roof with a secure ladder and binoculars. Pay special attention to shaded zones under trees and on the north-facing face. Remove loose branches and canopy debris that trap moisture on the roof and scale down moss growth by clearing gutters and downspouts so that water can drain quickly rather than sit along the eaves. Use a plastic leaf rake or soft-bristle brush to disturb superficial moss and avoid aggressive scraping that can gouge cedar shakes or asphalt alike. If you use a chemical moss cleaner, select a product appropriate for cedar and asphalt surfaces and apply only to dry periods to prevent runoff that could affect garden plantings and the landscape beneath.
Ventilation matters as much as surface care. Ensure attic ventilation remains balanced with soffit and ridge vents, so moisture that does migrate upward can be vented rather than stagnate under roofing membranes. In shaded zones, consider widening overhangs or trimming branches where feasible to reduce perpetually damp microclimates without altering the tree canopy's value to the home.
Because cedar shakes are at higher risk on this island, prioritize keeping the shakes dry and free of debris. Install or maintain metal flashings at rake and valley intersections to deter water creep, and ensure sealant or caulk has not degraded where shakes meet flashing. Periodically inspect for soft, spongy boards, especially near valleys and hips, and plan for timely replacement of any compromised sections. A proactive approach-staging replacement of the most vulnerable boards after a damp winter-helps prevent larger rot failures later.
Document a simple, repeatable maintenance cadence: annual visual inspection, semi-annual gutter and debris clearance, and targeted moss control in high-risk shaded zones. When moss is present, treat areas with care to avoid harming surrounding vegetation and consider mechanical removal combined with a moss-suppressing solution designed for cedar or asphalt surfaces. If the roof is reaching the latter part of its service life, anticipate more frequent maintenance cycles and plan for a thorough inspection after each heavy wet season. The goal is to keep moisture from lingering long enough to invite rot, while preserving the natural character of the island's wooden roofs.
On this island, persistent moisture, shade from dense tree cover, and salt-air exposure push roof aging faster than inland markets. When planning any roof or skylight work, the window between wet seasons is the zone where dry-out, tear-off, and inspection can proceed with fewer weather-related delays. Here, wet winters routinely slow tear-off, drying, and inspection scheduling, so choosing the right moment matters more than elsewhere. A short lull in rains is not just convenient-it's a safeguard against lingering moisture that can trap underlayment, flashings, and fasteners in damp conditions. The window you lock in should maximize dry days, minimize wind-driven spray, and avoid the worst of the shoulder seasons when storms surge and logistics tighten.
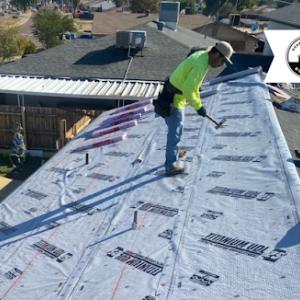
Spring storms and fall rain can interrupt active jobs on the island, which matters more where ferry-linked logistics and weather windows can already tighten scheduling. Your plan should target a solid block of consecutive dry days, ideally after the last heavy fall rains and before spring storms surge. Work with a crew that can pre-stage materials on the mainland or a sheltered site so limited weather delays don't cascade into weeks of downtime. Ask for a clearly written sequence: dry-in inspection, scaffold setup, tear-off (if applicable), underlayment inspection, flashing verification, and final wind-driven testing. A credible contractor will prioritize routes and staging that shorten exposure time for any attic or ceiling moisture to become an issue.
If timing shifts unavoidable, shore up interior protection and exterior drainage to reduce moisture intrusion. Seal soffits and interior gaps you can reach, and keep gutters clear so any incidental moisture has a clear path away from the roof line. Ask for temporary tarps or weather-resistant wrap to cover exposed openings during delays, ensuring no new moisture paths develop. Communication is key: insist on daily updates during shoulder-season windows when weather can flip quickly from drizzle to downpour. A reliable crew will circle back to recheck underlayment and flashing once drier days return so no moisture sits under materials when the final seal goes in.
Homeowners here benefit from booking before peak dry-season demand because emergency leak work rises after winter moisture exposure and stormy shoulder seasons. If a leak incident occurs during a late-winter or early-spring lull, a contractor who can pivot quickly to stabilize the roof without sacrificing long-term integrity is worth paying for. Choose a team that demonstrates immediate response capabilities, a clear plan for temporary leak control, and a transparent schedule for the full replacement once dry weather returns. In practice, secure your window of opportunity now, and treat the dry-season stretch as a critical, non-negotiable priority.
When you can't wait, these contractors offer fast response times to stop leaks and prevent further damage.


Roof Tec
(206) 488-7855 www.roof-tec.net
755 Winslow Way E Suite 310, Bainbridge Island, Washington
4.7 from 64 reviews
Roofing contractor. Roof Cleaning. Roof Repair.

Three Tree Roofing
(206) 210-3300 www.threetreeroofing.com
Serving
5.0 from 90 reviews
Finding the right Seattle roofer makes all the difference when it comes to protecting your property. At Three Tree Roofing, we bring years of experience, quality materials, and careful workmanship to every project. We know Seattle’s weather can be tough on roofs, so we focus on solutions that keep your property safe, dry, and comfortable year-round. Our friendly crew takes pride in clear communication, honest service, and treating every home like our own. From the first inspection to the final cleanup, we’re committed to making the process smooth and stress-free. With Three Tree Roofing, you get more than just a roof; you get peace of mind knowing your property is well protected for years to come.
Mountaintop Metal Roofing
(206) 339-9070 www.mountaintopmetalroofing.com
Serving
5.0 from 55 reviews
Specializing in standing seam panels and metal shingles, Mountaintop Metal Roofing safeguards Seattle homes with lifetime guaranteed roofing systems built for the Pacific Northwest. Choose from a variety of styles and colors for a beautiful, maintenance free roof that is backed with a lifetime, non-prorated, transferable warranty. Do it once. Do it right.

Fenix Roof Service
(425) 344-8709 www.fenixroofservice.com
Serving
4.9 from 186 reviews
Fenix Roof Service is a full-service Roof and Gutter company. We specialize in Roof/Gutter installation and Maintenance. We use state-of-the-art technologies during every project to ensure great results. We take the proper steps to preserve your home's integrity.
Hanley Construction
(360) 876-0870 www.hanleyroofing.com
Serving
5.0 from 588 reviews
Hanley Construction, located at 250 Bethel Avenue, is your go-to roofing contractor known for delivering top-notch roofing solutions that boost your property's durability and curb appeal. Kitsap County’s trusted roofing contractor since 1980, delivering expert residential and commercial roofing services with a focus on quality and professionalism. Our licensed, factory-trained team specialize Our team is committed to providing reliable and efficient service, ensuring the protection of your home or business against all weather conditions. Choose Hanley Construction for quality roofing services and experience the peace of mind that comes with knowing your roof is in expert hands. Contact us today to elevate your property's value and safety.
Hood Canal Roofing
(360) 689-0321 canalroofing.com
Serving
5.0 from 107 reviews
Proudly serving the Puget Sound! We specialize in roof inspections, roof repairs and full roof replacements in Pouslbo, Kingston, Bainbridge Island, Silverdale, Bremerton, Indianola, Suquamish, Gig Harbor, Port Gamble, Port Orchard, Port Ludlow, Hansville.
Kitsap Roof Pros
(360) 919-0374 kitsaproofpros.com
Serving
4.9 from 117 reviews
Kitsap Roof Pros is a local Roofing contractor providing dependable roofing solutions for homeowners and businesses. We handle residential roofing and commercial roofing, storm damage repair, gutter installation, roof maintenance, and roof cleaning, plus attic insulation and skylight installation to improve protection and efficiency. Licensed and insured in Washington, our team is known for punctual crews, clean job sites, and clear communication. Storm damage is a specialty, and we can guide the insurance claim process and be on-site with the adjuster when needed. Roof replacements include a 15–25 year in-house labor warranty, and 24/7 emergency roof support is available. Proudly serving Silverdale, WA and surrounding areas.

Interlock Metal Roofing (PNW) Inc. - Seattle
(206) 589-8423 www.washingtonmetalroofing.com
Serving
4.7 from 39 reviews
Choose Interlock Metal Roofing in Seattle, WA, trusted for over 28 years in the Pacific Northwest. As one of the largest roofing contractors in Western Washington, we're the top choice for residential and commercial metal roofing systems. Serving areas from Bellingham to Vancouver, our durable roofing solutions are designed to withstand the unique weather conditions of the PNW, ensuring superior protection and style for your home.
Berry Lake Home Services
(360) 443-0123 www.berrylakehome.com
Serving
4.9 from 34 reviews
Berry Lake Home Services is a Port Orchard, WA roofing contractor led by a team of experienced owners, dedicated to providing exceptional residential and commercial roof services. We are family-owned and are certified by the SBA and VA as a "Veteran-Owned Small Business."
Gurr Brothers of Seattle
(206) 627-0982 gurrbrothersroofing.com
Serving
4.9 from 108 reviews
At Gurr Brothers of Seattle, we pride ourselves on providing exceptional roofing services for both residential and commercial properties. Our team of experienced professionals are dedicated to delivering high-quality workmanship, fair pricing, and outstanding customer service. Trust us to keep your roof in top condition. Schedule a consultation today!

Spruce Properties
(360) 626-1908 www.sprucepropertiesnw.com
Serving
5.0 from 36 reviews
Spruce Properties is a trusted roofing contractor in Poulsbo, WA, specializing in professional roof replacement services for local homes and businesses. In the Pacific Northwest, constant rain, wind, and seasonal storms often cause wear, leaks, and moss growth, making timely roof replacement essential to protect your property. Our skilled team provides reliable solutions for shingle, metal, and flat roofing systems, ensuring durability against the area’s challenging weather conditions. With a commitment to quality workmanship and customer care, Spruce Properties is proud to be the choice for dependable and experienced roofers in Poulsbo and the surrounding communities.
Integrity Roofing & Construction
(360) 516-2478 integrityrc.com
Serving
4.8 from 642 reviews
Roofing, siding, and other construction services for residential and commercial properties.
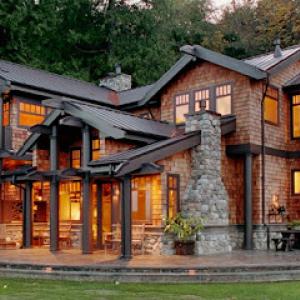
On this island, persistent moisture and shade from mature trees translate into a roof that ages differently than in drier parts of the state. The marine humidity pushes mold and moss growth, and salt air from Puget Sound adds a tang of mineral wear along the eaves and flashing. That combination makes moisture management a more central concern than sheer appearance or color choice. A roof that drains effectively, ventilates well, and deters moss growth will perform far longer in this climate. Your roof's aging will show up as faster granule loss, softer decking when leaks are present, and more frequent saturation cycles, especially after multi-day rainstorms that never quite stop. Keeping a roof dry and well-ventilated is not a cosmetic choice here; it's a functional one that protects insulation, framing, and interior surfaces.
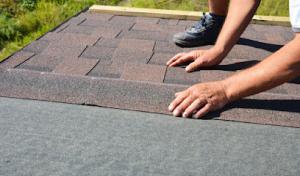
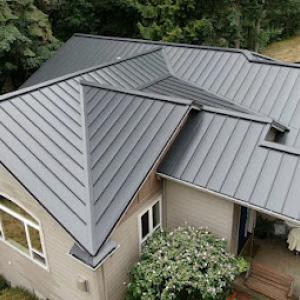
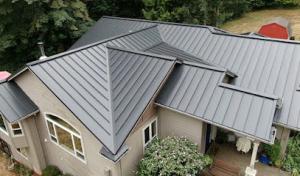
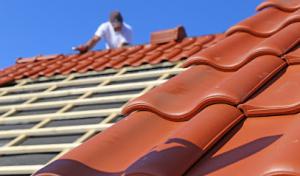
Asphalt shingles are common because they fit the island's large re-roofing market, but moisture management details matter more here than in drier Washington locations. Look for organic or fiberglass shingles rated for high-humidity climates, and pair them with a robust underlayment and careful flashing to steward water away from edges and penetrations. Standing seam metal is relevant not only for longevity but for shedding water efficiently during extended rainy periods typical of the Puget Sound climate. When installed with continuous eave and ridge details, this system reduces the chance of slow leaks at seams and can support higher attic ventilation, which helps dryness in the attic space and mitigate moss-friendly conditions on the roof surface. Concrete tile, synthetic slate, and synthetic/composite shingles appear in this market because higher-end custom homes often value curb appeal and dent-resistant performance, even if installation is more complex. These options can offer strong durability against moisture and a longer service life, but the roof structure must be prepared to carry heavier loads and the underlayment must be high-grade to handle the damp environment. Cedar shakes are an iconic choice around here, yet they demand rigorous maintenance against moss, rot-prone fasteners, and sealant upkeep to maintain water-tight seams and fire-resistance expectations. If cedar is selected, expect to commit to regular cleaning and protective coatings with a plan for eventual replacement in sections as needed.
Practical installation details matter more on the island. Ensure a continuous drip edge and a watertight valley system, with flashing integrated into the roof deck at all penetrations, chimneys, and skylights. A well-sealed, high-ventilation attic helps keep the roof system dry from below, slowing moisture-driven aging. Moss control becomes a proactive routine rather than a sporadic repair; consider a treatment plan that respects the local tree canopy and dew cycles, combined with periodic cleaning to prevent moisture from persisting on the surface. If choosing a metal roof, confirm panel seams are properly lapped and sealed to resist salt infiltration near shoreline-adjacent homes or coastal pockets. For heavier tile or slate options, verify the roof structure can bear the load and that moisture barriers align with the roof's geometry to avoid hidden rot. In all cases, select materials and profiles that balance water shedding with wind-driven rain resistance, ensuring that the roof remains a durable barrier through many Puget Sound wet seasons.
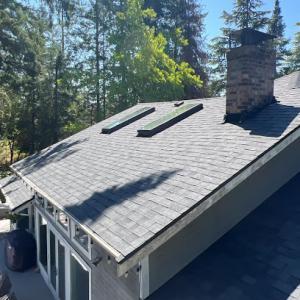
Skylights here are a popular way to pull in natural light during gray winters, a practical choice for homes with heavy tree cover and frequent shade. You'll likely see more skylight replacements or upgrades where aging seals and flashing have shown through decades of moisture on the island. When planning skylight work, expect a tighter emphasis on how the flashings meet the roof plane and how the surrounding shingles are integrated to avoid continuous wetting in the valleys and along eaves. In this microclimate, skylight projects don't just appear as a tidy accessory; they introduce new junctions where water can travel if the installation isn't meticulous from the outset.
Inspections in this jurisdiction specifically verify flashing, making penetrations like skylights and chimneys a local decision point during replacement rather than an afterthought. That means you should treat every penetrated area as a critical interface that deserves close inspection before any new roofing is installed. Be prepared for careful assessment of base flashing, curb flashing if applicable, and the transition between the skylight/frame and the roof. Chimneys, vent pipes, and stack penetrations require added attention to counter flashing and step flashing. The goal is a continuous, integrated waterproof seam that remains effective through winter storms and salt-laden air, not a surface fix that looks finished but leaks months later.
In a wet Puget Sound climate, leak complaints often center on flashing transitions and drainage details rather than purely heat-driven shingle failure. Pay particular attention to valley configurations, dormer connections, and the upstream drainage plan from the skylight or chimney. Clogged or misaligned gutters and downspouts can aggravate issues by backing up water into the roof deck around penetrations. If air circulation under the roof deck is restricted by dense shade or vegetation, moisture can linger and accelerate wear at flashing corners and sealants. In practice, this means you should schedule targeted inspections after heavy rains and during seasonal shifts, not only at the time of a roof replacement.
When planning work around skylights or chimneys, insist on a comprehensive flashing plan that demonstrates how each penetration ties into the main roof surface and drainage strategy. Ask for a detailed flashing diagram and a test after installation to confirm watertight performance in typical Puget Sound weather. Finally, consider routine, targeted checks around penetrations as part of your annual maintenance, especially after storms, to catch and address small failures before they become costly repairs.
Find contractors experienced in skylight installation, flashing, and leak repairs to bring natural light into your home.

Roof Tec
(206) 488-7855 www.roof-tec.net
755 Winslow Way E Suite 310, Bainbridge Island, Washington
4.7 from 64 reviews

Mountaintop Metal Roofing
(206) 339-9070 www.mountaintopmetalroofing.com
Serving
5.0 from 55 reviews
A full roof replacement in this area typically requires a building permit through the local city/county permitting process serving properties on the island. Begin by confirming that your project fits permit requirements with the jurisdiction that covers your property, and obtain the necessary application forms. The process often starts with a plan submission that details the chosen roofing materials, the roof's dimensions, ventilation strategy, flashing details, and drainage plan. Because the climate emphasizes moisture and shade, inspectors will expect clear documentation of moisture management measures and how moss control will be addressed.
Plan review is a standard early step. Your submission should show a coherent approach to flashing around chimneys, vents, skylights, and where roof planes meet walls. Ventilation plans matter here, since the island microclimate promotes damp conditions that can accelerate aging if attic air isn't properly vented. Drainage details are scrutinized as well, with attention to gutter connections, downspout outlets, and ensure runoff won't back up in the landscape or overwhelm island stormwater systems. If your roof includes cedar shakes, synthetic slates, or metal panels, be prepared to supplement drawings with manufacturer's installation manuals and any required warranty documentation demonstrating proper substrate and underlayment compatibility.
Inspections commonly check flashing integrity, ventilation installation, and drainage connections before final approval. A typical sequence includes a rough-in inspection after underlayment and flashing are installed, followed by a mid-project check as roofing material is placed, and a final inspection once all components are in place and the site is clean. On this island, inspectors will pay particular attention to how moss preventative measures are integrated into the roof edge details and vents, and whether attic or crawlspace ventilation remains unobstructed after the new roof is set. Be ready to demonstrate that all penetrations are sealed and that the roof meets the local standard for wind resistance and moisture control.
Contractors are expected to pull the permit and post the job-site permit notice, which is a visible compliance step homeowners should confirm before any work begins. Check that the posted notice includes the contractor's name, permit number, and project scope. If a plan review or inspection date is scheduled, note those dates and ensure the contractor provides access for inspectors. After approvals, maintain easy access to the permit card on-site and keep the notice visible throughout the project to demonstrate ongoing compliance to neighbors and future property records.
On this island, roof replacement pricing follows a blend of moisture-driven wear and distinctive local materials. Typical local pricing ranges from $350 to $900 per square for asphalt shingles, $800 to $1200 for concrete tile, $550 to $1000 for synthetic/composite shingles, $900 to $1800 for standing seam metal, $900 to $1500 for synthetic slate, and $700 to $1300 for cedar shakes. These bands reflect both material choices and the island's fiberglass-quiet moisture environment.
Costs on Bainbridge Island can rise when moisture damage is uncovered during tear-off, especially on older roofs where prolonged wet exposure has affected decking, ventilation paths, or flashing areas. A typical teardown may reveal plywood or boards with rot, bridging, or mold that needs careful handling. Each damaged deck square adds not only material costs but labor hours for removal, treatment, and re-anchoring of underlayment and new ventilation routes.
Island logistics, custom-home rooflines, and the prevalence of premium materials in parts of Bainbridge can push bids upward compared with simpler inland re-roof projects. Heavy or intricate profiles-such as cedar shakes, synthetic slate, or standing seams with multiple field seams-drive labor time, specialized fasteners, and staggered delivery. Expect crews to account for limited access, boat-season scheduling, and the need for protective measures against salt-air exposure during installation.
Plan for higher-than-average moisture-related contingencies, especially on aging homes. If the tear-off reveals extensive decking damage, line-item costs may surge beyond the initial material estimate. In contrast, newer or well-ventilated homes with intact flashing and underlayment tend to track closer to the lower ranges, with solid bids that focus on durable flashing, proper ventilation, and moisture-resistant shingles to last in this climate.
Get a clear picture of your project costs upfront - no commitment required.

In this maritime island climate, insurers expect a clear, verifiable trail of what happened to your roof after a storm or during ongoing moisture exposure. Documentation matters more than sensational headlines about coverage. Photos taken before and after any event, contractor estimates, and confirmation that work was performed are standard pieces you should assemble early in the process. The goal is to show a logical sequence: what condition existed, what storm or moisture event caused a change, and what repairs or replacements were needed to restore the roof's integrity.
Claim activity here tends to hinge on wind and seasonal storms rather than a statewide pullback in coverage. Sudden, high-wind damage can prompt quicker investigations, but a calm narrative with thorough records often wins the day when insurers review the claim. If a tree strike or flying debris tears into the roof edge or flashing, document the impact area with close-ups and a wider shot to place it in context. Then compare the pre-storm condition with the post-event reality to avoid disputes about preexisting wear.
Moisture-related deterioration can advance slowly in this shaded, moss-prone environment. When preparing claim records, separate sudden storm damage from long-term wear caused by persistent dampness. Keep a running log of when moss growth, granule loss, or soft spots appear, and tie those observations to dates of heavy rain, high tides, or winter storms. Insurers will look for a cause-effect link, so your notes should articulate how ongoing moisture may have contributed to deterioration alongside any isolated storm impacts.
If a claim involves both wind damage and moisture-driven aging, present the evidence in stages: first, the immediate damage from the event; second, the condition of surrounding roof areas influenced by continuous dampness; and third, the proposed repair plan or replacement that addresses both issues. A well-documented file reduces back-and-forth questions and helps demonstrate that repairs restore not just aesthetics but long-term weather resistance in this wooded, salt-air setting.
Connect with contractors who help homeowners navigate the claims process from damage assessment to final approval.
Mountaintop Metal Roofing
(206) 339-9070 www.mountaintopmetalroofing.com
Serving
5.0 from 55 reviews
Flat and low-slope roofing is an active specialty in this market, reflecting Bainbridge Island's mix of contemporary custom homes and additions. The marine island microclimate brings frequent cloudy days and extended rainfall, so water needs to shed quickly from all low-slope surfaces. The goal is not just a watertight plane but a system that drains reliably through the wet season and accommodates moss-prone conditions near shaded areas.
Extended rainy periods in the Puget Sound climate make drainage performance especially important on low-slope sections where water leaves the roof more slowly. Plan for a gentle but decisive slope, consistent deck drainage, and properly sized downspouts that lead away from foundations. Roof penetrations should be kept to a minimum and always flashed with materials rated for long-term exposure to moisture and salt spray. On Bainbridge Island, even small edge voids can trap damp air and invite moss growth, so every slope transition deserves close attention to how water glasses into the edge and into the drainage system.
Local inspections emphasize drainage details, so low-slope assemblies on Bainbridge need careful attention to transitions, edge conditions, and water-shedding design. Check that flashing around chimneys, skylights, and vent pipes remains continuous and uncracked. Edge details-counterflashing, gravel stops, and kickout flashing-should be inspected after each heavy rain to catch slow leaks before they spread. Pay special attention to deck-to-roof interfaces and parapets, which can trap moisture if not properly sloped and flashed.
Choose low-slope assemblies with proven performance in marine environments and with moss-resistance in mind. Regular cleaning of debris from around edges and drains helps sustain drainage efficiency. In shaded zones, consider proactive moss control and periodic resealing to preserve edge integrity. For new work, specify transitions that maintain uniform slope across joints and avoid abrupt changes that create ponding.
Find specialists in TPO, EPDM, and built-up flat roofing systems for residential and commercial properties.
Roof Tec
(206) 488-7855 www.roof-tec.net
755 Winslow Way E Suite 310, Bainbridge Island, Washington
4.7 from 64 reviews
On this island, warranty discussions often center less on a dramatic single event and more on long-term moisture exposure that quietly wears a roof year after year. When talking with contractors, you will notice that coverage expectations shift toward how well a roof manages persistent dampness, moss risk, and gradual degradation from salt air and shade. A meaningful warranty in this climate should articulate not only the materials warranty but also how the installer stands behind workmanship related to moisture intrusion, flashing, and drainage over time. Look for language that ties coverage to the specific island microclimate and the way it influences aging, rather than generic promises that assume dry summers and clean gutters.
Workmanship around flashing, ventilation, and drainage has outsized warranty importance here. Local inspections frequently verify these details because hidden or slowly developing failures in these areas are common under wet conditions and dense tree canopies. When evaluating warranties, ask the contractor to specify what is covered if a leak traces back to flashing joints, vent saddle integrity, roof-to-wall connections, or clogged/inefficient drainage. It's not enough to rely on a product label; the installer's workmanship warranty should align with how these elements perform under continuous moisture. A strong warranty will spell out inspection intervals and remedies if moisture-related issues emerge between routine checks.
For premium materials common in parts of the island, the warranty question extends beyond the manufacturer's coverage. Homeowners should compare whether the installer can support both manufacturer-backed coverage and local service after wet-season leak issues appear. Ask for a clear plan: who handles claims, how issues are documented, and what the typical turnaround is for addressing weather-driven concerns. Ensure the contract specifies that local service capability remains active for several years, since treated moss-prone areas or storms can reveal weaknesses that only prompt follow-up visits from a nearby crew. The goal is a warranty that remains practical in a climate where the seasonality of moisture, shade, and salt exposure repeatedly stress joints, seals, and venting.
Begin by requesting a written warranty outline that maps out moisture-related triggers, inspection cadence, and corrective steps. Have the contractor annotate how their flashing, ventilation, and drainage details are integrated with the warranty, including scenarios where maintenance or repairs may be needed to uphold coverage. For any premium material, verify local service availability and response times so that coverage translates into real-world protection when wet-season conditions intensify. In this market, a robust warranty is as essential as the roof itself.