Last updated: Apr 19, 2026
Spring and early summer storms push hail, thunder, and gusty winds through the North Shore with a force that tightens every homeowner's senses. In this area, shingles can shrug off a few blows, but the real risk sits beneath the surface: aging flashing, worn valleys, and roof-to-wall transitions that were solid a decade ago may now be vulnerable to wind-driven rain. Wilmette's older homes often rely on long-standing details like chimney cricket pans, step flashing at dormers, and integrated valleys that were not designed for the modern intensity of storms. After a big event, look for damp patches inside the attic, staining along ceiling lines, or a sudden drop in indoor air quality from moisture intrusion. If staining appears near a vertex or along a seam where two roof planes meet, treat it as a potential leak priority rather than a cosmetic issue. In this market, storm damage is a specialized call: quick, decisive assessment saves more than just drywall - it preserves the structural integrity of the roof assembly.
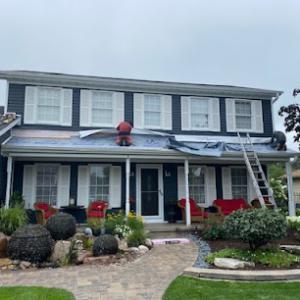
Time matters when wind-driven rain is involved. The first step is to keep you and your family safe, then minimize further exposure to the interior. If you observe active dripping or pooling, place a bucket and protect valuables, but avoid climbing onto slick surfaces to perform "one more quick fix." The right move is to document the damage from ground level and through any accessible attic hatch with fresh photos and video. These records are essential for insurance documentation and for a repair plan that you can trust. Contact a local contractor whose signals show emergency repair and storm damage as a core specialty; Wilmette homeowners report the fastest relief when the contractor can perform temporary tarping or board-up to prevent additional water intrusion while a permanent repair plan is drafted. Do not delay-temporary measures can stop further water entry and stabilize loose materials until a full roof cure is scheduled.
Many Wilmette homes rely on roof systems that were installed when wind and weather patterns were less severe, and the aging envelope shows it now after big storms. Flashing at chimneys and vent pipes often pulls away, and valley gutters can bend or become clogged with shingle grit, allowing rain to bypass the primary roof deck. Roof-to-wall transitions may reveal gaps where fascia or eave details have settled unevenly over the years. In these cases, water often travels laterally before dripping downward, which can disguise the true source of the leak. A knowledgeable local contractor will trace the leak to its root cause, which is rarely the obvious drip spot alone. Expect a careful evaluation of attic ventilation and the condition of underlayment layers, as good ventilation reduces condensation risks that mimic leak signs.
In Wilmette, insurers respond well to organized, precise documentation. Start with a clearly dated damage narrative, then attach timestamped photos and a short video walkthrough that highlights the most vulnerable roof edges, flashing, and transitions. For the adjuster's review, request a scope that includes temporary repair, a verified assessment of the roof's condition, and a phased plan that prioritizes safety and long-term reliability. Your chosen contractor can serve as your liaison, translating field findings into a clear repair path, and ensuring that the storm-damage report aligns with local expectations for older homes. Quick, accurate communication with the insurer supports timely approvals and reduces the risk of repeated leaks during the recovery.
When budgeting a re-roof, use these local ranges per square (1 square = 100 square feet) to gauge what a Wilmette project might cost. Asphalt shingles run from 350 to 650 per square. Metal roofing sits higher, from 700 to 1100 per square. Clay tile projects land between 1100 and 1800 per square, while concrete tile comes in around 900 to 1500 per square. For wood shingles or shakes, expect 600 to 1000 per square. Slate is the premium option, typically 1200 to 2400 per square. These figures reflect not just materials, but the labor profile in this market, including careful detailing around roof penetrations, chimneys, and edge detailing common on older, architecturally detailed homes.
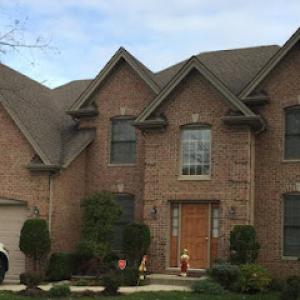
Wilmette's housing stock includes many older homes with distinctive trim, complex rooflines, and multiple chimneys. That means tear-offs often take longer than a straightforward box roof, and flashing work around multiple interfaces-where roof meets brick, stone, or decorative cornices-adds to the labor time. Matching material profiles to preserve curb appeal is a real consideration for any replacement. Contractors frequently spend additional hours coordinating color blends, shingle patterns, and any required underlayment or ventilation upgrades to respect historical lines while meeting modern performance standards. Expect the labor component to push the project toward the higher end of the ranges when the roof has multiple levels, dormers, or hipped sections.
Chicago-area storm surges and the North Shore climate can tighten contractor availability in peak season. The most common replacement window from late spring through early fall concentrates demand and pricing. If a storm creates urgent leak work or adds wind-driven damage, the scheduling bottlenecks can extend timelines and shift material access. When planning, consider a contingency for roof-tie-in work around chimneys and soffits, where shortages of skilled crews might delay start dates. In practice, you may see shorter lead times for asphalt and metal projects than for clay, concrete, or slate, which require more specialized crews and longer fabrication or sourcing cycles.
Start with a perimeter check of the roof-look for cracked seals around chimneys, vent collars, and any noticeable feathering of shingles near eaves. Document two things: the number of squares and the material you prefer, keeping in mind the local ranges. For historic or architecturally detailed homes, get at least two detailed bids that itemize tear-off, disposal, underlayment, flashing, and any necessary chimney or vent work. Ask contractors to show recent Wilmette projects with similar rooflines and note the time on tear-offs and re-nailing protocols. If a project involves multiple pitches or dormers, request a breakdown of staging, debris containment, and protection of landscaped beds. This focus can help align expectations with the realities of Wilmette's climate and housing stock, while maintaining a clear path from assessment to installation.
RVX Roofing Companies
(773) 862-8245 roofingwilmette.com
1251 Washington Ave, Wilmette, Illinois
5.0 from 41 reviews
RVX Roofing Companies & Contractors has been a leader among roofing companies for several years. If you need roofing contractors for commercial or residential work, our roofing company is your one-stop destination. Our roofing contractors have years of experience in this industry, and are some of the best you’ll find in any local roofing companies. We also have an incredible track record of customer service. When you work with a RVX Roofing Companies & Contractors, you’re hiring our entire customer service team. This means we’ll work with you personally on your project to ensure your satisfaction each step of the way. For industrial work, our commercial roofing contractors can re-roof, install, or repair metal, rubber, and flat roofing.
Shoreland Roofing
(847) 971-2426 shorelandroofing.com
1938 Lake Ave, Wilmette, Illinois
5.0 from 35 reviews
Shoreland Roofing is a residential and commercial roofing company based in Wilmette, IL. The family company began as Shoreland Construction, building spec homes in the Chicagoland area for over 20 years. Steven and Sue Tuchman (founders and owners of Shoreland construction and Shoreland Roofing) have experience in all aspects of construction and have gained extensive knowledge in roofing.
Lynch Roofing
(847) 217-0004 www.lynchroofing-il.com
809 Ridge Rd #206B, Wilmette, Illinois
4.9 from 44 reviews
Lynch Roofing has been serving Wilmette and the surrounding North Shore areas for 45+ years. Our experienced team specializes in Residential Roofing Services such as Roof inspections, repairs, replacement and new roof installation. We are a second generation family owned company who will always have an experienced supervisor on site.
Lakeland Exteriors & Roofing
(847) 395-8854 www.builtbylakeland.com
Serving
5.0 from 65 reviews
30 years as your roofing and exteriors expert. Commercial and residential roofing company providing repairs, maintenance and roof replacement

Zdanowicz Roofing Company
(224) 435-0924 roofing-glenview.com
Serving
4.9 from 43 reviews
For nearly 30 years, our roofing company has consistently served the people of Glenview, IL, offering high-quality roofing services at reasonable rates. We strive for greatness. This means our roofing company is considered first by every client looking to hire a roofing contractor. To ensure this, we provide a wide array of services, both commercial and residential, whether small or large scale. All our roofing options use quality materials to ensure your roof is not just lovely to look at, but durable for years to come. We aim to satisfy our clients above all else. Our team of highly capable professionals is here for you. For those with roofing needs in Glenview or close by, we’ll show you why we’re the best.
Greater Chicago Roofing - Skokie
(847) 929-9398 www.greaterchicagoroofing.com
Serving
5.0 from 51 reviews
Greater Chicago Roofing - Skokie is an experienced, well-established roofing company. No matter if you require roof installation, repairs or a complete replacement, you’ll be happy with the outcome of our services. Our staff has over 40 years of combined expertise in construction and roofing work. Our work quality is second to none and our dedication to our clients makes us the ideal choice. You can trust us to take care of the entire task - whether for commercial or residential property. We’re dedicated to customer complete satisfaction. We will always go the extra mile to give you excellent service. We also provide skylight and guttering services. Contact us now for your FREE estimate!
Safe Roofing Company
(224) 998-6056 roofing-skoki.com
Serving
5.0 from 29 reviews
Skokie, Illinois, is known for its long, cold winters, and having a reliable roof over your head is something you want to be confident about. Call in Safe Roofing Company for an inspection to make sure your shingles, downspouts, gutters, and flashings are all in good enough shape to keep you from moisture damage, ice-dam build-ups, and problems with debris and fallen branches. We offer excellent customer service backed up by our skilled contractors who can repair, replace, or maintain your commercial or residential roof, so it consistently performs to the best of its ability in the upcoming winter. Our contractors are the best in the business and will provide you with an affordable estimate and guide you through the process.
Warren's Roofing Company
(224) 998-6002 flatroofinginc.com
Serving
5.0 from 38 reviews
As Warren's Roofing Company, we serve you in Skokie and surroundings. Our mission has always been delivering you the finest roof installation, repair, and roof inspection that enables us to prevent more serious roof damages. The workers that we hire and well-trained and guide you every step of the roof installation or your roof repair in Skokie. We don’t accept any negligence and oversights. Keep in mind that having your roof installed and maintained properly is paramount to ensure your investment lasts for years. We do our best to supply you with the highest level of service that you’ll be truly glad about. Multiple roofing styles and materials are available. One call is definitely enough to start the cooperation.
Rosales Exteriors
(847) 406-6957 www.rosalesexteriors.com
Serving
4.9 from 36 reviews
Rosales Exteriors is a family owned business in the Lake County Area. We specialize in replacing, repairing, and installing Roof, Siding, and Gutters! Call us or Message us for a free estimate! We service many areas including Lake county, cook county, kenosha county and surrounding areas! - Local company - Small business Family owned and Operated - No Subcontractors - Fast free estimates - +20 Years of experience

RS Five
Serving
4.5 from 72 reviews
At RS Five, we’re more than just a roofing company — we’re a team of dedicated exterior specialists committed to protecting and enhancing homes across Chicagoland. With a deep understanding of roof replacement, siding installation, gutter guards, and storm damage restoration, we help homeowners navigate everything from routine repairs to complex insurance claims with ease and confidence. From your first consultation to final inspection, we pride ourselves on providing transparent communication, exceptional craftsmanship, and a seamless customer experience. Our expert team, including licensed Public Adjusters and skilled field professionals, is driven by results and built on trust.
RoofingSource
(800) 507-3177 www.roofingsource.com
Serving
4.9 from 47 reviews
The nation’s leading solution-focused rooftop partner.
Presidential Roofing
(847) 581-1040 www.presidentialroof.com
Serving
4.9 from 79 reviews
Presidential Roofing is residential, commercial and industrial roofing contractor committed to installing quality roofing systems that will provide our customers with years of problem free protection. Our purpose is to provide and install quality roofing systems that reflect the integrity of our company and the people we employ in a manner that is safe and cost efficient. Presidential Roofing was establishe in 1997 and is proudly serving entire Chicagoland since than. Owner of Presidential Roofing Tom Mikolajczyk is personaly involved in all of our projects insuring that our costumers are getting the best quality work at most affordable prices.We believe quality craftsmanship and design are just the beginning when instilling new r
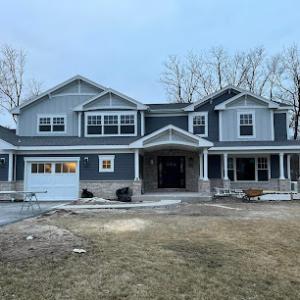
Wilmette's housing stock reflects a North Shore blend: standard suburban homes alongside older, higher-end properties that feature more distinctive roofing materials. The dominant options you'll encounter include asphalt shingles, metal, clay tile, concrete tile, wood shingles or shakes, and slate. Each material carries its own look, weight, and maintenance profile, and the choice often hinges on the surrounding architectural cues and how much of the roof you intend to replace at once. In this climate, with Lake Michigan exposure and the region's hail and freeze-thaw cycles, selecting a material that pairs well with the home's age and style while meeting performance needs is essential.
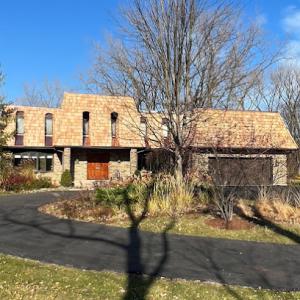
Wood shake and slate remain especially relevant in older, higher-end neighborhoods where appearance and material matching matter during partial repairs or full replacement. For a home with historic detailing or a steeply pitched roof, slate can honor the original character, while wood shakes deliver a traditional texture that complements timber trim and masonry. Metal roofing often suits contemporary or transitional designs yet can be integrated with traditional profiles when the profile and finish are chosen to echo the home's lines. Clay and concrete tiles bring a Mediterranean or Italianate sense of refinement that can suit villa-like or larger, timeless homes, while asphalt shingles offer practical versatility for a broad range of existing rooflines.
Heavy materials such as tile and slate can complicate replacement decisions on older homes if homeowners want to change systems, because structural or plan-review questions may arise when materials are changed. In Wilmette, some rafters or decking may have limited allowable spans, and the weight difference between a historic roof and a modern replacement can impact load calculations. When contemplating a switch from a lighter system to tile or slate, expect to evaluate roof framing, attic ventilation, and potential alterations to eaves or overhangs. A partial replacement that preserves key architectural cues-such as ridge lines, dormers, or decorative hips-often serves as a prudent bridge between preserving character and upgrading performance.
Given the lakefront exposure and the region's storm cycles, any material choice should emphasize wind resistance, leak resilience, and fast-drying capabilities after rain. Asphalt shingles provide reliable performance and ease of repair for typical storm scenarios, while metal offers outstanding wind uplift resistance when properly installed. Tile options, though durable, demand careful installation around penetrations and edge details to prevent leaks during freeze-thaw cycles. Clay and concrete tiles resist impact well but require a solid structural substrate and appropriate underlayment. Slate delivers exceptional longevity but carries higher installation complexity and cost, making it a decision that benefits from aligning with the home's style and structural readiness.
In this neighborhood, winter cycles aren't polite about small flaws. Chicago-area winter freeze-thaw cycles can widen small defects in shingles, flashing, and underlayment, turning minor wear into active leaks by late winter or spring. If a roof shows a hairline gap where shingles meet the vent stack or a loose edge of underlayment, the repeated freezing and thawing can push water deeper, even if the surface looks fine on a mid-fall inspection. The result is a leak that nearly always shows up after a few warm days and a bit of wind-driven melt.
Attic warmth and humidity matter just as much as the winter cold. Warm, humid summers in northeastern Illinois accelerate roof aging and make attic ventilation performance more important for shingle life and moisture control. Poor ventilation can cause heat to build up in the attic, softening asphalt granules, speeding wear on exposed edges, and drying out sealants that keep flashing water-tight. In practical terms, a well-ventilated attic helps keep shingles cooler and reduces the likelihood of moisture collecting at eaves and near penetrations. If soffit vents are blocked by insulation or dust, or roof vents are undersized for the attic space, the long-term health of the roof will suffer, especially on days when the sun is strong and the humidity is high.
Close attention to flashing, underlayment, and ventilation isn't optional in Wilmette; it's part of the core quality standard for any re-roof. The local permit and inspection process specifically checks flashing, underlayment, and ventilation, showing how central these details are in re-roofing work. That emphasis isn't a bureaucratic hurdle; it's a practical safeguard against leaks that can emerge years later when conditions align-high humidity, a strong wind, and a mid-winter thaw. A careful contractor will verify that flashing around chimneys, vents, and valleys is continuous, that underlayment properly overlaps and seals all transitions, and that roof ventilation paths remain clear and connected to the attic intake and exhaust.
For homeowners, this means planning around these realities. When you review materials and methods, ask specifically about how the system handles seasonal moisture and how attic ventilation paths will be preserved or upgraded. Expect scrutiny of how the roof transitions meet walls and how penetrations are sealed. If a contractor skips these details or glosses over the inspection steps, that is a warning signal-because the landscape here rewards diligent, detail-oriented workmanship that anticipates both freeze-thaw stress and humid summer cycles.
A full re-roof in Wilmette typically requires a permit through the Village of Wilmette Building Department. Before any nails go into the new roof, verify your project is properly registered and that a valid permit is pulled in the name of the property owner or contractor with the owner's authorization. The permit process helps ensure the work complies with local wind, fire, and ventilation standards that match the area's lakefront exposure and freeze-thaw cycles. Start this step as soon as you have a clear scope for the replacement, including the chosen roofing system and any attic ventilation upgrades.
Contractors generally submit plans as part of the permit package. In Wilmette, plan review may be triggered when there are changes to materials, roof slope adjustments, or structural conditions such as updated decking or flashing details. If the project sticks to standard asphalt shingles with no structural changes, plan review can be straightforward; if the roof line, chimney flashing, or eave detailing is altered, expect a more formal review. Have the contractor provide detailed drawings or manufacturer specifications showing underlayment type, flashing details around penetrations, and a venting strategy that satisfies both code and local expectations for this climate.
Inspections are commonly scheduled after roof removal and again at completion. The first inspection verifies that the removal was done properly and that the installation complies with code requirements for flashing, underlayment, and ventilation. The inspector will look at attic ventilation provisions to ensure there is adequate intake and exhaust, which is critical for Wilmette's winter performance and for preventing condensation issues in buildings with older stock. The final inspection confirms that the entire system is weather-tight and that all penetrations, skylights, and vents are correctly flashed and sealed. If adjustments are needed, the scheduling of additional visits should be coordinated through the Building Department and the contractor.
Keep the permit number handy and maintain a clear line of communication with the contractor about expected inspection dates. If a storm-led repair is involved, document pre-loss conditions and any temporary coverings to aid the inspector's review. Have visible access to the attic and roof line on the inspection day, and ensure ventilation openings remain accessible. For older homes with complex venting or historic detailing, confirm that any plan changes are resubmitted for review if the scope shifts during work. This approach helps avoid delays and keeps the project aligned with Wilmette's code expectations and the neighborhood's high-performance standards.
The Chicago-area hail and wind environment makes roof claims relatively common for Wilmette homeowners compared with calmer markets. Insurers often want detailed documentation such as condition reports, maintenance history, photos, and a professional roof assessment before approving or valuing a claim. Gather a clear record of any pre-existing issues, and organize it so an adjuster can quickly see the roof's baseline versus storm-related damage. A photo log taken before the claim, after the event, and at regular intervals since helps avoid disputes about what changed.
A thorough roof assessment from a licensed professional provides credibility when a claim is filed. Include notes on roof age, material type, and visible wear that might affect value or eligibility. Document any interior signs of damage such as attic leaks, staining, or mold, since these often tie back to the exterior condition. Timely, organized submissions reduce back-and-forth and help avoid delayed payouts. In ongoing storms, many insurers scrutinize whether maintenance issues contributed to the loss, so have maintenance history ready that demonstrates upstream care or reasonable mitigation.
Older roofs can face tighter underwriting or reduced coverage options, which matters in a village with many aging homes and legacy roofing materials. If the roof is near the end of its expected life, a claim may be valued differently, or substitutions could be considered. Noting upgrades, previous repairs, and any nonstandard materials helps an adjuster assess risk more accurately. When in doubt, prompt communication with the insurer about the observable damage and the roof's history can prevent surprises in settlement decisions.
Begin with a temporary leak mitigation plan to protect interior spaces, then contact the insurer promptly with your organized documentation. Insurance decisions hinge on clear evidence: the more you can show about condition, maintenance, and direct storm impact, the better the chances that a claim reflects actual loss rather than preexisting wear.
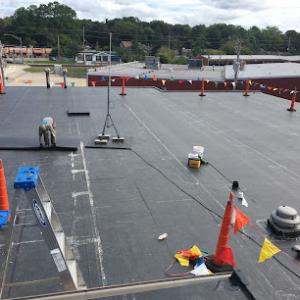
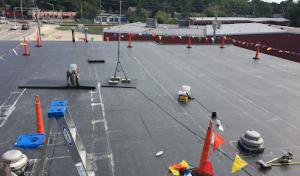
Even with many steep-slope homes around town, Wilmette shows meaningful demand for flat-roof work because some houses or additions feature low-slope sections that need specialized detailing. When evaluating a flat roof, focus on the edge detailing, parapet terminations, and proper drainage paths to the scuppers or internal drains. Pay close attention to transitions where low-slope planes meet vertical walls, as those are common leak points after freeze-thaw cycles and windy spring rain. A practical approach is to verify that the membrane is continuous across transitions and that fasteners are properly integrated with flashing, so wind-driven rain cannot find a path under the surface. Regular inspection after heavy storms helps catch micro-tears or blistering before it shows as a leak downstairs.
Skylight repair is a common specialty locally, aligning with leak-prone transitions during freeze-thaw cycles and wind-driven rain events. Inspect around the curb and flashing for any lifting, cracking, or membrane exposure. If condensation or puddling appears on the interior around a skylight, test the sealant and gasket integrity, and check the curb flashing for corrosion or sag. When a repair is needed, prioritize restoring the drain path and resealing the perimeter with materials compatible with the existing membrane. Remember that improper flashing or oversized flashing can pull in wind-driven moisture, so match installation detail to the existing roof pitch and local wind patterns.
Chimney-related roofing work is also a visible part of the market, reflecting the older housing stock where masonry intersections often become recurring leak points. Start with a careful assessment of chimney flashing, crown, and counterflashing, and inspect the joint between brick or stone and the roof deck. Tuckpointing or repointing may be necessary to restore a solid seal, and crown repairs help keep water from seeping into the roof plane. Ensure the chase and flashing at the chimney base are continuous across seasons, since even small gaps can channel water into attic spaces during heavy rain or thaw cycles.
Find specialists in TPO, EPDM, and built-up flat roofing systems for residential and commercial properties.
RVX Roofing Companies
(773) 862-8245 roofingwilmette.com
1251 Washington Ave, Wilmette, Illinois
5.0 from 41 reviews
Because storm-driven demand spikes in the Chicago area, Wilmette homeowners should expect many re-roofing and quick-response contractors competing for post-storm work. Start by identifying firms with a solid local track record and clear communication during crises. Prioritize those that can provide a proven response window, on-site scheduling that respects established residential lots, and a plan for protecting landscaping, driveways, and neighboring properties during the work.
Request multiple written estimates from firms with demonstrated Wilmette experience or a strong North Shore presence. Look for specifics: timeline milestones, protection measures for yards and driveways, and a plainly stated cleanup plan that minimizes debris on neighboring properties. Ask for a recent storm-repair project you can visit or a reference list with nearby homes similar in age and roof type. A long-established or family-owned firm often signals stability and reliable follow-through when storms bring rapid demand.
Cleanup is a major local hiring priority, which matters on established residential lots where landscaping, driveways, and neighboring properties are close and visible. Ensure the contract includes daily debris removal, proper disposal of torn underlayment, and gutter protection as part of the installation. During a site visit, verify access routes that won't trap vehicles or damage driveways, and confirm vendor responsibilities for protecting mature trees and landscaping edges that define Wilmette yards.
Long-established and family-owned firms are well represented in this market, suggesting homeowners here value stability and local reputation when hiring. Check how the contractor handles post-installation follow-ups, warranties, and a clear process for addressing any storm-related concerns that may arise after the project completes. A locally trusted crew often performs better under the seasonal wind, hail, and freeze-thaw cycles that shape Wilmette roofs.