Last updated: Apr 19, 2026
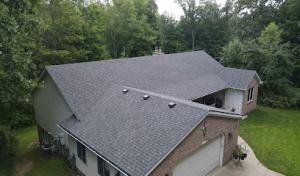
Waterford, MI has cold winters with repeated freeze-thaw cycles that are specifically noted as a roof-life factor in the area. When snow sits and then melts, refreezes at the eave line, creating ice dams that push water under shingles and into attic spaces. Lake-effect influences in and around Waterford can extend snow and moisture exposure compared with inland areas less affected by nearby water. That extra moisture means more repeated cycles where shingles crack, underlayment shifts, and ventilation gaps invite condensation. The result is faster deterioration of roofing components and a higher risk of hidden leaks that can show up long after a storm has passed.
In this climate, the telltale signals aren't just a ceiling stain after a thaw. Pay attention to a row of dark, damp shingles along the eave, pooled meltwater at the gutters, or a warm attic where insulation seems compressed or air leaks feel obvious around penetrations. Snow on the roof that remains in a ridge line while lower sections stay dry can indicate blocked drainage beneath the surface. If you hear or see dripping from ceiling fixtures, or feel a cold, drafty attic despite a heated home, those are urgent indicators to act-before water finds a path through to insulation and drywall. In Waterford's specific setup, delays in addressing even small leaks translate into rapid deterioration of underlayment and decking due to the rapid icing and reheating cycles.
First, clear safe, accessible areas around the eaves and form a plan to protect gutters and downspouts from ice buildup. Install temporary insulation blankets or use vented covers to reduce attic heat loss that fuels ice dam formation. If there is any sign of active leakage, place a clean, dry tarp or plastic sheeting over the problem area to direct moisture away from vulnerable ceilings and into a controlled drain path. Make sure attic ventilation is unobstructed: insufficient venting accelerates moisture buildup during thaw periods, especially where lake-effect snow lingers. Tighten or reseal any obvious air leaks around penetrations-pipes, chimneys, and electrical boxes-to minimize warm air rising into the attic space.
Seasonal planning matters more here than in milder climates. Upgrade or repair underlayment to a robust, ice-damming-resistant layer, and verify that the roof deck is fully ventilated with a clear flow path from soffits to ridge. Consider upgrading attic insulation to keep attic temperatures closer to living areas, reducing the heat that renders the eave edge vulnerable during thaw cycles. For roofs with multiple penetrations or older venting configurations, a targeted assessment can identify chokepoints where snow and meltwater linger. If you notice lingering snow piles on the roof after a storm, schedule a thorough inspection and targeted maintenance before the next freeze sets in. This city-specific pattern-cold winters, lake-influenced moisture, and limited workable roofing windows-demands proactive planning so a leak doesn't become a micro-surprise after the next thaw.
Spring in Waterford brings a sharp uptick in hail and storm activity that can rattle shingles, loosen granules, and crack flashing. Those gusty Michigan tempests hit roofs that have endured a long winter and leave developers of local homes scrambling to assess damage before a busy contractor schedule fills up. The risk isn't just in the impact marks visible on ridge caps or shingles; it's in wind-driven suction that can peel underlayment and lift edges, creating pathways for moisture to sneak in during thaw cycles. Your home's roof must withstand these real-time threats while you pursue a timely claim, so acting quickly with a clear plan matters.
Insurers in this region commonly ask for roof age, material type, recent storm history, and photo documentation when evaluating claims. A history of prior repairs, hail marks, and wind-related damage can tilt a claim toward acceptance or denial. If the roof is older or if the damage pattern lines up with multiple events, expect questions about how the system performed under freeze-thaw cycles. On reputable claims outcomes, a roof that demonstrates sound installation details-proper ventilation, underlayment, and evidence of wind-uplift resistance-tends to fare better. When the roof system appears compliant with local expectations for wind resistance and water shedding, the review process proceeds more smoothly.
Visible damage documentation drives the outcome. Take clear photos from ground level showing any dimples, granule loss, curling shingles, or lifted edges, plus close-ups of flashing and valleys. Capture attic photos if you can reach an access point safely, especially where insulation or decking shows moisture staining. Keep a dated log of storm events and any immediate leaks you noticed after a storm. If you have prior work done on the roof, include receipts or records that show the material type and installation date. This concrete record helps insurers correlate observed damage with specific weather events, and it supports a claim that the roof system met the region's performance expectations at the time of install.
When rain clouds gather in the spring, prepare a plan that moves quickly from storm sighting to documentation. Contact a local, reputable contractor who is familiar with Waterford's typical homes and the common roofing stocks used here. Schedule a preliminary assessment promptly after a storm, focusing on areas most exposed to hail and wind. Ask the roofer to photograph and log what they see, including any signs of soft decking, lifted shingles, or compromised flashing. Share this information with the insurer in a concise, organized package that includes your roof's age, material type, and a brief storm history. If a claim is approved, coordinate with the contractor to align the repair plan with the season's tight scheduling, ensuring the roof's vulnerable areas are protected during the remaining thaw cycles.
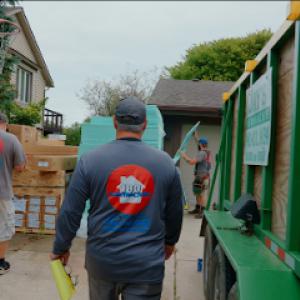
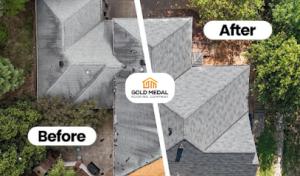
Find local contractors experienced in assessing and restoring roofs after hail, wind, and severe weather events.

BCM Roofing
Serving
4.9 from 334 reviews
Discover top-tier roofing solutions with BCM Roofing, your trusted full-service roofing contractor, serving Southeast Michigan since 2005. Specializing in residential and commercial roofing, we we ensure your property remains secure and energy-efficient. From residential storm damage roof repair to commercial roofing solutions, including flat and membrane systems, our expertise guarantees quality. Enhance your home with gutter, siding, and skylight installations or transform your space with composite decking. Our company offers a 50 year workmanship warranty, giving you peace of mind regarding knowing that your home is getting the best protection possible.

Roofing Solutions
(248) 599-9637 roofingsolutionsmi.com
Serving
4.9 from 27 reviews
We specialize in residential and commercial roofing, siding, gutters, gutter protection, repairs and exterior wood damage. Call for your free estimate.

Goral Construction
(248) 804-6933 goralconstructionllc.com
Serving
5.0 from 147 reviews
Goral Construction is a trusted, locally owned roofing and exterior contractor serving Waterford Township, MI and surrounding Oakland County communities. We specialize in roof replacement, roof repair, and storm damage restoration, including hail and wind damage roofing projects. Our team works with homeowners and insurance companies to handle insurance roof replacements, making the process smooth and stress free. We also provide professional siding installation and repair, gutter installation, and exterior restoration services. Whether you need emergency roof repair after a storm or a full roof replacement, we deliver quality workmanship, honest communication, and reliable service. Free inspections and estimates are available.
Gold Medal Roofing of Michigan
(248) 440-7985 www.goldmedalroofing.com
Serving
4.9 from 242 reviews
Gold Medal Roofing Company assists thousands of homeowners in getting roof repairs, or a completely new roof, through the insurance claims process. Let our team of licensed roofing contractors walk you through the process and help save you thousands of dollars! Book a FREE inspection today! We can do residential and commercial. Asphalt, flat roof materials and metal roof systems.
180 Contractors Roofing & Siding
(248) 573-3897 180contractors.com
Serving
5.0 from 241 reviews
Need a reliable roofing contractor in Metro Detroit? 180 Contractors is your award-winning, family-owned choice for roof replacement, roof repair, siding, windows, gutters, entry doors and attic insulation. From our Waterford headquarters we serve Oakland, Livingston and Wayne counties—including Waterford, Troy, Novi, Clarkston, Brighton and Howell—with certified Atlas & GAF installations backed by the Directorii $20K guarantee. Homeowners rave about our same-day quotes, flexible financing and spotless clean-up. Fully licensed, insured and A+ rated, we treat every house like our own and deliver craftsmanship that lasts.

Saint Roof
(248) 800-7663 www.saintroof.com
Serving
4.9 from 64 reviews
We are Saint Roof. A roofing company who cares for your roof. We’re proud to be a proven 5-Star Roofing Company who is relied upon for both repairs and replacements. We’ve been working on roofs for 35+ years and have served thousands of homeowners. Our leak-proof roof systems are tried and tested. We’d be honored to help you. Call us today! Let’s talk about your roof!
Kaiser Roofing
(248) 247-7893 www.kaiserroofing.com
Serving
5.0 from 17 reviews
Kaiser Roofing is your premier roofing contractor in the Waterford Township area. With a focus on quality craftsmanship and reliable service, we specialize in providing superior roofing solutions for both residential and commercial properties. Our experienced team is dedicated to protecting your home or business with durable materials and professional installation, ensuring your roof stands the test of time. Trust Kaiser Roofing for all your roofing needs, from new installations to essential repairs.
Drip Free Exteriors
(248) 342-8587 dripfreehome.com
Serving
5.0 from 13 reviews
Roofing & Exterior Services in Waterford, MI Drip Free Exteriors is a top-rated roofing contractor in Waterford, MI, specializing in roof replacements, roof repairs, siding, gutters and windows. With 20+ years of combined experience we proudly serve Oakland, Wayne, Washtenaw, Livingston, Genesee, Lapeer and Saint Clair Counties. Our licensed team delivers high-quality exterior remodeling with reliable service and competitive pricing. We handle storm damage, leaks, and full exterior upgrades. Get expert roofing and siding solutions from a trusted local company. Call today for your free quote!

Stable Roofing
(734) 743-8379 stableroofings.com
Serving
5.0 from 25 reviews
Stable Roofing is Metro Detroit’s trusted local roofing company, delivering quality craftsmanship and dependable service you can count on. We specialize in roof replacement, repair, and gutter installation for homes of all sizes. Our team takes pride in honest estimates, clear communication, and professional results—protecting your home while enhancing curb appeal. Whether it’s storm damage, leaks, or a full roof upgrade, Stable Roofing is here to keep your home safe, strong, and looking its best.

Olax Master Roofing
Serving
5.0 from 33 reviews
Welcome to Olax Master Roofing, your go-to roofing experts. With 20+ years of experience, we prioritize quality and customer satisfaction. Our certified team ensures expert craftsmanship using top-tier materials for durability. From inspections to installations, we offer comprehensive, timely, and affordable roofing solutions. Fully licensed and insured. Trust Olax Master Roofing for reliable, transparent, and customer-centric roofing services. Contact us for a free consultation. 🏠🔨✅

Roofing & Beyond
(248) 657-4144 roofingandbeyond.com
Serving
5.0 from 136 reviews
We specialize in Roof Replacement and Roof Repairs!
Guns&Hoses Roofing
(248) 681-3789 www.gunsandhosesroofing.com
Serving
5.0 from 35 reviews
Look at our photos on here all of them are examples of roofs needing repaired. If your roof looks like our photos posted then you need roof repairs! Our photos are all photographed by us on actual roofs that need repairing to show you roof issues. We specialize in roofing repairs only not complete roof replacement. Call us when you have roof issues and a new roof costing thousands of dollars is not in the budget. We do your basic roof repair like fix roof leaks, missing shingle repair, chimney flashing issues, vent issues, pipe stack boot repairs, flat roof repairs. All roofs require maintenance new and old roofs. If you have roof issues or have a aging roof get it inspected today by us the #1 company in roofing repairs Guns&Hoses Roofing.
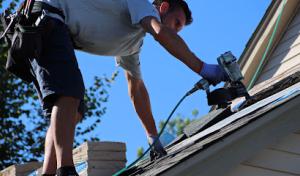
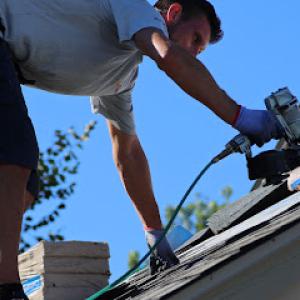
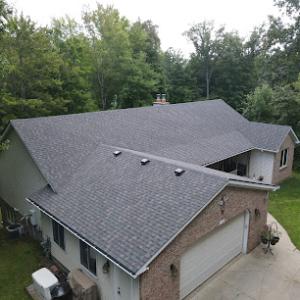
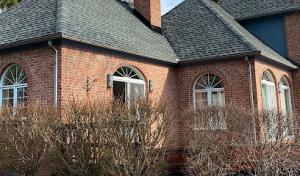
Asphalt shingles dominate the local market, and for good reason. They're familiar to most plumbers, carpenters, and homeowners, easy to repair, and align with the typical re-roof projects common in this area. In the lake-influenced climate, look for architectural or laminated shingles with good granule adhesion and a proven track record for resisting wind uplift and minor ice dam formation. When evaluating shingles, prioritize products with a strong grit layer and confirm compatibility with existing underlayment and attic ventilation. A solid install focuses on proper nailing patterns, adequate attic exhaust, and correct eave overhangs to help shed snow and reduce moisture buildup at the eave line.
Metal roofing stands out to homeowners who want reliable snow shedding and a long service life in freeze-thaw cycles. In this market, metal can deliver noticeable performance gains if installed with thoughtful detailing. Choose shingles or panels rated for appropriate wind uplift and consider concealed fasteners for cleaner lines and fewer leak paths. Pay attention to panel emphasis near eaves and penetrations-intersections, skylights, and chimneys need precise flashing to resist ice dams that form where warm attic air meets cold roof planes. Metal also benefits from a well-ventilated attic and a robust underlayment that can slip under metal panels to guard against condensation and ice near the soffits. If leaning toward metal for its longevity, pair it with a thicker underlayment and ensure the roof deck is watertight before installation.
Tile and slate offer excellent long-term durability and distinctive aesthetics, but the local installer pool tends to be narrower for these systems. Tile and slate require skilled, precise installation to maintain wind resistance and proper drainage, especially on steeper slopes where ice dams can still form if heat escapes into attic spaces. If choosing tile or slate, plan for careful detailing at hips, ridges, and penetrations, and verify that the chosen fasteners and underlayment are compatible with freeze-thaw expectations. With Waterford's inland-lake exposure, ensure the substrate is robust enough to support weight and that roof-to-wall connections accommodate movement during freeze cycles. Long-term performance hinges on meticulous installation and ongoing maintenance.
The decision path starts with aligning your home's roof shape, attic ventilation, and existing underlayment to the material's strengths. Asphalt shingles are the easiest to source and repair locally, with cost-effective maintenance paths and a broad installer base. Metal roofs reward a homeowner who prioritizes snow shedding, durability, and a higher upfront investment, especially when paired with a thoughtful ventilation strategy to minimize ice dam risk. Tile and slate appeal to durability-focused projects or homes seeking a distinctive look, but expect a narrower installer pool and more careful structural planning. In all cases, ensure the installation emphasizes proper ventilation, robust underlayment, and wind-uplift detailing-critical factors in this climate that influence ice dam resilience and long-term roof performance. For homes already with underlayment and vents, consult a local pro who can verify compatibility and tailor flashing details to the specific roof geometry and eave conditions. This tailored approach helps keep gutters clear, eaves well drained, and the roof surface resilient through the freezing seasons and thaw cycles that shape the Waterford weather scene.
Late spring through early fall is the best replacement window season for this area, because the climate pattern during those months tends to be more forgiving for sealant cure and frame installation. In practical terms, aim for windows to be installed when outdoor temperatures sit in a comfortable диапазон for caulking and adhesive work, and when the risk of sudden freeze-thaw cycles is lower. Scheduling during this window also leaves a buffer for any unexpected weather delays without pushing work into the tougher winter period.
The inland-lake exposure in this area can push moisture and temperature swings around the home, so choose windows with a tight, well-sealed nailing fin or flange installation and high-quality flashing. UV exposure in the summer matters, especially for vinyl or wood finishes, so look for coatings and glazing options that resist fading and heat transfer. Pay attention to the sealing system around sills and corners, since sun and heat can stress joints and accelerate wear on less robust products. In practice, specify reinforced glazing packs for glazing durability and insulated frames that keep interior comfort steady even when attic or rim-joist ventilation is challenged.
Fall leaf accumulation and wind can complicate moisture control if installation overlaps with debris buildup. Plan to complete interior air-sealing and exterior flashing before leaves start falling heavily, so inspectors can verify moisture barriers and drainage paths without debris interference. After installation, have a thorough blower-door or smoke-test-style check to ensure there are no hidden gaps around rough openings. With good strategies in place, the new unit resists wind-driven rain and ice dam risk better than aging windows, and the home dries out more consistently during spring thaws.
Get a clear picture of your project costs upfront - no commitment required.
When planning a re-roof project, know that Waterford Township generally requires a building permit for most re-roof work. This isn't a step to skip-the permit process is designed to catch issues before they become leaks or wind-hail problems. The township's Building Department will review your submitted plans for the roof, ensure they align with local codes, and issue the permit once everything checks out. If a contractor breezes past this without proper paperwork, you could face fines, mandatory removal of unpermitted work, or delays that stretch into the cold season. Treat the permit as the first line of defense against costly mistakes that can trigger ice dam damage in the next freeze-thaw cycle.
Plans should reflect details the Building Department expects to see: ventilation strategy, underlayment type and installation method, and wind-uplift considerations for the chosen roofing system. In Waterford, the inspector will specifically look for adequate attic ventilation to prevent condensation and ice dams, a proper underlayment layer for your climate, and fastener patterns that resist lift during gusty lake winds. If you're between shingle types, discuss options with a licensed contractor who understands how metal, synthetic, or tile roofs perform in inland-lake conditions. Submitting clear, complete drawings and product data helps the review move quickly and reduces the chance of a drawn-out back-and-forth that can hold up the permit.
Inspections occur during and after installation to verify the work meets code and the plans you approved. Expect at least one on-site inspection while the roof is being decked, another after the underlayment is in place, and a final walk-through once components are installed. The inspector will verify ventilation paths are unobstructed, underlayment overlaps and nailing are correct, and that wind-uplift details match the approved plan. If anything is out of spec, corrective work will be required before the project can advance or pass the interim inspection. Don't assume the work is "close enough"-Waterford's officers read the details, and the timeline can hinge on precision.
A final inspection is required to close out the permit. This closing step confirms the roof installation complies with all approved plans and current code, particularly ventilation, underlayment, and wind-uplift standards. If the final go-ahead isn't granted, the permit remains active, and you may face penalties or required removals before you can proceed with a proper solution. Treat the final inspection as your safety net against hidden flaws that would otherwise surface during the next winter thaw. Keeping all documentation, including manufacturer specs and inspection reports, accessible will smooth the path to a clean closeout.
Waterford's housing stock runs a broad gamut-from budget re-roofs to premium systems. Asphalt shingles still dominate, but metal, clay tile, concrete tile, synthetic/composite, and slate are common enough to create a wide local price spread. If you're replacing like-for-like, you'll see asphalt shingles on the lower end of the spectrum, with metal and tiles climbing toward the upper end. In practice, the range you'll see lands roughly from the mid to upper end of asphalt to premium offerings like slate or high-end composites, depending on your home style and roof complexity. This local mix means a project can swing significantly in cost based on material choice, roof pitch, and attic ventilation details that inspectors tend to scrutinize during re-roofs.
Freeze-thaw cycles and lake-influenced exposure shape both durability needs and long-term cost. Ice dams and wind uplift considerations drive emphasis on underlayment quality, drip edge, and proper ventilation. In Waterford, you'll want a system that resists ice buildup and sheds wind-driven snow efficiently. That translates into tighter installation standards and, occasionally, higher material grades or upgraded underlayment, which push the per-square price above the most basic options. If you're upgrading to metal or tiles, expect a higher upfront investment-but you'll gain resilience against repeated freeze-thaw cycles and potential ice-dam issues.
Storm activity can tighten scheduling and pressure pricing after severe weather, especially for re-roofs completed under tight timeframes. When a storm increases local demand, contractors may encounter shorter lead times and higher labor rates, even for standard asphalt replacements. If spring or early winter storms hit, you might see a quicker turn-around on bids but a tighter window for staging and inspections, with costs edging up accordingly.
For Waterford winters, pairing the right system with proper ventilation and a robust underlayment is a practical way to reduce long-term risk. Asphalt remains the most budget-conscious entry point, while metal and tile options offer enhanced wind resistance and ice-damming mitigation. Synthetic/composite shingles deliver a middle ground between price and performance, appealing when you want a durable, weather-ready roof without the premium for natural tile or slate.
Don't let upfront costs delay a critical repair - these contractors offer payment plans to fit your budget.
When a claim is considered, insurers commonly want a clear picture of the roof's age, the material used, and any recent storm history. That trio helps adjusters assess risk, replacement timelines, and depreciation. Gather purchase receipts, project notes, and any guarantees from the roofer, plus a brief maintenance history. Keeping this information organized not only expedites a settlement but also strengthens the position if a dispute arises over wear versus storm damage.
Adjusters serving this Michigan region may request photos and, in some cases, an on-site inspection, especially after hail or wind events. Have a current set of exterior photos showing all elevations, with close-ups of any hail hits, granule loss, curling shingles, or dented metal. If an inspection is scheduled, be present or designate a trusted representative and point out known vulnerabilities like vents, skylights, and valley areas that commonly suffer in freeze-thaw cycles. Provide clear dates for the most recent roofing work and note any patches or temporary repairs, as these details influence evaluation of damage versus pre-existing conditions.
Visible damage records can matter in claim handling, particularly after a severe winter or a lake-influenced storm. Keep a log of weather events with dates, photos labeled by area, and any contractor recommendations. If a repair or replacement has occurred, collect documentation that the work met local expectations for underlayment, ventilation, and wind-uplift details, which inspectors increasingly scrutinize after big storms. Clear alignment between documented damage, repair history, and local-style roofing (over shingles, metal, or synthetic options) reduces questions later and supports a smoother claim path.
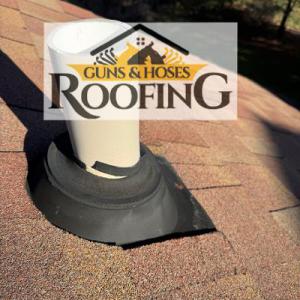
Homeowners in this area see a lot of leak-prone skylight penetrations after winter thaw and fast freeze. When a re-roof is planned, treat skylight flashing as a primary weather barrier, not an afterthought. Ensure the curb is solid, with properly mitered corners and a ventilated clearance above the flashing to prevent ice buildup. The flare around the skylight should shed water toward the shingles, not pool at the flange. In inland-lake winters, ice dam pressure can push against loose flashing, so an integrated sealant and metal counter-flashing set that extends onto the surrounding roof plane pays dividends. If a skylight is aged or warped, consider replacement with a pre-fab curb that's sized for the roof pitch and a compatible flashing boot. Regular inspection after heavy snows helps catch hairline leaks before they become drips.
Chimney work shows up often on older Southeast Michigan houses and merits careful attention to flashing where it meets the deck. Start with a solid base layer of underlayment around the chimney chase, then install step flashing that overlaps properly with the shingles. The base of the chimney should have corrosion-resistant metal counters and a self-sealing joint at the roof-to-flue transition. Water infiltration finds the thinnest path, so verify that sealant lines around brickwork haven't dried and cracked. If you notice staining on the ceiling around the chimney or damp mortar, address it promptly; a small adjustment now saves larger repairs after a freeze-thaw cycle.
Flat and low-slope roofs see annual attention for edge drainage and membrane integrity. In this climate, ice tends to back up at the eaves, so ensure slope and drainage are adequate and that the membrane laps onto higher-grade flashing at transitions. A robust edge detail with proper termination bars helps prevent wind uplift in winter days. For Waterford homes, choose a roof assembly that resists ponding, with a proven torch- or adhesive-applied membrane and compatible cap flashing at any penetrations. Regular resealing around penetrations reduces recurrent leaks in early spring.
Find contractors experienced in skylight installation, flashing, and leak repairs to bring natural light into your home.
In this market, homeowners look for crews that clean up after themselves, respond quickly to weather-driven issues, and keep projects affordable without cutting corners. When a contractor's reply is prompt after a storm or leak discovery, that's a strong signal that they'll stand by the job through to a solid finish. Look for local references and neighborhood familiarity-families that have worked with the same contractor year after year tend to know what works on Waterford homes, from shared roofer shortcuts to the quirks of common rooflines.
Waterford is known for long-established, family-owned and residential-focused contractors. Before selecting, ask for a few recent nearby projects and contact those homeowners about workmanship and cleanup performance. Notice whether the crew shows up with the familiar drive and respect that fits tight street layouts and driveways typical of the area. A contractor who blends into the neighborhood routine-getting to know the house, the trees, and the wind-swept eaves-often delivers more durable results, which matters when freeze-thaw cycles threaten the upper edge of the roof.
Because re-roofs in this town are frequently closeout-driven, comfort with final inspections is nonnegotiable. Ask for a walkthrough checklist that includes deck integrity, underlayment continuity, ventilation, and wind-uplift details. A solid candidate will explain how their crew protects landscaping, vents attic space, and handles ice-dam risk along eaves and parapets. Favor those who can narrate a clear plan for staging the tear-off, securing materials, and tidying the job site to minimize winter debris.
Direct questions about ice-dam solutions, drip edge installation, and attic ventilation reveal whether a contractor prioritizes resilience against lake-influenced winters. Expect practical explanations about how they seal transitions, crown molding around chimneys, and sealant choices for long-term performance. A trustworthy crew will tailor their method to your roster of prior repairs and the specific roof era of your home.