Last updated: Apr 19, 2026
Cold winters in this tight-knit North Jersey housing scene bring snow, ice, and brisk freeze-thaw cycles that turn small flashing flaws or loose shingles into active leaks in a heartbeat. A single winter storm can expose gaps around vent pipes, dormers, or chimney flashing that seemed minor in milder months. In Dover, where homes shoulder the most bitter stretches and storm severity can spike quickly, a tiny leak today can become a soggy attic tomorrow if not addressed fast. The short daylight, brittle roof edges, and compact rooflines on older stock mean you're more likely to see hidden damage show up as dripping from a ceiling or water staining along the eaves after a thaw followed by a freeze. Treat every thaw as a potential alert, not a reprieve.
When you notice water coming in during or after a winter thaw, act with purpose. First, keep the area safely contained-move valuables away from the path of dripping water and lay down absorbent material to limit secondary damage. Do a quick exterior check from ground level for obvious gaps around flashing, vents, or edges; if you spot damaged seals or loose flashings, document them with photos. Then reach for temporary containment: a sturdy tarp or plastic sheeting secured with weight and long screws or nails to prevent billowing in wind, plus a couple of sandbags on the lower edge to hold it in place. The goal is to keep water from cascading into the attic or living space while you arrange a prompt repair. In Dover, where storm-season urgency is part of the pace, you should rotate tarp positions after each major thaw or rain event to prevent slick buildup that can pull the tarp loose.
Temporary tarping isn't a fix, but it buys you critical hours when winter weather keeps you from scheduling a full roof replacement. Ensure the tarp overlaps the leak area sufficiently and extends onto intact roof surface to avoid wind-driven leaks around the edges. Seal the edges with roofing nails or heavy-duty staples and secure the perimeter with extra ballast-stones or heavy bricks-on the lower edge. Use a sealant at flashing joints only as a stopgap if you notice active seepage cresting around a particular seam, but don't rely on sealant as a long-term fix. If you're comfortable up on the ladder with clean, dry conditions, you can apply a temporary roof cement or a kit designed for emergency leaks to prevent further infiltration until a professional can evaluate. In cold snaps, handle ice and icicles with care; removing them safely can prevent punctures in a tarp or damaging ice from creating more leaks.
Winter exposure emphasizes the need for a plan that goes beyond quick fixes. If leak patterns persist after multiple storms, or you notice widespread moisture marks, it's a sign that the roof's overall integrity is compromised. In Dover, the pattern is to push full replacements toward the drier spring or fall windows, so a rapid, staged approach often begins with pinpoint repairs to protect the structure, followed by a scheduled replacement when outdoor conditions are favorable. The key is to coordinate quick-response teams for urgent repairs while aligning a larger replacement plan with longer dry spells. Early coordination helps prevent repeated winter emergencies and reduces the risk of interior damage building up session after session. A trusted local contractor with a track record for emergency response can document the damage, prioritize vulnerable spots, and arrange a cost- and time-efficient replacement plan that minimizes further exposure.
In this town, spring storms can unleash a tight mix of wind and heavy rain that stresses aging roofs built for older North Jersey layouts. Expect lifted shingles and flashing failures to show up during or right after these events, especially on roofs with age or prior weak spots. The pattern is practical to recognize: wind drives rain beneath the edges of shingles, and repeated downpours can push moisture into attic spaces or along eaves where underlayment has already started to wear. Winter ice can compound the damage, so an inspection after the thaw is not optional. The consequence is that small leaks left untreated become bigger issues quickly, often affecting ceilings, insulation, and interior finishes during a rain or melt cycle.
New Jersey homeowners may file wind or hail claims, but insurers commonly review roof age and maintenance history before approving full replacement. A claim can be denied or limited if the roof has significant wear, missing granules, curling shingles, or gaps around flashings that existed before the storm. The timing of the claim matters too: a rapid response after a storm can help demonstrate the roof's condition at the moment of impact, but stalled investigations or delayed reports may give the impression of preexisting issues. When a claim is approved, the insurer may press for a phased approach, where repairs address immediate leaks and replacement is considered if the roof's remaining life is short or the damage is widespread. Realistically, the setback for homeowners is not just the weather event itself, but the subsequent process of validation, scope agreement, and scheduling.
Documentation that matters includes photos of existing conditions before and after the storm, receipts for underlayment work or repairs, and evidence of wind-rated shingles when replacement is proposed. Make a dated record of any signs of moisture intrusion, including stained ceilings, musty attic spaces, and visible gaps around vents or skylights. Weather reports and incident timelines can support the narrative of impact timing. Keep copies of contractor estimates, material specifications, and any measurements that show the roof's coverage and compatibility with wind requirements. This collection becomes a practical trail when discussions shift from emergency leak patching to a planned, code-aligned replacement.
After a storm, the first step is a careful, daylight inspection from the ground and, if safe, from the roof with appropriate precautions. Look for lifted tabs, torn flashing, and damp insulation visible in attic spaces. Document everything with wide and close-up photos, noting date and location of each issue. If a contractor identifies underlying deck or underlayment concerns, get a written assessment that ties these conditions to observed leaks. Communicate clearly with the insurer about what is damaged versus what is aging material, and request a single comprehensive scope of work to avoid back-and-forth amendments. Understand that insurers will weigh the roof's age and maintenance history alongside the storm's impact when deciding on full replacement versus targeted repairs.
If multiple sections show bubbling, widespread flashing failures, or recurrent leaks across different seasons, replacement often becomes the prudent choice. A roof with signs of widespread wear may not withstand another wind-driven downpour or a heavy rain event without repeating problems. In contrast, small, well-documented patches that address the immediate leaks can buy time, but they should be part of a plan that accounts for the roof's remaining life and future weather expectations. In this town, a timely, well-documented intervention that aligns with wind and moisture resilience tends to reduce the risk of recurring damage and the stress of frequent temporary fixes.
Find local contractors experienced in assessing and restoring roofs after hail, wind, and severe weather events.
HM Contracting
(973) 229-9417 www.hmcontracting.com
37 Grant St, Dover, New Jersey
4.9 from 73 reviews
HM Contracting and Roof Specialists are a "one-stop" roofing shop. Our services include, Consultation, Preparation, Removal, Installation and Cleanup. HM Contracting has over 20+ years experience with installing and maintaining roofs in the Morris County NJ area.

Top Pro Roof Repair & Installation Dover
25-27 E Dickerson St # 201, Dover, New Jersey
5.0 from 7 reviews
At Top Pro Roof Repair & Installation Dover, we are committed to providing first-class roofing services to our valued customers in Dover, NJ, and beyond. With over a decade of experience, our team of experts is dedicated to delivering exceptional results with the utmost attention to detail. As your trusted roofing provider, we offer full-service solutions for your commercial or residential roofing project, including repairs, maintenance, and installations. Our customers are like family, which is why we always start with a repair before considering a replacement. Our goal is to save you time and money while still delivering the best possible results.

Above It All Roofing
(862) 485-3606 www.1aboveitallroofingllc.com
105B Bassett Hwy, Dover, New Jersey
5.0 from 4 reviews
Above It All Roofing, LLC provides silicone and polyurethane foam roofing services for commercial buildings in the Tri-State NJ area.
Stanley & Orke
(973) 627-2009 thestanleyway.com
165 Richards Ave, Dover, New Jersey
4.2 from 13 reviews
Stanley & Orke, Inc. was established in 1950 and has served customers in northern New Jersey performing roofing, sheet-metal and siding services. Stanley & Orke, Inc. acquired Benson & Bostrom Roofing Company in 1960, and since that time, both companies have been operated by the same family ownership. Benson & Bostrom was established in 1931 and operated under the same management until it was acquired by Stanley & Orke, Inc. Our services include installation of new roofing systems for both residential and commercial buildings. We also specialize in difficult projects including removal and disposal of old roofing systems and insulation as well as major reconstruction of roof decking, girders, rafters and other support members.

Fania Roofing
(973) 361-9151 www.faniaroofing.com
271 E Blackwell St, Dover, New Jersey
3.8 from 23 reviews
The Fania Roofing Company has been providing our clients with quality residential roofing, specialty roofing, and commercial roofing services, including roofing repairs since 1947. We will work with you to ensure your roof is well-suited to the design of your home or building and meets your needs and budget. We are the premier commercial and residential roofing choice throughout Northern New Jersey. We offer specialty roofing inspections, replacement, installation, and repairs for the following roofing types: wood shake and shingle, slate, tile, asphalt shingle, metal, and synthetic. The Fania Roofing Company are charter members of the National Slate Association.
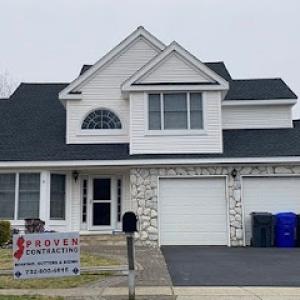
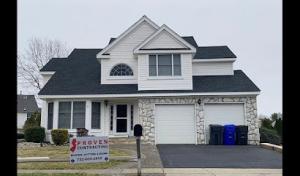
Proven Contracting of Randolph
(862) 412-1608 provencontractingnj.com
Serving
5.0 from 57 reviews
Proven Contracting proudly serves Randolph, NJ, and nearby communities including Dover, Chatham, Madison, Denville, Franklin, Ringwood, Hardyston, Hopatcong, Florham Park, Sparta, Pompton Lakes, Mountain Lakes, Rockaway, Stanhope, Vernon, Harding Township, Mendham Township, and throughout Morris and Sussex Counties. We specialize in roof repair, roof replacement, gutters, siding, and window installation. Homeowners trust our experienced roofers for quality craftsmanship, reliable service, and long-lasting results. For expert roofing and exterior solutions in and around Randolph, call Proven Contracting today.
Splendid Roofing & Chimney
(201) 745-4923 splendidconstructionnj.com
Serving
5.0 from 150 reviews
Splendid Roofing Company is a family-owned and operated business based in Montville, NJ, providing 24/7 comprehensive exterior solutions across New Jersey. Specializing in roofing, chimneys, gutters, and siding, the company handles everything from routine maintenance (like cleaning) to emergency repairs and full roof installations. Known for exceptional customer service, they offer free estimates and round-the-clock availability to ensure total homeowner satisfaction.
Nagy Roof & Repair
(973) 657-6249 nagyroofandrepair.com
Serving
5.0 from 76 reviews
Nagy Roof and Repair is an owner-operated roofing company based in Morristown, NJ, serving Morris County, NJ. I specialize in roof repairs, leak diagnoses, and full roof replacements. I’m on site for every job, explain your options clearly, pros and cons of repair vs replacement—not pressure sales. Homeowners choose Nagy Roof and Repair for honest advice, clean workmanship, and reliable results. Fully Insured, Bonded, and Licensed.
A1-Armor Construction
289 Mt Hope Ave, Dover, New Jersey
5.0 from 2 reviews
A1armor provides all chimney maintenance services. Chimney cleaning is essential to avoid potential fires, get a free inspection to determine if a chimney sweeps or relining is needed. Roofing repairs and new installations are also provided.

Cipollini Roofing
(973) 989-1110 www.cipolliniroofing.com
171 E Blackwell St, Dover, New Jersey
3.7 from 6 reviews
Since 1987 we have been in the business of roofing and sheet metal contracting, delivering satisfaction to building owners in the larger tri-state area. Our commitment to excellence earned us recognition from both roofing manufacturers and customers alike. P. Cipollini is a certified GAF Master Select roofing contractor – an award given to the top 1% of roofers in the U.S. P. Cipollini is certified by the State of New Jersey Department of Property Management and Construction, NJ Schools Construction, and registered as a Public Works Contractor.

Top Quality Home Renovation
(973) 932-3404 www.topqualityhr.com
Serving
5.0 from 111 reviews
Your roof (and your basement or foundation) are the most essential elements of your home. Without a properly functioning roof, shingles, or gutters, you could be faced with damaged shingles that let water into your attic. This can not only damage any belongings you have stored in your attic, Water in the attic is never a good thing, and it’s best to replace your shingles when they need it. If you find yourself in this situation, give Top Quality Home Renovation of Mine Hall, N.J., a call today. They can prevent damage and flooding and save you money, as well as the time and effort to find a roofing company like Top Quality Home Renovation to come out and install a new roof or repair an older one.
DeVito Roofing
(973) 398-4092 devitoroofing.com
Serving
4.8 from 50 reviews
DeVito Roofing provides roofing, gutters, and downspout services to Mine Hill, New Jersey, and surrounding areas.
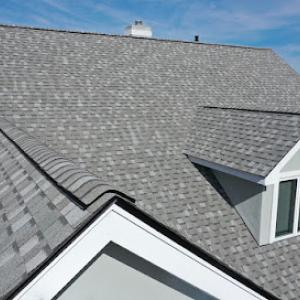
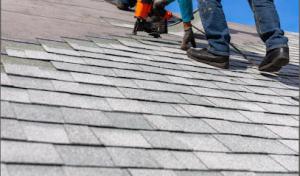
Asphalt shingles are the most practical fit for much of Dover because they align with the area's re-roofing-heavy market and broad contractor availability. They install quickly, handle typical Dover winter moisture well enough, and offer a wide range of profiles to match older homes with tight eaves and small rafter spans. If you expect frequent winter storms or fast leak response, asphalt remains the most predictable option for a first replacement or a temporary fix that buys time.
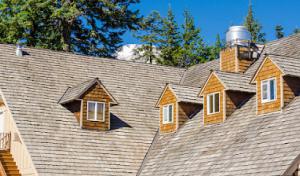
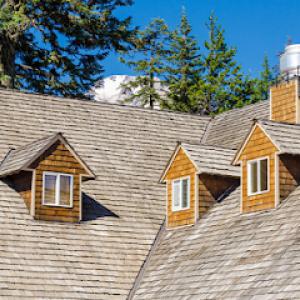
Metal, slate, clay tile, concrete tile, and wood shakes are all present in the market, but their suitability in Dover is strongly affected by winter snow stress, summer expansion, and the structural demands of heavier systems. Metal can shed snow efficiently when installed with proper overhangs and edge details; it also takes a beating from freeze-thaw cycles if coatings and closures aren't maintained. Slate and concrete tile resist impact and last long, yet their weight drives structural checks and careful attachment in older, tightly spaced homes. Clay tile provides a distinct look but can be brittle in cold snaps and requires precise framing. Wood shakes offer texture but demand solid maintenance to resist moisture and fungal decay in the shoulder seasons. In practice, choose a heavier system only if the roof and attic framing are verified to support it, and if the existing drainage and gutter layout can handle the load.
Dover experiences winter stress that tests every roof material differently. The roof should manage snow retention without excessive ice dam formation, and any surface should shed water efficiently after thaw. Materials with strong low-temperature performance and robust seals at penetrations tend to fare better in this climate. Whichever option is selected, confirm that flashing around chimneys, vents, and dormers is compatible with the chosen system to minimize ice-related leaks during late-winter thaws.
A practical approach is to match material choice to the house's age, design, and typical storm sequence. For many homes, a lightweight, quickly installed system that tolerates Dover winters while keeping leaks out during melt cycles provides reliable performance until a larger re-cover can be scheduled in spring or fall. Regular checks after heavy snow events help catch issues before they become widespread. Keep a close eye on attic ventilation and underlayment choices as you decide.
In this area, a full roof replacement is not treated as permit-free maintenance. Dover requires a building permit to ensure the replacement meets current codes and safety standards. The roofing contractor typically handles the filing with the Dover Building Department, and the permit is issued after the project scope is reviewed and the applicable fee is paid. Understanding this process helps avoid last-minute delays when winter storms demand a fast fix, since a permit lapse or incomplete submission can stall work right when weather windows are narrow.
Your contractor should present a clear scope of work that matches the actual roof profile, venting strategy, and insulation details planned for the replacement. This department review focuses on ventilation adequacy, attic space considerations, and drainage alignment with the existing structure. Having a precise scope minimizes back-and-forth and reduces the chance of delays caused by questions about roof penetrations, skylights, or chimney flashing. Prepare to supply any required drawings, product specifications, and installation methods as part of the review package.
A final inspection is typically required to verify installation quality, ventilation, and code compliance before a Certificate of Completion is issued. The inspector will look for proper ice and water shield placement in vulnerable Dover details, secure fastener patterns, and correct nailing for the chosen roofing material. Ventilation provisions, including dual intake and exhaust balance, are part of the assessment to prevent moisture buildup in tightly spaced historic or newer compact housing stock. Expect the inspector to check flashing around walls and dormers, the integrity of roof-to-wall connections, and the correct treatment of eaves and rake edges. If anything does not meet code, a correction notice will be issued with a defined timeline for compliance.
Coordinate the timing of permit approval with weather forecasts that show a reliable stretch of dry days. The final inspection cannot be scheduled until the work reaches substantial completion, so maintaining daily progress updates with the contractor helps align the inspection window with the inspector's availability. In neighborhoods with older housing stock and close lot lines, the inspector may also check for proper alignment with adjacent structures and safe access for the inspection crew. Plan around seasonal demands and the permit processing timeline to minimize the risk of rain infiltration during the re-roofing phase.
Ensure any roof penetrations for ventilation or exhaust are clearly marked in the project scope, and request updated attic ventilation calculations if modifications are planned. Confirm that the contractor's waste disposal plan aligns with local curbside restrictions and that debris containment is in place to protect winter pathways and neighboring properties. Finally, keep a dedicated contact at the Building Department and a copy of the permit card handy during the project in case the inspector requests quick clarifications.
In this market, the typical price spread reflects the common roof types you'll encounter on tighter North Jersey housing stock. Asphalt shingles run roughly from $350 to $650 per square (a square equals 100 square feet). Metal roofing sits higher, about $700 to $1,200 per square. Clay tile generally lands in the $900 to $1,800 per square range, while concrete tile runs $800 to $1,500 per square. Wood shingles or shakes are usually $450 to $900 per square, and slate clocks in from $1,200 to $2,600 per square. These ranges are-shaped by local traits like older tear-offs, chimney complexities, and the need to navigate closely spaced homes.
Winter weather changes the math. When a storm leaves leaks or structural stress, urgent temporary fixes may be required before a full replacement window opens in spring or fall. That rush work can push up material handling costs, scaffold time, and the labor needed to seal gaps quickly without delaying the next major phase. In practice, you'll see a bump in overall costs if you're moving from a temporary patch to a complete roof replacement in the middle of winter or rushing to secure a weather-tight condition before a seasonal window.
Final pricing in this market reflects more than the raw material price. Older roof tear-offs add labor and disposal complexity, especially when attic access is tight or roof lines weave around chimneys and dormers. Chimney flashing complexity raises material and labor hours because flashing must integrate with existing masonry without leaks. The labor required to work around tightly spaced properties also matters: you may need extra crew coordination, careful staging, or smaller equipment, all of which can nudge the bottom line upward. If the project includes more intricate tile or slate work to match existing visual rhythm, expect the price to trend higher within the ranges noted above.
Don't let upfront costs delay a critical repair - these contractors offer payment plans to fit your budget.
CKG Contractors Inc. New Roofs-Roof Repairs.
(973) 599-0811 ckgcontractors.com
Serving
4.8 from 150 reviews
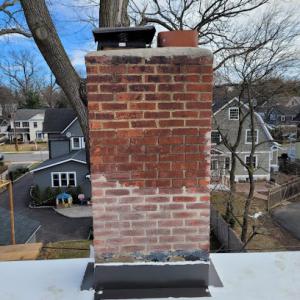
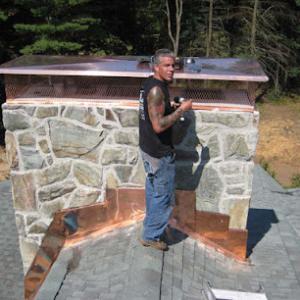
Chimney work in this market tends to be highly visible once finished, so flashing transitions from masonry to roof are front-and-center for homeowners. Winter freeze-thaw cycles stress mortar joints and metal flashings alike, and a sloppy transition can show up as slow leaks or damp patches well after the storm. When a contractor talks about chimney flashing, look for proper integration with the chimney chase, counter-flashing along brick or stone, and a continuous, corrosion-resistant metal path down onto the roof deck. If those details aren't addressed, you may end up chasing water intrusion every spring, even when the rest of the roof seems sound.
Skylight service is common locally, and failure often comes from weak curb detail or flashing accompanied by wind-driven rain. Freeze-thaw movement can pry loose shingle connectors and push moisture into the nailing fins and curb joints. Inspect skylight flashing for compression gaps at the curb, torn or aged valley sealant, and any buckling of the membrane under the curb. In Dover's climate, a skylight seal isn't just about keeping rain out; it's about maintaining a stable frame that won't crack in a sudden cold snap. If you notice condensation between panes or a damp ring around the curb, treat it as a red flag rather than a minor nuisance.
Older homes tend to leak at penetrations more than on flat field shingles, and this is especially true around chimneys and skylights. Pay attention to boot seals around vent pipes, the intersection where roof deck meets the chimney flashing, and the step-flashing seams along the chimney line. Deterioration here often becomes visible only after a storm or a rapid temperature swing. A thorough inspection should trace moisture back to its source, not just chase drips in the living space. When a leak is traced to a penetration or transition, expect the fix to involve targeted flashing upgrades and, if needed, reworking the surrounding roofing material to restore a reliable weather barrier.
Find contractors experienced in skylight installation, flashing, and leak repairs to bring natural light into your home.
HM Contracting
(973) 229-9417 www.hmcontracting.com
37 Grant St, Dover, New Jersey
4.9 from 73 reviews
Five Stars Roofing & Contracting
(973) 537-8137 fivestarsroofing.com
380 E Blackwell St, Dover, New Jersey
5.0 from 7 reviews
In this climate, wind and hail claims are possible, but roof age and prior upkeep can heavily influence claim outcomes. A durable, well-maintained roof stands up better when a storm hits, and that reality matters when you file. Statewide dynamics filter into local adjuster decisions, so Dover homeowners should expect that how old the roof is and what maintenance was done will affect coverage, depreciation, and settlement offers. Being prepared with a clear picture of the roof's condition helps navigation through the process.
Keep dated photos showing pre- and post-storm conditions, plus contractor findings and written assessments. Save receipts for underlayment, flashing repairs, and any code-compliance work. Organize these records by date and by scope of work, so the adjuster can see the sequence of events. Clear, well-timed documentation reduces back-and-forth and improves the chance of a fair review, especially if an issue is discovered after winter snows or spring thaws.
State regulators monitor insurer practices and rate changes affecting roofing-related coverage decisions in New Jersey. Understanding these oversight patterns helps you anticipate possible adjustments to your policy, including how depreciation for aging materials is handled and what constitutes covered damage versus wear and tear. Staying informed about regulatory updates can help you make timing decisions that align with your policy's protections.
After a storm, act promptly to prevent further damage while avoiding rushed, improper repairs. Schedule a professional inspection to document damage comprehensively, then coordinate with your adjuster to align on scope and sequencing. If repairs reveal hidden issues, request a reevaluation. Timing matters for coverage outcomes, particularly in seasonal Dover windows when moisture intrusion can escalate if leaks aren't addressed.
Speak in concrete terms about observed leaks, wind-lifted shingles, or hail impact. Provide estimates and contractor notes to support your case, and consider a second opinion if the initial assessment seems incomplete. Ensure that any fixes restore the roof to current safety and performance standards, including proper underlayment and flashing, which reviewers often scrutinize. The goal is to protect the home's structure through a transparent, well-documented process.
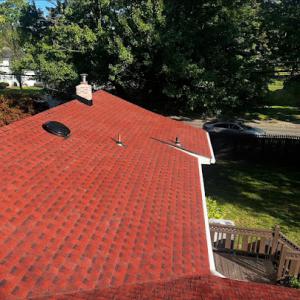
Although pitched residential roofs dominate the town, Dover's contractor market shows meaningful demand for flat-roof and roof-coating work, indicating a real low-slope segment in town. Heavy rain and winter ponding or freeze conditions make drainage and membrane condition especially important on Dover low-slope roofs. Coating and restoration options are relevant in Dover where owners want to extend service life without immediately moving to full replacement.
On low-slope sections, check for standing water after rain, especially near parapets, drains, and transitions to walls. Look for signs of blistering, surface granule loss, and edge or seam failure after freeze-thaw cycles. If the membrane shows irregular puckering or has aged noticeably, plan a targeted assessment rather than assuming all at once that a full replacement is required. In Dover, roof edges and scuppers tend to clog with winter debris, so confirm drainage paths are clear before colder months.
Roof coatings can buy time by sealing minor leaks, improving reflectivity to shed heat, and extending membrane life. For flat roofs in this area, silicone and acrylic blend coatings offer weather resistance and ease of maintenance. In colder months, coatings with good elongation handle contraction and expansion better, reducing crack risk at seams. If the existing membrane shows UV degradation or prior coating failures, choose a coating system designed to bond to the current material and address ponding with a thicker, self-flashing application.
Start with a professional inspection focused on drainage effectiveness and membrane integrity. Prioritize cleaning gutters and downspouts, then test drainage by simulating a rain event to locate slow runoffs. For coatings, obtain manufacturers' cure schedules and ensure compatibility with current membranes, especially where older products were used. Schedule coating work in a window with moderate temperatures and dry conditions to maximize cure performance and minimize delays. Plan a mid-cycle recheck after heavy winter months to catch early signs of edge lifting or seam fatigue.
Find specialists in TPO, EPDM, and built-up flat roofing systems for residential and commercial properties.


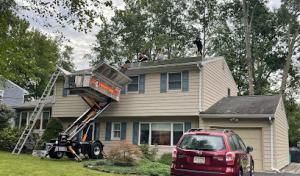
In this market, quick response, tidy cleanup, affordability, and a trustworthy local reputation drive decisions more than glossy premium options. When a roofer answers your call, gauge not only how soon they can be on the roof but how they handle the cleanup and debris removal after the job. A Dover project often means tight streets and closely spaced homes, so discuss neighborhood protection, material storage, and how they minimize disruption for your neighbors.
Because the market leans toward re-roofing, you should compare how contractors plan tear-off and site protection as part of the contract. Ask for a clear sequence: how they stage protection on landscaping, driveways, and gutters; where waste and old shingles go; and how they protect adjacent properties during windy days. Request a written outline of final cleanup, including how nail and shingle remnants are collected and verified as removed. In Dover, where snow and ice can linger, confirm they have a plan to keep the site safe during and after removal, and to address any residual moisture that could affect partial re-roofing or repairs.
Local reputation matters: look for contractors who have steady Dover references or testimonials from nearby streets with similar homes. Prioritize firms that demonstrate reliable communication, documented timelines, and proven follow-through on cleanup. You'll often find the strongest teams are the ones offering consistent, predictable responses and a straightforward, neighbor-friendly approach rather than flashy marketing.
Manufacturer-certified and warranty-offering contractors exist, but they are a smaller subset compared to the broader re-roofing crowd. You don't need the most specialized crew to get coverage that fits your needs, but you should confirm the warranty terms in writing and ask how they handle post-install issues, especially after winter storms. If a contractor can tie their warranty directly to the product line and provide a clear post-install support plan, that adds tangible peace of mind in this climate.
Pose practical questions about timetables (seasonal windows, storm response after hours), material handling (storage, ordering, and on-site routing), and cleanup milestones. In Dover, where a fast, clean finish matters to neighbors and homeowners alike, a straightforward answer that maps a practical, field-tested process is worth more than a glossy pitch.