Last updated: Apr 19, 2026
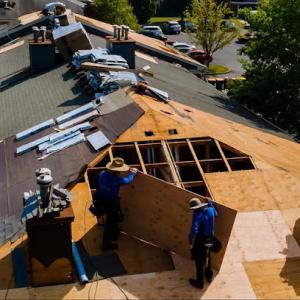
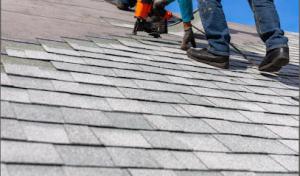
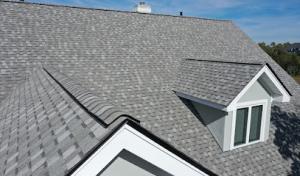
Ice dams are not a hypothetical problem in this town's inland climate. Rockaway sits in inland North Jersey where repeated freeze-thaw cycles are a bigger roofing stressor than coastal salt exposure. When winter temps swing above and below freezing, melted roof heat refreezes at the eaves, forming ice dams that back up water under shingles and into the attic. On older pitched homes with mixed roofing and inadequate insulation, those melt-and-freeze cycles become a daily watchdog scenario. If you're dealing with icicles hanging from the gutters, a runny ceiling, or stained drywall near a vent, you're not imagining the severity-this is the right moment to act.
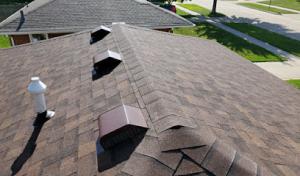
Snow and ice buildup along eaves is a practical concern for the town's many sloped residential roofs during Morris County winters. A thin line between a well-protected roof and a leaky one often runs along the overhang. In Rockaway, where trees crowd street fronts and homes sit close together, shade keeps ice linger time high and sunlight relief low. As a resident, you should treat the eave edge as the first front line: if ice forms a wall that blocks proper drainage, every hour of melt adds pressure that can pry shingles loose, bend flashing, and push water into soffits and behind chimneys. The damage can cascade from a minor drip to a multi-room leak if the attic remains poorly ventilated or insulated.
Emergency leak calls are locally relevant because this market shows very high prevalence of emergency repair and quick-response roofing services. When a sudden thaw hits after a heavy snow, or a wind-driven storm hits with freezing rain, the timeline from leak detection to repair is critical. In practice, that means you should keep a direct line to a trusted local roofer who can mobilize quickly, especially if your roof is older and the attic is poorly sealed. If water is dripping from ceiling joints or staining drywall, don't wait for a perfect storm to pass-address it now before the next cold snap. Quick-stabilization work, such as tarping exposed areas to prevent further water intrusion and securing loose shingles or flashing, buys critical hours until the full repair can be completed.
Key risk points to monitor this winter include chimney flashing, valley intersections, and dormer connections. Chimney flashing is a common failure point in older homes, where freeze-thaw cycles pry up metal flashing or cracks develop at the sealant line. Valleys trap meltwater, and if those metal seams are compromised, a storm can drive water deep into the roofing system. In homes with multiple layers of shingles or older decking, water can travel long distances before you notice a ceiling stain, which makes proactive inspection essential. If you notice gutters that stay capped with ice and a damp ceiling near an interior wall, treat that as a signal to call for a rapid assessment.
Practical steps you can take now include clearing loose snow from the roof edge and ensuring downstream gutters are free of obstructions so meltwater can move away from the eaves. Check attic insulation and ventilation: insufficient insulation allows heat to rise into the attic, aggravating ice dam formation; add insulation and ensure soffit vents and ridge vents work in concert. If a storm is forecast with freezing rain, plan for a temporary tarp over the affected roof area and arrange a same-day response from a local professional to prevent a small leak from turning into a larger one. In the Rockaway context, prioritize rapid repair plans that specifically address older pitched roofs, chimney flashing, and storm-driven leaks, because those are the vulnerabilities most likely to follow the pattern of inland freeze-thaw winters.

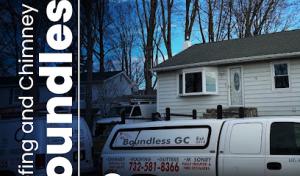
Boundless Roof Repair & Replacement
(973) 960-7921 boundlessgc.com
9 Stony Brook Rd, Rockaway, New Jersey
5.0 from 57 reviews
Boundless Roofing & Chimney, a GAF and BBB accredited leader with over 12 years of excellence in Rockaway, New Jersey, boasts 1000+ successful projects. Specializing in roofing, chimney, masonry, and concrete services, we offer expert roof repairs, chimney sweeps, gutter installations, and more. Our commitment to quality, durability, and aesthetic appeal makes us your trusted local contractor for any home improvement. Dedicated to superior craftsmanship and customer satisfaction, we provide reliable service and transparent pricing. Choose Boundless Roofing & Chimney in NJ, for your home's needs. Contact us today for top-tier roofing and chimney solutions.
Cedar Roofing Solutions
(973) 221-6433 www.cedarroofingsolutions.com
200 E Main St #28, Rockaway, New Jersey
5.0 from 21 reviews
Cedar Roofing Solutions serves homeowners and businesses in Rockaway and nearby Morris County areas including Dover, Denville, Parsippany, and Boonton. Our team handles everything from small roof repairs to full roof replacements using quality shingle, metal, cedar, and flat roofing systems. We locate and fix leaks, repair storm damage, replace flashing, install new roofs, and apply protective roof coatings to help extend roof life. Customers value our honest recommendations, clean workmanship, and clear pricing. Licensed and insured for safety and reliability. Call Cedar Roofing Solutions today to schedule a free roof inspection in Rockaway.

Rooferz
(973) 326-0108 www.rooferz.net
21 Pine St, Rockaway, New Jersey
4.9 from 20 reviews
We provide top-quality residential and commercial roofing services, specializing in repairs, replacements, and new installations. Backed by our 2-year labor guarantee and roofing systems with warranties ranging from 15 years to lifetime coverage, we take pride in delivering durable, reliable, and affordable solutions. Customer satisfaction and quality craftsmanship are at the heart of everything we do.
Shawnee Construction
(973) 601-7927 www.shawneeconstruction.net
101 Mt Hope Rd, Rockaway, New Jersey
4.6 from 11 reviews
Shawnee Construction is an owner-operated exterior remodeling company specializing in roofing, siding and windows for homes across Northern New Jersey. We’re a “hands-on” company where the owner visits each home, climbs on each roof and provides personal attention to each client.
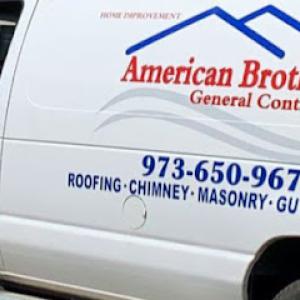
American Brothers General Construction
(973) 914-1918 www.americanbrothersgc.com
Serving
4.7 from 85 reviews
Roofing, masonry , chimney, gutters, siding, stone, retaining walls
Metro Elite Roofing & Siding
(973) 441-4544 www.metroeliteroofingandsiding.com
Serving
5.0 from 14 reviews
North Jersey’s trusted choice for premium roofing, siding, and gutter services across Sussex County, NJ, Morris County, NJ, and Essex County, NJ. We specialize in roof replacements, roof repairs, vinyl siding installation, seamless gutters, storm damage restoration, and exterior home upgrades designed to protect your home and elevate curb appeal. New Jersey homeowners choose us for our high‑quality craftsmanship, clean and professional crews, transparent pricing, and fast, reliable service. Whether you need a small repair or a full exterior renovation, we deliver durable results built for New Jersey weather and backed by honest, local expertise.
High Ground Construction
(201) 888-7388 highground-roofing.com
Serving
5.0 from 9 reviews
New Jersey Roofing Repair & Replacements Durable roof replacements, precise repairs, and leak diagnostics across NJ. Licensed & insured. Transparent pricing.

Hernandez & Sons Roofing
(862) 660-8100 hernandezsonsroofing.com
Serving
4.8 from 78 reviews
Ensure the durability of your roof with our thorough maintenance services. Explore our budget-friendly options for your roofing needs. Discover our customized roofing options designed for your satisfaction.
PJ Fitzpatrick
Serving
4.8 from 2181 reviews
A family owned and operated roofing business from Fairfield with over 135 years of experience. Serving the community as the best roofing contractors in Essex County for the past six years. We do residential as well as commercial projects. We offer roof inspections and free estimates. Give us a call today!
Fix Construction
(201) 684-9838 www.fixconstructionnj.com
Serving
4.9 from 84 reviews
Fix Construction has been serving as a leading Roofing Contractor since 2009. As a fully-certified professional, I’m ready to tackle anything from the most complex and large scale construction projects to the smallest of repair jobs. I’m fueled by my commitment to excellence and go the extra mile to make sure my clients are completely satisfied with my work. Call 201-379-9153 today to schedule a free, no-obligation appointment or use our online contact form to request more information about our products and services.
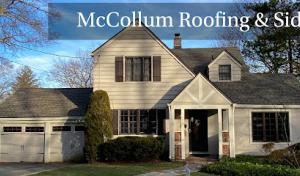
McCollum Roofing & Siding
(877) 604-7663 www.mccollumroofingandsiding.com
Serving
5.0 from 38 reviews
McCollum Roofing & Siding specializes in roofing and siding of all types. With over 35 years in this industry we can offer you years of qualified and hands on experience covering all spectrums of the roofing and siding business. From residential to commercial, we do it all.
Proven Contracting of Randolph
(862) 412-1608 provencontractingnj.com
Serving
5.0 from 57 reviews
Proven Contracting proudly serves Randolph, NJ, and nearby communities including Dover, Chatham, Madison, Denville, Franklin, Ringwood, Hardyston, Hopatcong, Florham Park, Sparta, Pompton Lakes, Mountain Lakes, Rockaway, Stanhope, Vernon, Harding Township, Mendham Township, and throughout Morris and Sussex Counties. We specialize in roof repair, roof replacement, gutters, siding, and window installation. Homeowners trust our experienced roofers for quality craftsmanship, reliable service, and long-lasting results. For expert roofing and exterior solutions in and around Randolph, call Proven Contracting today.
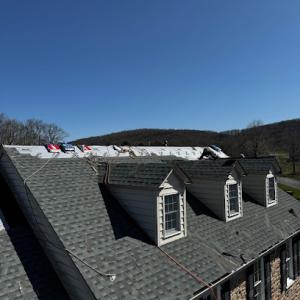
Spring and fall storms in this area bring sharp wind gusts and sudden shingle uplift. Missing shingles, lifted flashing around chimneys and vents, and exposed roof valleys can turn a minor leak into interior damage within hours. Inland Morris County sees these events as the most disruptive non-winter roof incidents, so eyes on the rooftop after every storm are essential. A quick check for loose edge shingles and any exposed fasteners can prevent water from slipping underneath and seeping into attic rafters or ceiling planes.
The local contractor market here specializes in storm-damage responses, and that focus matters when storms hit. You'll commonly encounter problems tied to wind: shingles peeled back along eaves, granule loss that hides underlying damage, and uplifted flashing around chimneys, dormers, and vent pipes. Tree impacts are another frequent trigger, with branches shadowing the roof and tearing at seams or ridge caps. Because this area is inland Morris County, the risk isn't coastal flood-driven; the real threat is wind-driven failures that create quick, stubborn leaks.
After a gusty day, walk the roof only if it's safe to do so from the ground or with proper fall protection. Look for curling, cracked, or missing shingles, especially on the windward side. Check flashing around chimneys and vent boots for displacement or cracks. Inspect valleys for hail bruising or debris buildup. If rain persists, inspect interior ceilings for staining or damp spots near light fixtures and along walls adjacent to exterior walls. A professional evaluation should confirm deck delamination, gutter pull-away, and fascia damage, which often signal the need for targeted repairs rather than a full roof replacement.
Seek a local contractor who emphasizes rapid response, evidence-based assessments, and thorough roof-penetration repairs. Ask for before-and-after photos, a documented storm-damage report, and references from neighbors who faced similar spring or fall storms. In Rockaway, you'll benefit from contractors who can promptly secure loose flashing, reseal chimney and vent penetrations, and perform shingle replacements with matched profiles to minimize visible patchwork. Prioritize firms with a track record of coordinating insurance parts of the job to restore a roof quickly and reliably.
If you notice missing shingles, lifting flashing, or attic intrusion, contact a storm-damage specialist without delay. Request a prompt site visit to assess wind-related vulnerabilities, then prioritize securement work to stop further water intrusion. For any attic or ceiling stains, document with photos and keep a log of weather events that preceded the damage. Quick, targeted repairs now prevent larger leaks in the next windstorm and reduce the risk of interior secondary damage.
Find local contractors experienced in assessing and restoring roofs after hail, wind, and severe weather events.

Cedar Roofing Solutions
(973) 221-6433 www.cedarroofingsolutions.com
200 E Main St #28, Rockaway, New Jersey
5.0 from 21 reviews

American Brothers General Construction
(973) 914-1918 www.americanbrothersgc.com
Serving
4.7 from 85 reviews
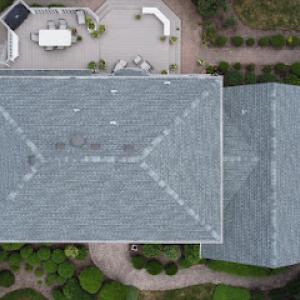
Asphalt shingles are the dominant practical choice for the typical detached, suburban home in Rockaway. The local contractor presence for asphalt systems is the strongest, which translates to easier access to reliable installation, faster service, and a familiar stack of flashing and valley details that align with older pitched roofs. For homes with standard 4/12 to 6/12 pitches and existing asphalt underlayment, a modern shingle upgrade often pairs well with the neighborhood's rooflines and eaves. The installation rhythm tends to be predictable in our freeze-thaw winters, where snow loads and ice dams form along gutters and overhangs. In practice, the key rock in asphalt's favor is its broad availability of proven flashing packages-particularly around chimney corners, vent pipes, and transitions from the roof to the soffit-and the ability to repair small sections without a full roof replacement.
Metal roofing appears in Rockaway, but not as commonly as asphalt, and installer availability is narrower. When metal does go on a pitched roof, it often targets homeowners looking for extended service life or a distinct aesthetic. The local climate-cold winters followed by warm summers-puts a spotlight on how metal honors thermal movement and fastener choices. A metal roof requires careful attention to the fastening pattern, seam integrity, and the compatibility of the roof deck and underlayment with the metal panels. For older pitched roofs, metal can be appealing if the roof line is sound and the flashing details can be upgraded to handle thermal expansion across seasons. In practice, metal installations benefit from experienced crews who understand how to optimize sealant performance at panel ends, eave edges, and around chimneys, where heat and moisture dynamics meet on a familiar Rockaway skyline.
Across both materials, the way a roof moves with winter cold and summer heat matters. Asphalt shingles rely on nailed fastening and good underlayment with proper alignment to prevent lift in wind-driven storms, and the underlayment choice should accommodate seasonal expansion and contraction. Metal roofs hinge on precise fastening patterns, competent sealants, and a robust underlayment strategy that handles the unique movement of metal panels. Older homes with pitched roofs benefit from ensuring the underlayment is intact and that flashing at chimneys, vent stacks, and ridge caps is updated to accommodate the seasonally variable foot traffic of ice and thaw cycles. In this climate, the combo of a solid underlayment and well-sealed penetrations can dramatically reduce the risk of snow melt breaking into attic spaces or leaking through to ceilings during spring thaws.
Chimneys are a frequent source of trouble in Rockaway's older single-family homes, where masonry penetrations meet modern roofing. The combination of winter freeze-thaw cycles and shifting foundations tests the metal flashing around brick or stonework. Expect leaks to start not just at the flashing edge, but at the transition where chimney step flashing meets the field shingles and at counter-flashing that has dried out or separated over time. A careful eye on the chimney crown, mortar cracks, and any staining along the chimney line can reveal hidden weaknesses before they become soaking leaks. When a leak track runs along the chimney, it is typically a flashing issue rather than a broad shingle failure, so a targeted repair often saves more roof than a full replacement.
Skylight installations bring light and value, but they introduce additional flashing challenges. In this market, curb flashing and the surrounding shingles deserve close scrutiny because improper integration can create a leak path that follows the skylight base across multiple courses of shingles. If the flashing appears blistered, warped, or lifted, water can exploit the seam the moment ice builds up on the curb. Routine checks should focus on the sealant line around the skylight and the condition of the flashing's corner joints. If a skylight is older, consider plan for re-flashing or replacement with a unit that provides a better thermal seal and a compatible shingle integration, rather than a quick cosmetic fix.
Flashing transitions are where most Rockaway leaks emerge during the heating season. Look for gaps where step flashing meets the chimney or where a pipe boot or vent terminates against a roof plane. Over time, sealants dry, metal corrodes, and fasteners back out from wind-driven rain or ice. A penetrating leak often travels along the underlayment and soaks decking before any visible interior sign appears. A proactive approach favors addressing multiple adjacent transitions in one visit, because a small, well-sealed upgrade now can prevent a larger, costlier repair later.
In winter, subfreezing mornings combined with afternoon thaw cycles can push lingering moisture into fragile joints. If a leak is suspected around chimneys, skylights, or flashing, prioritize a careful inspection from the roof edge with proper safety precautions. Before the first heavy snow, check for loose step flashing, corroded metal, and compromised sealants. After a storm, take quick interior notes of new stains or damp spots that align with a flashing line, and avoid delaying a professional assessment, as delayed repairs tend to grow worse and more invasive.
Find contractors experienced in skylight installation, flashing, and leak repairs to bring natural light into your home.
Shawnee Construction
(973) 601-7927 www.shawneeconstruction.net
101 Mt Hope Rd, Rockaway, New Jersey
4.6 from 11 reviews
In this market, asphalt shingles sit as the most accessible, straightforward option for a replacement. The typical Rockaway project falls around 350-700 USD per square for asphalt shingles, with other materials like metal, clay, concrete, wood, or synthetic options carrying higher per-square ranges. When planning, you'll often see asphalt chosen first because the bidding ecosystem and local demand skew toward re-roofing rather than elaborate, exotic systems. This helps keep projects predictable, especially when winter weather tightens schedules.
During periods of heavy storm activity across Morris County and nearby North Jersey towns, labor tightens and prices move upward. If a winter freeze-thaw cycle or a late-season Nor'easter hits, crews rotate to emergency work, and scheduling shifts from weeks to days. In Rockaway, essentially this means a sharper rise in overall project cost and potential delays, even if the chosen materials stay within the standard per-square range. If your roof is approaching the end of its life, expect quicker decisions from contractors and quicker material delivery during peak times.
Pricing in Rockaway also shifts with roofline steepness and feature set. Steep suburban pitches drive higher labor time, while chimney and skylight flashing can add tangible complexity and material waste. Tear-off volume matters as well; removing an older roof and hauling debris can add a few hundred to several hundred dollars, depending on how many layers are present and how much disposal is required. If cleanup and disposal are included in the contract, that tends to stabilize the final cost versus paying separately after the job wraps.
Older pitched homes in wooded neighborhoods often benefit from a cautious approach: reliable flashing around chimneys and vents, plus robust underlayment. Asphalt remains the most cost-effective entry, but if your budget allows, metal or synthetic options can offer longer lifespans and better wind resistance in storm-prone windows. Clay or concrete tiles add weight and require framing checks, which can influence the total price when the roof is already aging.
Start with a baseline of asphalt at the lower end and plan for upgrades only where the flashing, tear-off, or disposal workload clearly demands it. Ask for a breakdown that separates tear-off, disposal, underlayment, flashing, and waste handling. If storm season looms or recent storms have spiked local demand, request a staged timeline or priority scheduling to minimize downtime and keep costs on track.
Get a clear picture of your project costs upfront - no commitment required.
In this city, roofing permits are typically handled through the local municipal building department rather than a county roofing office. That means you'll file with the town hall's permit desk or the dedicated permits portal, and you'll interact with a housing inspector who understands the neighborhood's common roof styles, chimney flashing, and seasonal freeze-thaw concerns. The process is designed to ensure that an aging pitched roof with potential ice-dam risks is updated in a way that keeps your home watertight through the next long winter.
Permit close-out hinges on a post-installation inspection and final release after the work passes. A lot of homeowners assume a permit simply gets stamped once materials arrive, but the inspector will verify several key details: that the new roofing system is properly vented, that underlayment and flashing meet the local code expectations, and that any retrofit around chimneys, skylights, or dormers is completed to prevent ice dam leakage. Plan to accommodate a follow-up review after the contractor finishes installation and again after any weatherproofing is tested under seasonal conditions. That final clearance is the trigger for the permit to be closed in the town system.
Rockaway-area permit processing may require contractor licensing documentation and confirmation that installed materials comply before final sign-off. Have the contractor's current license number, insurance certificate, and a materials list ready for submission. Confirm whether the permit requires stamped shop drawings or product approval certifications for specific roofing components, particularly if the project includes anything beyond standard asphalt or metal systems. If you've had prior leak repairs or chimney flashing work, retain the inspection notes from those visits; the building department may request references or a brief summary to ensure consistency with code and local best practices.
Because inspections are tied to specific project milestones-like deck removal, underlayment installation, and flashing repairs-coordinate with the contractor to align the work with the inspector's availability. Winter work can introduce delays if weather pushes back certain steps, so it helps to build a small buffer into the timeline for the permit review and any signature authorizations. After approval, keep copies of all signed documents, warning notices, and change orders in a readily accessible project folder until the permit is officially closed.
In a New Jersey environment where storm and wind claims are common, roof age and prior claim history can affect underwriting scrutiny. Insurers serving homeowners in this area expect clear history on when the roof was installed, and any past repairs that could influence current risk. Being precise about shingles, flashing, and the overall roof condition helps avoid slowdowns when a claim is filed after a winter event or a stiff wind.
Because local claims are more likely tied to wind, hail, and winter damage than coastal flooding, photo documentation should focus on shingle loss, flashing displacement, interior leaks, and structural condition. Gather receipts, warranties, and notes about contractor work, including license status when possible. A written summary of the roof's age and recent repair history can support the claim and prevent disputes about coverage scope.
Take wide shots that show the roof in context, then close ups of damaged areas like lifted shingles, loose flashing around chimneys, vents, and skylights. Photograph attic and ceiling spots where leaks appear, with timestamps if available. If interior staining travels along joists, map the path so a adjuster can trace the leak origin. Consistency in lighting and angles helps the file stay readable.
Your contractor should be able to provide documentation confirming license status and material compatibility with the existing structure. Insurers will scrutinize whether replacement materials align with the roof's slope, fascia, and internal supports. A coherent package of photos, warranties, and a short repair history helps focus the claim toward appropriate remedies.
Missing or inconsistent paperwork can delay approval or lead to partial settlements. If a claim is delayed, the insurer may request confirmation of roof age, prior repairs, or contractor licensing. Keeping a file with dates, contact info, and a brief repair rationale helps you stay ready for review.
Connect with contractors who help homeowners navigate the claims process from damage assessment to final approval.
Boundless Roof Repair & Replacement
(973) 960-7921 boundlessgc.com
9 Stony Brook Rd, Rockaway, New Jersey
5.0 from 57 reviews
Asphalt shingles remain the backbone of most homes here, offering straightforward replacement and solid performance when paired with proper attic ventilation and a robust underlayment. In winter, the key is ensuring the edge detail and flashing around chimneys and penetrations stay watertight, since ice damming and wind-driven leaks can expose older homes with pitched roofs to faster wear. Local crews are most practiced with this material, which makes timely repairs and maintenance more predictable.
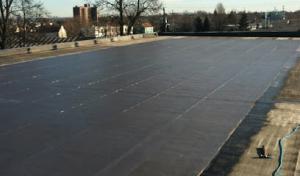
In Rockaway you will find active contractor capacity for tile, cedar shake, flat roofing, coatings, and limited solar-integrated roofing work. These systems are niche locally, so homeowners should expect a smaller installer pool than for standard shingle replacement. If you consider tile or cedar, plan for specialty crews that understand how these assemblies behave under freeze-thaw cycles and how they interact with chimney flashing. Flat roofs and coatings require careful attention to drainage and seasonal expansions, especially on older structures with mixed roof lines.
Winter weather drives the most urgent questions around specialty roofs: how a tile or cedar install handles ice dams, how flat roofs shed snow, and how coatings seal against moisture intrusion. When choosing a non-shingle option, verify that the contractor regularly services similar assemblies and uses underlayment and flashing details designed for cold climates. Availability of parts, aftercare, and timely resealing after storms can differentiate a durable year-round result from a seasonal fix.
Discuss specific winter test results or case studies from neighboring homes with similar roof geometry. Confirm the installer's service radius, maintenance plan, and warranty terms for the chosen system. Plan scheduling around potential snow or ice events to minimize exposure windows, and ensure an explicit plan for chimney flashing and venting integration. A thoughtful choice aligns material performance with the local climate and the contractor's proven capability to service these assemblies.
Find contractors who specialize in clay and concrete tile roofs, known for their durability and curb appeal.
McCollum Roofing & Siding
(877) 604-7663 www.mccollumroofingandsiding.com
Serving
5.0 from 38 reviews