Last updated: Apr 19, 2026
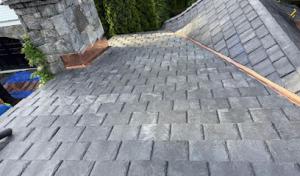
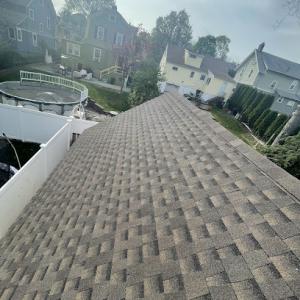
Cold winters with repeat freeze-thaw cycles drive ice damming as a primary roof risk on older pitched homes in this part of Essex County. The steep profiles common in our neighborhood help shed some snow, but when temperatures swing, melted water can back up at the eaves and around roof penetrations. That backing water refreezes at the edge, creating a dam you may not notice until a thaw reveals interior leaks along ceilings and walls. In these situations, the real danger isn't just a little dripping-it's structural moisture that can damage sheathing, insulation, and interior finishwork if left unchecked.
Snow and freezing temperatures work together to push moisture into hard-to-see spots. As snow melts on warmer days, water travels toward the cooler edge of the roof. If the eaves are insulated poorly or if the gutters are obstructed, water can back up behind the dam and find routes through any small openings around flashing, vent pipes, and chimneys. The resulting interior leak patterns often materialize during thaw periods, when you're distracted by other spring tasks and weather around you shifts from frigid to damp. This pattern is especially common on aging roofs with original flashing or roof penetrations that have settled over time.
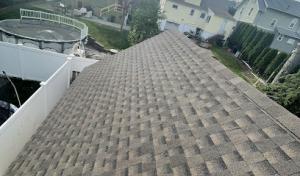
Leaf-heavy neighborhoods in Caldwell compound the problem. By late fall, gutters and downspouts can become partially blocked with accumulated leaves, pine needles, and debris. That partial blockage means less capacity for melted snow to drain away, forcing more water to back up at the edge. When winter arrives, that compromised flow creates a higher likelihood that ice will form at the roof edge, undertreating the edge of shingles and roof deck. The combination of blocked gutters and frozen cycles is a setup for repeated damming events, especially on older roofs where the edge detail relies on aging seals and lighter flashing.
If you notice ice at the eaves or see staining on interior ceilings after a thaw, action should be immediate. Start by clearing gutters and downspouts to restore drainage, removing debris that can trap meltwater at the fascia. Inspect roof edge details for lifted shingles, deteriorated flashing around vents and chimneys, and any signs of prior repairs that might be allowing water into the attic. Improve attic ventilation so warm, moist air doesn't build up under the ridge, which raises the snowmelt rate at the roof deck. Consider a professional inspection focused on the eaves, gutters, and roof penetrations to evaluate the integrity of flashing, ice barriers, and insulation around joints.
Plan seasonal checks that align with Caldwell's winter pattern. In late fall, schedule gutter cleaning and a roof edge inspection before the first heavy snow. If your home retains older edge details or has mixed material transitions, a targeted upgrade to drip edges, flashing, and an enhanced ice/water shield can dramatically reduce the chance of interior moisture during freeze-thaw cycles. For trees overhanging the roof, prune limbs that shed heavy leaf fall and droop toward the eaves, limiting debris and shade that keeps moisture lingering near the roof line. With these focused actions, the risk of ice damming on Caldwell's older pitched roofs becomes manageable, protecting both your attic and your living spaces.
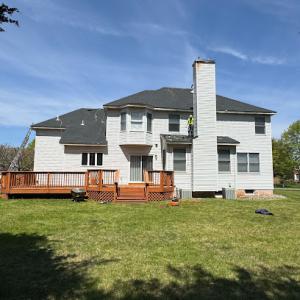
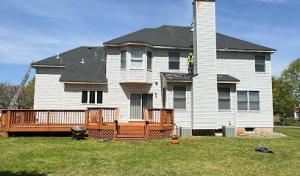
Spring storms and hail are a known seasonal risk in Caldwell and can create sudden shingle bruising, flashing displacement, and leak calls that compress contractor schedules. After a hail event, a quick exterior walkaround is essential: look for granule loss on asphalt shingles, bent or lifted flashing, and dark spots that suggest moisture intrusion behind the underlayment. If you notice curled edges or struck metal flashing, treat it as a red flag rather than a cosmetic issue. Delays in addressing these early signs can turn a manageable repair into a full-roof replacement where space and weather windows collide with busy contractor calendars. In practical terms, prioritize a storm-damage assessment within 48 to 72 hours of clear skies returning. Even if the roof looks intact from the ground, hidden bruising can undermine strength and set up for accelerated aging through the next freeze-thaw cycle.
Warm, humid summers in Caldwell can expose storm-weakened roofs by driving moisture into already compromised underlayment and decking areas. Long stretches of heat accompanied by rain or afternoon thunderstorms push moisture deeper, loosening shingles and compromising sealant joints. Moisture that sits under bent or lifted shingles will promote mold, rot, and premature failure of the roof deck. If attic space reveals higher humidity, musty smells, or condensation on the underside of sheathing, treat these as urgent signals even if no active leak is visible from the exterior. Rapid action should focus on identifying the source of moisture entry, drying damp areas, and securing temporary barriers to prevent water entry during the next rain event. This is the time when proactive venting checks, ridge vent function, and valley flashing integrity come into play, not just cosmetic repairs. The goal is to restore a dry, sealed roof envelope before the next weather system arrives.
Because local demand surges after weather events, homeowners in Caldwell often face scheduling delays for inspections, temporary protection, and full replacement starts. That lag can be costly if moisture has already penetrated decking or underlayment and invites secondary damage like interior staining or attic warmth loss. When a storm has just passed, set expectations with contractors: you will need expedited access to the roof line for a thorough damage appraisal, deck and underlayment checks, and, if needed, a swift temporary cover to block ongoing water intrusion. If a contractor cannot prioritize, consider arranging a temporary shield for the most vulnerable areas-over dormers, valleys, and chimney flashing-until a full assessment can proceed. The objective is to prevent further water entry while coordinating subsequent, more permanent repairs. In Caldwell, the sequence from damage recognition to secure, dry conditions should move quickly, with communications kept tight and updates provided at each stage.
Find local contractors experienced in assessing and restoring roofs after hail, wind, and severe weather events.
Pro Gen Construction & Roofing
(862) 222-1016 progenconstructionnj.com
27 Brookside Ave, Caldwell, New Jersey
5.0 from 63 reviews
Pro Gen Construction & Roofing
(862) 222-1016 progenconstructionnj.com
27 Brookside Ave, Caldwell, New Jersey
5.0 from 63 reviews
At Pro Gen Construction & Roofing, we turn your dreams into reality through expert craftsmanship and a dedication to delivering exceptional results. As a leading contractor near you in New Jersey, we offer premier services in roofing, siding, masonry, decking, and chimney in New Jersey. Looking for roofing Caldwell NJ? Look no further! Our team is dedicated to providing top-quality workmanship in every project. Where Quality Meets Craftsmanship. Call us now for a free estimate!
RK Roofing
31 Roseland Ave, Caldwell, New Jersey
4.9 from 47 reviews
RK Roofing Provides siding and roofing services to the Caldwell, Nj area.
Dream Home Roofers
(201) 426-6965 www.dreamhomeroofers.com
Serving
4.9 from 146 reviews
At Dream Home Roofers in West Caldwell, NJ, we offer top-tier asphalt roof installation and replacement services, ensuring your home is both protected and aesthetically improved. Whether you're upgrading an aging roof or building from scratch, our skilled team delivers durable asphalt roofing solutions that stand up to the elements. We also provide expert gutter replacement services, ensuring your new roof has the necessary drainage support to protect your home from water damage. With a strong focus on quality materials, precision, and customer satisfaction, we guarantee long-lasting results backed by comprehensive warranties. Contact us today for a free consultation and experience roofing and gutter services tailored to your home's needs.
Estate Roofing
(973) 298-0968 www.estateroofinginc.com
Serving
5.0 from 33 reviews
At Estate Roofing, we deliver professional, efficient, and reliable home services you can trust. With nearly 20 years of experience, we specialize in roof replacement and storm damage restoration, while also providing expert roof inspections, gutter repair and replacement, and siding installation and repairs. We’re committed to doing the job right the first time—with integrity, clear communication, and complete transparency throughout every step. Our experienced team treats every home as if it were our own, ensuring high-quality craftsmanship and long-lasting results. Whether you’re dealing with storm damage or planning a full exterior upgrade, Estate Roofing is here to help protect and enhance your property. Your trust is our top priority.
United Pro Construction
(973) 409-1010 unitedproconstructionllc.com
Serving
4.9 from 179 reviews
United Pro Construction is your local expert in residential and commercial roofing, siding, chimney, masonry, and gutter repair, replacement, and new installation services. We provide free estimates and offer 24/7 roof repair services, which include roof leak repair and roof tarp installation. We are available now and look forward to helping you with your service needs.
DeFalco Roofing
(973) 255-0374 www.defalcoroofing.com
Serving
5.0 from 303 reviews
Welcome to DeFalco Roofing, your trusted roofing expert serving Fairfield, NJ, Caldwell, NJ, West Essex, and surrounding areas. With years of experience in the industry, we specialize in high-quality roof installation, roof repair, siding installation, gutter installation, and window replacement. At DeFalco Roofing, we believe in the philosophy of "doing it right the first time." Our dedicated team is committed to providing exceptional craftsmanship and customer service that exceeds your expectations. Whether you need a new roof, a quick repair, or an upgrade to your siding and gutters, we have the skills and expertise to ensure your home is protected and looks its best. -Christian DeFalco
Express Way Roofing & Siding
(201) 362-0615 expresswayroofing.com
Serving
4.8 from 56 reviews
Express Way Roofing & Siding is a trusted roofing and siding contractor proudly serving Fairfield, NJ, and the surrounding areas. We specialize in roof repair, roof replacement, siding installation, chimney repair, and gutter services for both residential and commercial properties. Our team delivers professional workmanship, honest pricing, and long-lasting result, from fixing leaks and storm damage to complete roof and siding renovations. Whether you need emergency roof repair, new roof installation, or exterior maintenance, Express Way Roofing & Siding guarantees quality, reliability, and customer satisfaction on every project.
Simple Roofing
(201) 429-9607 simple-roofing.com
Serving
4.9 from 75 reviews
Simple Roofing is a roofing contractor in New Jersey that services Passaic County, Paterson, Newark, and nearby areas. We offer free roofing inspections and estimates. If your home has suffered weather-related damage, missing shingles, or it's just time to replace. Contact your New Jersey premier roofing repair contractor today for a free estimate.
A1 Garden State Construction
(201) 655-3980 a-1gardenstateconstruction.com
Serving
5.0 from 106 reviews
With 20+ years of experience, A-1 Garden State Construction serves its customers with pride, integrity, and attention to the details that matter most. This is one of the many things that sets us apart from other companies. We are locally owned and operated. Just give us a call today!
Northkit Roofing & Siding
(973) 319-8043 northkitroofing.com
Serving
4.8 from 307 reviews
NorthKit Roofing is a trusted exterior remodeling contractor that provides high-quality services to homeowners. Our team of experts is highly skilled and trained to handle any exterior remodeling project, from simple repairs to complete replacements. We use only the highest-quality materials and precision engineering to ensure that our roofs are built to last. Our services include metal roofing, shingle roofing, siding and window installations, and more. At NorthKit Roofing, we pride ourselves on providing exceptional customer service and delivering results that exceed our clients' expectations. Choose NorthKit Roofing for all your homes exterior remolding needs and enjoy a lifetime of protection and peace of mind.

Matute Roofing
(973) 618-6489 matuteroofing.com
Serving
5.0 from 452 reviews
Matute Roofing is a trusted, family-owned company based in Wayne, NJ, proudly serving Northern New Jersey and Rockland/Westchester Counties for over 20 years. As a GAF Master Elite® Certified contractor, we are a roofing contractor specializing in residential and commercial roofing, including full roof replacements, repairs, inspections, and flat roofing systems such as TPO, PVC, EPDM, and modified bitumen. In addition to roofing, we offer a comprehensive range of exterior services, including siding, windows, doors, gutters, and gutter guards, providing homeowners and property managers with reliable solutions.
Allied Brothers Home Corporation
(973) 566-0060 www.alliedbrothers.net
Serving
4.9 from 249 reviews
Depend on a construction company that is strongly committed to safety, quality, and innovation. Trust the experienced builders at Allied Brothers Home in Bloomfield and Wayne, New Jersey. Our unparalleled craftsmanship, expertise, and high level of commitment have made us a leading contractor in the industry. Turn to us for construction solutions that let you enjoy smart and stylish spaces. Allied Brothers Home provides roofing, siding, windows, decks, gutters & painting. Contact us today to schedule an appointment and for more information!
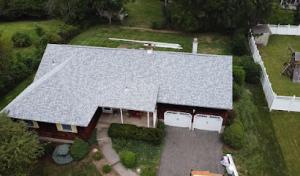
Asphalt shingles stay the practical baseline for most Caldwell homes. They're familiar to local roofers, affordable to replace, and work well with the borough's older pitched roof lines when paired with properly sized underlayment and flashing. In a neighborhood of steep roofs and tree canopies, asphalt's ease of installation and quick maintenance make it a sensible first choice. When selecting styles, look for good granule adhesion and a thick nailing zone to resist wind uplift on those brisk Essex County winters.
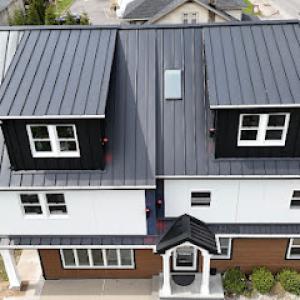
Metal roofing appears here and there where homeowners want a more contemporary or historically sympathetic look. Metal offers strong moisture shedding, quick shedding after snow, and solid fastener retention in fluctuating temperatures. On a lot with older framing, metal can be a smart upgrade if the roof already has a pronounced slope and you're aiming for a long service life with minimal maintenance. Pay attention to profile and fastener placement to preserve historical character while ensuring robust performance against seasonal storms and humidity.
Clay and concrete tiles can suit older architectural styles found in the borough, but they come with extra planning for structure. Heavier materials demand careful assessment of framing and tear-off sequencing, especially on aged homes with original support members. When tiles are chosen, ensure solid moisture control behind the tile, because winter ice damming and summer humidity push moisture through any small gaps. A professional evaluation of roof framing and a staged tear-off plan helps avoid surprises mid-project.
Wood shingles or shakes offer a distinct curb appeal on certain older facades, yet they require diligent maintenance in Caldwell's climate. Snow and ice can sit on wood longer, and high humidity accelerates staining and rot if ventilation isn't adequate. If wood is retained, ensure premium sealants and a robust ventilation strategy. This option often pairs best with specific architectural cues rather than universal use on every older roof line.
Synthetic or composite shingles blend modern moisture management with nods to traditional appearances. They tend to hold up well under Caldwell's winter and spring swings, offering decent insulation and fewer issues with moisture trapping. For homes where a durable, lower-maintenance surface is valued, these can provide a balanced fit with older roof silhouettes.
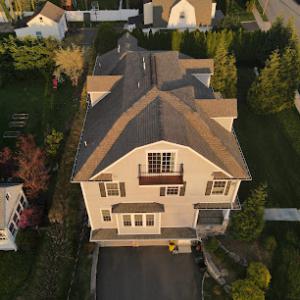
Caldwell's roof costs aren't just about square footage. The borough's mix of older, steeply pitched homes and tear-off work on heavy, mature tree streets creates layers of complexity that drive pricing up beyond a simple square-count calculator. A steep pitch means more decking exposure, more safety equipment, and longer labor hours. If the existing roof is a tear-off, you're paying for the disposal and handling of more material, plus the nuisance of weather windows that can shorten the effective work season. In this environment, two identical-looking houses can end up with noticeably different bids once the specifics of roof geometry, overhangs, and penetrations are considered.
For Caldwell, the cost ranges reflect the real-world realities of older homes and steeper roofs. Asphalt shingles typically run from around 350 to 700 USD per square, but expect bids to skew higher if a full tear-off is required or the roof measures longer than a standard square due to pitch. Metal roofing sits roughly between 700 and 1,200 USD per square, with premium finishes and thicker panels pushing toward the top end. Clay and concrete tiles range from about 900 to 1,800 USD and 800 to 1,500 USD per square, respectively, depending on weight considerations, underlayment needs, and roof structure compatibility. Wood shingles or shakes usually run 600 to 1,100 USD per square, given the care needed for installation on older rafters. Synthetic or composite shingles offer a more economical alternative in the 500 to 900 USD per square band, though the long-term performance and weight should be weighed against compatibility with existing decking and attic moisture control.
Storm-driven demand spikes and seasonal winter delays can tighten labor availability in this area, affecting both pricing and start dates. When crews are in high demand, you may see longer lead times before mobilization and tighter windows for weather-dependent work. In Caldwell, processing or inspection delays-whether due to busy office hours, crew availability, or weather gaps-can add project overhead and stretch the timeline. Plan for potential stretches between bids and actual start dates, and have a rough buffer for weather-related interruptions so decisions on materials and scheduling don't push costs up unexpectedly.
Older homes with steep roofs often require enhanced moisture management. If ice damming is a concern on winter days, you'll want to factor in upgraded attic ventilation, better underlayment, or moisture-control features that can shift the overall cost upward, but improve performance and longevity in the Caldwell climate. The choice of material will influence not only initial price but how well the system handles long-term moisture and seasonal freeze-thaw cycles.
Get a clear picture of your project costs upfront - no commitment required.
Pro Gen Construction & Roofing
(862) 222-1016 progenconstructionnj.com
27 Brookside Ave, Caldwell, New Jersey
5.0 from 63 reviews
When replacing a roof on a typical Caldwell home, the project is generally handled through the permit process rather than informal maintenance. The local building department expects a formal permit for a full tear-off and re-roof, reflecting the scope and safety considerations involved with steep pitches and tree-dense streets. Expect the permit office to require details that confirm the roof is securely detached from the structure, including edge protection and waste containment plans. Approaching the process with a clear plan helps prevent delays once the contractor submits the application.
In most cases, the contractor takes responsibility for filing the permit application, but you should confirm who will submit on your job. The application should include a thorough project scope that covers tear-off, disposal of old roofing material, and the re-roof installation method and materials. Specifics about roof decking condition, installation of underlayment, flashing details at chimneys and valleys, and attic ventilation plans are often requested. Having these items ready helps the plan review move more smoothly and reduces back-and-forth questions during the early weeks.
Plan review is a critical step before any work begins. Caldwell's building department conducts review to ensure compliance with local codes and neighborhood standards, particularly for older pitched roofs common in the area. Plan review plus inspection scheduling commonly adds about 1 to 2 weeks, depending on workload. During busy seasons, such as after winter, you may see a longer turnaround, so coordinating with the contractor to align the post-approval start date is essential.
Inspections occur both during and after the project, with a focus on safety and workmanship. The building official will typically verify that proper tear-off practices were followed, waste containment is maintained, and the roof deck is sound before the new roofing is secured. Throughout the installation, spot checks may address underlayment, flashing at roof penetrations, and attic ventilation compliance. Clear access for the inspector is crucial, so communicate any changes in schedule or unexpected site conditions promptly.
A final inspection confirms that all permit conditions are met and the roof installation adheres to code. Once approved, the permit is marked complete, and lien-like holdbacks or closeout items are released. If issues are found, a re-inspection will be scheduled, typically resulting in a short delay. Keeping documentation organized-permits, plan review approvals, and inspection records-helps ensure a smooth closeout and minimizes disruption to the rest of the house.
Coordinate with the contractor early to align permit timing with weather windows, especially given Caldwell's winter constraints. Confirm who will be the point of contact for plan-review questions and inspection scheduling to avoid miscommunications. If any exterior changes accompany the roof work, such as upgrades to attic vents or chimney flashing, ensure those details are clearly captured in the permit scope to prevent later compliance issues.
When a winter ice dam forms on an older pitched roof, the resulting moisture can reveal itself only after a thaw or a heavy spring rain. In New Jersey, insurers commonly want roof-age records, material specifications, and thorough before-and-after photo documentation for wind and hail claims affecting Caldwell homes. If maintenance history is weak, a carrier may argue that some damage is pre-existing wear, which can complicate a claim. Keep a simple file: gather warranty papers, shingle type, and any past repairs, and stash fresh photos after every significant weather event.
Because replacement claims are common in this market, homeowners benefit from documenting storm timing, visible exterior damage, and any interior leak evidence immediately. Take wide exterior shots that show roof angles, vents, and any shingles that have curled or lifted after a storm. Note the street name and weather date if you can. Inside, photograph ceiling stains, attic signs of moisture, and any damp insulation near rafters. These details help counter arguments that the issue arose from long-term neglect rather than a single event.
Act quickly if you suspect damage from ice damming or hail. Schedule a professional inspection and request a written report that specifies roof age, material type, and observed failures. Share those findings with the insurer promptly, along with the storm timestamp and any corroborating exterior photos. If a claim is denied or underpaid, your documentation trail-ages, materials, and timing-will be essential when seeking a fair adjustment. In this neighborhood, a clear, well-kept record can be the difference between a smooth settlement and extended dispute.
Connect with contractors who help homeowners navigate the claims process from damage assessment to final approval.
A1 Garden State Construction
(201) 655-3980 a-1gardenstateconstruction.com
Serving
5.0 from 106 reviews
Masonry chimneys are common in Caldwell's older housing stock and create distinctive flashing and counterflashing challenges during re-roofing. When a contractor removes old shingles, inspect the chimney-to-roof seam for cracked mortar, voids in the base flashing, and misaligned counterflashing. Plan a seamless transition around brick detailing and chimney caps, and ensure boots or aprons are sealed with proper backing. A failing chimney flashing often shows up as damp spots along the chase after a heavy snow or a thaw.
Skylights are a meaningful specialty in this market, making curb flashing and surrounding shingle integration a recurring leak concern on local homes. Ensure the curb is properly flashed with metal and that the surrounding shingles are trimmed neatly to avoid gaps. Sealants should be compatible with the roofing material in use. Regularly inspect skylight seals after winter freezes and spring storms, and replace aging flashing before seepage appears inside the attic.
While pitched roofs dominate, some Caldwell homes and additions include low-slope sections where drainage and membrane detailing differ from the main roof. In these areas, confirm a continuous water-tight membrane under the shingles and a clean, positive drain path toward gutters. Check transitions from low slope to higher pitches for membrane laps and proper step flashing details.
Ice damming and meltwater demand proactive monitoring near chimneys and skylights. During inspections after ice or heavy rain, look for wet rafters, staining on sheathing, and curling shingles at transitions. Schedule midwinter checks focused on flashing integrity and gutter performance, and address any lift or buckling promptly.
Find contractors experienced in skylight installation, flashing, and leak repairs to bring natural light into your home.
A1 Garden State Construction
(201) 655-3980 a-1gardenstateconstruction.com
Serving
5.0 from 106 reviews