Last updated: Apr 19, 2026
Hillsborough's four-season pattern creates repeated winter freeze-thaw cycles that shorten shingle life and make spring leak discovery common. The problem isn't just a cold snap; it's the repeated freeze expanding cracks and then thawing that lets water seep into vulnerable layers. In a suburban mix of mid-century caps, estate roofs, and newer developments, those micro-cracks show up as damp spots under loft insulation or along interior ceiling lines after a thaw. When the ice fits into small crevices, it pushes against flashing and edges, and water can work its way inward before a homeowner even notices. This is not a distant threat-it's a seasonal pattern you will see year after year if the roof isn't prepared.
Ice dams and snow load are a stated local seasonal risk, with flashing and gutters taking much of the stress during winter weather. When every snowfall adds weight and the sun can't reach the roof ridges, melting water has nowhere to go but up and under. Ice dams push against fascia boards, drip edges, and the joint between the roof and wall, forcing water into soffits and underlayment. In Hillsborough, the typical roof assemblies in older homes may rely on ventilation as a first line of defense; when ventilation lags behind winter demand, condensation can pool and degrade underlayment faster. Gutters clog easily with pine needles and shingle grit, turning a simple melt into a focused leak path along the eaves. The result is dramatic: slow, creeping leaks that undermine attic insulation and interior ceilings, often surfacing only after a series of storms.
Replacement timing is influenced locally by milder months because spring thaw and summer humidity can complicate underlayment condition and installation quality. The window between the insistence of winter and the heat of summer isn't just about comfort; it's about the long-term integrity of the roof's underlayment and ventilation plan. If a full roof replacement is needed, plan for a season where the weather offers dry days and moderate temperatures, ideally avoiding the peak heat of summer and the wettest weeks of early spring. The installer should verify that the new system includes expanded ventilation, continuous underlayment, and properly sealed flashing-elements that resist the twin threats of cold-induced contraction and humidity-driven degradation. In practice, that means prioritizing projects after a season of steady, moderate days when the roof deck is dry, the attic is properly ventilated, and there's enough daylight to complete flashing and accessory work without rushing. For homeowners, recognizing the telltale signs-peeling shingles at the eaves, moisture drops on ceilings after a thaw, and sags in fascia-is essential to catching a problem before it compounds with the next freeze. When scheduling near-spring, ensure the crew uses products rated for Hillsborough's temperature swings and that warranty coverage explicitly accounts for climate-specific stressors. This is how you turn the annual cycle from a creeping risk into a controlled, durable solution.
In this area the dominant materials are Asphalt Shingles, Metal Roofing, Clay Tile, Synthetic/Composite Shingles, Slate, and Fiber Cement Shingles. Each looks different on the street and ages with the seasons. Your decision should start by matching the roof's mass and restraint to the house style and overhangs. Heavier systems like slate and clay tile need solid framing and appropriate fasteners, while asphalt and synthetic options can work with a broader range of suburban to estate homes. Knowing what your neighbor installed helps you gauge curb appeal, weight considerations, and maintenance expectations for a long Hill season of freeze-thaw cycles.
As winters lean into repeated freeze-thaw cycles, proper ventilation and a sound underlayment aren't optional extras-they're lining up with every higher-than-average humidity summer that follows. You should plan for adequate attic intake and exhaust airflow to limit condensation and reduce ice dam risk. In Hillsborough, where summers can push humidity and heat into attic spaces, an underlayment that tolerates moisture and a ventilation strategy that keeps decks and eaves dry will pay off over the life of the roof. If you're choosing asphalt or synthetic shingles, verify the underlayment type and ensure proper nailing patterns that won't compromise sealing during cold snaps. For heavier systems, confirm the roof deck can handle the weight without altering the home's structural dynamics.
Estate-style homes and larger suburban properties often feature heavier options like slate or clay tile, where a robust deck and precise flashing are essential. For those with modern lines or moderate slopes, metal roofing can offer durable performance with good wind resistance and a distinct profile. Fiber cement and synthetic/shingle alternatives provide a middle ground, catching many of the advantages of both light and heavy systems without overburdening the structure. The local mix means you're likely to see a blend of profiles on neighboring properties, which helps set expectations for curb appeal, maintenance, and compatibility with existing gutters and flashings.
Start with a structural assessment to confirm the deck and rafters can support the chosen material, especially if considering slate or clay tile. Then evaluate attic ventilation: ensure there is a balanced mix of soffit vents and ridge or exhaust vents, plus a barrier that minimizes heat buildup in humid summers. When selecting materials, weigh the visible weight, the expected lifespan, and the local climate's attack plan-freeze-thaw resilience paired with efficient moisture management. For any full re-roof, require comprehensive flashing integrated with underlayment and a sealed edge at eaves and valleys to reduce ice dam formation and water intrusion in the heart of winter.
Given the local climate, expect annual inspection to catch minor leaks, inspect flashing at joints, and verify that underlayment remains intact after severe seasons. Periodic maintenance of valley paper and drip edge performance becomes a practical habit, especially on homes with complex roof lines or multiple polygons. If you're weighing asphalt against a heavier material, plan for how each option interacts with seasonal timing-late summer checks for humidity, then a fall review before winter sets in. Keeping a clear plan for shingle replacement cycles, vent checks, and flashing reinforcement helps guards against lingering moisture and keeps your roof performing through the town's characteristic swings.
Spring and fall storms are a named local risk that consistently tests Hillsborough homes. Heavy rain paired with gusty winds can reveal weak flashing and compromised underlayment long after a plan for a quiet season has seemed settled. Freeze-thaw cycles from inland Somerset County winters also compound exposure, forcing shingles to curl, seam lifts, and gutters to clog just when a storm arrives. When those conditions align, a small leak today can become a major issue tomorrow if left unaddressed. The message is simple: storms don't wait for the calendar, and neither should you when a leak appears.
Quick response is one of the strongest signals a contractor can send in Hillsborough. After a storm, homeowners expect activity, communication, and a clear plan for containment. A contractor that commits to rapid assessment, temporary protection, and a documented path to leak mitigation stands out from the pack. Temporary tarps, plywood, and covered flashings aren't just band-aids; they buy critical time while a durable fix is prepared. In this market, speed often determines whether interior damage is contained or escalates into costly repairs.
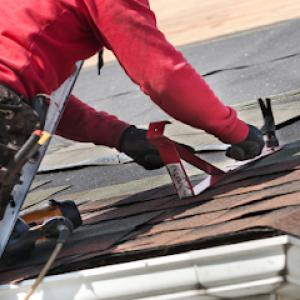
Emergency repair is highly prevalent among local contractors, indicating that temporary protection and rapid leak mitigation are routine parts of service here. When a leak is found, the first step is immediate containment: stop-gap protection that keeps water from infiltrating attic spaces, ceilings, and finished rooms. Then comes a targeted assessment of flashing around chimneys, vents, and vents' collars; roof edge details; and the underlayment's integrity. Expect a clear, written plan for repair that prioritizes securing the roof's most vulnerable seams before the next rainstorm can arrive.
If a storm is approaching or has just passed, do a quick safety check from ground level. Look for obvious gaps, lifted shingles, or staining on interior ceilings near the attic. If you notice active dripping or pooling, contact a local contractor with a proven rapid-response track record and request an emergency assessment window. Ask for a temporary protection plan that includes tarping or bracing, plus an explicit timeline for the permanent fix. After the storm, document damage with photos and keep a log of all communications for reference during repairs. The goal is to minimize exposure time-the longer water sits, the more interior damage and structural risk accumulate.
Storms in this region emphasize the need to address flashing detail and flashing-to-roof transitions during dry spells. Use a reputable local contractor who prioritizes thorough flashing inspections, ventilated attic spaces, and verified underlayment installation as part of any re-roof project. A proactive approach reduces the chance that spring or fall storms become repeated emergencies, preserving the home's envelope and reducing the disruption that heavy winds and rain can bring to a neighborhood already prone to rapid weather shifts.
Spartan Roofing
(973) 938-2776 www.spartanroofing-nj.com
Serving
5.0 from 97 reviews
New Jersey's Most Trusted Roofing Company. Serving all of North Jersey and Central Jersey Areas!
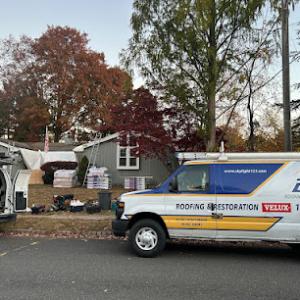
Skylight Roofing & Restoration
(732) 992-3090 skylight123.com
Serving
4.9 from 150 reviews
20+ years of experience providing quality roofing, storm damage, skylight, and exterior services to home and business owners in and around Princeton, NJ.
Asch Roofing
(732) 238-9917 www.aschroofing.com
Serving
4.7 from 144 reviews
Asch Roofing has been the cornerstone of reliable roofing & siding services in Monmouth Junction, New Jersey. For over six decades, our family-owned and operated business has been dedicated to protecting your home with quality craftsmanship and unparalleled expertise. We understand the importance of a sturdy, dependable roof, and we're committed to providing solutions that stand the test of time.

Princeton Roofing & Siding
(609) 540-0698 princetonroofingandsiding.com
Serving
5.0 from 26 reviews
Princeton Roofing And Siding is Princeton's number 1 roofing contractor. We take pride in our work from replacing a couple of shingles to installing a new full synthetic 40 year roof. Your neighbors trusted us for over 25 years, now its time for you to join us in the movement to make Princeton great again!
Smart Fit Roofing
Serving
5.0 from 33 reviews
Smart Fit Roofing provides roofing services in Sicklerville, NJ. Call us now for a free estimate!
T. Barkocy
(201) 841-0073 skylightspecialist.com
Serving
4.6 from 46 reviews
T. Barkocy offers superior roofing services. Being a second generation roofer with 30+ years, I noticed a market for roof repairs and skylight installations/repairs/replacements. I specialize in repairing existing roofs. Whether it be metal, slate, wood, tile or asphalt, I am well versed to repair your home's roof. I am also versed in flat roofing materials, such as EPDM and modified bituminous. Many residential roofing contractors are not trained on how to properly install roof flashings, etc. I am second gen. taught by my father. I offer a 5 year guarantee for all of the work that I complete. Along with roof repairs, I am also a VELUX certified Skylight Specialist. Whether it be a new install, repair or replacement, I can assist you.

Home Genius Exteriors
(732) 624-6442 homegeniusexteriors.com
Serving
4.8 from 651 reviews
Elevate your home with Home Genius Exteriors, setting the standard in New Jersey by offering full-service solutions for roofing, siding, windows, doors, gutters and insulation. We support our veterans and communities by supporting local and national charitable organizations through our Home Genius Cares initiative. With an Owens Corning® Platinum Preferred designation, we also offer flexible payment options, industry leading warranties and a wide range of premium products tailored for your home. It’s time for a different experience, entrust your next home project to a genius and schedule your free inspection today!
Bentley Roofing Services
(908) 708-6310 bentleyroofingsomerville.com
Serving
5.0 from 37 reviews
Bentley Roofing Services provides professional, high-quality roofing solutions for homeowners and businesses in Somerville. Our skilled team specializes in roof inspections, water leak detection, shingle, tile, and metal repairs, as well as complete roof replacements and preventative maintenance. We only use premium, industry‑standard materials and proven installation methods to ensure your roof withstands the elements for years to come. Whether you’re dealing with storm damage, aging components, or planning a roof upgrade, we deliver clear, honest assessments and upfront pricing. With fast, responsive scheduling and a commitment to exceptional workmanship, property owners in Somerville trust Bentley Roofing Services.
Lasting Construction & Improvements
(908) 755-0111 www.lastingconstructionnj.com
Serving
4.9 from 79 reviews
Lasting Construction, a fully licensed, insured, and certified company, is a family owned and operated business serving Northern and Central New Jersey. Many contractors say they are family owned and operated, but with us it is real. We are all related by blood or marriage. It is the family foundation that delivers true teamwork in the work we do for our roofing, gutter, and chimney home improvement customers.

MFA Roofing
(908) 275-5068 www.mfallcroofing.com
Serving
5.0 from 29 reviews
M.F.A. LLC provides new roofs, re-roofing, complete tear-offs, roof repairs, and asphalt shingles to the Hillsborough, NJ area. Serving Somerset County for 25 years.
Levs Construction
(908) 393-4723 levsconstruction.com
Serving
5.0 from 39 reviews
As a reputable provider of quality roofing services in Somerville, NJ, Levs Construction is specialized in roofing and siding solutions for our residential customers as well as flat roof installation for commercial customers. Levs Construction is also a GAF Master Elite® roofer, which indicates the level of excellence we stand for in our trade. Whether you need residential roof repair or residential roof replacement or commercial roof coatings, you can trust us to deliver the best roofing and siding solutions for your unique needs. Contact us today to learn more.
Arctic Roofing & Restoration
(888) 352-7284 arcticroofing.org
Serving
5.0 from 56 reviews
Arctic Roofing & Restoration is a top-rated roofing contractor based in Bridgewater, NJ, serving Somerset, Burlington, Monmouth, Middlesex, Ocean, and Mercer Counties. We specialize in roof replacement, roof repair, and storm damage restoratioN. We offer roof inspections, honest estimates, and insurance claim assistance. Our services include asphalt shingle roofing, flat roofing, siding, gutters, remodeling, & water mitigation. Whether you're paying out of pocket or filing a claim, Arctic Roofing ensures quality work and code-compliant solutions.
In Hillsborough Township, a Building Permit is generally required for a full re-roof. The township Construction Office issues the permit, and plans and fees must be submitted before work begins. This process helps ensure the work aligns with local codes, drainage considerations, and the neighborhood's standards for ventilation and flashing. Starting without a permit can stall a project and trigger inspections that delay completion, especially during peak roofing seasons when weather can compress schedules.
Before any shingle removal or deck rebuild starts, have a clear scope written for the permit package. The package should include roof plan details, attic ventilation strategy, and a note on how underlayment, flashing, and drip edges will be installed to handle Hillsborough's freeze-thaw cycles. If the house features complex eaves, valleys, or chimney flashings, ensure product data and installation specifics are included. The township often requires drawings or stamped notes from a licensed contractor or a professional engineer for larger or more intricate re-roofs. Expect that plans are reviewed for proper ventilation balance between the soffit intake and ridge or turbine exhaust, which directly affects ice dam risk in cold snaps.
Inspections are conducted in stages to verify compliance. The first inspection occurs after framing or underlayment but before the final roof covering goes on. This check focuses on ventilation pathways, attic insulation continuity, and the integrity of the roof deck and underlayment alignment. The second inspection happens after roofing is completed and all components are installed, including flashing, drip edges, and the completed ventilation plan. During the final inspection, inspectors verify that installation adheres to the approved plans and that flashing details at valleys, chimneys, and skylines are properly integrated to resist moisture intrusion. In Hillsborough, the emphasis on ventilation and flashing is deliberate to address the area's humid summers and winter freeze-thaw cycles, which can drive infrared heat into the attic and create ice dam pressure if not managed correctly.
Coordinate timing so the roof can be dried in within a single window, avoiding mid-winter or late-spring delays when weather can interrupt progress. Have the contractor present for inspections with the permit number, project address, and a concise summary of materials used, including underlayment type and venting strategy. If work slows due to paperwork or access, contact the Construction Office promptly to keep the schedule aligned with the permit's approved scope. Finally, keep a copy of inspection stamps on site; not only do they document compliance, they provide a record useful for future resale and any follow-up inquiries about ventilation adequacy or flashing integrity.
In this market, the numbers you'll see in Hillsborough reflect inland Somerset County's freeze-thaw cycles and humid summers. Asphalt shingles sit in the mid-low range, while heavier materials push into higher dollars. Local average pricing runs about $350 to $750 per square for asphalt shingles, $600 to $1100 for metal, $1200 to $2300 for clay tile, $400 to $800 for synthetic/composite, $1200 to $2500 for slate, and $550 to $850 for fiber cement shingles. Those ranges are for a standard full roof replacement, with typical neighborhoods and estate homes sharing a broad pattern, not unusual spikes driven by unusual shapes or large overlays.
Seasonal swings drive timing as much as material choice. When spring storms or fall winds compress scheduling, you can see prices drift upward simply from demand and the need to coordinate crews, delivery windows, and weather-safe work days. If you're weighing a late-season project, keep in mind that availability tightens and lead times lengthen, which can shift both the project start date and the overall timeline. For a full re-roof, map your target install window to a stretch with dry, moderate days and minimal freeze risk, since freezing can complicate underlayment and flashing work.
As you compare materials, align your choice with Hillsborough's typical home stock and climate needs. Asphalt shingles remain the most common for good value and broad color options, especially in subdivisions where consistent venting and attic exposure are easier to address. Metal roofing offers durability and wind resistance, with the trade-off of a higher upfront cost and sometimes a more pronounced appearance. Clay tile and slate bring exceptional longevity and a distinct look, but their weight and roof structure requirements can add to installation complexity and cost. Synthetic/composite shingles provide a middle ground between asphalt and premium options, often with better impact resistance. Fiber cement shingles offer good durability at a moderate price point, useful when you want a longer life without the weight of slate or clay.
When you're budgeting, plan for a realistic waste allowance and accessory upgrades that may be needed to address local conditions. Ventilation, flashing, and underlayment quality all factor into the total and influence how smoothly the permit and inspection steps (handled separately) go once the project starts. In Hillsborough, the right mix of material and timing can meaningfully affect comfort, energy performance, and long-term maintenance-especially across a roof that faces the town's mix of suburban subdivisions, rural roads, and estate properties.
Don't let upfront costs delay a critical repair - these contractors offer payment plans to fit your budget.


When a roof damage claim comes in after a Nor'easter or late-season freeze, photos are not optional. In New Jersey, carriers commonly request photo documentation and may ask adjusters to verify whether conditions were pre-existing. Take clear pictures from ground level and from angled roof views, focusing on all patches, flashing joints, and vents. A simple photo timeline showing before and after storm effects can help a claim move along without delays. Keep records of any professional inspections you've had in the past few years, since insurers will compare current damage to prior reports.
Statewide claim handling includes careful review of hail and wind damage, and some policies may apply depreciation holds even though insurer pullback is not uniform across the market. Understand that a claim may be paid in stages, with potential holds on aging components like underlayment, flashing, or accessory coatings. If a contractor identifies multiple failure points, document those findings and align them with the insurer's scope of coverage to avoid disputes about what qualifies as recoverable damage.
For Hillsborough homeowners, documenting storm timing, leak locations, flashing failures, and before-and-after conditions is especially important after spring and fall weather events. Leaks often appear in attic ceilings or around chimneys, skylights, and roof-to-wall transitions after freeze-thaw cycles. Emit a precise map of where water appeared, when it started, and how it progressed. Note any changes in roof decking or insulation that might affect claim outcomes. If flashing shows rust, lift, or poor securing, capture close-up images and multiple angles. Insurers may scrutinize whether the observed failures stem from the storm or pre-existing vulnerabilities, so thorough, organized records are essential to a fair review.
Connect with contractors who help homeowners navigate the claims process from damage assessment to final approval.
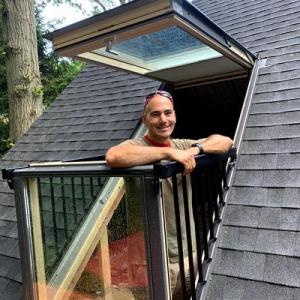
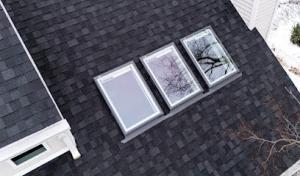
Skylight work is a meaningful specialty in this market, with enough local demand to justify dedicated repair and replacement expertise. In Hillsborough-style homes, skylights sit in varied roof planes and roof pitches, so the flashing must be tailored to each installation. When a skylight leaks, the failure often traces to the flashing boot, the curb seal, or the edge details where the curb meets the roof deck. A seasoned crew will verify proper daylight openings, gasket integrity, and continuous water shedding around the unit during a full reroof.
Chimney-related work is common among Hillsborough contractors, aligning with leak-prone roof intersections that need careful flashing in freeze-thaw conditions. Start by inspecting the chimney cricket or saddle and the step flashing along the sides. Mortar deterioration or efflorescence can open pathways for water, especially where the brick meets the roof. During reroofing, ensure a continuous seal from the chimney's base down and around the flue. A proper counter-flashing pair with well-sealed joints reduces ice-dam pathways and extends the life of both roof and chimney.
The township's inspection emphasis on flashing makes penetrations and roof-wall transitions a particularly important quality checkpoint on local re-roof projects. Pay close attention to where the deck meets the wall and at any skylight or vent penetrations. Use continuous flashing ahead of any shingle courses and test for wind-driven exposure at corners. In freeze-thaw cycles, even small gaps become big leaks, so meticulous sealant application and backer support are essential, especially around vent stacks and attic access hatches.
With inland winter cycles and humid summers, schedule flashing and penetration work for milder shoulder seasons to minimize cold-weather contraction risks. After any major storm, perform a targeted inspection of all penetrations-flashing, boot joints, and chimney flashing-before ice sets in. A proactive approach protects joints, reduces ice dam risk, and keeps the roof-assembly cohesive through Hillsborough's swings.
Find contractors experienced in skylight installation, flashing, and leak repairs to bring natural light into your home.
Payless Roof Repair & Skylight Repair
(848) 667-8840 paylessroofrepairandskylightrepair.com
Serving
5.0 from 51 reviews
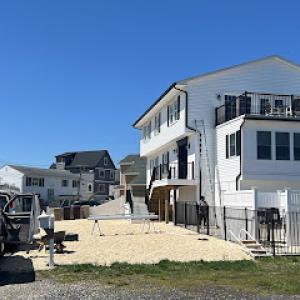
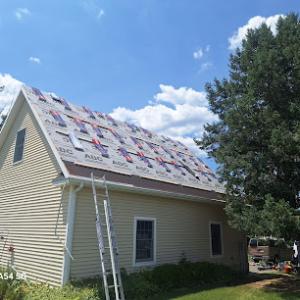
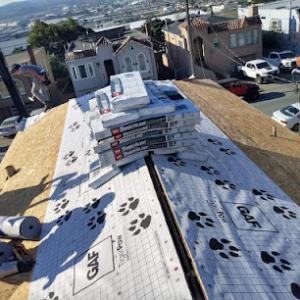
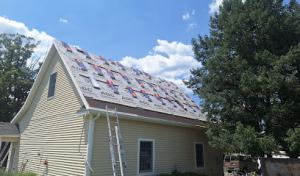
In this market, aging roofs across suburban subdivisions, rural roads, and estate homes often reach a point where full replacement makes the most sense. The inland Somerset climate with freeze-thaw cycles compounds damage in attic spaces and along eaves, so many homeowners opt for complete re-roofs rather than piecemeal repairs. A replacement gives you a new underlayment, properly vented insulation, and updated flashing that address ice dam risks and moisture intrusion from seasonal swings. Expect a contractor to discuss the sequence of removal, decking checks, and a thorough re-sheathing plan if any boards show signs of rot or wear after a harsh winter.
Cleanup included and fast communication are among the top signals of a reputable local crew. In Hillsborough, where construction traffic can linger on quiet cul-de-sacs and rural lanes, a contractor's promise to remove debris daily, protect landscaping, and promptly answer questions matters as much as the roof itself. For homeowners, this translates into a predictable schedule and fewer surprises when temperatures swing from freezing mornings to sun-baked afternoons. Effective jobsite management also minimizes the risk of water intrusion during replacement and helps keep seasonal ice dam risks down by ensuring the drainage plane is correctly restored.
Long-established, family-owned operations and manufacturer-certified installers maintain a visible presence, and reputation matters when choosing who to hire. These firms typically offer documented warranties and ongoing support that can be crucial after a harsh winter or a heavy storm. Because many Hillsborough homes blend traditional styles with modern upgrades, these contractors often tailor flashing, ventilation, and underlayment choices to the specific roof geometry-gable, hip, or low-slope-so seasonal shifts don't compromise performance. The result is a trustworthy match between materials, workmanship, and local climate realities.