Last updated: Apr 19, 2026
Snow-lrozen roofs and thaw cycles irritate the same roofs that leak after spring storms. In this area, a problem often shows up after one season transitions into the next, with active leaks surfacing as temperatures swing and moisture moves through aging flashing and clogged gutters. Your roof is likely to behave differently from one season to the next, so treat a small drip in late winter as a warning sign for spring storms, not a standalone issue. Quick action when you notice damp ceilings or attic condensation can stop a small problem from turning into a costly interior repair.
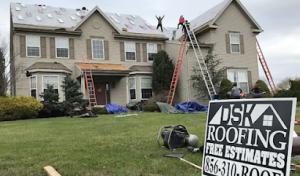
The local contractor signal mix clearly prioritizes emergency repair and storm-damage work. When a storm hits, fast tarping and a temporary dry-in save the house from further water intrusion while a longer-term fix is arranged. After any significant weather swing, schedule a post-storm assessment to identify compromised flashing, damaged valleys, or loosened ridge caps. If you see active dripping, treat it as an emergency, and arrange immediate tarping to keep water from reaching insulation or electrical lines. A temporary dry-in buys time for a thorough diagnosis and prevents roof decks from absorbing more moisture.
Autumn leaf debris is a practical Sewell issue because many neighborhoods have mature trees. Leaves accumulate in valleys and gutters, trapping moisture that can back up under shingles during rain events. Regular, targeted cleaning before and after peak leaf drop reduces the risk of moisture pooling at the eaves and fascia. In the spring, those same debris blockages can slow down drainage during heavy rain, so keep the gutter lines clear and inspect the downspouts to ensure fast moisture shedding away from the roof line. A clogged gutter or blocked valley often masquerades as a leak inside the home.
A practical routine after the seasonal switch is to walk the attic and inspect for dark stains, damp insulation, or mold pockets near the baffles and vent pipes. From the exterior, look for missing shingle granules, lifted edges, or rust on metal flashing near the chimney and vent stacks. If ladders are involved, have a partner steady the ladder and avoid brittle ice-dams by delaying access during freezing conditions. When in doubt, lean on a local contractor who understands how Sewell's mix of wind exposure, tree cover, and temperature swings stresses valley and flashing connections.
After a heavy storm, document any new leaks with photos, especially around skylights, dormers, and chimney areas. Notify a trusted local roofer for a rapid assessment within 24 hours if possible. If water is actively entering the home, prioritize tarping and temporary dry-in, then schedule a full diagnosis to map out the fastest, safest repair path. Quick notes, swift tarps, and an informed plan minimize interior damage and keep the roof repair moving without delay.
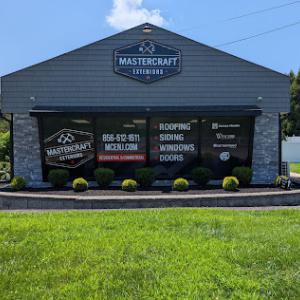
Mastercraft Exteriors
136 Hurffville - Cross Keys Rd, Sewell, New Jersey
5.0 from 139 reviews
At Mastercraft Exteriors, we want each and every customer to end up with the home that they want. We’re not about selling the costliest solutions. We ARE about understanding your personal style, learning how you use your space, and recommending how to achieve the greatest function and style within your budget. Whether it’s a new roof, new siding, or a deck, you can depend on Mastercraft for outstanding workmanship, seamless service, and a dependable, professional team that takes pride in helping make your house the home for your lifestyle . . . and your lifetime.

Mighty Dog Roofing of South Jersey
(856) 880-7929 www.mightydogroofing.com
309 Fries Mill Rd #6a, Sewell, New Jersey
4.9 from 166 reviews
Mighty Dog Roofing of South Jersey is a trusted roofing contractor serving Sewell and neighboring South Jersey towns. We specialize in roof repair and roof replacement plus siding and window installation, combining locally owned service with the backing of a national brand. Enjoy free roof inspections, industry warranties, and a “no mess left behind” promise. Ready for a consult? Call or book a free inspection today.
Mainline Construction Group
(856) 425-7425 www.mainlinecg.com
7 Clearbrook Ln, Sewell, New Jersey
5.0 from 45 reviews
Mainline Construction Group is South Jersey’s trusted expert in exterior renovations. Specializing in roofing, siding, windows, doors, and concrete, we provide top-quality craftsmanship and durable solutions for homeowners and businesses. With a commitment to excellence, we use premium materials and industry-leading techniques to enhance your property's curb appeal, energy efficiency, and structural integrity. Whether you need a roof replacement, new siding, energy-efficient windows, or custom concrete work, Mainline Construction Group is your go-to contractor. Contact us today for a free consultation and let us bring your vision to life!
Ultimate Improvements
(856) 357-0653 ultimateimprovements.com
4 Jan Ct, Sewell, New Jersey
4.8 from 172 reviews
Ultimate Improvements is a licensed and insured roofing & siding company with over 20 years experience brought to every job site!
JRG Builders
(856) 383-6789 www.jrgbuilders.net
1301 Hawthorne Ct, Sewell, New Jersey
5.0 from 37 reviews
Our company offers professional roofing, siding, gutter services and more. Our team of experienced professionals is committed to providing high-quality workmanship and excellent customer service. Whether you need a complete roof replacement, new siding installation, or gutter repair, we have the skills and expertise to get the job done right. We use only the best materials and state-of-the-art equipment to ensure that your project is completed on time and within budget. Contact us today to learn more about our services and to schedule a consultation.
Bill Collins Roofing
(856) 723-7448 billcollinsroofing.com
1 Thornfield Cir, Sewell, New Jersey
4.9 from 85 reviews
Residential Roofing Company
Spartan Exteriors
(609) 506-1880 thespartanexteriors.com
432 Ganttown Rd Suite 105, Sewell, New Jersey
5.0 from 25 reviews
Spartan Exteriors is a top rated roofing contractor based in Washington Township, New Jersey, proudly serving Gloucester County, Camden County, and surrounding South Jersey communities. We provide professional roof repairs, full roof replacements, storm damage restoration, siding, and gutter services for both residential and commercial properties. As local roofing specialists, we work directly with homeowners and insurance providers to simplify the storm recovery process and ensure quality repairs. From inspections to final cleanup, Spartan Exteriors is known for honest pricing, skilled craftsmanship, and dependable customer service you can trust.
Martino Roofing
(856) 582-0080 martinoroofingco.com
18 Tamwood Ln, Sewell, New Jersey
4.6 from 42 reviews
Full service Residential and commercial roofing company Gaf master elite certified (Residential) and Gaf Gold elite ( Commercial) offering the best long term warranty's in the industry backed by the #1 manufacturer in the country !

Tortorice Contractors
(856) 232-2222 www.tortorice.com
161 Blackwood-Barnsboro Rd, Sewell, New Jersey
4.4 from 37 reviews
After all, your home is your family’s single most important investment. It’s where you live your most important moments! We understand completely, because we’re a family business, so we ask for the opportunity to let us help you improve your home and enhance your lifestyle. And because we offer instant financing, everyone can have the home they desire quickly and at a cost they can afford. Tortorice Contractors is a South Jersey Siding and Roofing Company dedicated to your happiness and satisfaction. We look forward to talking with you, and showing you what the Tortorice Contractors’ family can do for your family.
Arias Roofing & Siding
(856) 306-8800 www.ariasroofingnj.com
110 Lambs Rd, Sewell, New Jersey
5.0 from 7 reviews
Arias Roofing & Siding has been providing South Jersey Residential Roof Repair, Roof Replacement, New Roofing, Siding and Windows for two decades, specializing in asphalt shingle roofing as well as metal, slate, rubber and flat roofing for South Jersey homeowners.
Madden Construction & Roofing
1000 Lantern Way, Sewell, New Jersey
5.0 from 5 reviews
Residential and Commercial construction, roofing and remodeling.

Grand View Roofing & Exteriors
(856) 305-9883 www.gvexteriors.com
Serving
4.9 from 290 reviews
Grand View Roofing & Exteriors is a professional construction company providing services for roofing, siding, windows, and gutters. As a family owned and operated company, we treat every customer as if they were our own family and each job as if it was our own home. We want to earn your trust through superior work and craftmanship. Whether your overall goal is to replace a failing roof, change your home’s curb appeal, increase your property value, and / or save money by improving the energy efficiency, Grand View Roofing & Exteriors has got you covered. We offer a variety of products to fit any budget and need, all professionally installed by our kind, skilled, and experienced employees.
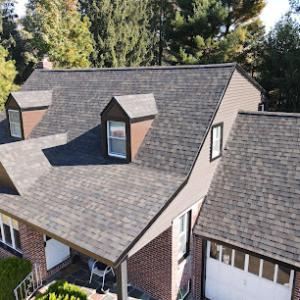
Asphalt shingles stand as the dominant practical choice in Sewell, given the mix of suburban lots and age of the roofs that show up in Gloucester County neighborhoods. Yet the local market also supports metal, slate, wood shake, clay tile, and concrete tile, which is broader than many suburban New Jersey roofing markets. When you're planning a roof update, this mix means you can tailor the system to the house style, the tree canopy, and the seasonal weather swings that define South Jersey summers and freezes.
Heavier materials such as slate, clay tile, and concrete tile can complicate replacement planning. Older framing and decking conditions must be verified during tear-off and inspection, because the added weight changes how the roof is supported and might require reinforcement. In practice, that means you should expect an extra step of confirming attic joist capacity, sheath integrity, and potential rafter spacing adjustments before ordering materials. If the existing structure shows signs of previous water intrusion or uneven decking, plan for a more thorough inspection and possible reinforcement, especially on two-story homes with larger roof footprints.
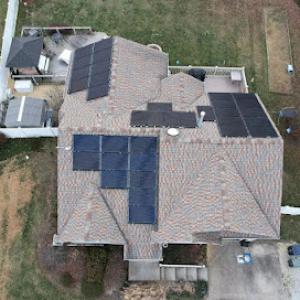
Warm, humid summers in South Jersey make ventilation and underlayment choices especially important when comparing asphalt to metal or tile systems. Asphalt shingle setups benefit from a robust attic ventilation plan to reduce heat buildup and condensation during wet, midsummer days. Metal and tile systems, while durable, rely on proper underlayment and venting to prevent heat-driven issues and to preserve deck longevity. In homes with mature trees and dense shade, you'll want to consider underlayment that resists moisture intrusion and breathes well, plus venting strategies that minimize hot-air trapping in the attic.
Your home style will influence the material selection beyond weight and ventilation. A traditional two-story brick or clapboard home often pairs well with classic asphalt or slate, while modern lines and larger roof planes can balance better with metal or tile options. For newer additions or sunrooms that extend the original roof, compatibility with existing drip edges, gutters, and flashing is key to a seamless transition. In all cases, choose a material that respects the local climate's swing-hot, humid summers followed by cold snaps-and aligns with the home's frame and decking realities.
If a storm or seasonal change reveals leaks or moisture intrusion, start with a quick interior check around ceiling spots and attic vents, then inspect skylights, flashing, and pipe penetrations from the exterior. Note any sagging areas or soft decking when you walk the attic or look at exposed rafters. In Sewell's climate, rapid assessment after weather swings helps prevent hidden damage from expanding water infiltration and temperature-related stresses.
In Sewell, the practical window for replacing roof windows-also known as skylight or attic vent windows-aligns with the seasonal dance of inland South Jersey weather. Spring and fall provide the most predictable conditions: milder temperatures, less humidity, and fewer extended freezes that can stress sealants and flashing. That combination keeps leaks from sneaking in during installation and helps seals set properly as roofers work through the day. Winter can slow or halt work when snow or ice makes tear-off risky or when cold temperatures keep sealants from curing correctly. Summer brings heat and humidity that slow crews as stacks of shingles and flashing panels are moved and staged, increasing the chance of heat-related fatigue and scheduling gaps. Planning around this rhythm reduces disruption and helps ensure long-term performance of the new windows.
Start with a careful inspection of the existing roof deck around any windows. Look for soft spots, torn underlayment, or lifted shingles that signal prior leaks or wind damage. In Sewell's climate, attic condensation and seasonal shifts can reveal hidden rot near the rafter tails or around old flashing. When selecting a window type, consider vented versus fixed models. Vented options reduce heat buildup in the attic during summer, while fixed skylights often seal more reliably in winter storms. The size and placement should leave room for flashing integration without crowding nearby roof penetrations. A local roofer will verify the alignment with the roof's pitch and the gutter line, ensuring proper drainage away from the window.
If a replacement window is urgent, aim for a mid-spring or early autumn installation window to minimize material stress and scheduling disruptions typical of winter and peak summer. Coordinate with crews on a weather-glide path: a string of dry days with overnight cooling tends to yield the best results. In late spring and early fall, mornings should be dry and temperatures comfortable enough to seal shingles and flashing without rushing. When the forecast shows a heat wave or an unexpected cold snap, plan for a temporary tarp or a quick-seal approach to protect interior spaces until conditions improve. For a more precise timeline, ask the contractor to stage the window and flashing materials in a shaded area of the yard to prevent heat damage and warping during transport.
The installation begins with safe teardown of the existing window-removing interior fasteners, then carefully lifting the roof cap and resealing perimeter flashing. The roof deck around the opening must be immaculate, free of nails protruding into the opening, and clean of old sealant bead accumulations. A high-quality underlayment patch goes in before the new window, followed by a drip edge and upgraded flashing that integrates with surrounding shingles. Proper shingle alignment around the window is crucial; misalignment can trap moisture and create slow leaks during seasonal swings. Sealants should cure in moderate temperatures, so weather windows matter. Final checks focus on interior condensation control and ensuring the interior trim remains watertight as attic temperatures swing with the seasons.
Get a clear picture of your project costs upfront - no commitment required.
In this area, Sewell is an unincorporated community within Washington Township, so homeowners typically interact with the township building department rather than a separate city hall office. That means the roof project is handled through the township's processes and forms, with decisions resting with township staff and inspectors who understand local conditions-like the region's humid summers, freeze-thaw cycles, and the importance of sound decking and flashing in suburban, tree-lined neighborhoods. A full roof replacement is treated as a permit-required project, reflecting the township's emphasis on ensuring decking, underlayment, flashing, and ventilation are up to standard before and after work proceeds.
If you are planning a full roof replacement, begin with securing the building permit required by the township. The permit is not simply a checkbox item; it initiates a review that assesses how the new roof will integrate with existing decking and drainage, and how underlayment and flashing will be installed to handle Sewell's seasonal swings. The township review happens before any work starts, so coordinating timing around this review can prevent delays. If you're replacing only a portion of the roof, the same permitting mindset generally applies, since the structural and moisture control elements must remain coherent across the entire roof system.
During the review, inspectors will expect a clear plan for decking condition, underlayment, flashing details, and venting provisions. In a neighborhood with mature trees and close-row homes, proper flashing around chimneys, vents, skylights, and transitions is essential to prevent leaks storm after storm. Underlayment choices should correspond to the climate's freeze-thaw cycles, and ventilation must be designed to reduce moisture buildup in attic spaces. If the current decking shows signs of past water intrusion or rot, the permit review may require replacement or reinforcement of decking sections before or alongside the roof replacement.
Inspections are a normal part of the project in this jurisdiction, conducted during key milestones and after completion. Expect inspections to verify that decking has been restored or reinforced as needed, that underlayment has been properly installed, that flashing is continuous and sealed, and that venting meets code and best-practice guidelines. Inspections may occur at multiple stages, so coordinating with your contractor to align schedule windows helps minimize downtime and rework.
Turnaround times for permits can vary depending on township workload. If online submittal is available, using that channel often speeds the initial review and communication of any missing items. Gather essential documentation early: a roof plan, scope of work, material selections, and any structural notes for decking or framing. Your contractor can help assemble these documents with the township-specific forms. Keeping communication channels open with the building department-via email or the online portal-helps prevent miscommunications that could stall the review, especially during peak seasons when weather-driven roofing projects surge.
Sewell homeowners commonly begin cost planning with the provided per-square ranges. The practical starting point is Asphalt Shingles at a typical 350-750 USD per square, with premium options like Metal Roofing (700-1400) and tiles spanning a broad spectrum (Clay 1200-2600, Concrete 1100-2400). Those ranges reflect what a basic replacement or refresh costs on a clean, straight roof. But actual bids can rise when tear-off reveals damaged decking after repeated humid-season moisture exposure or winter leak cycles. If the roof reveals softened or warped decking, expect decking replacement to add to material and labor costs, and that adjustment tends to show up in the bid as a separate line item rather than baked into a square-rate price.
The area's broad mix of roofing materials means costs vary sharply depending on whether a homeowner is replacing standard asphalt shingles or maintaining a premium roof such as slate, tile, or metal. In Sewell, you'll see a noticeable jump in price once you step beyond basic shingles. A slate roof, for instance, can push total square costs well into the 1600-3200 USD range per square, while tile options (Clay or Concrete) pull higher than asphalt but offer distinct durability and curb appeal. Wood shingles and shakes land in the mid-to-upper range, roughly 500-1200 per square, depending on thickness and grade. When budgeting, match your material choice to the roof's role in your home's value, and plan for additional edge work, flashing, and underlayment if venting or penetrations are complex.
Project timing can affect pricing in Sewell because storm-related demand spikes and the preferred spring/fall scheduling window can tighten contractor availability. If a harsh winter or late-season storm creates a backlog, bids can rise or scheduling may compress, leading to expedited timelines with higher labor costs. Conversely, a calm spring window can yield more flexibility and potentially more favorable scheduling, especially for lighter maintenance or mid-season roof checks. Plan ahead, especially if you suspect decking or flashing issues after seasonal weather swings, so pricing isn't driven by urgent, last-minute decisions.
New Jersey is a relatively stable insurance market for roofing claims, so Sewell is not defined by extreme claim pressure, but wind and hail losses still matter after seasonal storms. When a storm sweeps through Gloucester County, a quick after-action check becomes your best friend. The goal is to catch leaks before they travel, and to document the roof's condition while it's still fresh in memory. For many homes, the most consequential claims trace back to wind-driven lift on older shingles, exposed flashing, or compromised edge channels from heavy rain and blowing debris.
Sewell homeowners should expect insurers to ask for roof age, photos, and maintenance history, especially when damage appears after spring storms or winter weather events. A credible file combines dated photos showing the roof surface, any visible granule loss, and the condition of penetrations around vents and chimneys. Photos taken from the ground and from ladders (safe distance) help demonstrate where water intrusion begins. A log of past repairs, even minor ones, can influence how an adjuster interprets remaining life and need for replacement versus repair.
Nonstandard materials common in this market, including slate, tile, wood shake, and some metal systems, may receive closer insurer scrutiny for replacement scope and wind-rating documentation. If the claim involves one of these materials, anticipate requests for product specifications, installation details, and proof of wind resistance. In Sewell's climate, a thorough assessment should extend beyond obvious leaks to uncover hidden water tracks along roof lines, valleys, and attic spaces. A careful record of orientation and condition helps prevent disputes about what constitutes an adequate restoration versus a full replacement.
Begin with a prompt, professional inspection from a local roofer who understands seasonal weather swings here. Preserve damaged materials for insurer review when safe to do so, especially tiles or shakes that may be resettled or broken during removal. Maintain a concise timeline of events, photos, and communication with the contractor and insurer. If the scope grows due to wind or hail, a clear, organized presentation can reduce delays and help secure a fair settlement that aligns with actual replacement needs.
Connect with contractors who help homeowners navigate the claims process from damage assessment to final approval.
Ultimate Improvements
(856) 357-0653 ultimateimprovements.com
4 Jan Ct, Sewell, New Jersey
4.8 from 172 reviews
Bill Collins Roofing
(856) 723-7448 billcollinsroofing.com
1 Thornfield Cir, Sewell, New Jersey
4.9 from 85 reviews
Spartan Exteriors
(609) 506-1880 thespartanexteriors.com
432 Ganttown Rd Suite 105, Sewell, New Jersey
5.0 from 25 reviews
The local contractor market shows meaningful demand for skylight work, and that signals a recurring homeowner concern: leak-prone penetrations around skylights. Skylights sit at the intersection of heat, cold, and airborne debris, so aging flashing around the curb or curb-mounted units can fail first. Inspect annually after winter freeze-thaw cycles and again after heavy spring storms. Look for corroded countersflashing, loose shingles under boot-flashing, or dark stains along valley lines where water would shed toward the interior. If you notice condensation on the interior pane, or a puddle forming inside the ceiling around the skylight, treat it as a warning sign that the flashing needs resealing or replacing before the next storm.
Chimney-related roofing tie-ins are common enough locally to matter, especially where flashing ages faster than the surrounding field shingles. A leaking chimney flash can creep along the joint between brick or stone veneer and the roof deck, hidden behind fascia and gutter lines. Pay attention to rusted or lifted step flashing, gaps at the base of the chimney, and deteriorated sealant around the chase. After heavy rains or rapid temperature swings, check for damp spots or soft spots on the ceiling near the chimney interior. Addressing degraded flashing early prevents moisture from migrating into attic framing, where rot and mold can follow.
Flat and low-slope sections appear often enough in the contractor signal data to justify separate attention for drainage, membrane transitions, and ponding-related maintenance on additions or porch roofs. These areas are prone to standing water after storms, which accelerates deck-penetration wear and softens flashing joints. Inspect at least twice a year for blistering, seam separation, or edge uplift where the membrane meets vertical surfaces. Ensure parapet caps and edge metal are securely fastened, and that drainage outlets remain clear of debris to prevent water from backing up into flashing corners.
Seasonal weather swings demand a focused routine. After major storms, run a visual sweep from the ground-look for shingle lift near flashings, rusting from metal flashings, or any sagging around vents and skylights. In attic spaces, listen for dripping sounds or see daylight near flashing seams. When replacing shingles or performing a re-roof, prioritize flashing material compatibility with the selected roof covering to minimize future failures.
Finally, keep a simple upkeep habit: a light, protective sealant around non-structural flashing joints can buy time between repairs, and monthly debris removal from gutters helps prevent water backing onto flashing. In homes with flat roofs or porches, consider a routine review of membrane transitions before and after coastal storm seasons, so ponding issues don't silently undermine the roofline.
Find contractors experienced in skylight installation, flashing, and leak repairs to bring natural light into your home.

Mighty Dog Roofing of South Jersey
(856) 880-7929 www.mightydogroofing.com
309 Fries Mill Rd #6a, Sewell, New Jersey
4.9 from 166 reviews
Ultimate Improvements
(856) 357-0653 ultimateimprovements.com
4 Jan Ct, Sewell, New Jersey
4.8 from 172 reviews