Last updated: Apr 19, 2026
South Richmond Hill sits in inland Queens, so homeowners are more often dealing with wind-driven rain, snowmelt backup, and tropical-storm remnants than coastal salt exposure. That means roofs face abrupt pressure changes, with water chasing seams and flashing around edge details rather than a slow, soaking tide effect. The density of homes amplifies small leaks into meaningful interior damage, especially where heat from neighboring roofs moves moisture toward shared walls. Prioritize proactive checks after any storm or warm-to-cold swing when condensation and wind-driven spray can exploit weak points.
Tightly packed housing makes parapet edges, party-wall transitions, and flashing details critical weak points. Water intrusion can travel along shared building lines or spill from one unit into another, sometimes before a homeowner even notices a problem on their own roof. Look closely at the junctions where rooflines meet walls, where metal edging sits against shingles, and where flashing meets vent pipes or chimneys. If a neighboring unit shows staining or peeling paint near a roofline, there is a good chance your own flashing needs attention. Address suspected failures with prompt resealing, repointing, or flashing replacement before water finds a path into the attic or ceiling.
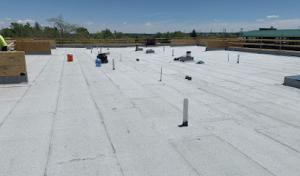
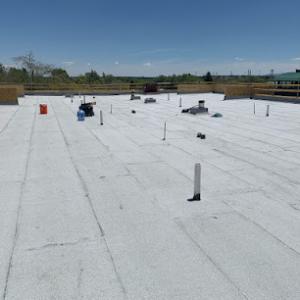
The city's block-to-block diversity means many homes have both pitched sections and low-slope rear areas. Low-slope sections are particularly unforgiving during late-summer tropical systems and spring-fall wind events, which frequently trigger leak calls, lifted shingles, and flashing failures rather than total roof loss. Inspect flat or low-slope areas for ponding, blisters, or wrinkled underlayment after heavy rain or wind. Check the transitions from pitched to low-slope areas for torn joints, degraded sealant, or worn-down boot joints around vents and skylights. In dense neighborhoods, even small discrepancies in field shingles or edge trim can become channel routes for water that then travels along the deck to reach living spaces.
After a windy or stormy period, perform a rapid interior check: look for attic stains, unusual attic air drafts, or newly damp insulation. If any evidence emerges, arrange a prompt exterior inspection focusing on flashing at chimneys, vents, and along party walls. On the roof, test for loose or lifted shingles by walking carefully along sturdy sections with another person guiding you away from edges. If a spot shows moisture ingress or compromised sealant, schedule a professional assessment to confirm whether a targeted flashing repair, resealing, or a partial replacement is required to stop ongoing leaks and prevent further damage to adjacent units.
Many homes in this area combine a visible sloped front roof with lower-slope rear sections, porches, dormers, or extensions. Replacement planning often has to address more than one roofing system on the same property. That means you're weighing how a pitched, front-facing roof interacts with flatter, low-slope areas that creep along the back and sides. The front roof may shed water quickly, while the rear sections absorb more water and sit closer to yards, driveways, or walks. Knowing which areas are tied to which system helps you choose materials, flashing details, and installation sequences that don't fight each other.
Low-slope sections are more vulnerable to ponding, membrane wear, and drainage-related leaks than the front-facing pitched areas homeowners notice from the street. Because these areas often sit near additions or porches, water migration can hinge on tiny changes in grade, drip edges, and flashing transitions. Chimneys and skylights are frequent leak points on older neighborhood housing stock because multiple roof planes, masonry penetrations, and retrofit additions create more flashing transitions. If you've got two or more roof planes converging at a single corner, keep a close eye on those intersections after every heavy rainfall.
Start with a quick exterior walk of the property after a storm. Look for visible sagging or pooling on the rear low-slope sections, and note any damp spots or staining on interior ceilings near those areas. When you inspect the roof itself, check flashing where the chimney, skylight, or dormer meets the main planes. Pay special attention to transitions where a higher pitched front roof meets a lower back section, since underlayment and flashing must coordinate across those borders. If there are extensions or porches, inspect the ridge line and edge of the overhang where debris can trap moisture and accelerate wear on membrane surfaces.
For front pitched and rear low-slope combinations, prioritize a seamless transition between systems. Use compatible flashing materials that bond well across different pitches, and ensure proper slope and drainage toward established gutters or downspouts. When resealing or replacing, consider keeping the same roof color and profile for the affected area to minimize mismatched wind uplift and thermal expansion stresses. If a dormer or extension creates additional penetrations, address those transitions with reinforced flashing and, where practical, a continuous underlayment layer beneath the entire roof assembly to reduce localized leaks.
Develop a seasonal plan that targets the rear, low-slope areas first, since they're the most prone to ponding. Schedule proactive cleaning of gutters and downspouts to prevent backup into the back sections. Keep an eye on chimney and skylight flashing after heavy rain and windy weeks, and consider a yearly inspection focused on those loss-prone joints. A coordinated approach that treats front and rear areas as a connected system will extend the life of the whole roof and reduce surprise leaks after storms.
Find specialists in TPO, EPDM, and built-up flat roofing systems for residential and commercial properties.
Five Star Roofing
(718) 795-6640 fivestarroofingny.net
Serving
4.8 from 443 reviews
Five Star Roofing is a fully licensed and insured commercial and residential roofing company located in Queens, NY. Since 2008, we have provided top-quality roofing services to Queens, Brooklyn, and Long Island homeowners. Our team of experienced and certified roofing professionals specializes in flat, shingle, tile, and metal roofs, as well as urgent repairs. Whether you need roof repairs, replacements, or installations, we have you covered! With a strong emphasis on excellent customer service and premium craftsmanship, we have built a reputation as one of the most trusted roofing companies in the area.

Power Roofing & Stucco Queens
(516) 995-8006 powerroofingnyc.com
Serving
5.0 from 30 reviews
Discover Power Roofing & Stucco Queens, the ultimate destination for your roofing and stucco needs. Based at 111-32 147th St, Jamaica, NY, our team of expert craftsmen are committed to delivering exceptional craftsmanship and customized solutions. With a focus on both roofing and stucco services, we empower homeowners and businesses alike to achieve their desired aesthetic and structural integrity. Trust Power Roofing & Stucco Queens for unparalleled quality and service, promising a safe and stunning exterior for your property.
Metro roofing
(347) 748-2500 themetroroofingcompany.com
Serving
4.8 from 52 reviews
Our company strives for quality and reasonable pricing . We pride our selves on our reputation and continue to work up to it
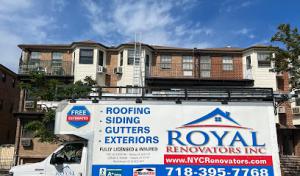
Royal Renovators
(718) 414-6067 www.nycrenovators.com
Serving
4.8 from 262 reviews
Royal Renovators is a trusted roofing contractor in Queens, serving homeowners and businesses throughout Queens, Brooklyn, Manhattan, the Bronx, and Long Island. We specialize in flat roof repairs and roof replacements for both residential and commercial properties. Since 1988, our licensed and insured team is BBB A+ Accredited and GAF Master Elite certified, working with flat and shingle roofing systems built to last. We also provide professional siding, masonry, and gutter services. From Brooklyn’s historic brownstones to Queens residential properties, clients choose us for honest, reliable roofing that withstands New York’s toughest weather. We offer emergency services for urgent leaks and storm damage. Call for Free Estimate today.
Santamaria Roofing
(516) 808-7872 santamariaroofingservices.com
Serving
5.0 from 34 reviews
We haves the best materials
J C Master Inc Roofing & siding
(347) 400-2611 jcmasterinc.net
Serving
4.0 from 92 reviews
JC Master is a licensed, insured roofing & siding contractor serving New York City—Brooklyn, Queens & Long Island—since 1997. We specialize in roof repairs & full replacements (shingle, flat/TPO/EPDM), gutters, leak detection, storm-damage assessments and insurance-claim support. Most of our work comes from referrals because we show up fast, document the damage, and handle the paperwork with your carrier. Free same-day inspections, clear pricing, and crews you can trust for family homes and multi-family buildings. Call for a visit today.

EA Chimney & Roofing
(718) 480-8350 eachimneyroofing.com
Serving
5.0 from 106 reviews
EA Chimney And Roofing has been safeguarding homes since 2009. Specializing in roofing services, we bring expertise and dedication to every project. Located in Jamaica, NY, we're committed to providing reliable solutions, ensuring the safety and beauty of your home's essential structures. Trust EA Chimney And Roofing to protect what matters most.
Paragon Chimney & Roofing of Queens
(347) 544-9554 paragonchimneyandroofing.com
Serving
5.0 from 482 reviews
Paragon Chimney & Roofing is dedicated to providing top-quality chimney and roofing services. Our team ensures safety, reliability, and customer satisfaction. Serving New York, we pride ourselves on expert craftsmanship and prompt service. Trust Paragon for all your chimney and roofing needs.

NY's ELITE ROOFING & SIDING
Serving
3.7 from 63 reviews
NY's ELITE ROOFING & SIDING INC. is a family owned and operated Company in NY, USA. We Service ALL Areas off NY, Long Island, Brooklyn, Queens, Bronx, Staten Island, Westchester, Suffolk and Nassau Country and Other Location's within the vicinity. Our Team has been expertly providing Roofing and Siding Installations for Over 25 Years- Making US the TOP CHOICE among ALL the other contractors providing Similar Services in the Area. We are FULLY EQUIPPED and LICENSED & INSURED Roofing and Siding Contractors. Our Team Specializes in ROOF INSTALLS, ROOF REPAIRS, ROOF REPLACEMENTS in Areas of NYC, LONG ISLAND, BROOKLYN, Westchester, Suffolk and Nassau County Plus Many Other AREAS of NY, USA 🇺🇸🇺🇸 2022 The Year of making it HAPPEN
SRT roofing services
(917) 459-8918 www.srtroofingny.com
Serving
4.7 from 92 reviews
srt roofing is a full service roofing company specializing in the installation and repairs of flat roof and shingle roof systems
Master Roofing
(718) 957-0313 www.master-roofers.com
Serving
4.5 from 55 reviews
Looking for a reliable roofing company in NYC? Look no further than Master Roofing With years of experience, we offer high-quality roofing services for residential, commercial, and industrial properties. Our team of skilled roofers uses top-quality materials and the latest techniques to ensure your roof is strong and durable. We provide personalized service and attention to every client, ensuring that your unique needs and budget are met. Contact us today for competitive pricing and efficient service. Our Services: Roof installation, Roof repair, Roof maintenance, Gutter installation, Gutter repair, Roof insulation installation, Roof cleaning, Emergency roof repair services, Roofing inspections, Roof replacement & more
Skyward
(718) 878-6748 www.skywardroofing.com
Serving
5.0 from 82 reviews
Skyward Roofing - Queens is a professional and trusted roofing company catering to the roofing needs of commercial and residential clients. With vast experience, our team of skilled experts offers quality roofing services customized to meet the special needs of every client. From new installations and repairs to inspections and maintenance, we deliver excellent artistry using quality materials and modern techniques. Dedicated to client satisfaction, we ensure timely project completion, moderate pricing, and a commitment to surpassing client expectations. Reliable, trustworthy, and efficient, we are the most sought-after company for roofing needs. Call us or visit our site for more information.
Asphalt shingles fit much of the neighborhood's residential stock because they work well on the pitched front roof sections common in the area and are easier to match during partial repairs. For dense rows and tight eaves, a standard 3-tab or a simple architectural shingle can often be blended with neighboring homes, keeping exterior lines uniform after a leak repair or partial replacement. When storm events push wind-driven rain toward the front roof, asphalt still delivers reliable performance with straightforward flashing details around chimneys, vents, and rake edges. For the back of the house, where low-slope sections may exist, it's important to ensure any transitions are properly sealed to prevent water intrusion.
Metal roofing is present but less dominant locally, often chosen where homeowners want longer service life or lower maintenance on specific roof sections rather than as the default neighborhood standard. If a rear or side addition features metal, that section will typically hold up well against wind and heavy storms, but it can create a ridge and seam layout that requires careful detailing to avoid leaks at fasteners and gaps. When mixing metal with asphalt, look for coordinated flashing that ties into the older roof planes without overloading older framing. A metal section can also handily handle a low-slope transition if designed with a proper crickets and scuppers system to channel water away from foundation walls.
Tile, wood shake, and slate exist in the broader NYC market but require careful structural and detailing review on older Queens homes, especially where rear additions or mixed roof framing may not suit heavier materials. Clay or concrete tiles bring lasting durability and a distinct look, but their weight demands verified framing and sometimes reinforcement at critical connections. Wood shakes can offer a regional charm, yet they demand meticulous maintenance against rot, pests, and moisture intrusion in tight urban blocks where shade and limited sun can slow drying. Slate provides premium durability but is usually paired with a structural assessment and precise underlayment details to handle potential movement in older structures. In homes with mixed pitched and low-slope elements, a careful assessment of weight distribution, fastener compatibility, and flashing complexity is essential to prevent leaks.
In dense blocks, you will frequently encounter roofs that blend front pitched surfaces with rear low-slope sections. The best approach prioritizes reliable, detailed flashing around penetrations, tight transitions at shoulders of different roof planes, and a uniform gutter or internal drain strategy to handle storm-driven runoff. When choosing materials, align the heavy, durable options with the most exposed sections while respecting the visual continuity from street-facing fronts to back portions. With any non-asphalt choice, pair the material with an explicit plan for structural compatibility and a comprehensive edge detailing to minimize future storm-related repairs.
South Richmond Hill follows the NYC pattern where late spring through fall is usually the preferred replacement window because crews can avoid winter freeze-thaw complications and summer installation extremes. When planning a reroof, target late May through October to align with milder temperatures, steady workdays, and reliable asphalt and underlayment performance. If the roof has mixed pitched and low-slope sections, prioritize the higher-risk areas first in this window, then complete touches on low-slope rear sections as weather permits.
Cold-season snow and thaw cycles in Queens increase the risk of ice dams and repeated wetting at eaves, especially on homes with uneven insulation or ventilation between original structures and later additions. If a replacement must occur in winter, plan for enhanced moisture management: ensure temporary shingling protection on exposed eaves, and set aside extra time for attic ventilation checks and scupper or gutter detailing. Ideal timing avoids the peak freeze-thaw months, but a carefully staged plan can still finish a project when a cold snap is brief and followed by a stretch of above-freezing days.
Hot, humid NYC summers accelerate asphalt aging and can make attic heat buildup worse, which matters on closely built neighborhood homes where ventilation upgrades are often part of a full reroof. In the heat window, crews may work earlier mornings to reduce heat exposure and install upgraded attic ventilation or radiant barriers as part of the replacement. If the roof includes a low-slope rear area, ensure the ventilation strategy is in place before shingle laydown to reduce heat-related adhesive issues and ensure long-term watertight performance.
Dense block patterns in the area mean evenings and weekends can see tight access around neighboring houses. Plan phasing to minimize disruption: begin with the front roof and any higher-pitched sections first, then move to the rear or low-slope areas once the front is weather-tight. Before starting, map out adjacent structures to coordinate debris containment and to prevent wind-blown debris from impacting neighboring properties.
Set a target for the late spring kickoff, and build a weather buffer into the initial module. Monitor weekly forecasts for temperature stability and precipitation risk, and adjust the sequence to converge on a continuous install during windows of several dry days. Have the crew inspect attic ventilation and insulation between original sections and additions as a standard part of the schedule, so that the reroof stays within a single, cohesive system rather than a patchwork over time.
In this neighborhood, roof replacement costs are shaped by Queens access constraints and dense lot lines. Narrow driveways, limited staging space, and close-proximity structures make tear-off, debris handling, and material delivery more labor-intensive. That translates to higher crew time and handling fees compared to more open sites. When budgeting, expect the base material price to be coupled with added labor for efficient staging and careful debris management in tight spaces. The mix of pitched fronts, low-slope rear areas, porches, and dormers commonly found here means several line items may appear on the bid, not just one lump price.
Many homes in the area feature both standard pitched sections and low-slope or flat patches. Contractors often price separate systems for the different roof segments to ensure proper waterproofing details and flashing. If a rear low-slope section or dormer requires its own underlayment, flashing plan, or drainage setup, the quote will reflect multiple installations rather than a single all-purpose system. Expect the lowest-priced square footage to be offset by premium pricing for the non-traditional sections and the precision work needed around dormers, porches, and multi-flash connections.
NYC labor markets put cost pressure on storm response work. After major wind events, scheduling can tighten quickly, and pricing can tick up due to surge demand and limited local crews. If timing is flexible, booking in a window with predicted calmer conditions can help secure more favorable terms, while still addressing urgent leaks promptly to prevent interior damage.
For South Richmond Hill homes, material selection strongly influences total cost. Asphalt shingles remain the most cost-effective, but labor and staging in tight yards push the final price higher than open-area projects. Metal roofing offers durable performance with a broader price band when factoring in specialized detailing for low-slope zones. The lighter tile and slate options can escalate costs further due to heavier equipment requirements and longer installation times in cramped spaces. For planning, map out the square footage of each distinct roof area-front pitched, rear low-slope, and any dormers or porches-and apply the local cost spectrum accordingly, recognizing that each segment may drive a separate line item on the contract. Typical project totals should be calculated with these broken-down segments in mind to avoid surprises when the crew starts work.
Get a clear picture of your project costs upfront - no commitment required.
Daniel's Roofing:Best roofing contractor Queens/Brooklyn Ny
(917) 204-2906 danielsroofingnyc.com
Serving
5.0 from 78 reviews
A full roof replacement in this area typically requires an NYC Department of Buildings permit rather than a simple over-the-counter local township approval, reflecting the city's centralized building oversight. That means the project will be reviewed beyond the contractor's word and canvas. If you're replacing multiple sections or converting a low-slope rear area, expect the permit process to extend the timeline and to trigger additional documentation.
Contractors generally need to submit the job application, verify licensing, and complete any required plan review before work proceeds, which is a key difference from smaller municipalities with lighter roofing administration. Your chosen pro should bring the plan set, structural notes, and ventilation details to the table, and you should verify their licenses are current with the Queens record. Rushing through this step can invite delays or compliance questions that slow progress mid-project.
Inspections in NYC focus on details such as ventilation, flashing, and waterproofing, and homeowners in Queens should expect compliance scrutiny during and after the job rather than assuming roofing is purely contractor-managed. Expect at least a thorough check of attic and eave ventilation balance, flashing around chimneys and stack penetrations, and the integrity of waterproofing at low-slope transitions. Any deviations from code-approved plans can trigger rework, fines, or staged inspections.
If issues arise, documentation becomes your ally. Keep copies of permit approvals, plan review comments, and stamped shop drawings. Communicate early with your contractor about inspection milestones, so you don't reach a post-work surprise that could require reopening roof lines or re-sealing critical flashing. In practice, compliance protects you from leaks that show up after storms and long after the crews have left.
After wind and hail events, the NYC metro insurance environment tends to heat up, and South Richmond Hill homeowners should anticipate more requests for documentation. Insurers look to confirm what existed before the wind, what was damaged, and how repairs were executed across layered sections of the roof. In dense block patterns, storm leaks often creep into rear low-slope areas that aren't visible from the street, so the claim file needs coverage for both front pitches and hidden contingencies. This is not a time for guesswork; accuracy matters to prevent delays or partial denial.
Insurers commonly want pre-loss and post-loss photos, installed material records, and detailed estimates. For Queens homes with multiple roof sections or layered repairs, this documentation becomes even more critical. Gather color photos that show the overall roof, flashing details around chimneys and dormers, and close-ups of damaged shingles, underlayment, and joints. If recent work exists, keep receipts or contracts that confirm the exact materials and their locations. Create a simple map of the roof layout to accompany estimates, noting any low-slope segments where leaks were reported. Prompt, organized submission reduces back-and-forth and helps prevent coverage gaps when the next storm cycle rolls in.
Older roofs may come with stricter terms or higher deductibles, making condition documentation and timely leak mitigation more important. If a leak appears, document its progression with photos and dates, and address active leaks quickly to avoid extra damage that could complicate a claim. When multiple roof sections exist, insurers will scrutinize the sequence of repairs and the provenance of patchwork. Clear records and rapid mitigation can help preserve coverage integrity when the next wind event approaches.
Connect with contractors who help homeowners navigate the claims process from damage assessment to final approval.
South Richmond Hill homes with rear low-slope additions may be candidates for coating or restoration work when the issue is surface aging rather than full structural failure. Coatings can improve waterproofing on those less-visible portions behind row and semi-detached layouts where front facades get more attention during inspections. This approach is not a universal substitute for replacing the main pitched roof, especially if the primary roof shows signs of deterioration or if the underlying deck has damage. A coating plan should be paired with a careful assessment of the drainage pattern and the flow of water toward scuppers and parapets.
Because NYC inspections emphasize waterproofing details, any coating approach on a South Richmond Hill roof still has to be evaluated in the context of drainage, penetrations, and edge conditions. That means examining satellite penetrations from vents, plumbing stacks, and any skylights, as well as the transitions where the low-slope section meets the main roof. Edge flashing at gables or parapets must be compatible with the coating system, and the coating should resist ponding water that often forms behind tight rowhouse setbacks. In practice, success hinges on meticulous surface preparation and a compatible topology between coating and original materials.
A coating performs best when the surface is clean and dry, with any minor blisters or loose granules removed before application. For rear extensions, moisture tends to linger in shaded spots, so algaecide or cleaner approved for roofing should be used to neutralize staining. Cracks and small leaks around penetrations should be addressed first with compatible sealants, then the coating layer can seal micro-movements without trapping moisture inside the substrate.
Choosing the right coating involves matching the product to the low-slope substrate and to the typical temperature shifts seen in Queens-adjacent neighborhoods. A durable, elastomeric formulation that remains flexible in cold snaps is preferable, especially behind dense row housing where thermal cycling is common. Note that coatings are most effective as a surface repair, not a cure-all for widespread deck rot or significant flashing failures.
Schedule periodic reviews after storm season to confirm that the coating remains intact over the low-slope area and that edge conditions stay watertight. In South Richmond Hill, small maintenance actions-re-sealing around penetrations and rechecking drainage paths-prevent larger issues from forming at the rear of the home. A proactive approach helps ensure the coating continues to act as a water shield without masking deeper problems.
Extend the life of your existing roof with reflective or waterproof coatings that protect against UV and moisture.
In this market, warranty value hinges on more than the shingle or roof system alone. Warranties are meaningful when flashing, ventilation, and waterproofing details meet NYC inspection expectations. For dense front-to-back roof lines and low-slope sections at the rear, a manufacturer's coverage may depend on how well those details are integrated with the overall system. When a leak path emerges near a wall transition or a ceiling stain, the warranty review will often look at whether the flashing and underlayment were installed to spec and whether attic ventilation remains adequate. A thorough assessment that ties together these elements strengthens the long-term protection offered by the warranty.
Dense urban housing makes photo documentation especially useful. Leaks and moisture can migrate along framing, around dormers, or across adjoining walls, making it hard to isolate the source after the fact. Take clear, time-stamped photos from multiple angles before, during, and after any repair or installation. Capture details of flashing joints at hips, valleys, and roof-to-wall connections, as well as attic vent locations and underlayment seams. Include close-ups of any discrepancies found and how they were addressed. Compile a simple written note that traces each major step to the corresponding photos, so future readers can follow the logical sequence.
When the project wraps, assemble material information, final scope documents, and inspection signoffs in one place. Insurers and potential buyers in the NYC area often request a cohesive package to verify what was done and how it was verified. Store a digital copy and a printed binder in a predictable spot so it can be retrieved quickly. If a later buyer or adjuster asks for specifics, this package helps demonstrate that the roof system was installed with attention to detailing and that the critical waterproofing and ventilation elements were considered in the context of the building's combined roof geometry.