Last updated: Apr 19, 2026
Elizabeth sits on the Newark Bay and Arthur Kill side of Union County, where salty air and brisk onshore winds turn ordinary storms into urgency. In this neighborhood, wind-driven rain can hammer the attic and eaves long after the main storm has passed. Shingle lift, fasteners corroded by salt spray, and flashing that has seen decades of salt breeze all combine to create sudden, stubborn leaks. When a storm hits, expect leaks to appear not just where drips are felt, but where wetness crawls along rafters, around chimneys, and behind fascia boards. The priority is to shield living spaces fast and control the damage before water moves through walls and into ceilings on multiple levels.
This city features many older attached and closely spaced homes, where water has a habit of leaping across party walls, chimneys, and adjoining rooflines. A single damaged valley or a compromised boot flash can feed leaks into several units or rooms. In Elizabeth, a leak is rarely a single point; it travels along attic planes, migrates through vent chases, and can pop up far from the actual storm exposure. The most challenging spots are where roofs meet walls, at chimney bases, and where neighbors' roofs overhang shared gutters. When trouble begins, treat every possible path as a relay point. Early inspection should map how water could track from the source to the most distant affected area, so tarping and containment can be targeted and effective even in a confined, multi-dwelling setting.
Emergency repair and storm damage are among the strongest specialties in this market, signaling that homeowners frequently need fast tarping and after-storm leak response. When a storm ends, the clock starts ticking: tarps should be deployed to cover actively leaking zones within hours, not days. A narrow attention to transects-covering the valley line, the chimney flashing, and any weakened joints along the eave line-can stop cascading water before it drips through into living spaces. In many Elizabeth homes, tarps must be secured against gusty winds that threaten to peel them loose, so sturdy fasteners, weighted edges, and proper anchoring are essential. After tarping, the focus shifts to a targeted leak trace: tracing water paths from the most obvious drip to concealed routes behind walls, ceilings, and along the attic ladder or hatch. This method minimizes the number of rooms exposed to ongoing moisture and reduces the risk of unseen mold development that can quietly take hold behind finished surfaces.
Begin with a quick exterior sweep after a storm: inspect flashing around chimneys, vent pipes, and roof-to-wall transitions for loose metal, lifting shingles, or corrosion on fasteners. Check the eaves and gutters for debris buildup that can back up and force water under shingles during a wind-driven rain. If you notice even a handful of drips, stage a tarp on the most vulnerable area and secure it with heavy weights or sandbags against wind. Keep a simple leak map: note where water appears and how it travels when rain accompanies wind, then communicate this map clearly to the repair professional so tarping and subsequent patching focus on the highest-risk routes first. In these tight, older neighborhoods, speed, precision, and a careful eye for concealed pathways are the difference between a minor setback and a prolonged, disruptive leak season.
Elizabeth's dense urban fabric-mixed commercial and residential blocks, porches, additions, and multifamily buildings-creates a landscape where low-slope sections age differently from steep-slope shingle roofs. Flat and low-slope roofs often bear the brunt of salt air, wind-driven rain, and the repeated freeze-thaw cycles that come with humid summers and chilly winters. Standing water on these surfaces is not just an inconvenience; it's a trigger for accelerated deterioration, membrane punctures, and leaks that can spread quickly into concealed spaces. Recognize that a low-slope roof in this city is not homogenous: some stretches over porches or rear additions may behave very differently from flatter, central sections.
Storms are a constant in this area, and a quick, decisive response can save interior damage. Start with a keen eye on transitions: where a flat roof meets a parapet, where metal flashings cap a membrane, and where there are multiple roof planes tied together. Identify weak points that storm winds can lift or water can find its way through, such as loose seam tape, deteriorated gravel ballast, or cracked sealant that has weathered years of humidity. Plan proactive steps for the peak storm season: re-seal critical seams, replace damaged flashings, and ensure drainage paths stay clear even when debris accumulates. In a dense block, a single compromised detail can become a neighborhood problem, so treat every flat or low-slope surface as a potential leak source.
Older roof geometry in Elizabeth can restrict drainage, amplifying standing-water risk during heavy downpours. Flat sections that are not properly pitched or that lack a continuous drainage plane will collect water until the next cold snap. Check for clogged scuppers, blocked internal gutters, and isolated low spots that hold moisture. When a low-slope roof carries porches or additions, the drainage network often runs through constrained paths; those paths require careful maintenance and occasional redesign to restore efficient water flow. In practice, this means regular inspection after heavy rain and after the first freeze of winter to confirm that water is evacuating as intended and not pooling near penetrations.
Flat-roof work in this city has become a practical specialty because many local buildings rely on low-slope systems for functional space and protected outdoor areas. Choose membrane systems or mechanically fastened coverings that tolerate salt spray and humidity, and prioritize long-term seams and edge details over cosmetic fixes. When weather turns harsh, temporary protection-heavy-duty tarps or quick-seal compounds-can limit damage until a permanent repair is feasible. Emphasize contractor familiarity with low-slope diagnostics, including the ability to test for moisture intrusion under membrane layers without tearing down finished ceilings, and to address embedded issues in multifamily or mixed-use layouts efficiently.
Create an annual rhythm that targets flat and low-slope sections first, then expands outward to adjoining roof areas. Schedule two key checkpoints: a late-spring inspection after winter stress and a mid-fall review before winter storms intensify. Keep a simple maintenance log noting seam integrity, flashings, and drainage performance, plus any observed ponding. For porches or additions that extend the main roof, pay special attention to junctions and transitions, where water is most likely to find its way through. In this climate, steady, targeted upkeep preserves the resilience of flat and low-slope roofs across multiple building types common to Elizabeth.
Find specialists in TPO, EPDM, and built-up flat roofing systems for residential and commercial properties.
Alpha Home Roofing
451 Grier Ave, Elizabeth, New Jersey
5.0 from 94 reviews
Nunez Home Improvement
(908) 992-9261 www.nunezhomepro.com
344 Vine St, Elizabeth, New Jersey
4.9 from 142 reviews
Alpha Home Roofing
451 Grier Ave, Elizabeth, New Jersey
5.0 from 94 reviews
Alpha Home Roofing We have over 16 years of experience in the roofing business. We love what we do and always pay close attention to everything we do. Making sure that the Customer is always satisfied with the finished work.
Nunez Home Improvement
(908) 992-9261 www.nunezhomepro.com
344 Vine St, Elizabeth, New Jersey
4.9 from 142 reviews
Nunez Home Improvement is a licensed and insured roofing contractor serving Elizabeth, Union County, and surrounding areas in New Jersey. We specialize in roof replacement, roof repair, storm damage roofing, and emergency roof repairs. Our team provides free roof inspections, honest estimates, and high-quality workmanship using top-grade materials. Whether your roof has leaks, wind damage, or needs a full replacement, we deliver reliable and professional service every time. Call today for a free roof inspection and También atendemos en español. Ofrecemos inspecciones gratuitas de techos, reparaciones, reemplazo de techos y trabajos por daños de tormenta en Elizabeth y Union County
RSB Construction & Roofing
(908) 402-1835 www.rsbconstructionllc.com
420 Maple Ave, Elizabeth, New Jersey
4.9 from 79 reviews
RSB Construction, located on 420 Maple Ave, is the premier roofing contractor in Elizabeth, NJ, with over 35 years of experience under owner Alvaro's expert leadership. Serving Hudson, Union, Bergen, and beyond, our certified team specializes in roof repair, residential and commercial roofing, roof replacement, and installation. Whether you need asphalt, metal, or shingle roofing, we offer customized, affordable solutions backed by lifetime labor warranties and stellar customer service. Trust RSB Construction for top-quality workmanship, from roof leak repairs to complete installations. Contact us today for reliable, precision roofing services tailored to your needs.

Peter Contractor
(347) 992-4144 petercontractor-llc.com
Serving
5.0 from 445 reviews
At Peter Contractor, we offer expert construction, remodeling, and roofing services across New Jersey and New York. With over 21 years of experience, we specialize in new roofs, repairs, and full exterior and interior renovations for residential, commercial, and industrial clients. As a GAF Certified, fully licensed and insured contractor, we provide top warranties and reliable, high-quality work. From roofing and siding to concrete and brickwork—we do it all, at the best price and with care.

FX Home Remodeling
(908) 967-8850 fxhomeremodeling.com
Serving
4.9 from 116 reviews
FX Home Remodeling – Roofing Contractor in Union, NJ FX Home Remodeling is a family-owned roofing company proudly serving Union County and surrounding New Jersey areas for over 20 years. We specialize in roof repairs, roof replacements, and new roof installations for both residential and commercial. Our team values honesty, quality, and craftsmanship, treating your home as if it were our own. We use only the best roofing materials, including GAF, Owens Corning, and CertainTeed, to ensure lasting protection and curb appeal. Services include: Roof Repair & Leak Detection New Roof Installation Roof Replacement Solutions Aluminum Seamless Gutters Gutter Cleaning & Maintenance Free Roof Inspections
Raidex construction
(973) 380-4652 www.raidexconstructionllc.com
Serving
4.8 from 116 reviews
Raidex Construction is a family-owned roofing and exterior services company with over 15 years of experience. We specialize in roof replacements through insurance claims, affordable roof repairs, siding repair, and gutter services. Locally based and highly rated with 4.5-star reviews, we focus on quality over quantity and offer easy financing options to help homeowners improve and protect their homes with confidence.
Midpoint Roofing
(973) 834-7570 midpointroofing.com
Serving
5.0 from 111 reviews
Midpoint Roofing is a premier roofing contractor in Union, NJ. We specialize in roof replacement, roof repair, and a wide range of roofing services. We are located at 2204 Morris Ave Suite 302b, Union, NJ 07083 and service clients in many different areas of New Jersey, including Union County, North and Central NJ. Our team of experienced professionals has lead the roofing industry for 10+ years. We are fully dedicated to providing top-notch workmanship and exceptional customer service. We offer the best prices on roof repairs and roof replacement around and work with insurance and do all the work for you! Trust Midpoint Roofing to handle all your roofing needs with integrity and quality. Contact us today for a free estimate or inspection!

B&B Roofing & Gutters
(718) 981-7663 bbroofingpros.com
Serving
5.0 from 231 reviews
B&B Roofing is a locally trusted roofing company serving Staten Island, Brooklyn, and New Jersey. With years of experience and thousands of satisfied homeowners and business owners, we specialize in roof replacement, roof repair, gutter installation, skylights, and waterproofing. Our licensed and insured roofers deliver quality work using top-grade materials from leading brands to ensure every roof is built to last. Whether it’s a leaking roof, storm damage, or a complete roof installation, our team provides fast, reliable service with clear communication and spotless cleanup. We take pride in honest pricing, professional workmanship, and customer satisfaction that’s second to none.

Herts Roofing & Construction
(908) 206-4240 hertsroofingnj.com
Serving
4.9 from 114 reviews
Located at 20 Commerce Drive Suite 135, Herts Roofing & Construction is your trusted local roofing contractor, specializing in comprehensive roofing services. Whether you need expert roof repair, seamless roof replacement, or efficient new roof installation, our skilled team ensures exceptional quality for every project. We cater to both residential roofing needs, offering affordable new roof costs and detailed roof inspections. Our experience extends to various materials, including durable metal roofing and versatile flat roofing, adeptly addressing any roofing challenge. For urgent needs, our emergency roof repair services are always ready. Choose Herts Roofing & Construction for unrivaled craftsmanship and reliability.
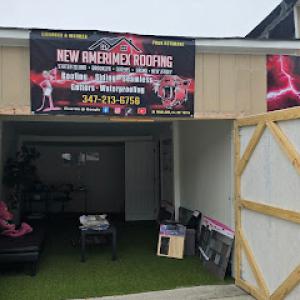
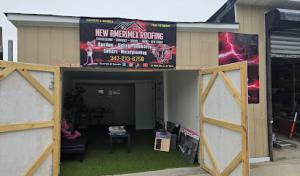
New Amerimex Roofing
(347) 213-6756 www.newamerimex.roofing.com
Serving
5.0 from 100 reviews
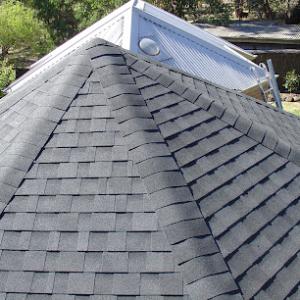
new amerimex roofing llc was founded in 2019 it is a family business that seeks to please each of its clients by providing them with an excellent job you can call robert at 347 213 6756 to make your appointment we make free estimates we are experts in shingles tpo epdm slatestone and rn all types of flat roofing .... in advance we thank you for the support and confidence you give us in doing the work

Skyward Roofing
(917) 979-8704 www.skywardroofing.com
Serving
4.8 from 44 reviews
Skyward Roofing is a premier roofing contractor known for delivering superior roofing solutions. The company stays abreast of the latest roofing technology and techniques advancements, ensuring clients benefit from the most efficient and practical solutions. This forward-thinking approach enables Skyward Roofing to tackle complex roofing challenges with cutting-edge tools and materials, enhancing durability and performance. Moreover, Skyward Roofing places a strong emphasis on environmental responsibility. The company actively promotes and utilizes eco-friendly roofing options, such as energy-efficient materials and sustainable practices. Additionally, the roofing firm is known for its robust training and development programs.
Elizabeth's proximity to tidal waterways means roofing components like flashing, fasteners, and exposed metal details live in a more corrosive environment than inland suburbs. In this setting, consider fasteners made from stainless steel or hot-dipped galvanized steel with a proven corrosion-resistant coating. Pay close attention to the joints where metal interlocks with other materials-screws and nails should be rated for coastal salt exposure, and any cultured or exposed metal trim should use materials designed to resist galvanic corrosion when in contact with copper, aluminum, or treated wood. For flashing, select alloys with higher corrosion resistance and ensure sealants used at edges remain flexible through seasonal cycles and salt-rich air exposure. A thoughtful approach to material compatibility helps prevent corrosion-driven leaks that stress the roof after a heavy storm.
The four-season climate subjects asphalt shingles to summer heat and winter contraction, creating differential movement between layers and potential edge wounds from wind-driven rain. For shingles, this means choosing products with robust dimensional stability and watertight interlock systems, plus compatible underlayment that can endure repeated freeze-thaw cycles without delamination. Heavier systems such as slate, clay tile, and concrete tile raise structural questions on older homes; they demand a careful assessment of roof framing, rafter spacing, and load transfer to the bearing walls. If a heavier roof is contemplated as part of storm resilience, a structural engineer or qualified roofer should verify that existing framing can safely support the additional weight, and consider reinforcement where necessary to avoid sag or tile failure during a gale.
The local market clearly supports asphalt shingle, metal roofing, and tile roofing specialists, matching the city's practical re-roofing needs and older homes with premium or heavy roof systems. Asphalt shingles provide fast, cost-effective defense against wind-driven rain, with granule infill and wind-resistant edging that can be prioritized in storm-prone corners. Metal roofing offers high wind resistance and excellent durability for coastal climates, especially in profiles that shed water quickly and resist salt spray on exposed seams. Tile options-whether clay, concrete, or synthetic-offer long service life and excellent thermal performance; however, they require precise substructure design and careful edge detailing to manage wind uplift and the additional weight. In older houses, ensure the roof deck and rafters are evaluated for the chosen material so that the assembly behaves as a unified system during a severe storm.
Detailing matters as much as the primary material. In salt-air environments, edge metal flashing should terminate in corrosion-resistant metal and be sealed with elastomeric compounds that remain pliable in cold weather. Venting is critical; blocked or poorly designed vents trap moisture and accelerate mold or roof deck decay under heavy rain. Drainage must be unimpeded to prevent ponding, which invites freeze-thaw damage in winter. For Elizabeth homes, periodic inspection of exposed metal trim, gutters, and downspouts is essential, especially after winter thaws and heavy wind events. A preventive approach, focusing on tightening fasteners, replacing damaged flashing, and resealing seams before major storms, helps maintain a resilient roof year after year.
When evaluating materials, consider your roof's exposure to salt spray, wind load, and seasonal temperature shifts. Asphalt shingles are a practical choice for rapid repairs and broad contractor familiarity in town. Metal roofing offers enduring performance for exposed ridgelines and clipped edges where wind uplift is a concern. Tile roofing, in its various forms, suits long-term residency plans and heavy-traffic, visually premium properties-so long as the underlying structure is prepared for the weight and the edges are treated to resist salt exposure. In all cases, ensure that corresponding components-underlayment, flashing, fasteners, and sealants-are matched to coastal exposure and temperature variability, and that maintenance routines remain aligned with the seasonal storm cycle that characterizes this neighborhood.
Your neighbors know that tight lot lines, limited staging space, and debris handling challenges are the norm in dense blocks near the harbor. Those constraints mean crews need extra time for prep, waste containment, and careful maneuvering around shrubbery, driveways, and sidewalks. As a result, the same material can end up costing more here than in a suburban setting, because labor time and cleanup complexity rise with each awkward access point. When you're budgeting, plan for a modest uplift in both material handling fees and disposal costs to reflect Elizabeth's tight-site realities.
Older roofs in this area often hide problems only revealed after removal, such as damaged decking, compromised ventilation runs, mismatched chimney flashing, or multiple-layer tear-offs. These issues push final pricing up from what a contractor first quoted, since decking repair or replacement and flashing rebuilds may be required. Expect a wider range in the estimate as the project unfolds, and use that cushion to account for potential add-ons that aren't evident until the old layers are off.
Storms drive spikes in emergency repairs and routine replacements alike. After a regional wind or rain event, scheduling can become tight and prices may rise due to heightened demand. If a storm hits, you might face faster timelines and limited supplier availability, which can affect both material delivery and crew booking. Build in a contingency window for weather-driven delays and fluctuations in pricing, and consider securing a preferred crew ahead of peak seasons when possible.
Common options fall within a broad range, for example asphalt shingles at around 350 to 650 USD per square, synthetic shingles at 500 to 900, metal 900 to 1400, clay or concrete tile higher, and slate at 1200 to 2600 USD per square. In Elizabeth, the decision often hinges on the balance between upfront cost and long-term performance against salt air, wind-driven rain, and freeze-thaw cycles. A roof that withstands frequent storms and minimizes future deck or flashing repairs can save more in the long run, even if it carries a higher initial price.
Get a clear picture of your project costs upfront - no commitment required.
A full roof replacement generally requires a building permit rather than being treated as a no-paperwork maintenance item. That means you need to line up the city's paperwork before any shingle removal starts, or the project can be halted and you risk fines or costly redos. The emphasis is on ensuring the structure, ventilation, and drainage work together with the new roof, not on a quick patch that looks fine from the ground.
The city process typically involves submitting contractor information, scope of work, and any needed structural details before work begins. In practice, you should send in the plan early and expect follow-ups if the scope touches attic vents, soffits, or any structural reinforcements. A permit isn't a hurdle for the sake of bureaucracy; it is your protection against undersized sheathing, improper bracing, or ventilation gaps that invite moisture and leaks during storm seasons. The paperwork also creates a record in case future leaks or hail damage appear.
Inspections are part of the local process during and after installation, and corrections may be required before final approval is issued. The inspector will check that daylighting, ventilation, and drip edge are correctly installed and that flashing around penetrations is watertight in a wind-driven rain climate. If anything isn't up to code, a corrective notice will specify changes and a re-inspection window. Delays can extend exposure to the next storm season, which is especially painful when salt air and gusts push water into attic spaces.
In this market, rushing to roof in storm readiness without the permit trail can bite when the next emergency leak call comes in. Coordinate closely with a contractor who understands Elizabeth's older stock, common framing quirks, and how to document every step for the city file. Keep a visible project binder on site with the permit number, inspection stamps, and any change orders. That practice reduces confusion when weather turns harsh and neighbors report leaks to the city. Ask for a copy of the final inspection report before closing up the attic access. Document any storm-related damage promptly for records. Keep everything organized.
In New Jersey, carriers commonly want pre-loss condition records, photos, and written estimates, which matters in Elizabeth because storm and emergency roof calls are so prevalent. You can help your claim by keeping organized records: before-and-after photos taken with date stamps, a simple file of maintenance notes, and receipts for any previous repairs. When a storm comes through, having a clear history of what the roof looked like beforehand can prevent disputes about whether damage existed already or was caused by a recent event. If you suspect a leak after a heavy rain, photograph the interior and the attic and note the date and weather, so the insurer sees a direct link to a specific incident.
Wind and hail events can trigger adjuster involvement, and tighter underwriting in some higher-risk New Jersey ZIP codes can influence whether homeowners choose impact-resistant or longer-life materials. If a claim touches a fast-moving storm, an adjuster may press for evidence that the roof's condition was consistent with the reported event rather than decades of wear. In practice, that means documenting missing granules, lifted shingles, or dented metal promptly, and securing a professional assessment that distinguishes sudden storm damage from chronic deterioration. For older homes, expect questions about maintenance and past leaks; a well-kept record of timely repairs can support a legitimate storm-related claim.
Because many Elizabeth homes are older, insurers may scrutinize maintenance history, prior leaks, and whether damage is sudden storm damage or long-term wear. A history of unresolved leaks or delayed repairs can complicate coverage expectations after a storm. To minimize friction, schedule preventive inspections after major seasons, address minor issues promptly, and keep contractor notes that clearly separate new damage from old concerns. If a leak emerges during a storm, act quickly to mitigate inside damage and document the steps taken, so the insurer sees proactive response rather than neglect.
Store photos and estimates in a labeled, weather-protected folder; add a concise narrative of each major incident with dates. Before filing, gather all known maintenance records and a recent, independent roof assessment. When communicating with the insurer, present a clear timeline that links the event to visible damage, while separating it from pre-existing conditions. This disciplined approach helps preserve coverage integrity when storms rear up along the Arthur Kill and Newark Bay breeze.
Chimney-related roofing work is a notable part of the Elizabeth market, reflecting the city's older housing stock where masonry penetrations are common leak points. In dense neighborhoods with brick and stone chimneys, the crown, flashing, and mortar joints take a beating from salt air and winter freeze-thaw cycles. Expect frequent calking, brick repointing, or flashing reseating as part of routine maintenance. When a roof call centers on a chimney, plan for expanded inspection to confirm both the chimney base and the cap detailing are intact and properly integrated with the roofline.
On tightly packed older homes, leaks around chimneys can be misdiagnosed because water often travels before appearing inside. Look for staining along interior ceilings that tracks from the chimney area, and check interior ceilings near the attic for dampness high up the wall near the chimney chase. Exterior checks should include the step-flashing where the chimney meets the roof, the condition of the chimney crown, and any rust or gaps in metal flashing. If flashing looks corroded or cracked, address it promptly to stop water before it migrates.
Skylight service is also strongly represented locally, suggesting flashing and curb details are a recurring repair issue rather than an occasional add-on. Inspect skylight curb flashings and the seal around the base in addition to the glazing. In older homes, the curb can settle or crack, allowing rain to seep between the roof and the skylight flange. Re-flashing or replacing the curb boot with weatherproof sealant is a practical, often-needed fix.
When leaks trace toward chimneys or skylights, prioritize temporary stoppage with roof-friendly sealant and ensure proper drainage away from these penetrations. Keep attic ventilation balanced so that condensation doesn't compound the issue. Regular seasonal checks focusing on crown integrity, flashing joints, and curb seals help prevent emergency calls during windy, wet months.
Find contractors experienced in skylight installation, flashing, and leak repairs to bring natural light into your home.


One Call 24-7 | Roofing & Restoration – Anytime. Anywhere. We’re There.
Serving
4.7 from 109 reviews
Spring and fall are the safest replacement windows in Elizabeth because they avoid both peak summer heat on shingle surfaces and winter snow or ice access problems. If a project can be planned, these seasons offer more predictable drying times, steadier humidity, and fewer weather-induced delays for exposed decking and underlayment installation. Scheduling work during these shoulder seasons also provides a clearer window for inspecting flashings, soffits, and vents before the next round of storms. For older homes with dense rooflines, aim for mid-season slots when crews can advance ventilation checks and deck repairs without competing with peak-season demand.
The city's seasonal pattern of heavy rain, humidity, and freeze-thaw makes timing especially important for exposed decking, underlayment installation, and inspection scheduling. After long stretches of rain, moisture can linger in wood and backing layers, so inspected surfaces should be dry before fasteners sit flush and membranes cure properly. Freeze-thaw cycles stress joints and fasteners; scheduling after a stretch of milder days allows sealants and underlayments to cure and settle before a real test of weather comes. For customers with older decking, plan staggered work that prioritizes flashing, boot sealing around vent pipes, and roof-to-wall transitions during periods with reliable dry spells.
After regional storms, Elizabeth homeowners may face longer wait times because the local contractor market shows unusually strong demand for quick-response and emergency work. If a storm hits, prioritize temporary containment and drip-edge protection while coordinating a follow-up inspection and staged repairs. Maintain a rapid-response plan for leaks near stacks, dormers, and valley intersections, where water can travel laterally across the deck. Have a clear line of communication with the roofing crew and a preferred method for reporting moisture intrusion and potential structural concerns as soon as it's safe to access the roof. In the interim, remove interior articles near the leak path and protect valuables to minimize damage.
In this market, many bids will push tear-off work as the norm, not just new-construction installs. You'll encounter long-established, family-owned, residential-focused crews who understand the tight stairwells, shared driveways, and frequent street-side debris of Elizabeth's dense neighborhoods. Look for a company that treats teardown as a core capability, not an add-on, and that can explain the value of removing old materials before laying new.
Ask who actually supervises the crew on your roof-whether it's the owner, a dedicated foreman, or another supervisor who will be on-site daily. The answer matters, because supervision directly affects safety, workmanship, and the consistency of installation in windy, salt-air conditions. Confirm a named supervisor with a reachable voice during critical phases of the project, from scaffold setup to final nail-down.
Cleanup is a major local hiring priority, which matters in Elizabeth's dense neighborhoods where nails, debris, and driveway or sidewalk mess spread quickly and draw neighbor complaints. Require a written cleanup plan: daily removal of waste, protection for landscaping and vehicles, and a guaranteed post-job sweep with a documented inspection. A contractor who prioritizes cleanup typically also maintains organized staging areas and a clear sequence of work.
Trust grows where contractors can point to a history of nearby homes with similar roof styles and exposure. Seek references from neighbors who faced storms or pre-windy seasons and can speak to responsiveness during emergencies. Verify licensing and insurance, and confirm who is responsible for lien waivers and post-install inspections. A locally rooted roofer with transparent practices helps ensure fast response when leaks strike after a storm.