Last updated: Apr 19, 2026
The peninsula setting means you contend with coastal Nor'easters, freeze-thaw cycles, and dense spacing that invites rapid water migration. A low-slope rear section can pond water long enough to soften seals and stress flashing, especially after a nor'easter or a sudden warm spell that melts ice and then refreezes at the coping edges. In attached and closely spaced homes, a small failure in a seam or around a penetrate point far from the center of a roof can escalate fast as water travels along a shared wall or party-wall jolt. This is not hypothetical-you are watching advance signs that radiate from key failure points rather than broad open field areas.
On blocks with rowhouses and mixed masonry, leaks usually announce themselves at the most exposed joints. Parapet walls and coping edges are frequent first responders because they sit at the joints where metal flashings meet the masonry, and because capillary action pulls moisture toward the parapet planes. Chimney intersections become problem zones when old masonry flanges crack or sealant dries out, creating a ladder for water to climb down into the roof assembly. Roof penetrations-vents, plumbing, and HVAC trunks-are another fault line because they require precise flashing details that must withstand repeated freeze-thaw action and salt-laturated air. It's common to notice staining along the seam lines or at the perimeter first, rather than broad, open field seepage that would be visible far from any edge.
Part of the challenge here is proximity to neighbors. Because homes are tightly spaced, a leak on one property can ride along a party-wall or slip in where shared masonry lines meet the roof deck. Water can track along a flashing pocket at a shared boundary and appear on a neighboring roof surface or inside a common wall cavity. This dynamic makes it essential to treat any visible drip or stain as a system-wide symptom, not a single, isolated drip. Quick detection and coordinated action with neighboring property owners can prevent escalating moisture in the ceiling and inside party walls.
If you notice staining along a parapet, a damp corner near a chimney, or moisture around a vent boot, address it promptly. Do not wait for a rain event to verify; inspect after a storm when water marks are fresh. Check coping caps for hairline cracks or displaced joints and test any metal flashing for looseness with a gentle tug. Inspect penetrations where flashing laps are difficult to seal, particularly near the chimney chase and stack boots. If you can safely access the roof, feel for any soft spots near seams or transitions-the foam or deck edge can indicate more extensive water intrusion. For a suspected leak near a party-wall, document stains on both sides of the wall and coordinate a joint inspection with the neighboring homeowner to map the moisture path.
Prioritize robust, continuous edge protection along parapets and coping edges, ensuring flashings are resistant to salt air and freeze-thaw cycles. Reinforce seam joints at all field seams and around penetrations with high-performance sealants rated for low-slope use. Consider upgrading to vent boots and pipe collars with sloped bases to shed water away from joints. Pay attention to the condition of roofing felt or underlayment beneath the membrane, as a compromised base accelerates leak progression through to interior finishes. For a densely packed street, install discreet but effective edge-drip channels or overflow points at the parapet to reduce ponding risk during heavy rains. Regular inspections after winter storms will catch early signs of coping edge movement or flashing deterioration before small issues become costly leaks.
Hudson Roofing
(201) 376-5373 www.facebook.com
336-338 John F. Kennedy Blvd, Bayonne, New Jersey
4.8 from 152 reviews
Hudson Roofing

B&B Roofing & Gutters
(718) 981-7663 bbroofingpros.com
Serving
5.0 from 231 reviews
B&B Roofing is a locally trusted roofing company serving Staten Island, Brooklyn, and New Jersey. With years of experience and thousands of satisfied homeowners and business owners, we specialize in roof replacement, roof repair, gutter installation, skylights, and waterproofing. Our licensed and insured roofers deliver quality work using top-grade materials from leading brands to ensure every roof is built to last. Whether it’s a leaking roof, storm damage, or a complete roof installation, our team provides fast, reliable service with clear communication and spotless cleanup. We take pride in honest pricing, professional workmanship, and customer satisfaction that’s second to none.
Eddy Roofing & Repair
(347) 603-1847 eddyroofstatenisland.com
Serving
5.0 from 55 reviews
Eddy Roofing & Repair proudly serves Staten Island with expert roofing solutions for residential and commercial properties. Whether you need a quick repair, leak fix, or full roof replacement, our skilled team uses high-quality materials and proven methods to ensure lasting protection. We work with shingles, flat roofs, and more. Trust Eddy Roofing & Repair for reliable service and durable results.
Golden Key Construction Group
(929) 564-4310 goldenkeyconstructiongroup.com
Serving
5.0 from 111 reviews
Golden Key Construction Group, founded in 2004, offers Staten Island and New Jersey residents a one-stop shop for their exterior needs. They specialize in Roofing, Siding, Decks, Chimneys, and Masonry, ensuring the durability and beauty of your home's exterior.
Global Roofing & Siding
(718) 715-5550 globalroofingnynj.com
Serving
4.9 from 116 reviews
Because of our strong focus and daily routine, our team is prepared to handle all your specific needs in an efficient and professional manner and there really isn’t any type of roofing situation we haven’t seen before. Besides our vast experience, attention to detail, impeccable customer support and passion for home owner satisfaction, here’s a few things to note about Global Roofing services we provide for ROOFING & SIDING SPECIALISTS LICENSED AND INSURED LOCALLY OWNED AND OPERATED PERSONAL GUARANTEES UNBEATABLE PRICES FREE ESTIMATES CIVIL SERVANTS & VETERAN DISCOUNTS PROUDLY SERVICING NJ & NY!
Alter Phase Roofing Contracting
(929) 370-1552 alterphaseroofing.com
Serving
5.0 from 63 reviews
"Alter Phase Roofing is your trusted Staten Island and Brooklyn source for professional roofing solutions, whether you need a full roof replacement, reliable roof repairs, or a robust commercial roof. We specialize in both residential and commercial projects, including flat roofing, and will help you choose the best materials to suit your needs and budget. From speedy leak fixes to beautiful new roofs, we're committed to quality workmanship, clear communication, and making the process hassle-free, from your initial call to the final inspection. Call Alter Phase Roofing today for your free estimate and experience the difference!
Skyward Roofing
(917) 979-8704 www.skywardroofing.com
Serving
4.8 from 44 reviews
Skyward Roofing is a premier roofing contractor known for delivering superior roofing solutions. The company stays abreast of the latest roofing technology and techniques advancements, ensuring clients benefit from the most efficient and practical solutions. This forward-thinking approach enables Skyward Roofing to tackle complex roofing challenges with cutting-edge tools and materials, enhancing durability and performance. Moreover, Skyward Roofing places a strong emphasis on environmental responsibility. The company actively promotes and utilizes eco-friendly roofing options, such as energy-efficient materials and sustainable practices. Additionally, the roofing firm is known for its robust training and development programs.

Elite Roofing Contractor
(201) 436-1011 eliteroofingincnj.com
Serving
4.9 from 346 reviews
Elite Roofing Contractor is your local Jersey City roofing company specializing in roof inspections, roof maintenance, roof repairs, roof replacements, roof deck installations, and all exterior services! With over 20,000 roofs serviced in Hudson County, NJ and over 5,000 roof inspections completed, we are your local, trustworthy, and reliable roofing contractor. Contact us today to see how Elite Roofing can make your roofing dreams come true!

Lema's Roofing & Siding
(862) 910-4588 lemasroofingandsidingcorp.com
Serving
4.9 from 63 reviews
At Lema’s Roofing & Siding, we provide expert services in roofing installation and repair, damage assessments, skylight and gutter installation and maintenance, as well as professional siding work. We serve both residential and commercial clients throughout key areas of New Jersey, including Newark, Elizabeth, Jersey City, Edison, and surrounding communities. With over 15 years of experience and a highly certified team, we ensure durable, efficient solutions using top-quality materials. Contact us today for your free estimate and discover why we're the trusted choice for roofing and siding services near you.
Alpha Home Roofing
Serving
5.0 from 94 reviews
Alpha Home Roofing We have over 16 years of experience in the roofing business. We love what we do and always pay close attention to everything we do. Making sure that the Customer is always satisfied with the finished work.
RSB Construction & Roofing
(908) 402-1835 www.rsbconstructionllc.com
Serving
4.9 from 79 reviews
RSB Construction, located on 420 Maple Ave, is the premier roofing contractor in Elizabeth, NJ, with over 35 years of experience under owner Alvaro's expert leadership. Serving Hudson, Union, Bergen, and beyond, our certified team specializes in roof repair, residential and commercial roofing, roof replacement, and installation. Whether you need asphalt, metal, or shingle roofing, we offer customized, affordable solutions backed by lifetime labor warranties and stellar customer service. Trust RSB Construction for top-quality workmanship, from roof leak repairs to complete installations. Contact us today for reliable, precision roofing services tailored to your needs.
Mark’s Roofing & Construction
(917) 498-6591 marks-roofing.com
Serving
4.7 from 50 reviews
At Marks Roofing, we specialize in delivering expert roofing services in New York and New Jersey with over 24 years of trusted experience. We offer comprehensive residential and commercial roofing solutions, including expert repairs, replacements, and storm damage restoration, as well as gutters, siding, and windows. As a family-owned business, we are dedicated to honesty, affordability, and superior craftsmanship. Our services include 24/7 emergency support, free roof inspections, free estimates, and precise drone inspections. Whether you need routine maintenance or urgent repairs, Marks Roofing delivers reliable, affordable solutions done right the first time. Contact us today!
A dense peninsula location places roofs in a direct line with wind-driven rain from coastal storm systems moving through Upper New York Bay and Newark Bay. That exposure means even small defects can become widespread leaks fast when Nor'easters push salt-laden spray and heavy downpours against attached rowhouses. The same force hits low-slope transitions and flashing around chimneys or skylights with particular intensity, turning everyday maintenance into a race against active leakage during a storm.
In this environment, flashing is only as dependable as its attachment and seal. Bayonne's spring and fall storm events routinely couple strong winds with rain, stressing joints where low-slope roofs meet walls, at chimney bases, and around skylights. Over time, that combination can lift laps, peel sealants, and loosen fasteners. When water finds a path here, it travels quickly along decking and into living spaces, especially if gutter flow is blocked or scupper drains are undersized for heavy rainfall. The result is not just a wet ceiling, but softening wood and compound damage that can worsen with every storm.
Winter Nor'easters in this area turn minor defects into active interior issues. Repeated wetting followed by cold snaps drives freeze-thaw cycles that push against shingles, underlayment, and flashing. This is particularly punishing for low-slope roofs where standing water is a constant possibility. Small roof penetrations-vents, exhausts, and skylights-become persistent leaks if the surrounding materials have not maintained their integrity. If there is any visible ripple or edge curl on the membrane, assume the problem extends beyond what's observable and plan for a more comprehensive remedy.
Low-slope and flat sections deserve proactive attention before the next storm sequence. Inspect visible flashing around chimneys and skylights for lifted edges, loose fasteners, or torn sealant. Clear gutters and downspouts to ensure rapid drainage away from the house. Pay special attention to transitions at party walls on attached homes; those shared seams often hide subtle gaps that only reveal themselves once rain pressure spikes. If you notice any damp spots or staining on ceilings after a rain, treat it as a warning sign that the underlying roof needs a closer look-early intervention can prevent interior damage.
Post-storm, climb to the attic or use a stable ladder to inspect for moisture tracks and daylight or frost patterns that indicate compromised barriers. Do not overstep safety limits; if a leak reaches insulation or joists, it's a signal that the roof assembly may need professional evaluation. Prioritize areas around flashing, roof-to-wall transitions, and any areas where snow or rain runoff concentrates. If you see staining, a localized drip, or unusual heat loss from the attic, escalate to a repair plan promptly to curb further interior damage.
Find local contractors experienced in assessing and restoring roofs after hail, wind, and severe weather events.
Hudson Roofing
(201) 376-5373 www.facebook.com
336-338 John F. Kennedy Blvd, Bayonne, New Jersey
4.8 from 152 reviews

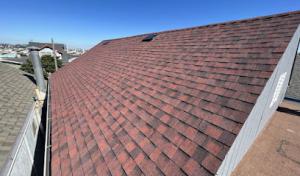
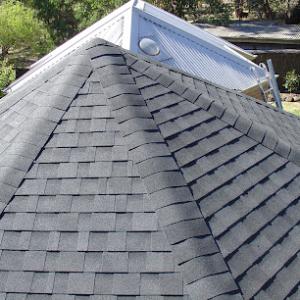
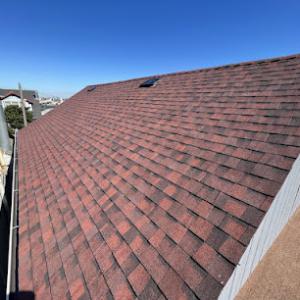
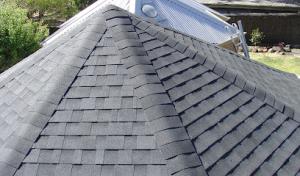
Asphalt shingles remain a practical fit for many pitched roofs in this coastal corridor, but coastal moisture, summer heat, and winter temperature swings can shorten service life when attic ventilation is poor. In Bayonne, emphasize a well-sealed attic with adequate intake and exhaust ventilation to keep the underside of the roof deck dry and limit ice dam risk during freeze-thaw cycles. When choosing asphalt, look for higher granule density and a shingle with good surface granulation to resist wind-driven rain and salt spray. In areas with frequent Nor'easters, consider a heavier shingle profile and a robust underlayment that provides a second line of defense against leaks at the top edge and around penetrations. Proper installation matters: ensure the starter course is aligned to divert water away from fascia and that the nailing pattern follows the manufacturer's wind uplift specification for low-slope sections common on attached homes.
Metal roofing can perform well in this wet and windy coastal climate, but detailing matters around attached-home transitions, chimneys, and penetrations common in the local housing stock. If you choose metal, focus on seamless or tightly sealed joints, continuous ridge venting, and fascia-to-rake detailing that directs water away from seams. For attached-row configurations, look for metal panels that are specifically rated for shallow slopes and have integrated channels or clips to limit movement at the overlaps. Pay attention to flashings at wall penetrations and step-flashing where the roof meets neighbors' structures. Zinc and aluminum options resist salt exposure, while steel with protective coatings helps extend life in salt-laden air. Consider a standing-seam system for a cleaner look and fewer leak-prone seams on narrow, shared façades.
Clay and concrete tile are available in this market but are heavier systems that need careful structural consideration on older homes before replacement. In dense neighborhoods with limited roof pitch options, tile may require a rework of rafters or a structural upgrade to support weight. If a retrofit is feasible, select tiles with a water-shedding profile and ensure underlayment includes a continuous, water-tight layer beneath to handle coastal salt spray and freeze-thaw cycles. The extra weight means more attention to trim and fastener choices around dormers, bay windows, and chimney transitions. Keep in mind that tile failures often start at penetrations and overhangs, so prioritize solid flashing around chimneys, vent stacks, and eave edge details to prevent moisture intrusion during heavy storms. If a roof is marginal for tile, consider a lighter option like synthetic composites that mimic traditional shapes while offering easier installation and integrated underlayment protection.
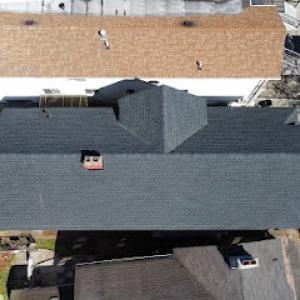
In this peninsula city, tight side yards and crowded streets mean crews often face limited staging space and careful debris handling. Asphalt shingles may stay the most straightforward option, but even they can cost more once you factor in extra trips, tarps, and edge protection to keep neighboring homes clean during a coastal storm season. When a roof is adjacent to other homes, the ability to drop materials safely and maneuver ladders without scraping siding or neighbors' windows becomes a real cost driver. Expect extra labor time for sized loads, careful waste containment, and meticulous site cleanup, which can push per-square prices above simple material pricing.
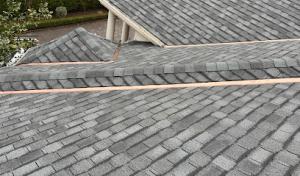
Bayonne's attached housing stock and varied roof geometry mean flashing, chimney transitions, and roof-to-wall details are consistently more numerous and complex than a suburban single-roof scenario. For a re-roof, plan for additional flashing around stacks, vents, and joints, plus careful detailing where different roof planes meet. If clay or concrete tile is considered, note that the weight and differing nailing patterns multiply the number of trips and staging needs, even if the per-square price seems favorable at a glance. Mixed shapes also increase the amount of trim and drip edge work required to prevent leaks along the parapet or tight eave lines-work that can add to both labor time and material waste.
Coastal Nor'easters and regional wind events create spikes in demand for urgent repairs or full replacements. After a damaging storm, schedules tighten as crews swing across multiple properties, and material shortages can appear quickly. In those windows, you may see higher pricing, compressed timelines, and the need for expedited staging and weather protection. If urgency is required, discuss phased work plans that prioritize vulnerable areas (valleys, chimneys, and flashings) first, while balancing the overall project sequence to minimize repeated access and waste handling on a narrow lot.
Asphalt shingles stay the most flexible option for a Bayonne roof, with typical ranges from 350 to 750 USD per square, but attic and parapet detailing can nudge the final total higher when attached homes demand extra flashing and transition work. Metal roofing climbs to 600-1,400 USD per square, where fasteners and edge details add time on complex shapes. If a Tile option is pursued, clay tiles run from 1,800 to 3,500 USD per square and concrete from 1,200 to 2,800 USD per square, with weight and structural considerations multiplying staging and labor needs. Wood shingles and synthetic shingles sit in between, yet still carry premium charges when size, form, and coastal exposure require additional edge protection and wrap detailing.
Get a clear picture of your project costs upfront - no commitment required.

In Bayonne, most re-roof projects start with a building permit, and the contractor typically submits the application and project details to the Bayonne Department of Housing and Engineering. This isn't a formality to check a box; it sets the stage for how the roof will be designed, how venting will be handled, and how flashing and leak prevention will be approached given the city's coastal exposure and tight rowhouse configurations. The permit packet usually includes a scope of work, roof dimensions, and any changes to existing venting or drainage. If a project slips without proper paperwork, it's not just a bureaucratic delay-it's a real risk to your ability to legally and safely operate on your home, especially when Nor'easters and freeze-thaw cycles test weak spots after completion.
Plan review and onsite inspections are built into Bayonne's process, and permit closure hinges on passing the final inspection rather than simply finishing the roof work. That means you or your contractor should anticipate a staged rhythm: documents reviewed first, then mid-project checks, and finally the critical final inspection that confirms weatherproofing details, correct underlayment, and proper flashing around dormers, chimneys, and parapets. For low-slope or flat-roof sections common to attached homes, the inspector will scrutinize transitions between roof planes, the integrity of edge metal, and how the system handles ponded water during wind-driven rain. The goal is to confirm that the installation will perform under Bayonne's coastal winds and the seasonal freeze-thaw cycles, not just to satisfy a permit box.
Permit timelines can slow down when the project touches utilities or venting changes, so homeowners should confirm the full scope before tear-off begins. If the plan adds or relocates vent stacks, gas lines, or electrical penetrations, the review and coordination with utility providers can extend the schedule. Rushed permitting often leads to overlooked details, and in a dense, attached housing landscape, a missed flashing detail or an improper kick-out can become a neighborly dispute and a leak hotspot after a coastal storm. Expect clarifications or required amendments if the plan calls for changes to stack heights, vent centers, or drainage routing. Clear communication with the contractor and the permitting authority helps ensure that the final inspection passes on the first attempt, securing a durable roof that stands up to Bayonne's unique climate.
In the Bayonne area, insurers commonly scrutinize wind, hail, and moisture claims by asking for roof age, prior repair history, and condition photos. That means your file should tell a clear, dated story of how the roof has held up over time and through Nor'easters. When a claim focuses on recurring moisture or flashing issues rather than a single dramatic event, the quality of your documentation can tilt the outcome. Keep in mind that photos and notes carry more weight than memory after a storm.
Because many Bayonne leak claims involve flashing, low-slope sections, or repeated moisture entry rather than obvious catastrophic loss, documentation quality can affect claim outcomes. Preserve evidence promptly after a storm, focusing on signs that might worsen in a coastal climate-roof lines around chimneys, skylights, and top-floor ceilings. If interior staining appears, document it quickly with dates and lighting that clearly show the extent. A steady record across multiple events helps insurers see patterns rather than sporadic damage.
Homeowners should build a straightforward photo log: wide shots of the entire roof, close-ups of flashing details, edge coping, and any visible wear on low-slope areas. Include nearby features like dormers, valleys, and gutters that influence drainage. Take exterior and interior photos on the same day after Nor'easters or heavy rain, labeling each image with date, weather, and location. Keep a simple history of repairs, noting contractor names, dates, materials used, and the reason for each repair.
Store images in a cloud folder and in a labeled binder; make sure recent photos are easily accessible. When requesting an adjustment or filing a claim, send a concise timeline that ties storm events to visible changes in the roof and interior spaces. Being orderly now reduces back-and-forth later and helps ensure your claim reflects the true condition of those coastal, low-slope sections.
Connect with contractors who help homeowners navigate the claims process from damage assessment to final approval.
Hudson Roofing
(201) 376-5373 www.facebook.com
336-338 John F. Kennedy Blvd, Bayonne, New Jersey
4.8 from 152 reviews
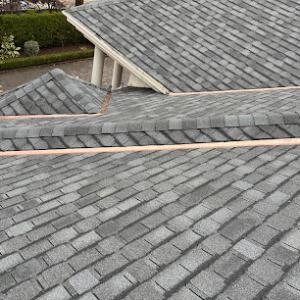
In this market, chimney flashing and counterflashing fail where repointing and roofing work aren't coordinated. For tight, older masonry homes, the chimney chase can pull away from the roof deck after a tough Nor'easter or a freeze-thaw cycle. When misalignment happens, water can wick under the shingles and travel along the counterflashing before any dripline shows inside. The fix is deliberate coordination: schedule flashing repair or replacement to coincide with any roof work, and ensure the mason seals the chase with compatible sealant and proper backer rod before new roof layers go on. Inspect the kick-out flashing at the top edge of the chimney for rust or bending half-exits, and verify the apron is bedded with a continuous bead of non-reactive sealant. If repointing is done, request a through-roof inspection to confirm the flashing remains watertight after mortar work.
Skylights stand out as a meaningful specialty in this climate. On Bayonne homes, curb details often date from earlier designs, and aging shingles meet low-slope membranes with uneven transitions. Check the curb flashing, valley pans, and any step flashing where the skylight meets the roof membrane. A common failure occurs where the curb is too short or the membrane overlaps poorly, creating a trap for water that travels sideways before dripping inside. Replace aging skylight seals and consider upgrading to a more robust curb with integrated flanges. When you replace a roof, plan for a skylight seal upgrade at the same time to avoid a second round of disturbance.
On tightly built homes, water entry around chimneys and skylights can be misdiagnosed because moisture may travel before appearing inside. Trace leaks to their sources by inspecting attic penetrations from above, looking for stencil-like staining along flashing joints, and testing for dampness at dawn after a storm. Use a smoke pencil or noncorrosive dye to verify wind-driven infiltration paths. If moisture appears only near the perimeter of a chimney or skylight during a wind-driven event, suspect flashing laps and proper sealant adhesion rather than a simple shingle failure. Schedule targeted resealing and, where needed, re-flashing with compatible, flexible metal or membrane to maintain a continuous weather barrier. In Bayonne, these steps save the interior drama of late-season leaks.
Find contractors experienced in skylight installation, flashing, and leak repairs to bring natural light into your home.
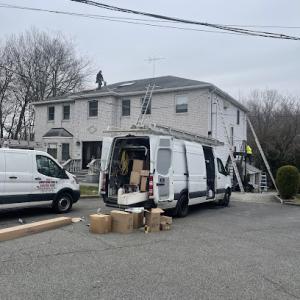
In this tight-knit, peninsula setting, access to rooftops is a real factor, especially on attached rowhomes where space for equipment and debris control is limited. A Bayonne contractor with hands-on experience navigating narrow driveways, alley access, and close-neighbor logistics can reduce surprises during a re-roof, emergency repair, or cleanup after a coastal storm. Look for teams that routinely manage debris containment, protect neighboring properties, and coordinate with multiple nearby houses in a single project window. The best local operators understand how Nor'easters and freeze-thaw cycles stress flat and low-slope roofs, so they plan for water escape routes, flashing details, and post-storm inspections before a single shingle is lifted.
The local contractor mix includes many long-established and family-owned operators, which matters when leaks, final inspections, and warranty issues come up. Favor firms that demonstrate a documented process for on-site management, including clear communication with you and with neighbors who share walls. Ask about how they handle staging areas, drop-trips for materials, and protection of front stoops and sidewalks. References from nearby homeowners with similar house types are especially valuable, as are follow-up visits after a job to verify any leak concerns and to confirm warranty coverage is honored over time.
Start with asking for a recent Bayonne project contactable for post-job follow-up. Verify the contractor carries appropriate liability and worker's comp insurance and that the crew will be supervised during the entirety of the project. Request a site evaluation that includes a photogenic plan for debris protection, edge protection, and tarp strategies to shield adjacent homes. Inquire about their process for final inspection and the steps they take if a leak appears after rain. A detailed written plan that outlines access routes, daily cleanup, and neighbor communication will save headaches once the crew begins work.
Because yards are tight and walls sit close together, scheduling should minimize disruption to neighbors and parking on the street. Expect a clear plan for material delivery routes that avoid blocking driveways, plus a robust cleanup protocol that addresses stray nails and shingle fragments. The roofer should outline how edge protection and walkoffs are installed to keep gutters and soffits intact, with a neighbor-friendly communication plan so residents understand when noise, deliveries, or inspections will occur. Finally, confirm that the plan anticipates coastal storm conditions and the need for rapid tarping or temporary fixes between heavier repair sessions.