Last updated: Apr 19, 2026
In this coastal climate, the window for full roof replacements is framed by long, damp winters and only moderately dry summers. The goal is to plan for a dry, mild stretch to minimize moisture exposure during tear-off and to keep open decking from sitting exposed too long. When rain returns, work slows or halts, and you risk repeated wet cycles that can stress roof decks, underlayment, and flashing. A careful schedule that targets a dry lull reduces the chance of moisture-related delays and issues.
Fall dampness in the central Kitsap area accelerates moss growth on asphalt shingles, wood products, and tile surfaces. If maintenance or a partial replacement lines up with this moss-rich period, you will face faster aging of recently exposed surfaces and a higher likelihood of algae and mold taking hold on exposed underlayment or decking. Plan major work to begin and proceed through a dry segment of late summer into early autumn whenever possible, so moss has less time to establish itself on newly exposed materials. For asphalt and wood varieties, this seasonal tendency means a tighter inspection regime before winter sets in, focusing on any moss gutters, ridge vents, and valleys that accumulate moisture and organic debris.
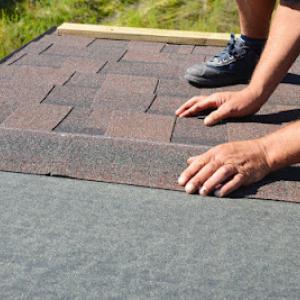
When scheduling, break the project into two critical phases: the tear-off and the recovery, with the dry-weather window treated as a shared risk between these phases. Tear-off should wrap up before any prolonged wet period, to limit bare decking exposure. The recovery phase-installation of underlayment, insulation, and shingles-should proceed in a dry stretch that remains free of heavy rain. If a sudden storm interrupts the schedule, you want decking and exposed edges to have minimal time to soak up moisture before protective layers go back over them. Staging areas should be fenced and tarped to protect decking, and temporary weather barriers must be ready to seal off openings quickly if a moisture event appears on the forecast.
Spring rain and wind in this area can interrupt open-roof schedules and expose decking to repeated moisture cycles if staging is not tightly managed. Even light, persistent showers can drive moisture into exposed edges, endangering the integrity of underlayment and the first layer of shingles. Have a contingency plan for wind-driven rain: pre-install temporary windbreaks at eave lines, secure loose materials, and ensure that staging ladders and platforms are covered or moved quickly to keep moisture off critical joints. If a mid-project storm comes through, a quick protective wrap around exposed decking and fasteners helps preserve the work already completed.
Create a simple calendar-based checklist that aligns with local moisture patterns. Begin with a pre-project inspection in late summer, documenting existing moss buildup, flashing condition, and deck exposure risk. Build a weather buffer into your schedule, with one or two待 dry window(s) of at least 7-10 days predicted by regional forecasts to consolidate tear-off and installation phases. Maintain daily moisture checks during the active phases; if humidity remains high for multiple days, pause only long enough to allow decking to dry, then resume. After any rain event within the project footprint, perform a rapid re-inspection of all seams, penetrations, and underlayment edges before closing up, ensuring there is no standing moisture near critical joints.
When talking to a contractor, confirm that the project timeline prioritizes dry, mild days for the tear-off and a continuous stretch of dry weather for underlayment and shingle installation. Ask for a staging plan that minimizes open decking exposure and clearly defines tarp deployment, edge protection, and ventilation during the dry period. Request a contingency plan for spring wind and rain interruptions, including rapid resealing of any exposed areas and a verified sequence for resealing penetrations if temporary closures are needed during weather delays.
Hood Canal Roofing
(360) 689-0321 canalroofing.com
9435 Provost Rd NW STE 204, Silverdale, Washington
5.0 from 107 reviews
Proudly serving the Puget Sound! We specialize in roof inspections, roof repairs and full roof replacements in Pouslbo, Kingston, Bainbridge Island, Silverdale, Bremerton, Indianola, Suquamish, Gig Harbor, Port Gamble, Port Orchard, Port Ludlow, Hansville.
Kitsap Roof Pros
(360) 919-0374 kitsaproofpros.com
10880 Old Frontier Rd NW, Silverdale, Washington
4.9 from 117 reviews
Kitsap Roof Pros is a local Roofing contractor providing dependable roofing solutions for homeowners and businesses. We handle residential roofing and commercial roofing, storm damage repair, gutter installation, roof maintenance, and roof cleaning, plus attic insulation and skylight installation to improve protection and efficiency. Licensed and insured in Washington, our team is known for punctual crews, clean job sites, and clear communication. Storm damage is a specialty, and we can guide the insurance claim process and be on-site with the adjuster when needed. Roof replacements include a 15–25 year in-house labor warranty, and 24/7 emergency roof support is available. Proudly serving Silverdale, WA and surrounding areas.
State Wide Contracting
(360) 552-0621 www.waroofers.com
10868 Myhre Pl NW Suite 104 -105, Silverdale, Washington
4.0 from 8 reviews
With years of experience and dedication, we specialize in roofing siding and gutters. Call us, we open our doors in 2011 we’ve got gone to great lengths to be seen more than a general contractors, 2022 appears to be the year for big strides on our roofing services ,dedicated to providing customers with a variety of exceptional roofing services, from metal to asphalt, from residential to light commercial T.P.O. Whether you need a brand new roof installed, an old one repaired or replace, you can count on State Wide Contracting to deliver. Call us today and book an appointment, we are the new roof no mess system. Ask for details
Roofing & Maintenance
(360) 535-0767 www.roofingandmaintenance.com
Serving
5.0 from 11 reviews
Roofing and Maintenance is a premier roofing contractor in Kitsap County. Since our inception in 2023, our team of skilled professionals has provided comprehensive solutions for both residential and commercial clients, meticulously handling various roofing projects each year. With a focus on durability and aesthetics, we take pride in our ability to protect and enhance the value of your property through expert installations and repairs. Trust us to elevate the appearance and functionality of your roof while ensuring long-lasting performance and peace of mind.

Joseph Builders
(360) 649-7391 www.josephbuildersnw.com
2916 NW Bucklin Hill Rd, Silverdale, Washington
4.2 from 5 reviews
Visit our showroom at 23361 St Rte 3, Belfair. We are a family owned and operated custom home builder and contractor.

Fav's Moss Removal
(360) 643-5389 www.fmremoval.com
Serving
5.0 from 21 reviews
Welcome to Fav's Moss Removal and Pressure Washing Service, where we turn your property from dull to dazzling! Are you tired of seeing unsightly moss, grime, and dirt taking over your once beautiful outdoor spaces? Look no further! At Fav's Moss Removal we specialize in restoring the natural beauty of your property through our expert moss cleaning. But we don't stop at moss cleaning! Our pressure washing service is designed to breathe new life into various surfaces, including driveways, patios, decks, siding, and more. We use specialized techniques to remove stubborn stains, dirt, and grime, restoring surfaces to their original glory without causing any damage.

Rhyatt Construction
Silverdale, Washington
5.0 from 1 review
Commercial and Residential Roofing Contractor in Port Orchard, WA. We specialize in New Construction, Flat Roofs, Metal Roofs, Shingles, Cedar Shingles, Cedar Shake, Siding, Roof Replacement, Roof Repairs, TVC Roofing, and TPO Roofing.
Integrity Roofing & Construction
(360) 516-2478 integrityrc.com
Serving
4.8 from 642 reviews
Roofing, siding, and other construction services for residential and commercial properties.

Spruce Properties
(360) 626-1908 www.sprucepropertiesnw.com
Serving
5.0 from 36 reviews
Spruce Properties is a trusted roofing contractor in Poulsbo, WA, specializing in professional roof replacement services for local homes and businesses. In the Pacific Northwest, constant rain, wind, and seasonal storms often cause wear, leaks, and moss growth, making timely roof replacement essential to protect your property. Our skilled team provides reliable solutions for shingle, metal, and flat roofing systems, ensuring durability against the area’s challenging weather conditions. With a commitment to quality workmanship and customer care, Spruce Properties is proud to be the choice for dependable and experienced roofers in Poulsbo and the surrounding communities.
Kitsap Construction
(253) 686-0034 www.kitsaproof.com
Serving
4.9 from 10 reviews
Your local trusted roofing contractor. Specializing in residential re-roof, new construction roofing and roof repairs.
Genesis Roofing Services
(425) 595-8020 www.genesisroofingservices.com
Serving
4.9 from 48 reviews
At Genesis Roofing Services, we offer roofing, residential re-roofing, roof repair, roof installation, roof cleaning services. We proudly serve Snohomish & King Counties. Count on us for local, professional roofing services!
Hanley Construction
(360) 876-0870 www.hanleyroofing.com
Serving
5.0 from 588 reviews
Hanley Construction, located at 250 Bethel Avenue, is your go-to roofing contractor known for delivering top-notch roofing solutions that boost your property's durability and curb appeal. Kitsap County’s trusted roofing contractor since 1980, delivering expert residential and commercial roofing services with a focus on quality and professionalism. Our licensed, factory-trained team specialize Our team is committed to providing reliable and efficient service, ensuring the protection of your home or business against all weather conditions. Choose Hanley Construction for quality roofing services and experience the peace of mind that comes with knowing your roof is in expert hands. Contact us today to elevate your property's value and safety.
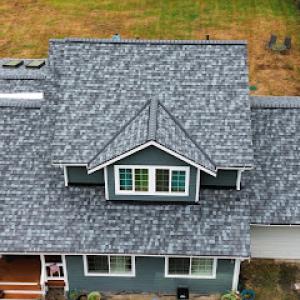
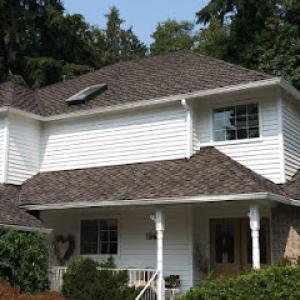
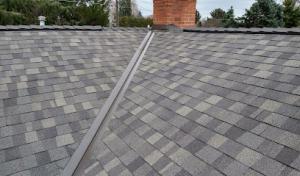
Asphalt shingles remain a dominant choice in Silverdale, and that familiarity matters when you're weighing maintenance needs down the line. The region's persistent shade and dampness create conditions that encourage algae and moss retention on older or shaded sections. When selecting asphalt, look for products with algae-resistant granules and a long warranty on both the shingle and the underlayment. Pay attention to the nailing zone and proper attic ventilation, because moisture trapped under the roof deck accelerates granule loss and can shorten the lifespan of the roof. In practice, this means choosing a thicker, high-quality asphalt shingle, ensuring a solid underlayment, and planning for regular moss and debris cleaning in late winter and early spring when growth tends to surge in the damp climate. For installations and replacements, consider a roof color that minimizes heat retention in the attic while still reflecting visible moisture buildup, and ask about self-sealing strips that help bindings survive the windier periods typical of storm season.
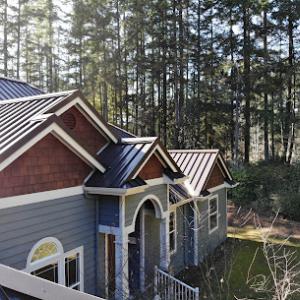
Metal roofing has meaningful local traction and performs well in rain-heavy climates because it sheds water and debris efficiently. In Silverdale, the ability to shed moss-laden branches and wet leaves reduces moisture retention on the surface, which translates to slower moss growth and less granule loss compared to aging asphalt. However, the detailing around penetrations, seams, and fasteners matters a lot during windy storm periods. If metal is chosen, ensure a comprehensive seal at edges, vents, and skylights, and insist on double-lock or continuous flashing to prevent leaks that can occur near ridge lines and roof-to-wall transitions. Contractors should also account for potential thermal expansion effects and verify that fasteners are corrosion-resistant given the marine-influenced air. An edge-to-edge coating or a matte finish can suppress glare during gray winter skies, which can help you spot moss early before it takes hold in shaded areas.
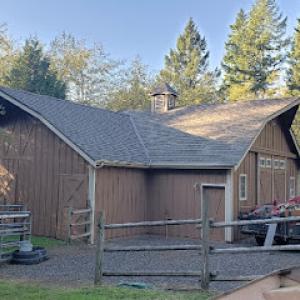
Wood shakes, clay tile, and concrete tile are all present in the market, yet the region's moisture exposure makes weight, maintenance burden, and moss control especially important when comparing them to asphalt and metal. Wood shakes offer a natural look and decent insulation, but in a damp climate they demand more frequent moss cleaning and occasional treatment to prevent rot. Clay and concrete tiles are durable and fire resistant, yet their weight requires a sturdy substructure and careful inspection after heavy rains or windstorms. Moss can take a foothold between tiles, where shade and moisture linger, so a proactive cleaning schedule and professional mossControl treatments become part of the routine. When considering these materials, verify the roof deck's load capacity, ensure proper underlayment, and plan for targeted moss management around overhanging trees or shaded sections.
In Kitsap's moisture-rich environment, proactive maintenance trumps reactive repairs. Moss and algae can silently undermine roof performance by trapping moisture against underlayment and decking, accelerating wear. A practical approach blends regular inspections after winter storms with strategic cleaning and the use of moss inhibitors suitable for the roof type. For any replacement, evaluate the long-term moisture exposure of the site-shade patterns, nearby trees, and gutter effectiveness all influence how soon you'll want to refresh the roof. With this climate, choosing a system that can shed water efficiently and withstand recurring damp seasons will help keep the roof performing well for years to come.
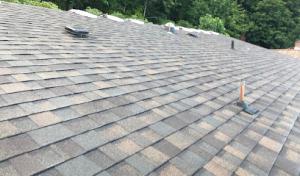
When a winter storm unloads heavy rain and strong wind, you need to act fast. Leaks often start at ridge caps, flashing transitions, and the edges of older shingles where the protective seal has been weakened by repeated exposure. If you notice dripping inside or damp ceilings, don't wait for a perfect sunny window to intervene. Set up tarping over any visibly vulnerable roof areas, especially around ridge lines and transitions, and secure the tarp with battens or heavy-gauge plywood to avoid wind-driven loosening. In this region's long wet stretches, even a small temporary opening can become a much bigger interior moisture problem if drying is delayed. Check attic ventilation and the roof deck for pooled moisture once the weather eases, and plan a rapid follow-up roof visit with a contractor to reseal critical joints.
Ridge caps are a frequent trouble spot during winter storms. High winds can lift cap shingles, exposing underlayment to further moisture intrusion. Flashing transitions at valleys, chimneys, and vent pipes are another weak link, especially where sealants have aged or been improperly trimmed. The edges of older shingles often show wear after repeated wet seasons, creating micro-untreated openings that eyes may miss until water marks appear inside. If moss or algae have already compromised a section, water can travel laterally, following the grain of the underlayment and finding quiet entry points along joist bays. Your roof's vulnerability intensifies when the roof is under tarping stress or if the protective granules have eroded, leaving bare asphalt paths for water to penetrate.
Insurance activity in this market tends to follow wind and rain events rather than hail, so clear photo documentation that ties damage to a specific storm window is essential. Photograph the ridge, flashing, seam transitions, and any soft decking or damp insulation you uncover after the storm passes. Include a dated sequence: pre-storm condition (if visible), scene during the event (if safe), and post-storm condition. Video walks around the entire roof edge help establish scope. When you file a claim, present these records promptly to your adjuster and request an on-site evaluation that prioritizes the most vulnerable leak paths first. If a contractor recommends immediate emergency drying or tarping, act quickly to reduce ongoing interior damage, and keep receipts and photos for your file.
Because the region stays wet for long stretches, you must treat minor storm-created openings as urgent repair opportunities rather than cosmetic fixes. Develop a short-term prevention plan: reinforce vulnerable ridge caps during dry spells, refresh flashing sealants with materials proven for coastal moisture, and schedule regular inspections after storms. Maintain clear gutters and downspouts to prevent water from pooling at fascia edges, which can create secondary entry points. For aging roofs, prioritize proactive resealing and edge protection before the next wet cycle to limit the build-up of interior moisture and costly repairs later.
Find local contractors experienced in assessing and restoring roofs after hail, wind, and severe weather events.
Kitsap Roof Pros
(360) 919-0374 kitsaproofpros.com
10880 Old Frontier Rd NW, Silverdale, Washington
4.9 from 117 reviews


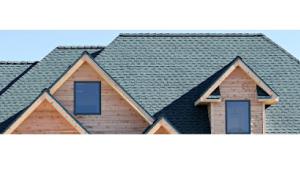
In Silverdale, skylights sit in a line of potential trouble during the long, rainy season. The local contractor market is active with skylight work, but that pace often brings imperfect flashing and curb details that invite slow leaks. Penetrations through roof planes become visible first, so you may notice a discoloration or damp spot around a skylight long before a broad roof failure shows itself. When you inspect, pay particular attention to the head flashing where the skylight meets the roof, and to any signs of water tracking along the curb. If a skylight is decades old, anticipate more frequent resealing or topping off with improved flashing as part of a reliable maintenance plan rather than waiting for a leak to appear.
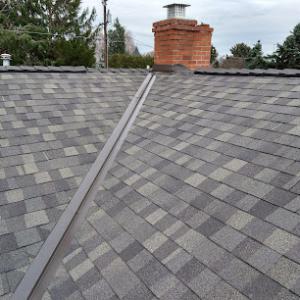
Chimney work appears regularly in the local market, reflecting how counterflashing and cricket details matter on older re-roof projects. In moisture-rich settings, the joint between chimney cap, flashing, and roofing material is where dampness often lingers. Look for cracked or degraded mortar around the chimney, worn counterflashing, or gaps where a cricket should shed water away from the chase. If you see any staining near the chimney, treat it as a warning sign that the flashing may be failing, not just the roofing surface. Addressing counterflashing and cricket details sooner rather than later can prevent the kind of slow, creeping leaks that undermine the local framing and interior finishes.
Because penetrations are frequent leak points, adopt a proactive approach: schedule inspection after the wettest months to catch rising moisture before it soaks into sheathing. When planning, request detail-oriented flashing work around skylights and chimneys, with a clear emphasis on proper sealant selection and compatible metals to resist Kitsap humidity. In older homes, do not assume a single remedy fits all-each chimney and skylight needs tailored flashing geometry, backed by thorough caulking and periodic re-sealing as part of maintenance rather than a one-time fix.
Find contractors experienced in skylight installation, flashing, and leak repairs to bring natural light into your home.
Hood Canal Roofing
(360) 689-0321 canalroofing.com
9435 Provost Rd NW STE 204, Silverdale, Washington
5.0 from 107 reviews
Kitsap Roof Pros
(360) 919-0374 kitsaproofpros.com
10880 Old Frontier Rd NW, Silverdale, Washington
4.9 from 117 reviews
When planning a full roof replacement, the permit is filed through Kitsap County or the applicable local city process. In this area, homeowners typically rely on the contractor to submit the permit paperwork, but it's prudent to confirm who is handling the submission before work starts. Because Silverdale is an unincorporated community commonly served through county processes, it's important to verify whether the property is handled directly by Kitsap County permitting or through a city-only workflow. If the project lies within unincorporated Kitsap, the county is usually the controlling authority, even if the contractor suggests otherwise.
Before the permit is pulled, have the contractor provide a clear scope of work, including underlayment type, ventilation details, and any temporary roof protection for adjacent structures. The county process will expect a plan that accounts for moisture control given the long wet season, and the submission should reflect underlayment and flashing specifics that meet local code adaptations for damp Kitsap conditions. Check whether any homeowners' association or local overlay requirements apply to the property, and ensure the plan includes drainage and debris containment strategies suitable for a moss-prone climate.
The local inspection sequence commonly includes an inspection after underlayment installation. This is a critical checkpoint to confirm that moisture barriers, ventilation, and nail placement meet code requirements before shingles go on. Schedule this inspection promptly to avoid delays in weather windows. A final inspection is required after completion before the roofing system is fully signed off, confirming that the installation integrates properly with existing gutters, eaves, and attic venting. Plan for accessibility, as inspectors will need access to the attic and roof edge details.
Coordinate with the contractor to ensure the permit package includes a detailed roof plan, product specs, and a project timeline aligned with Kitsap County scheduling. After the underlayment inspection passes, maintain the site in a way that supports efficient final inspection-keep yard debris contained, and ensure access is not obstructed by vehicles or equipment. If any changes occur during the project, request a permit amendment promptly to prevent hold-ups during final review.
Replacement projects in this area are heavily shaped by moisture and the region's tendency toward long, wet seasons. Local pricing often reflects tear-off, disposal, deck condition discovery, and cleanup more than a simple new-construction install. The same climate that encourages moss also drives crews to plan around drier windows, so scheduling pressure and backlog can compress availability and affect the bottom line.
Asphalt shingles remain the lower-cost mainstream option, with typical pricing around 350 to 650 USD per square installed in this market. Metal roofing, while appealing for its longevity and water shedding, carries higher labor and detailing costs and generally ranges from 700 to 1,200 USD per square. Tile options-clay or concrete-step up again in price, commonly 900 to 1,800 USD per square for clay and 800 to 1,600 USD per square for concrete, with installation requiring careful moisture management work. Wood shingles or shakes sit around 600 to 1,100 USD per square, and synthetic or composite shingles run roughly 500 to 900 USD per square. In practice, the best-fit choice balances initial cost, long-term moss resistance, and how well the roof handles Silverdale's wet season and moisture intrusion.
In this climate, material choice sharply influences labor complexity. Metal and concrete tile often demand more meticulous flashing, underlayment details, and drainage planning to prevent moss-friendly puddling. Asphalt offers a straightforward path but still benefits from a thorough underlayment and ventilation plan to combat ongoing moisture. Because crews target the region's drier periods, you may see quotes shift with storm backlogs or narrow windows between rain events. Expect pricing to reflect the need for careful moisture management during teardown, deck inspection, and reinstallation to avoid premature failures.
A typical Silverdale replacement that includes tear-off, disposal, and deck condition discovery will skew toward the upper end of general material ranges when material choices lean away from asphalt. If re-roofing is needed due to moss-related damage or persistent moisture issues, set aside additional funds for underlayment upgrades, improved attic ventilation, or enhanced drip edge and flashings. Preparation for cleanup and post-project moss prevention can also influence the final invoice, particularly on larger or multi-story homes.
Get a clear picture of your project costs upfront - no commitment required.
In this coastal community, claim patterns lean more on wind-and-rain events than hail, so insurers split decisions between storm-created damage and age-related wear in a consistently wet climate. That means a roof failure after a winter nor'easter might be treated differently from the same failure during a drier year. When you assess a loss, expect the adjuster to scrutinize whether moisture intrusion came from a single storm or from prolonged moss and saturation that quietly degraded shingles, underlayment, and flashing over time.
Carriers here commonly want clear before-and-after photos, a thorough maintenance history, and evidence of prior condition. If a roof has had moss remediation, past patching, or signs of repeated minor leaks, those details can tilt an adjustment toward repair rather than full replacement-or, conversely, toward a shorter material life expectancy claim. In practice, gather photos taken after every wet-season cycle, keep receipts for maintenance, and document any professional inspections. This is not just bureaucratic ritual; it directly affects how the settlement is shaped when the next big moisture event hits.
During stormier stretches, some insurers tighten underwriting or request more detailed roof inspections, which can influence how quickly a replacement decision is pursued and how extensively contractor documentation is requested. Expect questions about roof age, observed moss buildup, attic ventilation, and evidence of prior wind-driven damage. The more transparent you are about the roof's history and current condition, the clearer the path to an accurate assessment-without surprises when the weather turns harsh. In practice, this means keeping a consistent maintenance routine and having a trusted local contractor document conditions before and after any weather-driven events.
Connect with contractors who help homeowners navigate the claims process from damage assessment to final approval.
Hood Canal Roofing
(360) 689-0321 canalroofing.com
9435 Provost Rd NW STE 204, Silverdale, Washington
5.0 from 107 reviews
Kitsap Roof Pros
(360) 919-0374 kitsaproofpros.com
10880 Old Frontier Rd NW, Silverdale, Washington
4.9 from 117 reviews
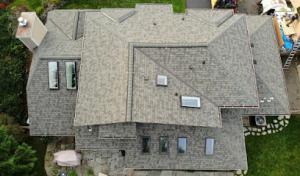
Flat and low-slope roofing has a visible local specialty presence even though pitched residential roofs dominate, indicating recurring demand on additions, porches, and mixed-roof homes in the area. In this climate, those low-slope sections are common where new spaces extend the original roofline, and they frequently share a moisture-driven history with the main roof. Understanding how these pieces connect helps you plan longer-lasting protection for the entire envelope.
In Silverdale's rain-heavy environment, low-slope sections are especially vulnerable to drainage-related leaks where they tie into steeper roof systems. Water can back up at transitions, along flashing, or where gutters and downspouts meet the edge of a flat plane. If a low-slope area is allowed to linger with standing moisture or ice dam formation near eave edges, the risk of hidden rot and fastener failure increases despite what the visible shingles on the steeper sections look like. Treat any slow drainage as a signal to recheck the entire tie-in details rather than addressing the low-slope area in isolation.
These transitions often deserve separate scope review during re-roofing because moisture problems can be concentrated on the low-slope portions even when the main shingle roof appears serviceable. When planning a replacement, expect a dedicated inspection of edge flashing, underlayment compatibility, and drainage runs at the junctions between low-slope and steeper planes. A thorough plan for these interfaces reduces the chance of late leaks and helps ensure the new roof maintains performance across all roof types present on the home.
During the wet season, keep an eye on flat sections after heavy rains and after moss treatment, if any. Schedule targeted inspections after major gutters cleanouts or wind-driven events, and verify that all transitions maintain proper slope and sealant integrity. If moisture appears near the interface, address it before it migrates into framing or insulation.
Find specialists in TPO, EPDM, and built-up flat roofing systems for residential and commercial properties.
State Wide Contracting
(360) 552-0621 www.waroofers.com
10868 Myhre Pl NW Suite 104 -105, Silverdale, Washington
4.0 from 8 reviews