Last updated: Apr 19, 2026
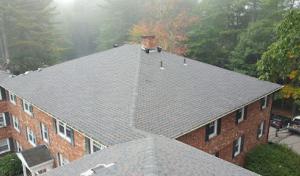
Salt air and humid air in this region mix with cold winters to create relentless freeze-thaw cycles. Each cycle pushes moisture into tiny gaps in shingles, underlayment, and especially along flashing around chimneys and vents. When temperatures bounce above and below freezing, that moisture expands and contracts, slowly widening seams until finish coatings crack and sealants separate. In a suburban roof setup with multiple vent penetrations and older flashing, these micro-failures accumulate into a network of hidden pathways for water. By the time the snow clears, the roof might look fine, but the structure is already under attack from repeated stress that weakens adhesion and accelerates deterioration.
Spring storms in this area bring sharp downpours after months of snow. Those storms don't just test the surface; they test the roof's ability to shed water quickly and completely. Snow can blanket a roof well into March, masking soft spots or compromised sealants. When the first strong rain arrives, water follows the path of least resistance, often along rafter tails, along the backs of columns where flashing edges meet shingles, and through compromised valley areas. If snowmelt is rapid and gutters are clogged, the capacity to move water away is overwhelmed, and leaks that were dormant during winter become active overnight. Neighboring homes with mid-life roofs frequently reveal new wet spots in the attic or along interior ceilings after a spring thunderstorm line.
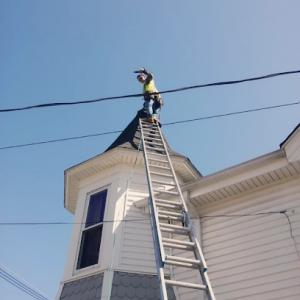
Late fall wind events can gust aggressively, striking older roofs with repeated loading from wind-driven debris and seasonal debris coverage. When early snow begins, the added weight acts as a stress test on compromised seams and underlayment. A marginal roof condition can slip into active leak territory as wind-driven rain and snow accumulate near flashing joints and at ridges. In Salem, that combination of wind, cold air, and a first substantial snow load is a common trigger for developing leaks that were just barely keeping water out during milder autumn days. Pay particular attention to ridge lines and chimney flashing after a strong late-fall wind event.
Inside the attic, look for dark streaks that follow the path from penetrations, along rafter tails, or near joints where sealants have aged. On the exterior, inspect the intersections where metal flashing meets shingles, especially around valleys and dormers. Note any granule loss on shingles, soft spots, or curling edges, as those signs correlate with water access routes created by freeze-thaw damage. If moisture is noticed on ceiling corners or around skylights after a heavy rain, treat that area as a priority for inspection and possible repair.
Begin a targeted seasonal checklist that prioritizes vent seals, flashing integrity, and drainage paths. Clear gutters and downspouts before spring storms arrive to maintain rapid water shedding during high rainfall events. Schedule a professional roof inspection before winter sets in to identify aging seals and weakened flashing that are particularly vulnerable to freeze-thaw cycles. In the interim, monitor attic insulation and ventilation; poor ventilation accelerates condensation that compounds leak risk. If a leak appears during a storm or soon after, address it promptly by protecting the interior and arranging a timely evaluation, since delay often converts a minor flaw into a larger repair.
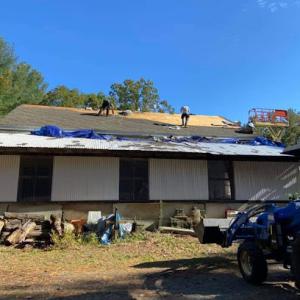
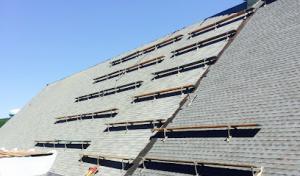
Replacement work hinges on staying dry and cold enough to install properly without ice buildup. In this climate, the window that actually makes sense begins when the risk of heavy snow and sustained freezing temps eases, but before late-fall wind and snow-load stress returns. You're aiming for a stretch of solid, dry days with moderate temperatures that won't push shingle or underlayment materials to extremes. Plan to lock in a start date only after a fairly accurate long-range forecast shows multiple dry days in a row, plus a few days of milder weather to finish delicate tasks like attic venting or flashing work. The goal is to finish before the first big cold snap or early-season storm, so avoid a start that drifts into late fall if a late-summer or early-fall window exists.
Spring rains are a truth-teller for Salem roofs. Winter damage often surfaces only after the thaw, when freezing cycles have stressed seams, penetrations, and edge details. If you're waiting for the last snow melt, you might miss the ideal Friday-to-Sunday window that allows completion before spring weather turns wet and windy. Start by inspecting the roof after the first few weeks of thaw to identify obvious issues-dislodged fasteners, lifted shingles, torn flashings, or visible daylight through the attic-so the contractor can schedule targeted repairs or confirm a replacement plan. Because spring rain commonly reveals winter damage, your decision point may shift from "maybe later" to "now is the right moment." Coordinate a scope that prioritizes the most vulnerable areas first, like valleys, skylights, and roof-to-wall transitions, to minimize delays caused by weather interruptions.
Storms drive a quick shift in demand, especially after a harsh winter and a wet spring. When a spate of storms tightens the market, scheduling becomes a negotiation: you'll be competing with neighbors who faced similar issues and with crews that are juggling multiple projects. The best approach is to have a clear plan ready, with preferred materials and a realistic target completion date, so the contractor can commit to a firm timeline. Build some flexibility into your expectations for weather delays, but avoid letting a few storm warnings push you into an unreachable start. If a window opens-two or three solid dry weeks in a row-lock in the appointment and prepare the site in advance: move vehicles away from the driveway, trim overhanging branches, and clear gutters so installation can proceed smoothly once the crew arrives.
Start with a trusted local roofer who understands the seasonal quirks here: heavy snowfall, rapid thaw cycles, and mid-season storm patterns that affect supply and crew availability. Request a written start-to-finish schedule that includes contingency days for weather disruptions. Confirm that the plan prioritizes critical areas first (valleys, penetrations, and flashing) and that the chosen materials are compatible with our climate's freeze-thaw cycles. If you notice winter damage during thaw, document it promptly and share photos with the contractor to refine the scope before work begins. Finally, keep a close eye on the forecast in the weeks leading up to the planned start, ready to adjust if a significant storm pattern appears. This approach helps ensure a reliable project flow and minimizes the chance of work stalling when spring winds change the conditions again.
Get a clear picture of your project costs upfront - no commitment required.


Prestige Roofers, LLC. Roofing , Siding & General Construction
Serving
4.8 from 17 reviews

MGS Construction
(603) 237-1011 www.mgsconstructionllc.com
224 Main St Suite 3A, Salem, New Hampshire
5.0 from 526 reviews
MGS Construction provides roofing, siding, windows, and decks, to all of NH and MA.

A&A Services Home Improvement
(978) 613-8232 a-aservices.com
115 North St, Salem, Massachusetts
4.9 from 520 reviews
A&A Services Home Improvement in Salem provides reliable roof replacements tailored to the North Shore’s coastal weather. Our team specializes in helping homeowners protect their properties from heavy winds, harsh winters, and moisture issues common throughout Salem and surrounding areas. We deliver professional roof installation, replacement, and exterior improvements designed for long-lasting performance. As trusted roofing contractors with decades of local experience, we’re committed to quality workmanship and dependable service on every project.
Professional Roofing Contractors
(978) 744-6888 www.proroofingboston.com
11 Franklin St B, Salem, Massachusetts
4.3 from 6 reviews
The leading roof repair and roof replacement contractor in Greater Boston for over 50 years. Specializing in Commerical, Slate, Copper, Rubber, EDPM, Shingle, Steeple.
Manny's Roofing
(978) 703-3167 www.mannysroofing.com
Serving
5.0 from 111 reviews
Manny’s Roofing specializes in residential and commercial roofing. We service all of New Hampshire and Massachusetts. We are committed to quality, using top-grade materials and advanced techniques to ensure durability and efficiency in every project. With 20+ years of roofing experience, we have built a solid reputation based on trust and customer satisfaction. We offer roof installation, roof repair, and maintenance services, always focused on providing personalized service tailored to each client's needs. Call for a free quote today!
Couture's Construction
(978) 552-9964 couturesconstruction.com
Serving
5.0 from 31 reviews
We are a family-run, owner-operated, fully licensed and insured construction company that specializes in (but not limited to) roofing, siding, windows, decks, and doors. In addition to installation of the above products, we also offer repair services to allow you to get the most out of all the elements of your home or business.
Paradise Remodeling
(781) 732-0203 www.paradiseremodelinginc.com
Serving
5.0 from 34 reviews
Paradise Remodeling is a trusted home improvement contractor based in Methuen, Massachusetts, proudly serving homeowners across the region since 2012. We specialize in roofing, siding, skylights, doors, and windows, offering high-quality craftsmanship and a customer-first approach on every project. As a fully licensed and insured contractor, Paradise Remodeling delivers reliable and efficient service with a strong commitment to durability, energy efficiency, and curb appeal. Whether you’re looking to enhance your home’s exterior, upgrade your roof, or improve natural lighting with skylights, our experienced team brings over a decade of expertise to every job. From the initial consultation to project completion, we prioritize your sati.
Tip Top Roofing Company
(617) 630-9334 www.tiptopslateroofing.com
Serving
4.2 from 5 reviews
Tip Top Roofing Company, founded in 2011 and based in Methuen, MA, is your go-to roofing contractor for all your roofing needs. Our dedicated team offers a wide range of services, including new slate roof installation, custom copper fabrication, cedar shakes, wood shingles, rubber roof systems, and more. Whether you need slate and custom tiles replaced, roofing repair services, or assistance with natural and PVC gutters, we've got you covered. We also specialize in snow and ice removal, leak solving, and troubleshooting to ensure your roof remains in optimal condition year-round. At Tip Top Roofing Company, we prioritize quality craftsmanship, exceptional service, and customer satisfaction. Contact us today to discuss about your project.
Town Roofing
(781) 426-1087 townroofing.com
Serving
4.7 from 18 reviews
Welcome to Town Roofing, your trusted roofing contractor serving Methuen, MA, and the surrounding areas. As a family-owned business with three generations in the industry, we pride ourselves on delivering exceptional roofing services to homeowners and businesses alike.
Mandette Roofing Plus
(978) 315-5555 mandetteroofing.com
Serving
5.0 from 49 reviews
Mandette Roofing Contractor. Roofing and Siding expertise in Portland ME and Nearby Cities. With over 20 years of combined experience in the roofing industry, Amanda and Eli founded Mandette to provide homeowners with the peace of mind they deserve. They understand that a roof is more than just shingles and nails - it's about protecting what matters most to you. That's why their team is dedicated to delivering exceptional client experiences and lasting results. We assist with insurance claims by performing repairs or replacements as specified by your insurance company. Our team will guide you through each step of the claims process and work directly with your insurance adjuster to ensure you receive the coverage you need for storm damage.
Rumi Roofing
(603) 715-0599 rumiroofing.wixsite.com
Serving
5.0 from 4 reviews
We are a family owned, "Licensed and FULLY Insured" Roofing Contractors for over a decade with proved QUALITY and WARRANTY on all labors and materials. Offering our services doesn't matter on how big or small are any single project WE will cover YOU trough our 24/7 ROOFING EMERGENCY ASSISTANCE. FEEL SAFE AND GIVE US A CALL THEN WE WILL BE THERE THE SAME DAY FOR A FREE ROOF INSPECTION. We're covering New Hampshire and Massachusetts.

RJ Talbot Roofing & Contracting
(978) 361-6129 talbotroofing.com
Serving
4.9 from 87 reviews
RJ Talbot Roofing & Contracting provides residential and commercial roofing services, installation, and repairs to the greater Haverhill, MA area.
Over The Top Home Maintenance
(603) 412-4120 overthetophm.com
Serving
5.0 from 17 reviews
Chimney, roofing and masonry
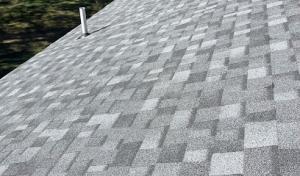
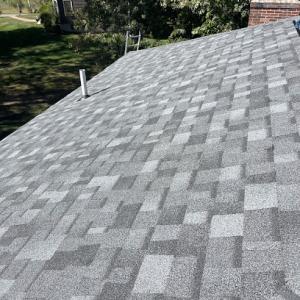
In this market, the dominant materials include asphalt shingles, metal roofing, clay tile, concrete tile, synthetic/composite shingles, and slate. Each of these brings a different set of performance considerations when the thermometer swings from winter cold to spring storm bursts. The choice shapes how flashings and penetrations-chimneys, vent pipes, skylights-need to be detailing-focused, especially where cold air meets moisture entering from a windy, water-laden spring. If asphalt is your baseline, you'll find familiar quick responses to freeze-thaw cycles, but even newer synthetic options require careful edge and transition work to avoid slow leaks that show up after a heavy thaw.
Salem's climate cycles through freeze-thaw stress that concentrates near transitions. That means a roof isn't just the surface you see; it's the suite of joints where shingles meet flashing, where valleys intersect, and where vents pierce the deck. Regardless of material, you want flashing that can move with ice buildup and a shingle layer that doesn't allow ice dams to pry up edge details. Metal roofs demand seam and edge sealing that handles thermal contraction, while clay or concrete tiles need battens and underlayment arrangements that prevent cracking or shifting when ice expands. Synthetic shingles, though forgiving in some installs, still rely on precise attic ventilation and correctly sealed perimeters to keep moisture away from fasteners and joints.
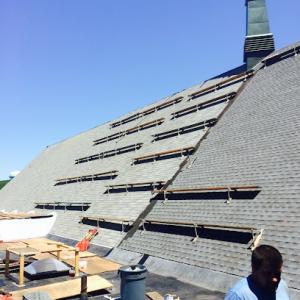
Heavier systems-slate, clay tile, and concrete tile-require closer attention to structural and installation compliance during a replacement project. The added weight means an assessment of the deck's framing and support is essential before the project begins, especially on homes with limited attic access or older framing. In Salem's windy springs, proper underlayment and securement become pivotal for storm-driven rain. For these materials, paying attention to yard drainage around the roof edges, clean valleys, and the alignment of terra-cotta or slate tabs helps ensure that a thaw or a wind-driven storm won't introduce water behind the outer layers.
Every roof type benefits from proactive maintenance at transitions. Chimneys and vent stacks, as well as skylights, need periodic resealing and edge protection to outpace weathering. With asphalt or composite shingles, edge-fastener security matters; for metal, ensure sealant around laps remains intact; for tiles, check for broken pieces after severe hail or heavy sleet. In a climate with frequent freeze-thaw cycles, you'll gain the most resilience by inspecting these areas after winter storms and before the next heating season.
When you're lining up a roof replacement, you'll see clear price bands in Salem that reflect local demand, winter timing, and stock of proven installers. Asphalt shingles typically run from 350 to 650 USD per square, metal from 600 to 1200, clay tile from 900 to 1900, concrete tile from 800 to 1600, synthetic/composite shingles from 400 to 800, and slate from 1700 to 2800. These ranges cover common suburban homes with standard rafters and ventilation but can shift if the roof needs unusual framing work or extra underlayment. In practice, your project will track with material choice, roof slope, and the length of the project window.
In Salem, costs can rise when winter damage and spring storm demand compress contractor availability and push homeowners into faster scheduling windows. If you're aiming for a spring replacement after a heavy snow season, expect limited crews and shorter notice for start dates. That pressure often translates into higher labor rates or weekend scheduling surcharges, especially for larger homes or complex roof lines. A plan that lines up a bit ahead of storms-noticing shingle wear and flashing rust before a cold snap-helps curb these spikes.
Projects in Salem can price higher when the roof system requires ventilation or structural corrections to satisfy final inspection expectations. If your attic vents, insulation, or ridge vents aren't up to the expected standard, contractors may need to retrofit or add components. Likewise, signs of frost damage, thaw cycles, or previous leaks can reveal decking replacements or support repairs that elevate both material and labor costs. Budget for a contingency to accommodate necessary ventilation improvements and any minor framing tweaks that keep the roof performing through freeze-thaw cycles and spring storms.
Don't let upfront costs delay a critical repair - these contractors offer payment plans to fit your budget.

Black Swan Roofs - Roofing Contractor
(603) 512-4281 www.blackswanroofs.com
Serving
5.0 from 51 reviews

In Salem, NH, a building permit is typically required for a full roof replacement. That isn't a generic rule that can be skipped or rushed, especially when the weather here compounds risk. The contractor generally files the permit with the Town of Salem Building Department, and a careful homeowner understands that this step protects the home from unforeseen hazards later on. If a permit isn't pulled, you can face delays, potential liability for unsafe workmanship, and difficulty securing insurance or resale approval. The process is not designed to trip you up, but to ensure that the roof's new structure sits on solid foundation, anchored properly against wind, snow, and freeze-thaw cycles.
The permit paperwork isn't just a box to check; it creates a traceable record that the project followed local codes and town guidelines. Expect the Building Department to request project details, including the scope, materials, and a plan for ventilation and attic access. The application is typically submitted by the contractor, but you should stay engaged enough to verify that the plan includes adequate ventilation, proper flashing detail around chimneys and dormers, and secure deck and sheathing attachment. In this climate, poor ventilation can trap moisture during the thaw and re-freeze cycle, accelerating deterioration of decking and underlayment.
An inspector typically visits at completion to verify installation, including structural and ventilation compliance. This final inspection is not a nuisance; it's the last checkpoint that confirms the roof system will stand up to heavy snow loads, wind events, and seasonal temperature swings. The inspector will check that nailing patterns meet code, underlayment is continuous where required, drip edge is in place, and that attic ventilation openings maintain the balance needed to prevent condensation. If anything isn't aligned with code or the permit plan, you'll be informed of corrections that must be made before the permit can be closed. Delays at this stage are often tied to miscuts, missing flashing details, or insufficient intake and exhaust ventilation.
Budgeting concerns are real, but the consequences of skipping or rushing permit steps aren't purely financial. A contractor who bypasses the permit may also bypass essential documentation that verifies safe, code-compliant work. If an inspector uncovers moisture issues, improper flashing, or ventilation gaps, repairs to bring the system into compliance will be required, sometimes long after the roof is in place. In today's climate of freeze-thaw stress and spring storms, ensuring that a permit is obtained and a diligent final inspection is completed can mean the difference between a roof that performs for decades and one that flags early, costing more in the long run.
When a storm or winter damage hits, claims in this area follow a practical, documentation-driven path. New Hampshire insurers commonly ask Salem homeowners for documentation of roof scope and any prior damage when a claim is involved. The goal is to separate fresh damage from preexisting wear so the claim reflects current needs rather than past conditions.
Adjusters may request photos plus notes on attic ventilation and underlayment, which makes pre-tear-off documentation especially important in Salem claims. Take clear, timestamped photos from inside the attic and around eaves, plus close-ups of any visible damage. A concise written note on venting and underlayment quality helps the adjuster see how well the roof system managed freeze-thaw cycles before the incident.
There is no statewide market-wide insurer pullback in New Hampshire, but policy terms vary by carrier and can affect how Salem homeowners approach repair versus replacement. Gather a recent roof plan or scope, any service records, and a simple map of damaged areas. Having a prepared scope helps conversations with the adjuster stay focused on what needs attention now, rather than debating past performance.
If a claim is approved, decide early whether repair or replacement best fits the roof's long-term performance in cold winters and spring storms. A documented, attic-inclusive view of current conditions supports a rational choice, minimizing downtime and ensuring the living space remains protected while weather continues to churn through the season.
Coordinate with the adjuster to schedule a field visit during dry periods when possible. Keep a consistent set of photos and notes ready, and reference attic details when discussing underlayment and ventilation. In this climate, timing the response to temp and moisture swings helps prevent further leaks and secondary damage.
Connect with contractors who help homeowners navigate the claims process from damage assessment to final approval.
Skylights are a frequent source of roof trouble in this market, where cold winters and thaw cycles stress the transition from roof deck to daylight. In Salem, skylight work is a meaningful specialty among local contractors, so failures often trace to the surrounding flashing, the curb seal, and the flashing boot where the skylight meets the roof. The most common failure pattern shows up after a harsh winter: capillary action along seam laps, micro-cracks in sealants, and moisture intrusion from wind-driven rain that penetrates poorly flashed joints. When spring rain arrives, these weak spots reveal themselves first, sometimes as a small interior drip around the skylight framing or as stained ceiling areas that progress quickly if not addressed. Routine checks during milder periods help; look for lifted shingle edges near the skylight, whitening of sealant, or crusty mineral deposits around the flashing. If you notice any of these signs, treat the issue promptly, because repeated freeze-thaw cycles amplify existing gaps and can push leaks further along the roof deck.
Chimney-related work is also common, aligned with flashing and masonry transition issues that worsen under freeze-thaw conditions. The chimney stack creates multiple potential leakage routes: step flashing where the chimney meets the roof, counter-flashing against the brick or stone, and the mortar joints that can crumble with winter moisture. In Salem's climate, the combination of moisture intrusion and repeated expansion-contraction cycles makes chimney leaks a frequent early indicator of broader roof system wear. Look for staining around the chimney base, loose chimney cap components, or mortar cracks that widen after freeze events. Spring rain can chase moisture along the chimney-to-roof interface, so addressing flashing integrity and ensuring proper sealant compatibility with masonry is essential. A thorough inspection should verify that the chimney crown is intact and that flashing is continuous and correctly integrated with the roof, reducing the chance that winter movement leads to a larger leak later.
Winter movement and spring rainfall often expose penetrations first, making skylight and chimney details a priority for proactive maintenance. Regularly scheduled checks of flashing continuity, sealant condition, and masonry integrity help homeowners catch small flaws before they become costly repairs. When leaks are suspected, addressing these penetrations promptly with the right flashing, masonry repair, and protective coatings minimizes disruption and protects the broader roof system during the most vulnerable seasons.
Find contractors experienced in skylight installation, flashing, and leak repairs to bring natural light into your home.

MGS Construction
(603) 237-1011 www.mgsconstructionllc.com
224 Main St Suite 3A, Salem, New Hampshire
5.0 from 526 reviews

A&A Services Home Improvement
(978) 613-8232 a-aservices.com
115 North St, Salem, Massachusetts
4.9 from 520 reviews
Flat or low-slope roofing appears as a smaller but real specialty in Salem, suggesting relevance for porches, additions, garages, and mixed-roofline homes rather than citywide dominance. Those sections don't just sit behind the main house-they're exposed to the same freeze-thaw cycles and spring storms, but with drainage and edge details that can become the weak link first. The practical takeaway is that low-slope areas demand attention not as a secondary afterthought, but as a key part of the overall roof system.
In the snow-and-thaw climate, low-slope sections are more sensitive to drainage, membrane detailing, and edge flashing than steeper main roof planes. Snow needs to move, meltwater needs a clear path, and ice build-up can form along the edges where flashing or termination meets walls. If drainage stalls, the resulting ponding can stress membranes, headers, and fasteners. In Salem, even small leaks on a porch or garage roof can propagate into hidden rot that undermines framing in a hurry once spring comes.
Homeowners with both pitched and low-slope sections often need replacement planning that addresses the entire roof assembly instead of only the visible shingle areas. A joint approach helps avoid situations where a new shingle surface outlives the edge details or the membrane remains vulnerable beneath a newer layer. When scheduling replacements, consider how the addition's roof-to-wall connections, ventilation, and flashing tie into the main roof's drainage, ensuring that sealants and transitions do not become the first point of failure during a thaw or a storm.
Find specialists in TPO, EPDM, and built-up flat roofing systems for residential and commercial properties.

J B Kidney Co Inc Roofing & Sheet Metal
(978) 744-2875 jbkidneyroofing.com
41 Osborne St, Salem, Massachusetts
4.4 from 7 reviews
Professional Roofing Contractors
(978) 744-6888 www.proroofingboston.com
11 Franklin St B, Salem, Massachusetts
4.3 from 6 reviews

Big Sky Roofing & Restoration
(857) 800-1658 bigskyroofingrestorationllc.com
Serving
5.0 from 11 reviews
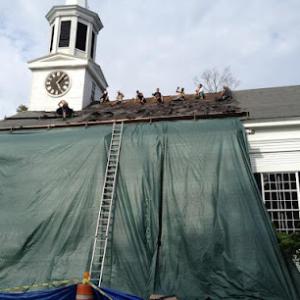
Cleanup is one of the strongest contractor signals in Salem, showing that homeowners here strongly value debris control and post-job site condition. After a storm-driven project, the yard should look finished, not scattered with shingles, nails, or scrap material. Expect crews to haul away what they remove, seal gaps around the chimney and vents, and leave a tidy drip edge and waste pile cleared from driveways and lawns. If debris remains or nails show up in mulch beds, that's a red flag that the job wasn't fully closed out.
Affordable pricing and re-roofing are both highly prevalent in the local market, indicating a practical replacement-focused customer base. Homeowners often prioritize straightforward, durable solutions over premium branding. When evaluating materials, look for a plan that minimizes disruption-one-day or two-day installs, respectful preparation, and clear staging. In this market, you'll see emphasis on reliable underlayment, solid flashing around chimneys and vents, and fast, predictable leak response rather than fancy feature packages.
Warranty offerings appear often enough to matter, but the market is driven more by responsiveness and straightforward execution than by premium branding alone. A solid warranty should back up workmanship and the roofing materials for the expected life of the product. The key test is how quickly a contractor returns calls, assesses issues, and schedules a fix after a storm or a reported leak. A dependable crew will treat storm damage with urgency and keep disruption to a minimum.
Fluctuating temperatures and repeated freeze-thaw cycles stress vents, flashing, and any existing roof penetrations. Salem homeowners expect a plan that anticipates spring storms and winter melt, with proactive inspection after heavy snowfall and rapid response when leaks first appear. A reliable contractor will offer a concise, step-by-step path from initial assessment through temporary measures and final repair, keeping the seam between winter and spring waterproof and secure.