Last updated: Apr 19, 2026
Saline, MI has cold winters with snow and ice, making ice dams a primary roof risk for local homeowners. When snow sits on a roof and melts from the sun or indoor heat, that melt can refreeze at the eaves, creating ice dams that trap water behind them. The result can be active leaks into the attic and ceiling layers, stained insulation, and accelerated wood rot if moisture sits long enough. With Washtenaw County's typical freeze-thaw cycles, a small gap under shingles or flashing can become a big problem within days. The danger isn't just water; it's compromised attic ventilation, deteriorated decking, and the sudden need for extensive damage repair after a winter thaw.
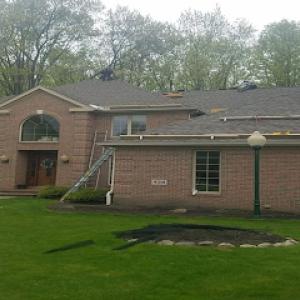
Roofing work in Saline is typically most favorable from late spring through early fall because drying conditions are better and freeze-thaw installation risks are lower. Dry, consistent air helps seal, fasten, and vent roof systems without the repeated creep of moisture that comes with spring rains and cool spells. If a roof is already showing damage from a long winter-loose shingles, lifted edges, or aging underlayment-planning a late-spring to early-fall project minimizes the chance of snow, ice, or sleet interrupting work and reduces the likelihood of premature failures. In practice, the window from late spring into early fall aligns with the best drying weather and the most predictable temperatures for adhesives, sealants, and roof decking work.
Spring thaw and frequent rain in the Saline area can delay tear-offs and complicate moisture control on exposed roof decks. As temperatures swing, crews may encounter pockets of moisture trapped beneath peeling shingles or compromised underlayment. When a roof is left exposed during wet springs, exposed decking can absorb rainwater, slowing the project and increasing the risk of structural damage beneath the surface. Effective moisture management becomes critical: covering exposed areas promptly, maintaining continuous ventilation in the attic during work, and scheduling full dry-out periods before new layers go down. The key is anticipating intermittent wet spells and building contingencies into the project plan so leaks don't silently undermine repairs or replacements.
Given the local climate, attention to the exposed roof deck is non-negotiable. Ice dam activity prior to a replacement often means some decking issues-soft spots, cupping, or delamination-are present and must be addressed before new materials are installed. Your contractor should inspect attic ventilation, insulation levels, and soffit intake to ensure moisture can move freely and not trap heat that feeds future ice dam formation. Hidden rot behind sagging decking is a common Saline-specific pitfall, especially on older neighborhood homes with long-standing dam pressure. Expect a careful moisture survey, followed by targeted remediation measures that restore a dry, stable base for the new roof system.
If an ice dam threat is suspected, arrange an expert inspection that prioritizes attic ventilation, ridge and gable vent balance, and full dry-out of any wet decking before work begins. Prepare for a schedule aligned with the late-spring to early-fall window, but stay flexible if a winter windstorm or sudden thaw creates urgent damage. Document visible leaks and water marks, and communicate clearly about where attic spaces trap heat or moisture most. When choosing materials, consider how the new roof will handle Saline's freeze-thaw cycles and ensure drip edge, flashing, and proper shingle overhangs are configured to shed ice and meltwater away from the interior. In a town marked by winter ice dams, a thoughtfully timed, moisture-aware replacement plan protects your home long after the last spring thaw.
Michigan sees periodic hail and wind events that drive roof claim activity, and Saline homeowners are part of that broader claim environment. When a severe storm rolls through, the first concern is damage to shingles, flashing, vents, and gutters. In Washtenaw County, those wind-driven impacts often show up as uplifted tabs, lifted shingles, or crushed granules in the driveway. Hail can punch through softer roofing materials or dent metal components, creating hidden weaknesses that only show up after the next freeze-thaw cycle. The urgency is real: unattended wind damage can cascade into leaks and ice-dam risk once winter returns. The local pattern is to see a burst of activity in the days immediately following a storm, with adjusters working long hours to scope widespread properties. Being prepared translates into faster return-to-dull-quiet roofs and less ongoing disruption.
In Saline, autumn wind storms and debris can create urgent repair conditions and post-storm prep challenges. Fallen branches, loose shingles, and damaged gutters are common after those crisp, high-speed gusts sweep through neighborhoods. If roof damage is left exposed, snow and ice can exploit the weakest point, accelerating wear and increasing the chance of ice dam formation once winter arrives. Urgent repairs-like temporary coverings or securing loose flashing-are not cosmetic choices; they protect interior spaces and prevent water intrusion during the heavier winter months. When storms rip through, the goal is to stabilize the roof surface quickly while preserving the integrity of underlying decking and insulation. This approach minimizes the risk of secondary damage and keeps the claim process moving without delays caused by further deterioration.
Local claim approvals often depend on thorough documentation such as date-stamped photos, damage descriptions, and contractor estimates because adjusters may scrutinize re-roof claims. Take clear photos from multiple angles: shingles near the ridge, flashing around chimneys and vents, gutters, and any signs of interior leaks or ceiling staining inside. Note the date and the storm details in a simple log, including wind speeds if known, hail size, and the time of day. For any urgent temporary repairs, photograph those steps as well: tarps, boards, or metal patches. Obtain a detailed contractor estimate that itemizes replacement materials, labor, and the scope of work, including tear-off if applicable, attic ventilation checks, and flashing replacement. Keep a copy of the contractor's license and any certifications relevant to hail and wind damage. This thorough packet helps an adjuster see exactly what was affected, reducing back-and-forth and accelerating a fair determination.
Develop a post-storm action plan that you can implement in a matter of hours, not days. Begin by performing a rapid exterior inspection with safety in mind, using proper ladders and fall protection, and mark any areas that look compromised. Schedule a licensed roofing professional for a thorough assessment within 24 to 72 hours if conditions allow. Have a weather-safe method to protect vulnerable spots-such as tarps over softened valleys or exposed decking-until permanent repairs can be completed. Communication is key: share photos, notes, and the contractor's assessment with the insurer promptly, and keep a written timeline of all events and responses. In a tight insurance window, timely, accurate documentation and decisive action can determine how smoothly the claim proceeds and how quickly a weather-tight roof is restored.
Connect with contractors who help homeowners navigate the claims process from damage assessment to final approval.
Neighborhood Roofing
(734) 994-6500 www.neighborhoodroofing.com
1377 Tefft Ct, Saline, Michigan
5.0 from 276 reviews
Diversified Roofing
(734) 429-5840 diversifiedroofingllc.com
779 W Michigan Ave, Saline, Michigan
4.9 from 138 reviews
Neighborhood Roofing
(734) 994-6500 www.neighborhoodroofing.com
1377 Tefft Ct, Saline, Michigan
5.0 from 276 reviews
For nearly 50 years, Neighborhood Roofing has been proudly serving SE Michigan as one of its most trusted & experienced roofing contractors. Specializing in roof replacements and repairs, we handle all types of roofing systems for buildings of every size. As a locally owned business, we're dedicated to providing exceptional service, expert craftsmanship, and long-lasting quality. Our commitment is simple: to ensure your home or business has a dependable roof, without overselling or unnecessary costs. At Neighborhood Roofing, we believe in honesty and transparency. If your roof doesn’t need replacing, we’ll let you know and focus on cost-effective repairs or maintenance to extend its life. Your satisfaction and trust are our top priority.

Roofman USA
8166 Braun Rd, Saline, Michigan
4.9 from 341 reviews
Expert roofing contractors offering world-class residential roof replacement services in Ann Arbor, MI & communities throughout Southeast Michigan. Having invented and installed rubber shingles for over 3 decades, Roofman can show you hundreds of roofs in your area that are over 30 years old that look like they were installed yesterday! Roofman is the roofer that residents in Metro Detroit area and communities throughout the southeast region of Michigan turn to when they want to replace their unsightly and leaky roof with a long-lasting new roof that can stand up to Mother Nature’s harshest weather.
Diversified Roofing
(734) 429-5840 diversifiedroofingllc.com
779 W Michigan Ave, Saline, Michigan
4.9 from 138 reviews
Diversified Roofing is a reliable commercial roofing contractor in Saline, MI, specializing in residential roofing, storm damage repair, shingle roofing services, flat roofing services, and gutter protection. As roofing experts, we use premium materials and offer energy-efficient, modern roofing options tailored to your needs. Whether you’re restoring your property after a storm or upgrading your roof, our skilled team delivers quality and honest service. Protect your investment and enhance your building’s value. Contact Diversified Roofing today to schedule a consultation and discover the best roofing solutions for your home or business.

Imperial Building & Roofing
(734) 995-9955 www.imperialbuilding.com
Serving
4.9 from 94 reviews
Imperial Building & Roofing is a proud family owned and operated roofing company dedicated to serving our community with integrity and excellence. We hold ourselves to the highest standards because we know our success depends on the trust and satisfaction of our customers. At Imperial, we build to last by combining years of experience with quality craftsmanship to protect your home, your most valuable investment. Let us put our expertise to work for you.
Roof Advance
(734) 219-4988 roofadvance.com
Serving
5.0 from 397 reviews
Ever since Roof Advance first started out in 1996, we knew that we wanted to provide a level of service that would let customers know they their biggest investment was in trusted hands, and that we’d take care of their homes as carefully as we would our own. That commitment to quality has definitely paid off in the form of many industry awards, perfect 5 star reviews, and a long and growing list of satisfied homeowners.

Freedom Roofing, Windows & Siding
Serving
5.0 from 75 reviews
Based in Ann Arbor and Freedom Roofing, Windows and Siding 3rd location! We are a veteran-owned business. We offer complete residential and commercial roof replacements and roof repairs, window replacements, siding replacements, and gutter system installation. We are an Owens Corning Platinum Preferred Contractor, and are certified with multiple low-slope EPDM, TPO, and PVC roofing manufacturers. We offer asphalt, metal, and membrane roof solutions for our residential, commercial, multi-family, and industrial customers.

GoTo Roofing
(734) 627-7663 www.gotoroofing.com
Serving
4.9 from 461 reviews
Every roof is unique. When it’s time to replace or repair your roof, you need knowledgeable professionals, quality materials, and people you can trust...You need GoTo Roofing! We are the “go to” choice for all your roofing, siding, and window needs! Contact us today for a FREE estimate.

A H Construction & Roofing
(734) 481-1983 www.ahconstructionco.com
Serving
5.0 from 212 reviews
A.H. Construction provides new roofing and roof repair services for residential homes and businesses in the Ann Arbor and surrounding area since 1987. When you choose A.H. Construction you can count on our licensed, bonded and insured team to give your roofing project the care, quality and attention to detail it deserves. Regardless of the size of your home roofing or roof repair project, we’re committed to keeping you 100% satisfied. Call us today for a free roofing estimate!
Billy White Roofing
(734) 882-2137 www.bwrannarbor.com
Serving
4.9 from 38 reviews
Billy White Roofing is a trusted roofing contractor that has been serving Ann Arbor, MI, and the surrounding areas since 1994. We focus on delivering quality workmanship, excellent customer service, and affordable pricing. Our experienced staff specializes in roof repairs, replacement, and maintenance to ensure your peace of mind and satisfaction. Contact us today!
Lincoln Roofing & Construction
(734) 476-6196 lincoln-roofingco.com
Serving
5.0 from 7 reviews
Best roofing company in Washtenaw County. We fix storm damage and replace entire roofing systems.

Chico's Roofing
(734) 417-7171 chicosroofing.com
Serving
4.8 from 37 reviews
We are a local home roofing company dedicated to providing high-quality solutions to our clients, family-owned and operated company that values skilled craftmanship and integrity. With a commitment to providing high-quality roofing solutions, we take pride in serving our local community and building lasting relationships with our customers. Licensed & Insured Company.

Rapid Roofing
(734) 875-9116 rapidroofing.com
Serving
4.8 from 69 reviews
Rapid Roofing: Ann Arbor's Leading Roofing Experts Serving Ann Arbor, MI, and nearby areas, Rapid Roofing delivers top-notch roofing solutions with a commitment to quality and customer satisfaction. Renowned for dependability and exceptional craftsmanship, we complete every project to the highest standards. We tailor our services to meet your unique roofing needs. Our team values transparency and keeps you informed throughout the process. Using the latest industry techniques and expertise, we handle any roofing challenge efficiently. At Rapid Roofing, your satisfaction is our priority. Contact us today to learn how we can protect and enhance your home with our superior roofing services.
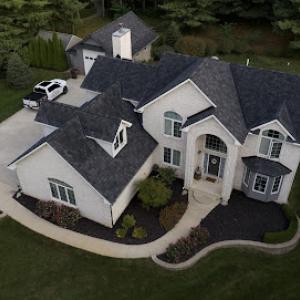
The dominant roofing materials used in Saline are asphalt shingles, metal roofing, clay tile, concrete tile, synthetic/composite shingles, and slate. Each has a story in this neighborhood of freeze-thaw winters and bright summer heat. Asphalt shingles are common on older and newer homes alike, offering a practical balance of weight, ease of installation, and repair options. Metal roofing shows up on garages and add-ons or steeper sections, where snow shed and durability are prized. Clay and concrete tiles stand out on southwestern-style lines or homes with a longer local presence, delivering a distinctive look but demanding a careful underlayment and solid roof deck to prevent ice backing in winter. Synthetic or composite shingles mimic traditional appearance with enhanced impact resistance. Slate remains a premium choice for certain homes, delivering longevity but requiring a solid substrate and careful installation.
Saline's winter snow and ice put extra importance on how each material handles freeze-thaw cycling, snow shedding, and underlayment protection. For asphalt shingles, pair a high-quality underlayment with proper attic ventilation to reduce ice dam risk, especially on eaves and low-slope sections. Metal roofs shed snow well, but fasteners and seams must be sealed to prevent ice backing; consider continuous insulation beneath for improved thermal breaks. Clay and concrete tiles carry excellent durability but can be vulnerable where underlayment isn't compatible with freeze-thaw cycles; a waterproof underlayment and correct slope are essential to mitigate ice dam formation. Synthetic/composite shingles aim to balance flexibility and resilience, yet installation quality matters just as much as the product itself-proper nailing patterns and edge detailing prevent panels from buckling under winter loads. Slate handles freeze-thaw well if installed on a rigid, well-supported deck; mismatches between deck and slate height can trap moisture and create ice pathways that damage decking over time.
Warm Saline summers can affect material handling and installation dynamics, especially for heat-sensitive roofing products during peak-season crews. Asphalt shingles remain forgiving in heat when crews work with shaded runs and proper ventilation of the attic to minimize heat transfer during application. Metal roofing benefits from cooler rooftop work environments and careful panel handling to avoid denting; heat-softened fasteners should be addressed promptly to ensure long-term seal integrity. Clay and concrete tiles demand skilled handling in heat; installed correctly, they resist thermal movement, but improper spacing or over- or under-tightening can trigger cracks. Synthetic/composite shingles tolerate heat relatively well but still require controlled curing conditions and careful substrate preparation. Slate installation is most sensitive to heat-related expansion and crew experience, calling for precise nailing and alignment to maintain wind and impact resistance.
Typical Saline roofing costs are provided per square, with asphalt shingles at 350 to 650 USD, metal at 700 to 1200 USD, clay tile at 900 to 1800 USD, concrete tile at 800 to 1500 USD, synthetic/composite at 450 to 900 USD, and slate at 1500 to 3800 USD. This helps you compare bids without chasing "low-ball" quotes that don't reflect the local weather and labor realities. Asphalt remains the most common choice for residential roofs in neighborhoods with varied rooflines, while metal and tile systems show up on newer homes or projects that aim to maximize longevity against Michigan freeze-thaw cycles. When a former asphalt roof needs replacement, you'll often see a jump to synthetic or slate options if you're upgrading aesthetics or resale value. Keep these ranges in mind as you filter contractor proposals and balance upfront cost with expected life and maintenance.
In Saline, costs can rise when storm-driven demand surges after Michigan hail or wind events and contractor schedules tighten. When a big storm hits, crews from nearby towns vie for the same limited window between rain and freeze, which compresses lead times and can push project start dates into peak season. If your roof shows sudden leaks after a storm, you'll likely see faster quotes but potentially higher material surcharges or expedited labor charges. Planning ahead for a spring or early summer project can help you lock a preferred crew before the busiest months.
Seasonal timing matters locally because late spring through early fall is the preferred work window in Saline, which can concentrate demand and affect pricing and lead times. If you have flexibility, align your project with mid-spring or early fall when the risk of severe cold snaps and unexpected storms is lower, and crews aren't racing to finish multiple large replacements before winter. Scheduling early can also improve material availability, particularly for specialty products like clay, concrete, or slate, which tend to have longer lead times or backlog during busy periods.
When choosing a roof, weigh long-term performance against upfront cost in light of snow load, ice dam risk, and attic ventilation. Asphalt is economical and familiar for older Saline housing stock that features varied roof pitches and dormers. Metal roofs excel where ice dam concerns are prominent and where a lighter structure or modern aesthetic fits the home. Clay and concrete tiles offer strong freeze-thaw resilience but require a solid substrate and careful installation to prevent cracking in deep freezes. Synthetic/composite provides a balance of durability and price, while slate delivers longevity at the high end of the spectrum. Your decision should factor in not only the square-foot price but also install complexity, weight considerations, and warranty coverage.
Get a clear picture of your project costs upfront - no commitment required.


In Saline, a full roof replacement typically requires obtaining a building permit before any tear-off or new installation begins. This is not a paper formality; the permit ensures that the roof assembly, decking, underlayment, and ventilation meet local code expectations for a midwestern freeze-thaw environment. The clock on the timeline starts when the permit is issued, not when the project starts, so coordinating with the contractor early is key to avoiding weather-driven delays during Washtenaw County winters.
The permit application is generally submitted by the contractor to the City of Saline Building Department. It is common for the contractor to bring in the supporting documentation, including proposed methods, materials, and an accurate scope of work. Homeowners should expect to review the submission and confirm that all details reflect the actual project plan, especially in older neighborhoods where attic ventilation, ice-dam mitigation, and deck repair may be required alongside the roof replacement. If questions arise about the scope, ask the contractor to clarify how ice dam prevention will be addressed and how attic temperature control is maintained during replacement.
Inspections in Saline are scheduled during and after the work to verify decking, underlayment, and proper installation for code compliance. The interim inspection, often requested after tearing off the old roof and installing the new decking and underlayment, ensures that the deck boards are securely fastened and that the new underlayment conforms to the local standards for thermal movement and moisture control. A final inspection confirms that flashing details, drip edge, soffit and venting are installed correctly and that penetrations-such as around chimneys, skylights, and roof penetrations-are sealed to resist winter moisture intrusion.
To help the process go smoothly, keep the permit number accessible on site and provide the inspector with any requested documentation, including a brief summary of the ventilation strategy and ice-dam mitigation plan. In areas with older structures, inspectors may pay close attention to attic insulation levels and the condition of existing soffits, as these influence condensation risk and moisture management after replacement. If there is any discrepancy between the contractor's installation method and code expectations, address it promptly before proceeding to the next stage of work to avoid a stop-work order or rework.
Given Saline's exposure to winter ice dams and storm events, scheduling around particularly harsh periods can help prevent rework caused by winter moisture. The permit process, when followed diligently, provides a clear framework for documenting compliance with decking, underlayment, and installation standards that specifically impact ice-dam resilience. Communicate openly with the Building Department if weather conditions require temporary adjustments to the sequence of work, and ensure that inspections are requested promptly to maintain a steady, code-compliant tempo for the project.
Saline homeowners operate in a Michigan insurance environment with recurring hail and wind claim activity rather than a low-claim market. That means the risk of storm-driven claims is a regular reality, not a rarity. There is no statewide insurer pullback noted for Michigan roofing, but local carrier practices can vary and affect how claims are handled. Understanding that variability helps set expectations when a roof issue surfaces after a tough hail season or a windy front.
Because adjusters may closely review roof claims in this market, Saline homeowners should keep photo evidence, written damage notes, and contractor estimates before temporary repairs begin. Taking clear photographs from multiple angles, noting the date and weather conditions, and recording any interior signs of leakage can make the claim process smoother. Written damage notes should describe missing granules, lifted shingles, or ice dam related staining, while estimates from a trusted local contractor help establish a repair scope that aligns with what the insurer will review.
Adjusters in this area often examine the roof more critically, especially after winter storms or hail events. A careful, well-documented submission can reduce back-and-forth and speed up decisions. If a contractor provides temporary tarping or quick fixes, coordinate with the insurer to determine necessary timelines and any required follow-up assessments. Clear communication about the extent of damage and the expected lifetime of the roofing system helps prevent post-approval disputes.
After a storm, prioritize safety and protect paid-for evidence. Move belongings away from damaged areas, avoid making irreversible changes before approval, and keep receipts for any materials or services purchased to mitigate further damage. In neighborhoods with older homes and ice-dam exposure, persistent concerns may surface even after a claim is settled, making careful documentation and a measured, honest approach essential for a reliable restoration path.
Skylights in the local housing stock often drive independent flashing detail work because penetration points sit against ridges of the roof and near vents. In cold winters, ice buildup can push against the skylight edge and push flashing out of place. When planning any repair or re-roof, inspect the skylight curb, sealant bead, and metal flashing where it meets the asphalt or composite roof surface. If a skylight is older or not flush with the deck, consider replacing the flashing with a continuous, properly tapered seal for proper slope drainage. Pay attention to any glazing leaks from interior joints that travel along the curb line and look for cracking or drying of sealants in the corner joints after a freeze-thaw cycle.
Chimneys are common trouble spots because roof-to-masonry transitions create a two-material junction that expands and contracts differently. In Saline, where snow and ice can sit along the chimney apron for weeks, the lead and step flashing around the chimney must maintain a tight seal along the entire chase. Inspect for loose shingle tabs adjacent to the chimney and for corrosion or separation of the counter-flashing. If mortar joints show deterioration, the risk of water intrusion increases because gaps channel meltwater into the roof deck beneath. When repairing a roof near a chimney, ensure flashing is continuous behind the counter-flash and that any sealant used against the masonry remains intact after winter conditions.
Ice dams frequently form where skylight and chimney penetrations interrupt the roof's smooth surface. Water can back up along the underside of the flashing and find its way inside at the interior edge of the curb or around the chimney chase. During a repair or reroof, verify that the flashing is integrated with proper step flashing on the sides and a continuous head flashing over the top of the chimney. Use a clear view from the attic to check for light or staining near penetrations after storms, then address promptly to prevent broad deck damage.
Schedule seasonal checks focusing on skylight seals, chimney cap condition, and the alignment of flashing against the roofing plane. In late winter, look for ice buildup at the joint lines and address any minor gaps before they widen. Keep the surrounding roof surface clean of debris that can trap moisture near penetrations. When resealing, choose a compatible sealant that remains flexible in cold temperatures and is appropriate for both roof material and masonry. Regular attention to these points helps reduce the chance of slow leaks becoming major repairs.
Find contractors experienced in skylight installation, flashing, and leak repairs to bring natural light into your home.
Neighborhood Roofing
(734) 994-6500 www.neighborhoodroofing.com
1377 Tefft Ct, Saline, Michigan
5.0 from 276 reviews
Diversified Roofing
(734) 429-5840 diversifiedroofingllc.com
779 W Michigan Ave, Saline, Michigan
4.9 from 138 reviews
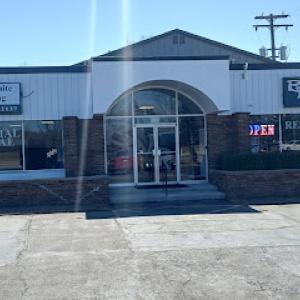
Flat-roof specialization exists but is not dominant in Saline, so low-slope sections are a secondary concern rather than the city's main roofing profile. Still, those surfaces sit on many additions and garages, and they behave differently than steep main roofs. You'll notice drainage and waterproofing become critical when spring rains and snowmelt ramp up, even if the slope isn't truly flat. Treat these areas with the same seriousness you give to the rest of the roof, just with attention to how water moves and sits.
When you're inspecting after a thaw or a heavy rain, look for wide surface pooling, especially near edges or transitions to steeper sections. On a typical Saline home, low-slope sections collect more meltwater and can show early signs of membrane wear or edge flashing failure. If you see consistent damp spots on ceilings or upper walls below these areas, note the location and plan a targeted assessment of seals, drip edges, and termination bars. Regularly clear debris from scuppers or termination points to keep water moving toward downspouts rather than pooling.
Because winter access can be difficult in Saline, small low-slope leaks can linger until weather allows proper repair or replacement. If you notice a minor drip during warm spells or a seasonal shift, schedule a follow-up check when conditions permit safe inspection and temporary mitigation. Keep an eye on snow buildup near low-slope zones after a storm, since ice dams can form where water cannot drain quickly enough. A proactive approach reduces the risk of slow, ice-related damage seeping into framing or insulation.
In spring and fall, perform a hands-on survey of the edge details and any transitions from low-slope sections to steeper roofs. Clean gutters and check for signs of granule loss or punctures on the nearby roofing membranes. When you do hire a contractor, ask specifically about the durability of low-slope flashing, the condition of the membrane, and the potential need for enhanced edge protection where transitions meet the main roof. This targeted attention helps prevent small leaks from becoming bigger problems during the shoulder seasons.
Find specialists in TPO, EPDM, and built-up flat roofing systems for residential and commercial properties.
Diversified Roofing
(734) 429-5840 diversifiedroofingllc.com
779 W Michigan Ave, Saline, Michigan
4.9 from 138 reviews
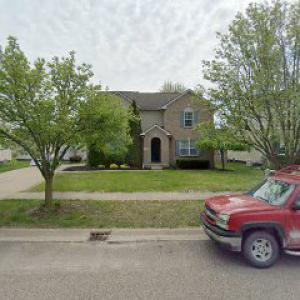
In Saline, the contractor market prioritizes re-roofing with prompt scheduling after leaks and storms. Homeowners expect crews that can assess damage quickly, secure the roof to prevent further moisture ingress, and begin repairs on a schedule that minimizes interior water intrusion. Local crews often streamline communication, returning calls fast and honoring realistic timelines for cleanup and debris removal. Quick response isn't just about patching; it's about arranging a repair plan that prevents ice dam buildup when winter returns.
Affordable pricing with clear, all-inclusive cleanup is a common hiring priority. Homeowners here value bids that lay out material and labor plainly and guarantee cleanup after a job finishes. Local firms frequently bundle trash removal, site protection, and surface tidying into the contract, reducing post-project chores for residents juggling busy schedules. When evaluating options, homeowners look for bids that minimize surprises while still delivering solid performance on a mid-range or practical upgrade.
Chimneys and attic spaces carry unique considerations in this market. Homeowners want contractors who understand chimney flashing, venting compatibility, and insulation interfacing to prevent heat loss and ice dam formation. Attic insulation familiarity matters too, as improper sealing or cold bridges can undermine roof efficiency. Long-established or family-owned firms are highly valued for their steady workmanship, predictable crews, and attention to local climate quirks. A track record of honest communication and reliable guarantees helps bids stand out.
Given the strong emphasis on after-storm work, homeowners prioritize contractors who can propose durable, storm-resilient assemblies and explain how a roof design handles freeze-thaw cycles and moisture management. When comparing options, the best bids balance practical upgrade choices with a clear plan for long-term performance, especially for homes with older neighborhoods and varied rooflines. The right contractor aligns scheduling with late-spring to early-fall windows, preserving interior comfort while attacking storm damage efficiently.