Last updated: Apr 19, 2026
Western Pennsylvania wind and hail are common roof-claim drivers in Aliquippa, making post-storm inspections and documentation especially important. After a storm, the first 24 to 48 hours are critical for catching leaks that aren't yet visible from the ground. Shingle loosening, granule loss, dented metal, and hidden underlayment damage can advance quickly with the freeze-thaw cycle. If a storm hits, you need a plan to verify every observable defect and anticipate what insurers will want to see. Delayed reporting or incomplete documentation often slows or jeopardizes a claim.
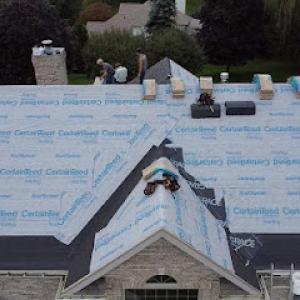
Start with a rapid inspection of the most vulnerable areas: valleys, hips, chimneys, vents, and edges where wind-driven impact is most likely. Take clear, timestamped photos from multiple angles, and include close-ups of damaged shingles, granule loss, and any interior staining near ceilings or walls. Identify the shingle type visible on your roof in each photo, and note the color and any distinctive markings. If there is standing water or active leaks, arrange temporary tarping or emergency patch work to minimize interior damage, but avoid making permanent repairs that could accidentally change the scope of the claim.
Insurers in this region commonly ask for photo documentation, identification of shingle type, and underlayment verification before approving scope changes. Build a simple file that factors in these elements: a dated damage map of the roof, a catalog of affected roof planes, and notes on any visible flashing or structural signs of stress. Photograph the attic near the ceiling for signs of moisture or framing movement. If you have access to the attic, document any leaks with video or time-stamped photos. A concise, organized submission helps the adjuster understand the severity quickly and reduces back-and-forth.
The local contractor market shows unusually strong demand for emergency repair, storm damage work, and insurance-claim help compared with specialty new-construction roofing. That demand creates a crowded landscape, so prioritize a contractor who can demonstrate storm-damage specialization, rapid on-site evaluation, and a robust documentation package. Look for someone who explains the claim process clearly, helps assemble the scope of work aligned to what the insurer will approve, and coordinates temporary repairs that protect the home without inflating the claim.
Set a plan to re-inspect after every significant rainfall or wind event in the weeks following the original storm. Hail-damaged shingles can fail gradually as granules loosen and water intrudes behind an insufficient underlayment. Schedule a professional inspection within 72 hours of the storm and again at the two-week mark if severe weather continues. Keep a running log of new damage or symptoms-drips in the ceiling, attic condensation, or new staining-as these details influence both urgency and the final scope of the claim.
When meeting an adjuster, present your organized damage map, the photo catalog, and the shingle identification notes. Be precise about the timing of the storm, the sequence of observed leaks, and any emergency repairs performed. If scope changes are needed, request a written update that explains how the changes affect the total repair plan and the insurer's payout. In Aliquippa, the storm-repair market values quick, decisive action; that means you should expect a fast, documentation-driven process and prepare to advocate for a comprehensive restoration rather than a patch job.
After the claim is underway, establish a trusted, long-term partner for full replacement if needed. The goal is to restore protective performance and prevent a repeat of avoidable leaks in the next round of winter weather. Keep confirming that the scope aligns with the insurer's approved adjustments, and document any contractor-required changes to underlayment or flashing as you move toward completion. A well-documented, promptly executed plan helps you regain shelter quickly and with greater certainty in a storm-driven market.
Find local contractors experienced in assessing and restoring roofs after hail, wind, and severe weather events.
Neill & Son Roofing
(724) 888-6418 www.neillandsonroofing.com
Serving
4.9 from 245 reviews
Neill and Son Roofing, located in Monaca, PA, is a reputable roofing contractor serving Pittsburgh, the West Virginia Panhandle, and Eastern Ohio. With over 30 years of family-owned and operated experience, we specialize in asphalt and metal roof replacements, roofing repairs, seamless rain gutter installation, gutter guard installation, and gutter installation & replacement services. Our commitment to quality craftsmanship and customer satisfaction is unmatched. We also offer expert siding installations and comprehensive residential and commercial roofing solutions. Choose Neill and Son Roofing for excellence, reliability, and superior service.
TaylorMade Solutions
Serving
4.5 from 71 reviews
For all your roofing and solar needs, contact TaylorMade Solutions. As a one-stop shop for Roofing, Solar, Siding, Soffit, Fascia, Gutters, Decks, we offer a wide range of services. And because we care deeply about your experience with us, we'll make sure to sit down and work directly with you for all your needs, from the consultation to the installation. We are Owens Corning Platinum Preferred Partners and Palmetto partners, so rest assured you'll be receiving quality services that only official partners can offer. Contact our office today for a No Hassle, No Pressure, No Obligation experience! Be sure to ask about our financing Options!
Buccos Roofing
(724) 414-3542 buccosroofing.com
Serving
4.9 from 27 reviews
Buccos Roofing was founded in 2012 by Dan Easton, Mark Easton and Ernie Comfort. Together, the three Peters Township natives set out to serve the greater Pittsburgh community and never looked back. What once was a three-man, one truck crew, working out of a garage, is now an enterprise spanning the greater Pittsburgh area. They attribute their success to hard work, good friends, and family. Today, Buccos Roofing is home to over 25 roofing contractors and additional staff. Together, our team of experts work hard to provide our customers with the best roofing and exterior renovation experience possible. Our mission is to deliver reliable and enjoyable services to each of our clients, prioritizing their needs first.

MHI Roofing
Serving
4.8 from 1403 reviews
MHI Roofing has been a trusted roofing contractor since 1979, serving Pittsburgh, Mt Lebanon, Bethel Park, Monroeville, Upper St Clair, McCandless, and nearby areas in Allegheny & Washington County. We specialize in Shingle Roofing, Roof Repairs, Roof Inspections, and Seamless Gutters. Call us now for a free estimate!

Royal Roof & Gutter
Serving
5.0 from 74 reviews
We are insured, reliable, roof replacement specialists. We use specialized equipment to collect and manage the debris from the old roofing and eliminate the mess associated with replacing a roof. We are an Owens Corning Preferred Contractor and also DaVinci Roofscapes Master Contractor. Our roofs are backed by the biggest names in the business. Royal can help you with roofing repairs, chimney leaks, and gutter cleaning. Our quotes are free and we use eagle view satellite technology to quickly and accurately measure your roof for replacement quotes.
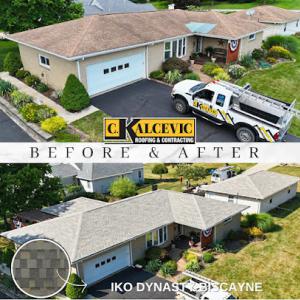
C. Kalcevic Roofing & Contracting
(724) 494-5614 www.ckalcevicroofing.com
Serving
5.0 from 62 reviews
C. Kalcevic Roofing & Contracting is a family-owned roofing company with over 25 years of experience serving Beaver & Allegheny Counties. We specialize in roof repair, full roof replacement, storm damage repair, siding, gutters, soffit & fascia. Our licensed and insured team is Google Guaranteed and known for honest, skilled, and reliable work. We proudly maintain a 5-star reputation built on customer trust, quality craftsmanship, and service that goes above and beyond. Whether you need asphalt or metal roofing, emergency leak repair, or a complete exterior upgrade, we’re here to protect and improve your home.

HHI Roofing
(724) 417-9365 www.hhiroofinginc.com
Serving
4.7 from 37 reviews
Since 2004, HHI Roofing has been providing top-quality residential and commercial roof repair and replacement services in Beaver, PA. Our experienced team delivers lasting results using premium materials and proven techniques. Whether you need a minor repair or a full roof replacement, we’re committed to exceptional craftsmanship, transparency, and customer satisfaction. Trust HHI Roofing to protect your property with reliable, professional service. Contact us today for a free consultation!
Saint Joseph Services
(724) 271-0376 www.saintjosephservicesambridge.com
Serving
4.2 from 25 reviews
Our locally owned and operated roofing company has been providing roofs to Ambridge for over 11 years. We ensure the protection of your home with a variety of roofing services. We can do everything from chimney repairs to gutter installation. We guarantee great customer service with nothing but the best materials used. Call today for a free estimate!
Knockout Home Solutions
(412) 545-6776 www.knockouthomesolutions.com
Serving
5.0 from 82 reviews
Knockout Home Solutions is your go-to partner for roofing, siding, gutters, solar, and home inspections in Pittsburgh, PA. From roof replacements to siding repairs and gutter installs, we protect your home against the elements with quality craftsmanship and dependable service. We also specialize in new construction and builder warranty inspections, helping you catch issues early and work with your builder to get them resolved. Whether you’re maintaining an older home or settling into a new build, we make the process easier—so you can focus on enjoying your home, not stressing over it.
Bradley's Roofing & Home Improvements
(724) 847-0373 www.bradleysroofing.com
Serving
5.0 from 37 reviews
Bradley's Roofing and Home Improvements, Inc. is a local, family owned business since 1980. We install all types of ROOFING, as well as SIDING, GUTTERS, DOWNSPOUTS, LEAF COVER, SIDING, WINDOWS, DOORS AND BLOW IN INSULATION. Our employees are all certified and payroll based. The owner is present on each and every job to give you that personal service that is missing in today's service industry. We would appreciate the opportunity to earn your business. 724-847-0373
Roof-Tastic & Beyond Exteriors - Pittsburgh
(412) 822-9650 pennsylvania.rooftastic.com
Serving
5.0 from 58 reviews
We are Roof-Tastic & Beyond Exteriors, proudly serving Pittsburgh, PA, and the surrounding areas. We specialize in residential roofing, siding, windows, gutters, and more. With an A+ BBB rating and a customer-first approach, we’re committed to delivering exceptional work and service you can rely on. We’re offering 15% off all services and low montly investment options available. Give us a call to book your free inspection and get a same-day estimate.
Dynamic Roofing Solutions
(412) 407-7927 www.dynamicroofingpittsburgh.com
Serving
4.9 from 147 reviews
Our mission is to provide the highest quality, most reliable roofing solutions for homeowners in our community by combining expert craftsmanship, a holistic approach to home protection, and unmatched customer service. We aim to build lasting trust by ensuring every project is completed with integrity and care, reflecting our commitment to excellence on every roof we work on. Pledge to Our Customers: Hiring Dynamic Roofing Solutions means you are choosing a team that is committed to your complete satisfaction, from the first call to the final cleanup. Holistic Expertise: We look beyond just the shingles, understanding how your roof interacts with your home's entire system, including drainage, ventilation, and much more! Call us today!
Cold winters and warm summers shape every roof in this valley. The freeze-thaw cycle shortens roof life and regularly exposes flashing and shingle seal failures. In practice, that means vulnerable edges, valleys, and terminations can deteriorate quietly through multiple cycles each season. Replacement work is typically confined to late spring through early fall because winter temperatures, snow, and moisture complicate tear-off and sealing. Plan major work for that window to avoid repeated freeze-thaw stress on new materials.
Winter snow loads and freezing conditions raise the risk of ice dams, which can push water under shingles and flashings when gutters are clogged or insulation is uneven. Pay attention to roof strain along eaves and around dormers, where heat loss concentrates. After a heavy snow event, carefully clear a safe path to prevent ice from backing up under shingles, but avoid shoveling off entire slopes if it risks damaging the surface. If an ice dam forms, address ventilation and insulation gradually; a local pro can advise on safe de-icing approaches that won't harm valley metal or sealants. Freezing conditions can also delay a proper seal, so plan temporary sealing only as a short-term measure until temperatures rise enough for a proper repair or replacement.
Spring storms bring wind-driven leaks and tree debris that can mask underlying roof problems. Inspect for lifted shingles, damaged flashing, and clogged gutters after each big wind or hail event. In autumn, falling leaves and acorns accumulate faster, increasing the chance of moisture retention and accelerated granule loss on asphalt or composite roofs. A proactive approach is to clear debris from the roof and gutters promptly and to check for granule wear and flashing integrity while the weather is still mild. Stagnant moisture from wetfalls can hide slower failures until a mid-season wind event exposes them, so treat any suspicious sealant or flashing joint as a priority.
Keep a weather-ready plan: identify a trusted local roofer who can respond quickly after a hail or wind event, and establish a simple damage-report routine with photos of affected areas. Document the date, weather conditions, and any leaks or interior staining as soon as noticeable. If a leak is present, limit interior damage by placing containers under drips and protecting belongings, then schedule a roof assessment within the same week if possible. For long-term reliability, prioritize repairs that restore proper flashing, ridge lines, and vent terminations, since those are the most common failure points under Aliquippa's climate.
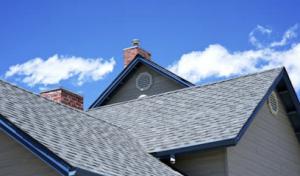
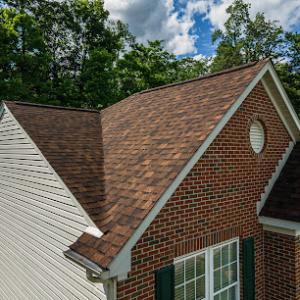
Asphalt shingles remain the practical backbone for most Aliquippa sidewalks and backyards, especially on the older residential stock that lines the hillier blocks near the Ohio River. They're familiar, install quickly, and handle the region's freeze-thaw cycles without demanding complex structural upgrades. For storms and quick leak response, asphalt shingles are forgiving when wind gusts roar through Western Pennsylvania, and retraining a roof after a wind event tends to be more straightforward than with heavier materials. For homeowners who want dependable performance without escalating repair complexity, asphalt delivers a balanced mix of ease, cost-effectiveness, and broad contractor familiarity. When shopping, focus on asphalt options with good wind resistance ratings and reinforced underlayment, since local wind-driven leaks can appear in small gaps around vents or valley intersections.
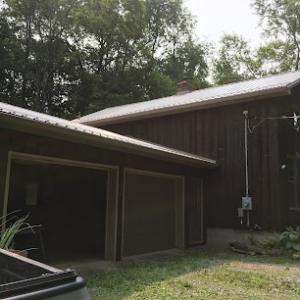
Metal roofing has a meaningful local presence and is often considered where homeowners want better snow shedding and longer service life through repeated western PA weather swings. In this climate, metal roofs shed snow more predictably and can reduce the risk of ice dam-related damage at eaves and in valleys. A metal option is especially sensible on mid-population homes where a dependable, lower-maintenance surface matters and where a homeowner intends to stay in place for many years. If choosing metal, pay attention to the panel profile and fastener sealing; poorly sealed penetrations or improper slope can undermine performance in heavy rains. In areas with tight roof geometry or numerous dormers, a metal system that's properly integrated with flashing and ventilation tends to hold up better than performance in the past.
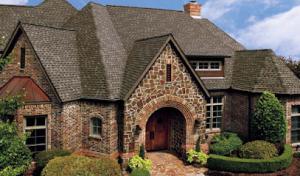
Slate and clay tile appear in the regional material mix but can create structural-load and repair-complexity issues on older homes common in Beaver County communities. These materials are visually striking and can boost curb appeal on the right historic renovations, but they demand careful assessment of the underlying structure. Older rafters and supports may not be prepared for the substantial weight of tile or slate, which means extra framing or reinforcement work could be needed before installation. Tile and slate also present snap- or crack-related repair risks in windy conditions or during hail events, which can complicate leak response after a storm. If contemplating these options, a detailed structural evaluation is essential, followed by a plan that accommodates potential rerouting of ventilation and attic access to maintain energy efficiency and long-term durability.
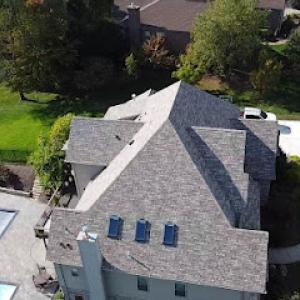
In Aliquippa's climate, the best choice often hinges on balancing local repair realities with the home's architectural heritage. Asphalt remains the everyday workhorse for most houses, while metal provides a robust alternative where extended life and improved snow shedding matter most. Slate and clay tile offer distinctive aesthetics but carry increased structural and repair considerations on older constructions. When evaluating materials, consider how each option interacts with your roof's pitch, valley lines, venting, and potential wind-driven leakage sites. A careful assessment after a storm-checking for lifted shingles, damaged flashing, and compromised seals-helps prevent small leaks from becoming bigger issues, preserving the roof's integrity through Aliquippa's seasonal shifts.
In this market, you'll notice a mix of modest re-roof budgets and older homes that can reveal decking, flashing, chimney work, and ventilation corrections once tear-off begins. That combination means project costs can shift midstream as contractors uncover what lies beneath the old shingles. Steeper, older rooflines and chimney penetrations add to labor time, especially when extra flashing or ventilation adjustments are needed to keep wind-driven rain out. Storm-driven demand spikes in western Pennsylvania can push scheduling and labor costs upward after major wind or hail events, so plan for potential delays and price bumps if a storm hits and repairs pile up.
The cost landscape in this area lands within clear bands by material, with the same basic rule: steeper pitch, more penetrations, and older decking tend to push costs toward the higher end. Asphalt shingles sit around 350 to 600 USD per square, a practical choice for many homes with modest budgets. Metal roofing runs higher, about 700 to 1200 USD per square, appreciated for its wind resistance and longer life in this climate. Clay tile brings a premium at roughly 1200 to 2300 USD per square, worth it only if the structure and budget support its weight and installation complexity. Wood shingles or shakes run about 700 to 1200 USD per square, offering a traditional look but requiring ongoing maintenance. Synthetic or composite shingles typically fall in the 500 to 900 USD per square range, providing decent durability at a moderate price. Slate leads the pack at 1500 to 2600 USD per square, reflecting its durability and specialized installation needs.
When a wind or hail event hits, expect a burst of inspections, insurance reviews, and faster-than-usual lead times. Good documentation can smooth this process: keep weather records, photos of hail exposure, and a log of any leaks or interior damage as soon as you notice it. If you're weighing material options after a storm, weigh the long-term cost of maintenance and potential deck or vent repair against initial price. For homeowners with steeper roofs or chimneys, set aside extra budget for scaffolding and targeted flashing work, which often appear mid-tear-off.
Get a clear picture of your project costs upfront - no commitment required.
Saint Joseph Services
(724) 271-0376 www.saintjosephservicesambridge.com
Serving
4.2 from 25 reviews
A roofing permit is typically required in Aliquippa, and the borough building department takes a careful look at contractor license details, project scope, and sometimes roof size before issuance. The review is not a formality; it can hinge on whether the contractor holds current credentials and whether the planned work aligns with the property's structure and historical considerations. For homeowners, this means you should avoid starting work without a permit in hand, because skipping it can trigger back-dating steps, fines, and possible requirements to undo or redo portions of the job. If your roof is over an older home with complex eaves or a steep pitch, the review can become more stringent, since the department wants to ensure workers have the proper equipment and safety measures for that terrain.
Inspections are generally scheduled during the course of the project, and a final inspection is required to close the permit. Plan for the inspector to observe multiple phases of the work, including tear-down, replacement, ventilation, and flashing, depending on the material type. The process often goes smoother when the crew is prepared with access to attic spaces, a clean work area, and a clear room-by-room or section-by-section plan so the inspector can verify scope against the approved permit. In practice, you're more likely to see a timely inspection if the crew communicates ahead about material changes, roof height, and any deviations from the initial plan. A final inspection confirms that the project matches the permit and meets local safety and code expectations.
Weather delays are a familiar nuisance in this climate, especially during the freeze-thaw cycles that stress roofs in winter and the storm-driven repair market afterward. Backlogs at the borough, especially after wind or hail events, can push inspection timing weeks out. Plan for potential plan-review questions tied to material type, as certain coverings (such as clay tile or slate) prompt more detailed scrutiny about fasteners, underlayment, and wind resistance. If repairs require structural changes or additions, the permit review may extend further to confirm engineering compatibility and load considerations. Staying proactive-keeping all required paperwork accessible, confirming the permit number on site, and coordinating with the contractor for timely submittals-reduces the risk of hold-ups.
Have your contractor provide copies of licensed credentials, a clear scope of work, and a current set of project plans or drawings when submitting for permit. Keep a file with the permit number, inspection appointment dates, and any correspondence from the borough. If a reviewer asks for clarifications about material type or roof size, respond promptly with precise measurements, photos, and product specifications. Good record-keeping helps prevent miscommunications that can stall approvals and prolong the timeline between weather-driven projects and the necessary final sign-off.
In this western Pennsylvania town, wind and hail are more than weather talk; they shape how roof damage is documented and how repair scopes are written. Storms can push quick leaks and hidden leaks into urgent repairs, and the way a roofer frames a scope after a wind event often hinges on how thoroughly the damage is cataloged. Expect adjusters to scrutinize shingle lift, ridge damage, and hidden moisture, with an eye toward what happened at the moment of impact versus what emerged after a few thaw cycles.
State-level conditions strongly influence what is covered and how claims are handled, sometimes more than any one neighborhood rule. Deductibles and replacement-versus actual-cash-value terms play a central role in what ends up being paid out. If a storm created multiple points of damage across the roof and into the attic, be prepared for questions about the timing and progression of leaks. The reality is that coverage decisions can hinge on how clearly the claim traces wear to the storm event rather than to ordinary wear and tear.
Because adjusters may ask for proof of pre-existing conditions, keep dated photos before storms and again immediately after any damaging event. A timeline helps demonstrate what changes occurred with the latest wind or hail. Store these images in a labeled, easy-to-access location, and share them with your roofer and the insurer early in the process. Clear, organized records reduce back-and-forth and support a faster, more accurate assessment of needed repairs.
Roofer-generated damage narratives in Aliquippa often balance visible impacts with concealed moisture risks. The most solid scopes describe both surface damage and potential interior concerns, with notes on shingle lift, flashing integrity, and attic ventilation. Be prepared for questions about how pre-existing conditions may influence the claim, and insist on documentation that matches the adjuster's line items so repair work aligns with what the policy actually covers.
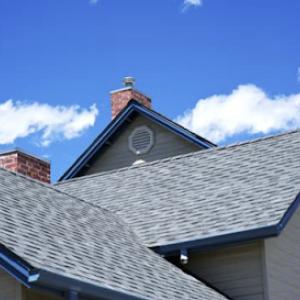
Chimneys are a common source of roof problems in this market, especially on the older housing stock found across the neighborhoods. After a wind or hail event, you should first inspect the chimney flashing where it meets the roof deck. Look for lifted metal, loose fasteners, or gaps that let moisture creep under shingles. Masonry joints around the chimney can crumble or spall, letting rainwater travel down the chimney chase and into the attic. Pay attention to the crown and mortar; a cracked crown or deteriorating mortar invites leaks even when the roof itself looks intact. If you notice dark staining along the chimney or inside the attic near the flue, treat it as a sign to schedule a pro inspection, since flashing and masonry issues often require specialized repairs beyond field shingles. When you plan repairs, coordinate flashing replacement or resealing with shingle work to prevent a patchwork that leaks in the next windstorm.
Skylight service is a meaningful specialty locally, and leak troubleshooting often involves curb flashing, surrounding shingles, and aging seals rather than field shingles alone. Start with the curb area: check for degraded caulk, pulled or distorted flashing, and any settlement that creates a gap where water can pool. Inspect the seal around the skylight itself; aging gaskets and interlayers fail with freeze-thaw cycles, especially in the Ohio River valley climate. If the skylight sits on a raised curb, verify that the curb flashing is properly integrated with the roofing materials and that the shingle line sits flush against it. Look for recurring leaks near skylights after storms, which is a common pattern for older homes with curb flash issues or worn seals rather than a simple shingle fault.
On older Beaver County homes, leak investigations often need to separate roof-covering failure from masonry, flashing, and penetration problems. Start by tracing moisture ingress to its highest risk area: is the leak following a chimney wall, a skylight perch, or a vent pipe? Use a methodical approach: inspect the interior ceiling for staining patterns, then move to the attic to map entry points against attic framing and insulation. Examine flashing along the chimney, skylight curb, roof penetrations, and the transition from masonry to roofing. If the source remains elusive after a visual check, plan targeted diagnostic steps with a local roofer who understands how salt air and humidity in this valley can accelerate corrosion and seal deterioration.
Find contractors experienced in skylight installation, flashing, and leak repairs to bring natural light into your home.
Roof-Tastic & Beyond Exteriors - Pittsburgh
(412) 822-9650 pennsylvania.rooftastic.com
Serving
5.0 from 58 reviews
Flat and low-slope roofing exists in the local market, but it remains a targeted concern rather than a citywide focus. Most Aliquippa homes rely on pitched residential re-roofing, so protectors of porch, addition, or garage roofs should treat these projects as specialized work. Understanding the differences in materials, flashings, and drainage is essential when the main roof is not flat.
These roofs face standing water after heavy rains and during repeated freeze-thaw cycles, which accelerates membrane wear and edge deterioration. In this climate, minor ponding can become a long-term issue if neglected, so prompt attention after wind-driven leaks matters. A flat or low-slope roof benefits from regular, targeted inspections after storms and seasonal transitions, focusing on seams, penetrations, and flashing around vents, skylights, and edges.
Homeowners with porches, additions, or garages should confirm whether the contractor treats low-slope details separately from the main house roof. A dedicated crew or specific detailing plan for the flat sections can prevent mismatched installation, improper flashing, or uneven transitions. Ask about materials designed for low-slope performance, including edge curb compatibility, seam reinforcement, and how drains or scuppers are positioned to minimize standing water.
Plan for a proactive maintenance routine that targets seam integrity, flashing condition, and membrane surface cleanliness. After storms, inspect for debris blocking drainage paths and signs of pooling. If leaks appear, prioritize timely inspection of the flat sections and porch or garage roofs, as delays can extend damage into adjacent structures. Finally, ensure documentation of all patches and repairs for insurance conversations and future preventative planning. In Aliquippa, staying ahead of membrane wear during wet winters and rapid spring rains makes a practical difference in longevity.
Find specialists in TPO, EPDM, and built-up flat roofing systems for residential and commercial properties.

In this market, the most useful hiring cues are a quick response after a storm, clear cleanup plans included in the job, fair pricing perceptions from neighbors, and solid re-roofing experience. Aliquippa homeowners prioritize crews that can show up fast, handle debris removal, and manage a complete replacement when needed. Expect to see a mix of long-established, family-owned firms with a steady presence and smaller crews offering flexible scheduling. Manufacturer-certified contractors are less common than familiar repair-and-replace teams, so don't assume a label alone guarantees the right fit.
When you call around, ask who will actually do the work and who will be on-site for inspections and repairs. You'll often encounter one or two smaller outfits that promise "certified" status, but the crew leading the project might be different from the person you spoke with at the estimate. Look for a local firm that can point to past storm jobs in the valley and can detail a realistic plan for wind and hail scenarios common to this area. A visible, family-owned presence can translate into accountability when the job runs long or you need follow-up.
Drone inspections and free inspections are common now, but confirm who prints the final storm documentation and how the report ties to your claim. You want a contractor who can provide a thorough roof-condition record, photos of hail impacts, and a written scope that matches what your insurer needs. Also confirm who handles cleanup on completion and whether debris and waste will be removed in a single pass, not left for a second visit.
Clear milestones, reachable contacts, and a written guarantee matter in a market with quick leak responses after wind events. Favor firms that list a sensible cleanup and waste-disposal plan, a defined warranty, and a commitment to return if a post-storm issue surfaces. A solid local neighbor reference can reveal how the crew handles the inevitable weather-induced delays and the step-by-step repair path.