Last updated: Apr 19, 2026
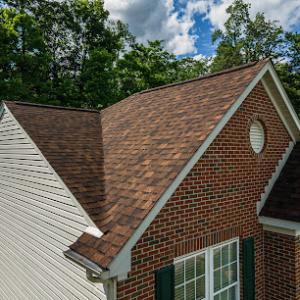
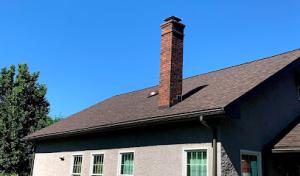
Beaver Falls sits in western Pennsylvania's Ohio Valley weather pattern, where snow and freezing temperatures in winter are followed by wet, windy spring systems that commonly expose leaks after thaw cycles. That sequence can push hidden roof issues into the open quickly as ice dams form, melt, and refreeze along the eaves. If your attic feels damp after a thaw, or you notice staining along valleys and chimneys, you're already outside the window where minor drips become major repairs. The risk isn't just a drip-it's the rapid progression from frozen storage of moisture to active intrusion during the first warm spells. Pay particular attention to flashing around vent pipes, skylights, and chimney corners, where thaw cycles magnify thin spots in sealants and shingle laps.
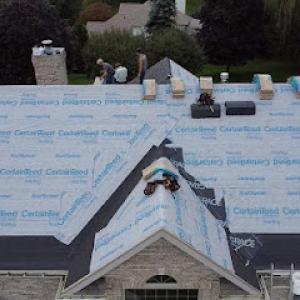
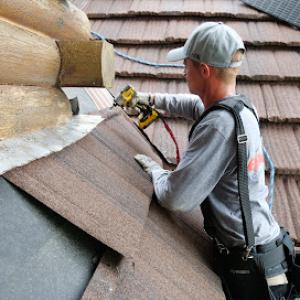
The city's practical reroofing season is typically late spring through early fall because winter snow, ice, and cold temperatures complicate tear-off, access, and shingle sealing. When a storm pack hits, crews must operate with dry, snow-free decks and solid, accessible eaves to lay new material properly. In Beaver Falls, that means a tight clock after the last melt of spring and before the first major fall windstorms. If you're staring down a leak during a thaw, don't wait for the first heavy rain to breach the roof again. Plan for a controlled replacement or targeted repairs in the narrow window, because delays push your home into winter exposure with partial fixes that fail under freeze-thaw cycles.
Warm, humid summers in Beaver Falls can slow crews and affect asphalt shingle handling, while fall leaf debris and wind increase gutter backup and moisture-management problems on older homes. High humidity can reduce sealant set times and complicate adhesive-backed flashing-any slip in installation now can create longer-term leaks once cool nights return. If your roof sees mid-summer heat spikes, ensure the crew takes midday breaks and uses reflective or ventilated coverings to keep shingles cool during installation. A rushed job in heat can compromise granule adhesion, reducing a roof's life and inviting early deterioration.
Spring storm damage can be deceptive. A wind-driven shingle tear, lifted edge, or loose ridge vent may not immediately leak, but pressure from a new rain event will reveal vulnerabilities. After a severe storm, walk the ground around the home and inspect for shingle tabs, granule washout, or torn underlayment showing at edges. Inside, check ceilings in the upper rooms below vented roofs and along walls where cold air feels damp or reveals water stains. If you find active leaks, document with photos, note the area's exposure to wind-driven rain, and map any interior staining to a likely roof section. This helps prioritize the most critical zones for quick tarping and staged repairs within the feasible window before the next winter cycle. Keep gutters clear during storm season; clogged gutters push water up under shingles and into soffits, compounding ice-related issues when temperatures drop again.
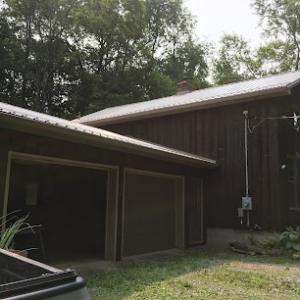
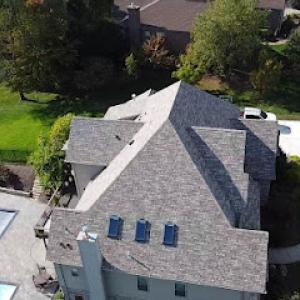
In this hillside and river-adjacent environment, asphalt shingles and metal roofing are the most practical choices for Beaver Falls homes. Asphalt shingles are familiar to local crews, speed-friendly to install, and handle the region's typical snow load without excessive weight. Their install and repair work aligns with the storm-driven repair pace you're used to after a late winter or early spring thaw. Metal roofing, from lightweight standing-seam to through-fastened panels, delivers solid performance during freeze-thaw cycles and high-wind events common to the area. The combination of ease of repair, availability of local crews, and compatibility with existing framing makes these two options a steady, dependable match for aging western Pennsylvania housing stock.
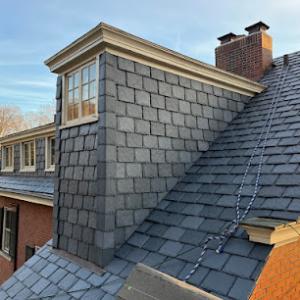
Slate, clay tile, and concrete tile present in the market, but they demand careful consideration when the home was built during Beaver County-era construction. Those materials bring durable long-term performance, yet they also add substantial weight. On older framing, that extra load can stress sheathing, fascia, and rafters if the structure hasn't been upgraded to handle it. Replacing with a heavy premium system should be paired with a structural assessment to confirm the roof can bear the weight, and with a plan for potential reinforcement if needed. Also factor in the specialized repair labor required for these materials; accessibility and the availability of locally skilled masons or tile specialists influence both time and convenience of service. For older homes in particular, weigh the risk of sag or the need for retrofit against the benefit of a tile or slate look.
Synthetic or composite shingles offer a middle ground for Beaver Falls homeowners who want a slate-like aesthetic without the full weight and cost burden of natural slate. These products mimic the appearance of more expensive options while keeping installation and maintenance more straightforward for aging framing. They can provide better resistance to local freezing cycles and storm impact than traditional asphalt, with an easier replacement path should a panel or two need swapping after a heavy wind event. If choosing this route, verify that the product carries a realistic weight and a performance rating aligned with the winter conditions you face along the river valleys.
When evaluating options, start with an honest structural check of the attic and rafters, especially on homes with a long service life in steep hillside neighborhoods. Inspect for prior freeze-thaw damage, moisture intrusion, and signs of sagging or uneven decking, which can indicate where heavier roofing would demand attention. For replacements, consider a layered approach: preserve the existing deck where solid, upgrade underlayment and ventilation to improve long-term performance in the climate, and select a finish that balances weight, cost, and local repair practicality. In practice, you'll likely find that asphalt or metal provides the most dependable, straightforward path for most Beaver Falls homes, with alternatives reserved for those seeking a specific look or willing to address the structural realities of older builds.
In this part of the region, storm demand after wind or hail events drives pricing for roof replacements. Local replacement pricing is best framed around the per-square ranges below, with Beaver Falls costs moving upward when western Pennsylvania experiences a flurry of late-winter and spring weather damage. When a spike hits, crews often route more crews and equipment here, pushing material and labor costs higher for a short period. Your project may not be nailed down to the exact middle of any range, but the trend is real: the more storm activity, the more you should expect to pay per square.
Older homes on steeper lots are common in this city's hillside neighborhoods, and that reality matters for the bottom line. Tear-off, decking repairs, chimney flashing work, and debris handling become noticeably more labor-intensive than on simpler, low-pitch roofs. Contractors factor those extra steps into the quote, especially when the roof has multiple ridges, dormers, or surrounding trees that complicate staging. Expect higher labor hours, longer job timelines, and a corresponding uptick in waste disposal if old decking shows signs of rot or water damage. This is where a reputable contractor may adjust the schedule and the crew size to protect quality and safety, which can influence the final cost nuance.
Material choice matters more here than in some markets. Asphalt shingles and metal roofs are common and generally easier to source through the broader Pittsburgh-area supply chain, which helps keep prices steadier for those options. Slate and concrete or clay tile systems, by contrast, involve more specialized labor pools and longer scheduling windows, adding not only to the per-square price but to the duration of the project. If a home has historic trim or delicate flashing details, consider that slate or tile will require roofers with specific expertise, and that specialty work tends to cluster in peak demand periods after storms.
Asphalt Shingles: 350 to 700 USD per square. Metal Roofing: 700 to 1200 USD per square. Clay Tile: 900 to 1900 USD per square. Concrete Tile: 800 to 1500 USD per square. Synthetic/Composite Shingles: 500 to 900 USD per square. Slate: 1200 to 2500 USD per square. In Beaver Falls, those numbers tend to drift upward during storm surges, especially for steeper, complex jobs, but the general ranking by material remains the same. When planning, anchor expectations to both the local weather-driven demand cycle and the specific roof geometry to avoid sticker shock when crews finish.

HHI Roofing
(724) 417-9365 www.hhiroofinginc.com
Serving
4.7 from 37 reviews
Since 2004, HHI Roofing has been providing top-quality residential and commercial roof repair and replacement services in Beaver, PA. Our experienced team delivers lasting results using premium materials and proven techniques. Whether you need a minor repair or a full roof replacement, we’re committed to exceptional craftsmanship, transparency, and customer satisfaction. Trust HHI Roofing to protect your property with reliable, professional service. Contact us today for a free consultation!
Buccos Roofing
(724) 414-3542 buccosroofing.com
Serving
4.9 from 27 reviews
Buccos Roofing was founded in 2012 by Dan Easton, Mark Easton and Ernie Comfort. Together, the three Peters Township natives set out to serve the greater Pittsburgh community and never looked back. What once was a three-man, one truck crew, working out of a garage, is now an enterprise spanning the greater Pittsburgh area. They attribute their success to hard work, good friends, and family. Today, Buccos Roofing is home to over 25 roofing contractors and additional staff. Together, our team of experts work hard to provide our customers with the best roofing and exterior renovation experience possible. Our mission is to deliver reliable and enjoyable services to each of our clients, prioritizing their needs first.
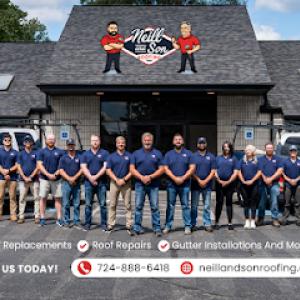
Neill & Son Roofing
(724) 888-6418 www.neillandsonroofing.com
Serving
4.9 from 245 reviews
Neill and Son Roofing, located in Monaca, PA, is a reputable roofing contractor serving Pittsburgh, the West Virginia Panhandle, and Eastern Ohio. With over 30 years of family-owned and operated experience, we specialize in asphalt and metal roof replacements, roofing repairs, seamless rain gutter installation, gutter guard installation, and gutter installation & replacement services. Our commitment to quality craftsmanship and customer satisfaction is unmatched. We also offer expert siding installations and comprehensive residential and commercial roofing solutions. Choose Neill and Son Roofing for excellence, reliability, and superior service.
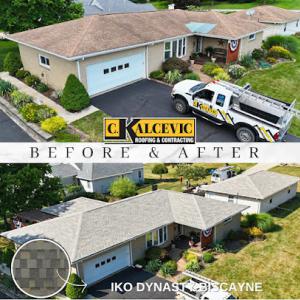
C. Kalcevic Roofing & Contracting
(724) 494-5614 www.ckalcevicroofing.com
Serving
5.0 from 62 reviews
C. Kalcevic Roofing & Contracting is a family-owned roofing company with over 25 years of experience serving Beaver & Allegheny Counties. We specialize in roof repair, full roof replacement, storm damage repair, siding, gutters, soffit & fascia. Our licensed and insured team is Google Guaranteed and known for honest, skilled, and reliable work. We proudly maintain a 5-star reputation built on customer trust, quality craftsmanship, and service that goes above and beyond. Whether you need asphalt or metal roofing, emergency leak repair, or a complete exterior upgrade, we’re here to protect and improve your home.
Monroy's Roofing & Exteriors
(724) 333-1128 monroysroofingexteriors.com
Serving
5.0 from 46 reviews
Monroys Sandoval Roofing & General Construction was founded on the principles of quality, integrity, and commitment. Over the past 10 years, we have been serving the residents and businesses of Monaca, PA, earning a reputation for reliability, transparency, and superior craftsmanship. Our dedicated team possesses the skills and expertise to handle a wide variety of construction and roofing tasks, ensuring our clients receive top-tier services regardless of the size or complexity of their projects. Our philosophy is simple - to provide our clients with services that add value, durability, and aesthetic appeal to their properties.
Knockout Home Solutions
(412) 545-6776 www.knockouthomesolutions.com
Serving
5.0 from 82 reviews
Knockout Home Solutions is your go-to partner for roofing, siding, gutters, solar, and home inspections in Pittsburgh, PA. From roof replacements to siding repairs and gutter installs, we protect your home against the elements with quality craftsmanship and dependable service. We also specialize in new construction and builder warranty inspections, helping you catch issues early and work with your builder to get them resolved. Whether you’re maintaining an older home or settling into a new build, we make the process easier—so you can focus on enjoying your home, not stressing over it.
C.E. Little Contracting
(724) 777-3604 celittlecontracting.com
Serving
4.9 from 276 reviews
Welcome! At C.E. Little Contracting, proudly serving the Pittsburgh area for 40 years, owner Chuck leads our team with integrity and a commitment to exceptional quality. We specialize in residential and commercial roofing, roof replacements and roof installations. Certified by Carlisle, Johnstone, Conklin, and CertainTeed as a Master Roofer, we install asphalt shingles, synthetic slate, TPO, PVC, EPDM, and seamless gutters. Backed by an A+ BBB rating, we provide 24/7 emergency services, roof insurance claim assistance, free inspections, estimates, and drone assessments. When you're searching for "roofer near me" you can count on us. Your satisfaction is our top priority!

Stresko Contracting
(412) 320-5481 streskocontracting.com
Serving
5.0 from 20 reviews
Established in 2022, Stresko Contracting is a Midland, PA-based roofing contractor dedicated to providing the community with high-quality roofing services. We are a locally owned company who takes pride in providing our community with a quality service at a fair price. We specialize in residential and commercial roof repair and replacement, committed to using high-quality materials and providing exceptional service to the local community. Contact us now to get the best roofing services in town!
Bradley's Roofing & Home Improvements
(724) 847-0373 www.bradleysroofing.com
Serving
5.0 from 37 reviews
Bradley's Roofing and Home Improvements, Inc. is a local, family owned business since 1980. We install all types of ROOFING, as well as SIDING, GUTTERS, DOWNSPOUTS, LEAF COVER, SIDING, WINDOWS, DOORS AND BLOW IN INSULATION. Our employees are all certified and payroll based. The owner is present on each and every job to give you that personal service that is missing in today's service industry. We would appreciate the opportunity to earn your business. 724-847-0373
Roof-Tastic & Beyond Exteriors - Pittsburgh
(412) 822-9650 pennsylvania.rooftastic.com
Serving
5.0 from 58 reviews
We are Roof-Tastic & Beyond Exteriors, proudly serving Pittsburgh, PA, and the surrounding areas. We specialize in residential roofing, siding, windows, gutters, and more. With an A+ BBB rating and a customer-first approach, we’re committed to delivering exceptional work and service you can rely on. We’re offering 15% off all services and low montly investment options available. Give us a call to book your free inspection and get a same-day estimate.
Dynamic Roofing Solutions
(412) 407-7927 www.dynamicroofingpittsburgh.com
Serving
4.9 from 147 reviews
Our mission is to provide the highest quality, most reliable roofing solutions for homeowners in our community by combining expert craftsmanship, a holistic approach to home protection, and unmatched customer service. We aim to build lasting trust by ensuring every project is completed with integrity and care, reflecting our commitment to excellence on every roof we work on. Pledge to Our Customers: Hiring Dynamic Roofing Solutions means you are choosing a team that is committed to your complete satisfaction, from the first call to the final cleanup. Holistic Expertise: We look beyond just the shingles, understanding how your roof interacts with your home's entire system, including drainage, ventilation, and much more! Call us today!
Erie Home
Serving
4.5 from 30 reviews
Since 1976, Erie Home has manufactured, supplied, and installed the best-performing roofing on the market. By providing ironclad warranties and convenient financing, we ensure that every homeowner we work with receives top quality service and value for their homes and properties. Erie Home professionals are the roofing company of choice in the greater Cranberry, PA area. Whether you need roof inspections or roof damage repair services, Erie Home has been the go-to roofing contractor for nearly 50 years because of our attention to detail and dedication to making sure our customers are satisfied with their results. Contact us today for a quote and see why we're the trusted roofing company Cranberry counts on.
In this town, a full roof replacement isn't a "no-paperwork" job. The borough building department handles the permit process, and a permit is typically required to proceed. Treat the paperwork as part of the job timeline, not an afterthought. Scheduling your contractor's permit pull early helps prevent delays that can push your project into less favorable weather windows or into peak-season rushes.
Be prepared for staged inspections that track progress, from tear-off or installation milestones to a final completion check. The timeline for these inspections can swing from a few business days to a couple of weeks, depending on how smoothly the contractor meets the approved plan and how busy the building department is. Communicate clearly with your roofer about the exact inspection milestones and who will be available to facilitate access when the inspector arrives.
The borough may request verification that the chosen contractor is properly licensed and that the reroof conforms to local code expectations. Have documentation ready-licensing, any required contractor registrations, and a copy of the permit plan. Because inspection timing and permit review can affect scheduling, build those steps into your project calendar before peak season arrives. If the contractor provides a pre-inspection checklist, use it to anticipate what inspectors will look for-drainage, ice guards, ventilation, and flashing standards all matter for a compliant result.
Plan for permit submission as soon as you're ready to commit to a replacement, not when you're already strapped for time. In this climate, winter and early spring weather can complicate staged inspections, so aim to align your tear-off phase with predictable dry spells and moderate temperatures. Ask your contractor to lock in inspection windows and to coordinate access with neighbors, especially on steeper lots where pull-off space and street access can influence inspection ease. The goal is steady progress with minimal rework caused by weather or minor noncompliance issues that trigger additional visits.
In Beaver Falls and the broader western Pennsylvania market, reroof claims are commonly tied to wind and hail events rather than hurricane-type losses. This reality shapes how a homeowner approaches the claims process, from initial notice to final settlement, and it guides what gets documented and how the work is scoped.
When a storm hits, take thorough photos from multiple angles-drip edges, ridges, valleys, and any attic signs of leakage or moisture. Keep a dated record of any observed damage inside the house, such as staining on ceilings or warped decking. Create a simple, equipment-free inventory that aligns with your contractor's scope of work, so the adjuster can see exactly what needs replacement or repair. In this region, insurers in particular look for corroborating evidence that damage is storm-related rather than age-related deterioration, so clear pictures tied to specific events matter.
Have a contractor prepare a written scope of work that matches the photos and the observed condition. The document should describe the exact components to be replaced or repaired, including underlayment, ventilation, flashing, and any attic insulation or decking that shows water intrusion. A well-documented scope helps the adjuster understand the full extent of the claim and reduces back-and-forth requests for clarification. In practice, a complete scope that includes venting and underlayment details often accelerates settlement.
Adjusters may require ventilation or underlayment upgrades as part of claim resolution. Be prepared for questions about ridge and soffit venting, attic baffles, and the condition of the existing underlayment. If the existing roof lacks proper ventilation or shows signs of moisture entrapment, have your contractor propose specific upgrades. Providing these recommendations up front can help the claim move forward rather than stall on technicalities.
Insurers in this region want evidence that the damage stems from a storm event rather than chronic deterioration. Save weather-related reports, prior claim history, and any temporary repairs you made after the storm. A well-documented connection between the event and the current conditions improves the likelihood of a favorable adjustment outcome, especially when the home's steep hillside roof and moisture exposure amplify the impact of wind-driven hail.
Higher deductibles are a realistic issue when hail or wind damage is involved. Expect discussions about eligible components versus improvements, and be ready to discuss depreciation and replacement timelines. Having a clear, contractor-signed scope helps ensure the settlement reflects the actual work needed, including any code-compliant upgrades for ventilation and underlayment. Maintain calm, organized records so the process stays focused on restoring the roof to its proper function after the season's swings.
Connect with contractors who help homeowners navigate the claims process from damage assessment to final approval.

C. Kalcevic Roofing & Contracting
(724) 494-5614 www.ckalcevicroofing.com
Serving
5.0 from 62 reviews
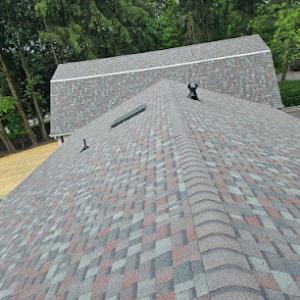
Older homes often need more than shingles alone because reroofing frequently uncovers flashing deterioration around chimneys and transitions common on established western Pennsylvania housing. You'll see that decay show up as cracking, rusted boots, or tucked-in metal that doesn't seal well after years of temperature swings. When a pro lifts the old roof to install new underlayment, the flashing can crumble or pull away, letting water migrate from the chimney crease or vent transitions into the attic. If you're eyeing a replacement, plan for restoring those details in tandem with the shingles, or you'll be chasing leaks again soon.
The winter pattern in this area tends to push weaknesses to the obvious spots: eaves, valleys, flashing lines, and roof penetrations where melting snow refreezes and backs water up. If your fascia or overhangs aren't sealing well, ice damming becomes a regular risk, backing water under shingles and into the gutters. Valleys and chimney-to-roof junctions are especially sensitive to ice buildup. A careful inspection during a mild thaw can reveal hairline gaps you don't notice in the dry season, but those gaps become stubborn leaks once the temperatures swing back.
Leaf debris in fall is a local maintenance issue because clogged gutters and poor drainage can trap moisture at the roof edge before winter sets in. When gutters are packed with leaves, meltwater pools at the eave and backs onto the roof edge, accelerating ice dam formation and encouraging edge rot. Regular fall gutter cleaning, paired with a quick scouting of downspout flow, can save you a storm-season headache. Don't wait for the first snowfall to discover how much moisture your roof edge is already holding.
Find contractors experienced in skylight installation, flashing, and leak repairs to bring natural light into your home.
Roof-Tastic & Beyond Exteriors - Pittsburgh
(412) 822-9650 pennsylvania.rooftastic.com
Serving
5.0 from 58 reviews
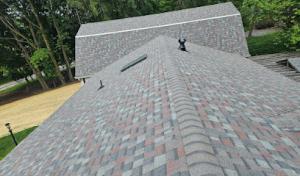
Beaver Falls neighborhoods sit on steep hills overlooking the Beaver River and the Ohio Valley, so storm debris and ice dam risks are real after a winter or early spring blowout. When you call a roofer, ask how they handle rapid cleanup and debris containment on narrow residential lots where tear-off debris can block driveways or roll into landscaping. Look for crews that prioritize staging, containment tarps, and post-work cleanup as part of the contract.
Reroofing is more common here than new-construction installs, so a practical contractor should outline a complete tear-off process: safe removal, decking inspection, flashing integration, and a clean, weather-tight finish. Favor quotes that spell out each step and show a logical sequence from remove to reveal to finish. If the crew pushes only a "replacement" pitch without detailing the tear-off and decking checks, keep shopping.
In this market, affordability battles for attention, but the strongest firms emphasize certification, formal licensing, and documented workmanship. Expect to see insurance documentation and warranty terms discussed directly. Ask for a written warranty that covers both materials and workmanship, and request references from recent Beaver Falls jobs that faced winter ice or spring storm cycles.
Be prepared to discuss unique site factors: tight yards, possible drainage adjustments, and the impact of heavy snow on gutters and downspouts. A solid contractor will tailor a plan to your house's slope, ensure staging works within your property boundaries, and detail how they protect landscaping during tear-off and disposal.
Beaver Falls experiences a narrow late-spring to early-fall window for replacement. Work with a roofer who can forecast a realistic timeline, communicate weather backups, and coordinate debris control and cleanup so your yard remains manageable even during a tight schedule.