Last updated: Apr 19, 2026
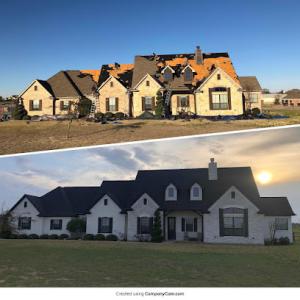
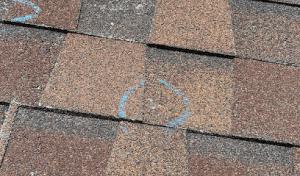
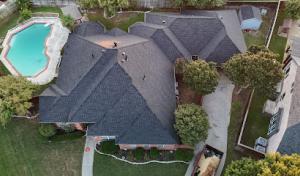
Spring severe storms surge through the Dallas-Fort Worth hail and wind corridor, and that means a roof decision often comes down to storm events rather than age. In this market, a calm year rarely means a free roof. The rhythm of hail, fast-moving wind, and the pressure to settle claims quickly creates a cycle of inspection, paperwork, and replacement that homeowners must navigate with urgency. When a storm hits, you're not just protecting shingles-you're protecting your home's structure, interior, and long-term resale value. The trigger for replacement is frequently a hail impact pattern and wind-driven damage that shows up on the first post-storm inspection, not a random wear-and-tear assessment.
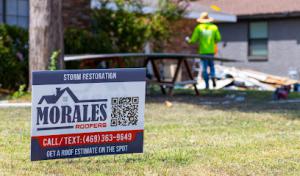
Local contractor signals show insurance_claims and storm_damage as the dominant specialties in this market, reflecting how often homeowners need claim-driven roof work. That means your first call after a storm should be to a roofing contractor who understands the claims process and can speak the language of adjusters, appraisers, and carriers. Expect a vendor network that thrives on rapid response, documented damage, and verified communication with the insurer. In practice, that means you should anticipate a coordinated effort: a thorough damage assessment, a clear set of repair or replacement recommendations, and a documented path from inspection to approval.
Because this area sits in a high-claim DFW insurance environment, homeowners should expect carriers to require date-stamped photos, elevation-by-elevation damage documentation, and an adjuster inspection before approving replacement. Think of it as a three-part gate: precise time-stamped imagery to prove the storm occurred and when, a level-by-level survey that captures roof planes and penetrations, and a professional adjuster's review that verifies the scope aligns with the policy. If any of these steps are missing or rushed, delays can stretch the process from days into weeks. Your goal is to present a clean, organized claim package on day one, with a contractor who can translate findings to the insurer in plain terms.
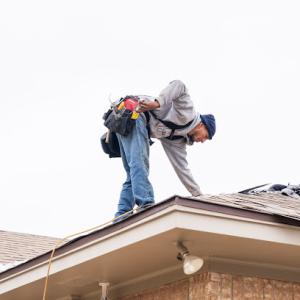
Start with speed: storms in this corridor set tight windows for emergency tarping or temporary protection. If a leak appears, arrange temporary measures promptly to minimize interior damage and to keep the claim moving rather than stalling on interior mitigation. Next, secure professional documentation. A contractor should provide clear, date-stamped photos, organized by roof surface and elevation, plus a written assessment that links observed damage to hail and wind indicators. Finally, align with a contractor who can proactively schedule an adjuster visit and accompany the adjuster to inspect the property. The presence of a qualified, knowledgeable contractor at the appointment often helps secure a favorable scope for replacement rather than a patchwork fix.
Immediately after a storm, walk the property with a flashlight at dusk to spot dented gutters, damaged flashings, and curled or missing shingles. Photograph from multiple angles, focusing on high-impact zones such as ridges, valleys, and edges, then document any interior signs of water intrusion. If you suspect asphalt or composite shingles show granule loss, or if metal, tile, or wood components reveal hail denting or wind-related uplift, call a contractor who can translate those signs into a claim-ready report. In this market, the speed and clarity of your initial damage documentation can dramatically influence how quickly a replacement decision is approved and how comprehensively the new roof is installed to resist the next severe event.

911 Exteriors Roofing & Construction
(972) 243-6700 www.911exteriors.com
2302 Parkside Ave, Irving, Texas
5.0 from 371 reviews
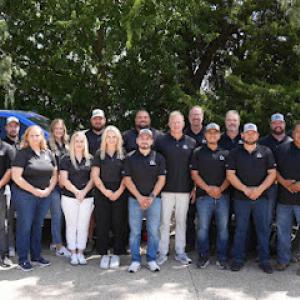
911 Exteriors Roofing and Construction is a trusted Irving roofing company located at 2302 Parkside Ave, Irving, TX 75061, United States, delivering expert residential and commercial roofing solutions across the Dallas-Fort Worth area. With decades of experience, we specialize in roof repair, roof replacement, hail and storm damage restoration, roof inspections, maintenance, and emergency services. Our skilled team uses premium materials, offers insurance claim assistance, and backs every project with quality workmanship. Whether you need a full roof replacement or quick repair, 911 exteriors roofing and construction, known for dependable services, provides reliable, cost-effective and durable roofing solutions to protect your property
Kidd Roofing
(972) 823-7663 www.kiddroof.com
2916 W Story Rd, Irving, Texas
5.0 from 267 reviews
Kidd Roofing is a Residential & Commercial roofing company that was founded in 1982. We handle all types of jobs including re-roofing, new construction, and service work. We install shingles, metal, tile, single ply, modified, coatings and more. Kidd Roofing is a multi year GAF President's Club winner and has an A+ rating with the BBB, are members of the National Roofing Contractors Association and several other associations. We are consistently ranked as one of the Top 100 Roofing Contractors in the US and a multi recipient of the 5000 Fastest Growing Companies.
X Roofing & Solar
(682) 376-2497 xroofandsolar.com
940 N Belt Line Rd #121, Irving, Texas
5.0 from 149 reviews
We offer roofing services and general contractor services
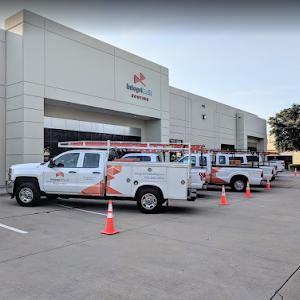
IntegriBuilt Roofing
(817) 421-0295 integribuiltroofing.com
8100 Jetstar Dr STE 100, Irving, Texas
4.9 from 327 reviews
IntegriBuilt dba IntegriBuilt Roofing -Commercial and Residential Roofing Company serving Dallas, Fort Worth and surrounding areas. Specializing in commercial flat roof repair, multi-family apartment complexes as well as residential insurance claims from hail or storm damage. BBB A+ and Accredited. Call us for TPO or Shingle roof leaks. We're able to diagnose tough leaks and damage due to our decades of experience on staff. We are fully insured with business liability and workers comp. We currently serve the entire DFW metroplex with concentration on Collin County, Tarrant County, Denton County and Dallas County. IntegriBuilt Roofing believes in Integrity, Teamwork and Performance.

Hybrid Roofing
(469) 773-3856 hybridroofingllc.com
511 E John W Carpenter Fwy, Irving, Texas
5.0 from 118 reviews
Welcome to Hybrid Roofing, your trusted partner in residential roofing solutions. As a family-owned and operated business, we take great pride in delivering top-notch services that blend tradition with innovation. Established with a vision to revolutionize the roofing industry, we are dedicated to bringing the new generation of roofing into the old, all while ensuring peace of mind for our valued customers. At Hybrid Roofing, we understand that your home is your most significant investment, and protecting it starts from the top down. With years of experience and a passion for excellence, our team is committed to providing you with unparalleled craftsmanship and service.

Robinson Brothers Roofing
(469) 290-1335 robinsonroofing.online
1109 S MacArthur Blvd, Irving, Texas
4.8 from 89 reviews
Our Roofing Services for Irving Storm Damage Repair: Repairing weather-related roof damages. Leak Detection and Repair: Finding and fixing leak sources on the roof. Shingle Replacement: Installing new shingles where needed. Emergency Hail Damage Repair: Mending hail-induced damages on the roof. Structural Repair: Restoring integrity to the roof's framework. Skylight Sealing and Repair: Mending skylight leaks. Flashing Repair: Repairing and sealing flashing areas.
Golden Nail Roofing & Construction
(972) 954-1264 goldennailroofing.com
2300 Valley View Ln, Irving, Texas
5.0 from 90 reviews
''Here at GoldenNail Roofing & Remodeling we are a family-owned business With humble beginnings and a dedication to excellence, Our team of skilled professionals is dedicated to excellence in every project we undertake. Whether it's a simple repair, a complete roof replacement, or ongoing maintenance, we approach each job with precision and integrity, ensuring customer satisfaction every step of the way.
C.H.A. Roofing
222 W Las Colinas Blvd. suite 1650, Irving, Texas
4.8 from 97 reviews
At C.H.A. Roofing, we take great pride in serving the Irving, Tx area with vast knowledge of our trade. Over the years, we have successfully completed a wide variety of roof repair, restoration, and construction jobs for both commercial and residential properties. We offer thorough drone roof inspections backed by over 25 years’ worth of expert knowledge, as well as gutter, siding, and fencing installation. Get in touch today to find out what we can do for you.
RestoreMasters Contracting
(800) 400-7663 www.restoremastersllc.com
400 E Las Colinas Blvd #1050, Irving, Texas
4.6 from 86 reviews
Your local roofer with nationwide capabilities. Top 100 Roofing Contractor 5000 Company | Serving Texas and communities across the nation since 2006, RestoreMasters is the trusted choice among commercial property owners and residential homeowners for world-class roofing & restoration services. Led by the best restoration team in the industry, we deliver high-quality roof replacements, large-scale project management, superior craftsmanship with excellent warranty coverage. Our nationwide network of emergency response teams provides total restoration services to hotels, resorts, condominiums, apartment complexes, churches, restaurants, retail, office, industrial buildings, homeowners & more. It's an honor to serve you.
KPost Roofing & Waterproofing
(469) 898-8099 kpostcompany.com
Serving
4.9 from 813 reviews
Established in 2004 as a commercial roofing company, KPost has undergone remarkable growth in its 20-year journey. Today, we serve both commercial and residential properties in roofing, waterproofing and solar services in Dallas, across North Texas and beyond. Expanding beyond roofing, our team of experts now ventures into the building envelope category. Holding the prestigious Tesla Energy Certification, residential leads the way in innovations like the Tesla Roof and Solar technologies. Known for integrity, we actively engage with DFW homeowners for roof inspection and repairs, earning a stellar reputation. When you need roofing, waterproofing or solar energy services in Dallas, TX, call KPost today!
True Bond Roofing
(817) 720-0706 www.truebondroofing.com
Serving
5.0 from 56 reviews
True Bond Roofing is a husband-and-wife owned local roofing and general contracting company serving the DFW area. We specialize in roof repairs, full roof replacements, chimney flashing repairs and reseals, hail and wind damage repairs, gutter installation, pergolas, fencing, permanent outdoor lighting, and home improvement projects. We focus on clear communication, dependable service, and helping homeowners protect and improve their homes.
CLC Roofing
(972) 304-4431 www.clcroofing.com
Serving
4.9 from 565 reviews
Welcome to CLC Roofing, a Dallas based roofing company. My name is Chad Cross and I started the company over two and half decades ago. We have been blessed with hiring some outstanding employees that have helped CLC continue to grow and deliver outstanding roofing installations across the DFW Metroplex. We are a Platinum Preferred Contractor with Owens Corning. Platinum Preferred Roofing Contractors are the top tier of a premier network of roofing professionals chosen specifically based on their commitment to service, reliability, and unparalleled craftsmanship. Contact us today for a free roof inspection. We look forward to exceeding your expectations.
In this part of the Metroplex, windows face a unique mix of sun, heat, hail, and strong winds. Dry, milder stretches between late spring and early fall can help installers work efficiently, but the North Texas sun still softens some framing materials over time. When a replacement window is chosen, you're balancing glare and heat gain with curb appeal and the home's overall energy performance. Look for a design that reduces heat transfer in the peak afternoon hours and holds up to regular hail exposure, since eye-catching impact resistance matters just as much as style for homes that see heavy storm seasons.
After a hail event or a severe wind outbreak, start with a careful exterior and interior inspection. Check for cracked glass, dented frames, compromised seals, and any moisture intrusion around the opening. If a pane is shattered or the frame is warped, replacement is typically the best path, especially for older homes with less efficient glazing. In most Irving neighborhoods, a well-sealed unit helps blunt the blast of mid-summer heat that can otherwise creep around gaps and reduce comfort inside. For dwellings with traditional stucco or masonry exteriors, a window system that integrates well with the wall envelope is worth prioritizing to maintain structural integrity.
When choosing a replacement window, consider both impact resistance and wind performance. Look for windows with tested wind-load ratings that align with your home's exposure to gusty late-season winds. Impact-rated glazing can help prevent breakage from hail while maintaining clear views. In addition, you'll want a frame material that resists warping in heat and responds well to Texas summers-vinyl and fiberglass are common in this area, with fiberglass offering excellent durability in the face of sun and wind. Proper installation is essential; a well-sealed, properly flashed unit minimizes air leakage and resists water infiltration during heavy spring storms and fall fronts.
Spring is a prime damage season and a high-demand period in Irving, which can tighten scheduling after hail outbreaks across the DFW metro. If a replacement window is needed due to storm damage, aim to secure a window of steady weather rather than rushing into a peak heat day. Early fall offers a practical balance: the sun is lower, temperatures are milder, and there's still enough time to complete work before potential late-season wind events bring added risk to open openings. If a late-season job is required, ensure the crew accounts for cool evenings and dew in the installation window, which can affect sealant curing and siding interactions.
Before crews arrive, clear the area around the outside opening and inside the room to provide easy access. Mark any hidden utilities or electrical fixtures near the window to prevent accidental damage. Inside the home, prepare a safe staging area for any debris and protect flooring with drop cloths. On the installation day, expect careful removal of the old unit, meticulous measuring, and precise placement of the new frame to ensure airtight seals. A proper flash-and-flash-back sequence is critical in a storm-prone climate, where wind-driven rain can target vulnerable joints during storms in spring and fall.
After the new windows go in, test operation to ensure smooth opening and secure locking. Check for uniform caulking lines and a dry interior around the frame edges. In a city with frequent hail and wind, a tight, well-sealed installation helps reduce drafts and heat gain during summer and strengthens resistance to windborne debris during late-season storms. Keep an eye on any signs of water intrusion after the first heavy rain-early detection makes for quick repair and long-term performance.
Get a clear picture of your project costs upfront - no commitment required.
Lifetime Roofing of America
(972) 931-7898 www.lifetimeroofingofamerica.com
Serving
4.8 from 97 reviews
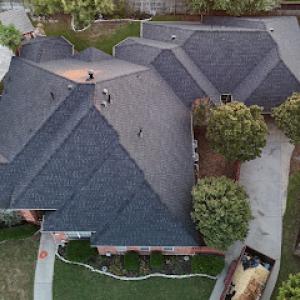
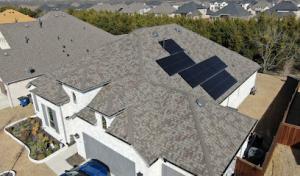
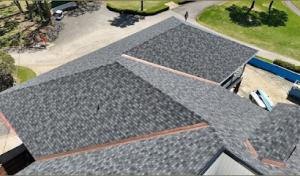
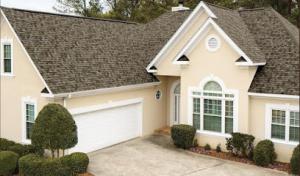
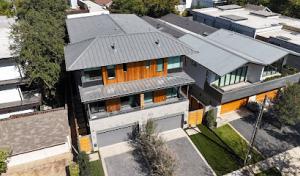
In Irving, asphalt shingles dominate many neighborhoods because they fit mainstream suburban housing stock and remain the most common replacement choice after storm losses. This material handles North Texas heat fairly well when the attic is properly vented, and modern shingles offer good impact resistance for standard hail events. When a hailstorm hits, the key for asphalt is not just the surface shingle but the underlayment and roof deck beneath. A well-sealed underlayment helps prevent water intrusion if granules are loosened and the integrity of the roof deck is compromised. If you notice bruising, missing granules, or wind-driven lifting after a storm, an experienced contractor will assess whether you can preserve the existing shingles with repairs or need a full or partial replacement that aligns with the neighborhood age and architectural style. Color and granule loss matter aesthetically and for long-term UV resistance, so color-matched replacements and proper shading considerations should be part of the plan.
Clay tile and concrete tile are relevant in higher-end Irving areas and Mediterranean-style homes, but their weight and breakage risk make underlayment condition and tile matching especially important after hail. These tiles can deliver excellent long-term performance in heat and sun, yet a single hail strike can crack one tile and jeopardize neighboring tiles if the underlayment has been compromised. Before choosing tile replacements, homeowners should evaluate the roof's structural support, fastener compatibility, and the condition of the existing underlayment. Tile matching is not only a color or profile concern; it includes ensuring fewer gaps where water can enter and that the replacement tiles cooperate with proper flashing around vents, chimneys, and transitions. In dense neighborhoods, a partial or complete replacement may be triggered by inspection requirements or to maintain a cohesive appearance, so plan for potential texture and shade adjustments that respect the home's original character.
Metal roofing has a meaningful local presence in Irving, reflecting homeowner interest in longer service life and better resistance to North Texas heat and repeated storm cycles. Metal panels can outperform shingles in terms of wind resistance and hail impact, particularly when installed with correct fastening patterns, continuous sealants, and high-quality coatings designed for radiant heat. For metal roofs, inspectors will look closely at fastener integrity, edge flashing, and panel seams after severe weather. If hail denting occurs, some metal systems can be repaired without full replacement, but widespread denting or compromised coatings may necessitate panel replacement to preserve energy efficiency and curb appeal. A metal roof system often contributes to a lighter maintenance burden over time, which matters in storm-prone seasons and reused homes.
Regardless of material, the health of the roof in a hail episode hinges on the underlying decking, flashing, and underlayment, all of which influence long-term performance and the ease of a future repair. In a climate with heavy insurance-driven re-roof cycles, choose a material that couples well with your home's architecture while offering predictable performance under heat and wind. When evaluating replacements, consider how the selected system will age with the neighborhood's styling cues and how it will respond to future North Texas storms. A knowledgeable local contractor can help you balance aesthetics, durability, and long-term value, making sure that the roof not only survives the next hail event but also maintains energy efficiency and curb appeal through the heat of summer and the surprises of springtime.
In the aftermath of North Texas hail events, you'll see costs drift higher as crews, dumpsters, and inspection scheduling tighten up. Provided local ranges run about 350 to 550 USD per square for asphalt shingles, 700 to 1100 for metal, 1000 to 1700 for clay tile, 900 to 1500 for concrete tile, 650 to 950 for wood shingles or shakes, and 500 to 900 for synthetic or composite shingles. Those figures assume a straightforward tear-off and replacement, with standard attic access and no unusual decking issues. When storm season hits, expect the midpoints to move up by a noticeable margin as demand climbs.
Prices rise primarily because crews, materials, and disposal services get booked quickly across the DFW metroplex. In yards near Las Colinas or busy commercial corridors, you'll see longer lead times and higher mobilization costs. The same weather that created damage also slows scheduling, which can push project timelines and labor rates upward. If a contractor must skim additional time to protect or replace interior components, those charges can compound. In short, local demand spikes translate directly into higher line items on the estimate.
Price differences inside Irving reflect roof complexity, tile handling, and whether the project involves low-slope tie-ins or detached structures. Clay and concrete tile generally command higher per-square prices, particularly when handling fragile or heavy materials on a steep or multi-section roof. If storm damage reveals decking or framing repairs during tear-off, expect patchwork or replacement to raise costs beyond the initial material estimate. Low-slope sections near driveways or overhangs can also incur additional staging or specialty materials, nudging the final figure upward. In contrast, a straightforward asphalt shingle replacement tends to stay closer to the lower end of its range unless there are unusual access issues.
First, obtain multiple written estimates after a storm to benchmark pricing, then compare line items rather than totals alone. Ask how many squares are slated for replacement, whether tear-off is full or partial, and if decking or fascia work is anticipated. Confirm if any contingency is baked into the quote for weather or scheduling delays, and request a clear breakdown for disposal and material handling. Finally, discuss color selections and warranty terms upfront, since color-matching and longer-term coverage can influence both price and long-term performance in the area's hail-prone climate.
Don't let upfront costs delay a critical repair - these contractors offer payment plans to fit your budget.
In this housing mix, a full re-roof typically triggers a roofing permit issued through the City of Irving Building Department. If the project moves forward without the permit, you risk stop-work orders, compliance corrections, or denial of final approval when the job is inspected. The permit cadence in Irving aligns with the city's emphasis on thorough tear-offs for new underlayment and proper venting, especially after hail and wind events that can weaken the roof deck. When insurance-driven repairs are involved, verify that your chosen contractor actually secures the permit before any material is removed.
Inspections in Irving are planned to occur after the tear-off is complete and again after installation. Expect a review that may include framing if any repair or replacement is needed, verification of underlayment installation, and a final completion check. The city's approach aims to confirm there are no concealed damages and that the installation aligns with current code and local wind- or hail-resistant requirements. Missing a scheduled inspection can delay access to final approval and endorsements for filing an insurance claim.
The local process may require the contractor's license number and proof of compliance with wind- or hail-resistant requirements before final approval. Before work begins, confirm the contractor is properly licensed in Texas and that their scope includes the Irving area's climate realities. Ask for written confirmation of the permit number, the planned inspection dates, and a clear statement that the job will meet the city's wind and water-resistance standards. If the contractor cannot provide these, reassess the engagement to avoid project hold-ups and potential rework.
Begin by contacting the City of Irving Building Department to confirm permit requirements for your specific roof type and scope. Have your contractor provide the permit number and a timeline for tear-off and installation inspections, including any anticipated framing work. Keep a meticulous folder of inspection notices, photos of the tear-off, and receipts for materials and underlayment. When the final inspection is scheduled, ensure all documentation and contractor licensing details are ready for review to minimize the risk of a late or failed final approval.
Hail and wind storms hammer the DFW area regularly, and Irving homeowners operate under a high-claim insurance market. Carrier scrutiny is routine, and decisions can hinge on whether the damage aligns with policy language and the chosen replacement path. In practice, that means not all damage is treated the same, and shifts in coverage can come with how the roof is restored, what materials are allowed, and how many layers are acceptable. This isn't meant to alarm you, but it is a reality in this climate: thorough documentation and clear communication with the insurer matter.
Policies in this region may include material-specific requirements or upgrade conditions for hail-prone areas. That can affect replacement choices after a claim, especially if a carrier pushes for certain classifications or newer formulations to improve hail resistance. Before signing a scope, check whether the policy encourages or requires a specific roof system, underlayment, or class rating. A misaligned choice can lead to gaps between the claim payout and the actual cost to restore a roof that holds up to North Texas weather.
For claims, you should keep storm dates, interior leak photos, exterior slope photos, temporary repair receipts, and all adjuster and contractor scope documents organized from the start. The goal is to build a coherent timeline that shows when damage occurred, how it was assessed, and what steps were taken pending a final decision. Photos should capture both the interior and exterior conditions, including any attic signs of water intrusion and the condition of penetration points around chimneys, vents, and skylights. Having these items ready reduces back-and-forth with the carrier and helps protect your position when adjustments are made.
In Irving, adjustments can hinge on matching scope to the policy language and to the actual on-roof findings. Share the same documentation with both the adjuster and the contractor, and ensure every scope item aligns with the photos and dates you've collected. If a preferred material or upgrade is proposed, request a written rationale tied to the policy language and the hail/wind history of your street. Clear, side-by-side documentation helps prevent surprises when the final settlement is reviewed.
If documents are incomplete, the path to resolution becomes longer and more fraught with disagreements over coverage. Delays or disputes near major weather events are common, so organizing from the outset reduces risk. The goal is to avoid gaps that an insurer could interpret as uncertainty about damage causation or scope. Keeping a unbroken trail of storm dates, photos, receipts, and correspondence helps solidify your claim and supports a smoother recovery process.
Connect with contractors who help homeowners navigate the claims process from damage assessment to final approval.

911 Exteriors Roofing & Construction
(972) 243-6700 www.911exteriors.com
2302 Parkside Ave, Irving, Texas
5.0 from 371 reviews
X Roofing & Solar
(682) 376-2497 xroofandsolar.com
940 N Belt Line Rd #121, Irving, Texas
5.0 from 149 reviews
Las Colinas carries a substantial low-slope roof inventory, and drainage and membrane condition are real local concerns. Flat roofs appear as an active specialty, with many owners regularly hiring for leak repairs and replacements beyond steep-slope shingle work. On mixed-use and commercial-style buildings, storm-driven punctures, flashing failures, and ponding-related deterioration can become urgent after severe weather. In this market, keeping an eye on edging details, drip edges, and terminations where the roof meets parapets is essential, because those spots fail fast under hail and high winds.
Start with a walk-around after a hail or wind event, focusing on seams, flashings, and any ponding areas. Look for lifted membranes, blisters, or worn gravel stops on ballast-supported systems. For low-slope roofs, check transitions where ceiling lights or HVAC curb penetrations pass through the membrane; those penetrations are common leakage points. If there are flat sections adjacent to tile or brick perimeter walls, monitor for edge shrinkage and edge-wall flashing failures. In Las Colinas, the most cost-effective early fix is often resealing or re-flashing, but ponding should prompt closer inspection of insulation and substrate integrity.
Label any damaged zones, particularly around penetrations and flashing laps. Prioritize remediation where water has pooled or where membrane laps show signs of separation. Document with photos from multiple angles and note date-stamped weather events that preceded the damage. Coordinate repairs with any necessary re-surfacing, ensuring the chosen membrane and flashing systems align with existing substrates and drainage patterns. For complex cases or suspected punctures, it's prudent to involve a contractor who specializes in low-slope systems and understands local storm behavior.
When a major storm hits, focus first on controlling interior water intrusion and then on selecting a durable, compatible membrane system that enhances drainage and long-term reliability. A nearby flat-roof specialist can quickly assess whether a full tear-off is warranted or if targeted patchwork will suffice, balancing performance with project timeline.
Find specialists in TPO, EPDM, and built-up flat roofing systems for residential and commercial properties.
X Roofing & Solar
(682) 376-2497 xroofandsolar.com
940 N Belt Line Rd #121, Irving, Texas
5.0 from 149 reviews
IntegriBuilt Roofing
(817) 421-0295 integribuiltroofing.com
8100 Jetstar Dr STE 100, Irving, Texas
4.9 from 327 reviews
Robinson Brothers Roofing
(469) 290-1335 robinsonroofing.online
1109 S MacArthur Blvd, Irving, Texas
4.8 from 89 reviews
In Irving, skylight repair is a meaningful specialty signal, indicating that leak tracing around roof penetrations is a recurring local service need. After hail and high winds, skylight seals and flashing are common failure points because rain can ride up the slope and find tiny gaps around curb mounts, flashing pans, or curb-to-roof transitions. Inspect the skylight flashing from the attic access to confirm there is no moisture staining, and check the curb for warping. If condensation or dampness appears near the shaft, plan a careful reseal or flashing replacement rather than a full replacement of the skylight unit. Remember that skylight installations near mature trees or in windy corridors around Las Colinas can experience accelerated wear.
Chimney work also shows up strongly in the local contractor landscape, which matters in older Irving homes where flashing details can fail during wind-driven rain events. The most frequent issues are step flashing where it meets the roof, counter-flashing into brick mortar, and the base sill flashing. After a wind event, look for rust stains, loose shingles at the base, or mortar cracks that allow water behind the flashing. A targeted fix often restores the seal without touching neighboring shingles. If the chimney cap or cricket is misaligned, water can back up and pool against the flashing edge, inviting leaks that mimic a larger roof problem.
After North Texas hail and high winds, Irving leak calls often center on penetrations and flashing transitions rather than field shingles alone. When a roof shows no obvious shingle damage but dampness trails from a pen entry, suspect the penetrations first. Prioritize attic moisture checks and trace the path of any dripping to its source. Local crews frequently find that a small flashing adjustment stops a recurring drip month after month.
If tracing leads to consistent drip at skylights or chimneys despite reseals, that points to a professional evaluation. A trained contractor will reflash, reseal, and verify proper diversion of water away from the interior. In tight neighborhoods near busy corridors, a timely pro assessment prevents repeated storm-cycle calls and interior damage.
Find contractors experienced in skylight installation, flashing, and leak repairs to bring natural light into your home.
Robinson Brothers Roofing
(469) 290-1335 robinsonroofing.online
1109 S MacArthur Blvd, Irving, Texas
4.8 from 89 reviews
RestoreMasters Contracting
(800) 400-7663 www.restoremastersllc.com
400 E Las Colinas Blvd #1050, Irving, Texas
4.6 from 86 reviews
The contractor pool after a North Texas hail event can feel like a crowded marketplace, with countless crews promising fast response, free inspections, and help navigating insurance. In this climate, a good choice hinges on more than a single hail-marked truck. You want a team that has staying power beyond the initial rush, and that means looking for actual presence, not just a quick call back.
Because re-roofing and cleanup are common signals after severe weather, you should confirm who will handle tear-off debris, magnetic nail sweeps, and final site protection before any agreement is signed. Ask for a written plan that covers debris containment, waste removal, and how yard access will be protected during the project. If a contractor glosses over cleanup specifics or leaves debris in driveways or landscaping, that is a red flag you should not ignore.
Long-established, family-owned, locally owned, and manufacturer-certified firms all have visible presence in the area, giving you a real basis to compare tenure and warranty backing rather than choosing only on speed. Look for a company with verifiable references, a stable local address, and clear warranty terms that extend beyond the initial year. A sturdy, transparent warranty demonstrates confidence in workmanship and materials, which matters as you weather the next storm season.
When you shortlist candidates, request a written scope that outlines tear-off requirements, debris management, and protective measures for landscaping and hardscapes. Check local references in nearby neighborhoods that share similar roof types and weather histories. And insist on a contingency plan for unexpected weather delays-storm recovery in this area can stretch schedules, and a prepared contractor will communicate openly rather than leaving you in the lurch.
Get a clear picture of your project costs upfront - no commitment required.
Lifetime Roofing of America
(972) 931-7898 www.lifetimeroofingofamerica.com
Serving
4.8 from 97 reviews