Last updated: Apr 19, 2026
Spring hailstorms and strong winds are a recurring trigger for roof inspections, repairs, and full replacements in Eagle Mountain. The sudden freeze-thaw cycles, sharp day-night swings, and bright desert sun can crack, dent, and loosen shingles far faster than a mild winter would. When a storm rolls through, you need to be ready to inspect immediately after a lull in wind, because new damage compounds quickly after every round of hail. If you've got asphalt or metal in the mix, those fast-moving hailstones punch in through the top layer and can compromise the deck beneath, especially on homes with flat or low-slope sections common in newer neighborhoods.
Utah insurers commonly require detailed photo documentation after hail and wind events, and adjusters may compare claim scope closely to the contracted roofing material. That means you must capture clear, date-stamped photos of the entire roof, plus close-ups of any denting, granule loss, or shingle curling. Take wide shots from multiple angles, then switch to ultra-closeups of damaged shingles, flashing, and penetrations. If you've replaced any section before the claim, document it too. A well-organized photo log helps prevent disputes and speeds up the review, which is critical when months of storm season intensify claim activity.
Because claim activity is common in this part of Utah, homeowners in Eagle Mountain often need to separate cosmetic granule loss from functional damage to shingles, flashing, and penetrations. Cosmetic granule loss can look alarming yet pose little risk to leak integrity, while hairline cracks, lifted edges, or compromised flashing create real paths for water intrusion. The key is to evaluate the roof's ability to shed water and withstand wind once the storm passes. If water seepage appears in the attic, or if shingles shift under wind gusts, that's functional damage you must flag separately from surface discoloration or granule wear.
Post-storm, schedule a rapid, thorough inspection with a reputable local roofer who understands Eagle Mountain's attic ventilation, solar gains, and common vent configurations. Photograph attic signs of moisture, warped decking, or compressed insulation, and compare what you observe to your roof's original warranty scope and material. If you notice any bubbling under shingles or exposed nails, treat it as an active issue rather than cosmetic wear. In the days after a hail event, prioritize addressing roof issues that could allow water intrusion, then coordinate with your insurer on the documentation package to support a timely, accurate claim.
Find local contractors experienced in assessing and restoring roofs after hail, wind, and severe weather events.
Leatherneck Roofing
(801) 941-9942 leatherneckroofing.com
1749 E Fall St, Eagle Mountain, Utah
5.0 from 48 reviews
Blackridge Roofing
(801) 901-3708 blackridgeroofing.com
9028 S Sunset Dr, Eagle Mountain, Utah
4.9 from 49 reviews

Leatherneck Roofing
(801) 941-9942 leatherneckroofing.com
1749 E Fall St, Eagle Mountain, Utah
5.0 from 48 reviews
Leatherneck Roofing, located at 1749 East Fall Street in Eagle Mountain, Utah, is your top choice for all roofing needs. As a premier roofing contractor, we specialize in gutter installation, emergency roofing services, and comprehensive roof maintenance and inspections. Serving both residential and commercial clients, we excel in roof repair, replacement, and new installations using high-quality materials from brands like Malarkey, IKO, CertainTeed, and GAF. Our skilled team is dedicated to providing durable, energy-efficient roofing solutions with exceptional craftsmanship. For a reliable "roofing company near me," trust Leatherneck Roofing for outstanding service and client satisfaction.
Blackridge Roofing
(801) 901-3708 blackridgeroofing.com
9028 S Sunset Dr, Eagle Mountain, Utah
4.9 from 49 reviews
At Blackridge Roofing in Eagle Mountain, UT we have over 50 years of combined experience in roofing, soffit, fascia, rain gutters, and exteriors to residents of Salt Lake, Utah and Davis counties. As specialists in the roofing industry, our main focus is high quality roof replacements and roof repairs, and our biggest goal is to provide a worry-free experience for our customers. We also offer a full suite of exterior and interior remodeling services, from siding to painting to kitchen remodels.
Top Dog Roofing
4063 E Sleeping Hollow Dr, Eagle Mountain, Utah
5.0 from 3 reviews
At Top Dog Roofing we pride ourselves on providing a high quality service that you can count on. Our processes are seamless, making the experience easy for you from start to finish. Our services include but are not limited to: Installation & removal of Asphalt / metal roofs on single and multi-family homes, We also do Roof repairs & gutter cleaning. Fully licensed and insured. Call today for a free quote.
Crest Roofing
(801) 718-9389 www.crest-roofing.com
Serving
5.0 from 76 reviews
Professional Roof Repair & Replacement
Brady Roofing
(385) 317-3659 www.bradyroofing.com
Serving
5.0 from 43 reviews
Brady Roofing, serving South Jordan, UT, specializes in high-quality roof replacements that protect homes from Utah’s intense sun, heavy snow, and seasonal wind. Our experienced team ensures every new roof is built for durability and performance, whether replacing aging shingles or repairing storm-damaged structures. We take pride in delivering precise workmanship and dependable results that stand up to the region’s changing weather. Homeowners across South Jordan and nearby areas trust Brady Roofing as their experienced roofing contractor for professional service and long-lasting solutions.
Big West Roofing
(801) 336-4840 www.bigwestroofing.com
Serving
5.0 from 60 reviews
Welcome to Big West Roofing Company – Your Utah Roofing Experts Looking for top-quality roofing services in Utah? Look no further than Big West Roofing Company. With a commitment to excellence and years of experience serving the Utah community, we're your trusted partner for all your roofing needs. Our Services: Residential Roofing: Protect your Utah home with our expert residential roofing solutions. Commercial Roofing: Keep your Utah business safe and secure with our commercial roofing services. Roof Repairs: From minor fixes to major repairs, our team has you covered. Roof Replacement: Upgrade your Utah property with a durable, long-lasting roof replacement. Roof Inspections: Stay proactive with our comprehensive roof inspection services
Remi Roofing
Serving
4.9 from 279 reviews
Remi is the new way to roof—pairing quality contractors with technology that simplifies the entire roofing experience. From guaranteed quotes, to clear and consistent communication, Remi delivers the kind of service homeowners expect today.
First Stop Roofing & Solar
(801) 706-2556 www.firststoproofingandsolar.com
Serving
4.9 from 69 reviews
Local Roofing Installer. Local solar installer. We Provide Honest Quality Business.
Conrad's Roofing & Construction
Serving
4.8 from 402 reviews
Conrad's Roofing & Construction
Dynamite Roofing
(801) 448-0017 www.dynamiteutah.com
Serving
4.9 from 230 reviews
Dynamite Roofing is Utah’s trusted residential and commercial roofing contractor, proudly serving Salt Lake County, Utah County, the greater Wasatch front, and surrounding communities. With decades of proven experience, we specialize in roof repair, replacement, asphalt shingle roofing, metal roofing, and storm damage restoration. Our certified team uses top-rated materials and photo-documented inspections to deliver durable, warrantied results. Licensed, insured, and 5-Star Rated, we complete most projects in one day with clean worksites and transparent estimates. Call Dynamite Roofing for quality, clarity, and protection that lasts.
Lasting Impressions Roofing & Improvements
(385) 355-4778 lastingimpressions28.wixsite.com
Serving
5.0 from 78 reviews
Roofing and Repair that lasts! Certified Roofing Repair and Home Inspections Est. 2019 in NC and now servicing all of Utah! Services include: -Complete roof renewal -Roofing repair -Roof tune-ups -Home inspections And much more! Call or visit our website for more information Se habla español
Rooval Roofing
(801) 471-4062 rooval-roofing.com
Serving
5.0 from 19 reviews
At Rooval Roofing, we specialize in Emergency Roof Repair, providing top-tier Residential Roofing and Commercial Roofing solutions in American Fork. Our skilled team is adept at Roof Installation, ensuring your property is well-protected against the elements. We understand the urgency of Leak Repair and offer prompt, reliable service. Our comprehensive and quick services helps to prevent water damage, enhancing your home's longevity. In the face of unpredictable weather, our team of roof repair experts is ready to support you. Regular Roof Inspection by our experts can catch potential issues early, saving you time and money. Contact our team in American Forks Today to get your roof repair estimate.
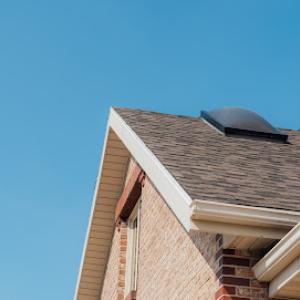
Eagle Mountain's hot, dry summers accelerate UV wear on exposed roofing, especially on south- and west-facing slopes. That tanning effect isn't just cosmetic: it ages shingles and seals faster, especially on older roofs. If your home sits with long summer sun exposure on those faces, you'll notice granule loss, faster color fading, and edges beginning to curl sooner than you'd expect. In practice, this means paying closer attention to the protective layers near attic vents, valleys, and eave edges where sun exposure is fiercest.
The heat also compounds how other weather events act on the roof. The area's high-desert climate pushes materials to cope with big daily temperature swings. Materials expand in the heat and contract when cool nights arrive, and those cycles are most stressful where roof penetrations meet the surface. Seams around vent pipes, skylights, and chimneys can develop micro-movement over time, and the edge details-value-rich in keeping water out-face the brunt of expansion and contraction. If you notice loose flashing or raised edges, address them before wind-driven moisture finds gaps.
Cold snowy winters followed by freeze-thaw cycling can shorten the service life of flashing details and underlayment in this setting. When moisture penetrates, then freezes, it expands and can lift the flashing or create micro-cracks in the underlayment beneath shingles or tiles. In practice, this means you should not wait for visible leaks to act. After heavy snows or rapid thaw cycles, inspect flashing around vents, chimneys, and wall intersections for loose pieces, corrosion, or lifted corners. Don't overlook the underlayment: any area showing multiple winters of condensation or frost buildup should be a candidate for closer review.
Large shoulder-season temperature swings in this high-desert setting put repeated stress on roof penetrations and edge details. The transition from warm days to frosty nights causes fast metal movement and can loosen fasteners or degrade sealant around perimeters. Inspect gutters, drip edges, and fascia for signs of metal fatigue, such as cupping, bending, or loose hangers. If you have a penetration with a soft caulking bead or deteriorating sealant, it's a good indicator that flashing performance is compromised and could need resealing or replacement ahead of the next storm season.
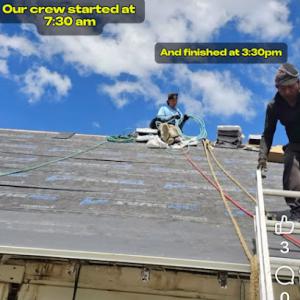
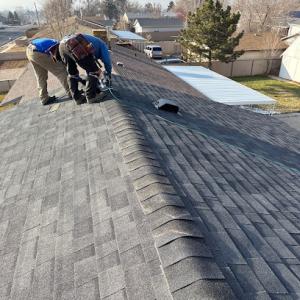
Spring hail, wind damage, and insurance-driven roof replacement timing are practical realities here. Hail can ding shingles or tiles, thinning the protective surface and accelerating granule loss on asphalt and composite shingles, or denting metal panels. Wind can peel back edges or lift soft flashings, exposing underlayment to weather. After a hailstorm or strong wind event, perform a targeted inspection or hire a roofer to do a mid-roof walk to check for dented shingles, torn edge strips, lifted valleys, or damaged vent boots. If damage is found, document it with photos and notes ASAP for insurance timelines, and plan a professional assessment before any decision about replacement becomes necessary. Regular, guided inspections after severe weather help keep the roof performing and inform timely decisions about repairs versus replacement.
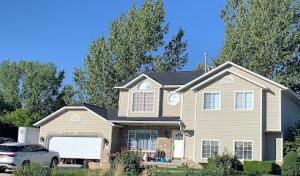
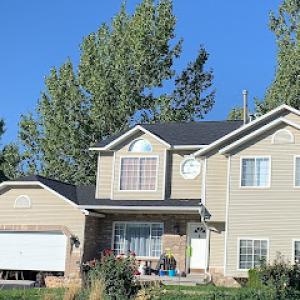
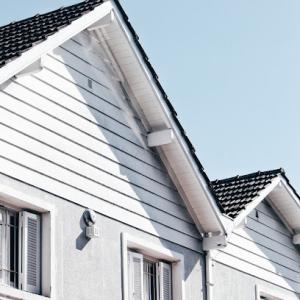
Asphalt shingles remain the dominant choice for most homes in this market, thanks to their balance of installation ease, local contractor familiarity, and widespread color options that suit contemporary suburban lines. In Eagle Mountain, the summer sun can accelerate heat aging, so choosing an impact-resistant asphalt with a high class rating and a stout 30-year or longer warranty helps extend life in the face of UV exposure. Hail can pock unprotected surfaces, so look for shingles labeled with impact resistance or through-fastened options that resist wind uplift. A reflective or cool-gray shingle can also help moderate attic temperatures, improving comfort and reducing cooling loads on hot afternoons.
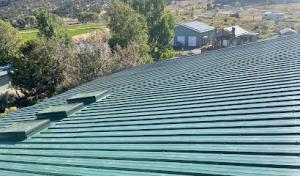
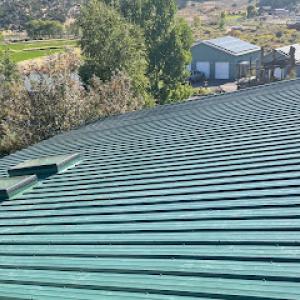
Metal roofing is especially relevant for homes in this market due to snow shedding benefits, wildfire-conscious preferences in dry conditions, and strong UV resistance. In a high-desert climate, metal panels shed snow more predictably, which reduces the risk of ice damming and seasonal weight buildup. UV stability matters because long exposure to intense sun can cause color fading if a coating isn't robust. Metal's resistance to hail damage is another practical advantage, though ensure edges and fasteners are well-sealed to prevent corrosion at seams. If choosing metal, seek powder-coated finishes with reputable warranties and compatible underlayment to protect against thermal expansion cycles that occur with wide temperature swings.
Clay and concrete tiles bring classic aesthetics and durable performance, yet their weight requires a structural assessment of the existing roof deck, an especially important consideration in newer suburban stock where roof framing may vary. These tiles tend to have higher upfront complexity for installation and replacement, and they can break from hail impacts despite being heavy-duty overall; a careful selection of impact-rated variants helps. Synthetic or composite shingles offer a modern compromise, combining design versatility with enhanced impact resistance and lighter weight compared with natural tiles. Slate provides premium longevity and a distinctive look but carries substantial weight and higher repair costs, making it less common for typical Eagle Mountain homes unless a builder or homeowner specifically designed for it. When considering any non-shingle option, verify compatibility with the existing roof structure and ensure proper underlayment and attic ventilation to maximize performance in both sun-drenched summers and snowy winters.
In this climate, the best choice balances resistance to spring hail, wind endurance, and the ability to weather sharp day-night temperature swings. Asphalt shingles offer accessible resilience and ease of repair for many neighborhoods, with upgraded impact resistance and reflective coatings addressing sun exposure. Metal roofing stands out for longevity and performance under UV and snow shedding, important for homes that prioritize long-term durability. For higher-end tile or slate options, a thorough structural assessment and a clear understanding of repair pathways after hail damage are essential, given the weight and potential complexity. Each option benefits from honoring local roofing crew experience, which tends to emphasize wind uplift ratings, proper attic ventilation, and compatibility with the region's severe seasonal cycles.
Explore specialists in steel, aluminum, and standing seam metal roofs built to last 50 years or more.
Blackridge Roofing
(801) 901-3708 blackridgeroofing.com
9028 S Sunset Dr, Eagle Mountain, Utah
4.9 from 49 reviews
In Eagle Mountain, replacement pricing follows the same per-square logic you'll see across Utah's high-desert suburbs, but with local twists. Asphalt shingles sit at the lower end of the market, while slate finishes at the top. This means your total project price will swing widely depending on the material you choose, the roof's complexity, and how the market behaves after spring hail and windy spells. Use the city's typical ranges as a practical рамкa: asphalt shingles roughly 450 to 850 per square, metal 700 to 1200, clay tile 1000 to 1800, concrete tile 900 to 1500, synthetic or composite shingles 600 to 1100, and slate 1600 to 2800 per square. A "square" here is 100 square feet of roof area, measured on the roof deck.
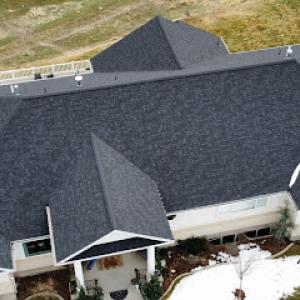
Pricing by material matters, but the roof's shape and layout often drive the bill as much as the chosen material. In newer suburban subdivisions, roof complexity-multiple ridgelines, dormers, and varied pitch-can raise both material waste and labor time. This nudges the per-square price higher, especially for heavier tile and slate options that require careful handling and additional underlayment considerations. If your home has a flatter profile with clean lines, you'll likely stay closer to the lower end of the range; a multi-gable, steep, or intricate surface can push costs upward even before any hail-related repairs are considered.
Storm-driven demand spikes after spring hail and wind events can tighten scheduling and push Eagle Mountain roofing prices upward during busy claim seasons. When large storms hit, crews can get booked weeks out, and suppliers may experience short-term price adjustments on specialty materials. If you're eyeing a full replacement in the aftermath of a damaging season, expect potential price creep tied to availability and expedited scheduling needs. Keeping your preferred material choice flexible within a reasonable range can help manage timing and costs without sacrificing long-term performance.
Understanding the total bill means balancing material choice with roof complexity and seasonal demand. If affordability is a priority, asphalt shingles stay the most budget-friendly option and commonly pair well with standard suburban rooflines. If longevity and curb appeal drive the decision, heavier materials like concrete or clay tile and, at the top end, slate, bring extended life but require a larger upfront investment. Planning ahead for a chosen material and consulting with a local roofer about visible roof features can yield a realistic, achievable timeline and cost estimate within these local ranges.
Get a clear picture of your project costs upfront - no commitment required.
A full roof replacement in Eagle Mountain typically requires a permit before work starts. Skipping this step can lead to fines, delays, or a rejected project when the City Inspector uncovers an unpermitted replacement during a later sale or refinance. The permit process also helps ensure that the chosen materials, flashing details, and workmanship meet local codes that address the area's high-desert sun, wind, and snow patterns. Before a hammer ever taps the ridge, you should have a clear plan for how the project will handle underlayment, ventilation, and wind-driven rain resistance, all of which are scrutinized during permitting.
Project details are submitted to the Eagle Mountain City Building Department to obtain the roofing permit. This submission typically includes a scope of work, roof decking and underlayment specifications, the proposed roof system, and any required sketches or product data. The building department uses these details to verify compliance with local wind, snow load, and fire codes, which can influence material selection and nailing patterns. Timely submission and complete documentation reduce the risk of plan revisions that cause project delays.
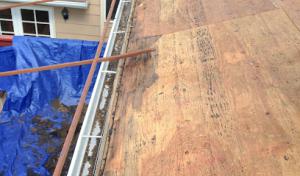
Inspections are commonly scheduled at key milestones in Eagle Mountain, including after underlayment and flashing work and again at final completion. The first milestone checks that the roof deck is sound and underlayment, ice/water barrier where required, and flashing around chimneys, vents, and skylights are correctly installed. A second inspection at final completion confirms proper fastening, ventilation, and that all penetrations are sealed against the region's seasonal temperature swings and hail exposure. If an issue is found, corrections must be made before the final sign-off, which protects the homeowner from potential insurance disputes and future leaks. Planning for these inspections in the calendar helps prevent surprise rework and keeps the project on track.
Snow and freezing temperatures can delay permanent roofing work and make temporary protection more important after storm damage. When a storm hits, moisture digs in quickly if damaged areas sit through thaw-freeze cycles. That means the moment you spot a leak or see daylight through damaged decking, prioritize rapid protection to minimize interior damage and avoid costly freeze-thaw widening.
Emergency action matters locally because moisture intrusion can worsen fast when damaged roofs sit through freeze-thaw conditions. If you lose shingles, flashing, or gutters during a heavy snowfall, securing a watertight barrier right away is critical. Use a sturdy tarp and plywood to cover the affected area, anchoring edges well to withstand wind and additional snowfall. Do not rely on makeshift fixes; aim for a seal that keeps water out until a professional can complete a proper fix in safer weather.
After a storm, limit interior exposure by trapping warmth and moisture inside the home as little as possible. Clear nearby snow from overhangs and use a roof-safe tarp fastened with rocks, weights, or fixed fasteners to prevent wind displacement. Keep interior doors closed to slow radiant heat loss into the attic, and avoid walking on steep or icy sections. If you need help applying a temporary cover, contact a local roofer who can advise on securing a durable tarp and coordinating a safe, timely repair window.
Scheduling constraints are more likely in cold-weather periods when adhesives, sealants, and safe installation windows are limited. Plan for delays caused by snow, wind, and short daylight hours, and align emergency repairs with the next dry, warmer day to restore a full, lasting roof seal. Prioritize temporary protection before temperatures drop further to prevent additional moisture intrusion.
When you can't wait, these contractors offer fast response times to stop leaks and prevent further damage.
Leatherneck Roofing
(801) 941-9942 leatherneckroofing.com
1749 E Fall St, Eagle Mountain, Utah
5.0 from 48 reviews
In this high-desert environment, temperature swings and hail exposure quickly expose weak installation details. When a roof faces rapid warm-to-cold shifts and sudden hailstorms, the quality of flashing, the continuity of underlayment, and the precision of storm-repair work become deciding factors in how long a roof will hold up. Look beyond the material itself and ask how the job was executed: were valleys properly sealed, are boot penetrations and vent stacks fully integrated, and did the crew maintain proper exposure and nailing patterns? Small gaps on flashing or a rushed repair around skylights can become leaks after the first spring melt or a heavy hail season. A careful, detail-focused installation is not a luxury here, it's a practical buffer against the season's toughest weather.
Homeowners should verify that warranty language aligns with the actual material being installed. Insurers can adjust claim estimates to the contracted product when the contract lists a different specification than what arrives on the roof. Ambiguity in the warranty-whether it covers workmanship separately from material defects, and how long each aspect is protected-can leave you with a dispute after a hail event. Expect clarity on what is covered for flashing and underlayment, how workmanship defects are diagnosed, and what triggers a warranty claim. If the agreement groups multiple components under a single umbrella, push for explicit delineation so coverage isn't obscured by marketing language.
The market here includes many re-roofing-focused contractors, so clear warranty terms help distinguish long-term value from temporary storm-season sales tactics. Ask for a written warranty that specifies the scope, exclusions, and remedies, and request real-world references that can attest to durability after harsh springs. A dependable contractor will treat a warranty as a promise backed by a thoughtful installation plan, not as a afterthought tucked into the back of a bid.