Last updated: Apr 19, 2026
This coastline layout means your roof endures more than typical wear. Long Island Sound wind can whip rain at faces, edges, and flashing, often exploiting aging shingles and poorly sealed joints. You'll notice wind-driven rain sneaking under roof edges, around chimney flashing, and where valleys meet drainage paths. If your shingles show curling, lifted edges, or granule loss near the eaves, that's a cue to inspect closely. Shoreline exposure amplifies small gaps into real leaks during autumn storms and early winter fronts, when rain comes heavy and temperatures swing rapidly.
Autumn storms arrive with higher winds and soaking rain, just as many roofs reach the end of a long summer UV cycle. Shingle edges can become brittle, underlayment wears thin, and flashing around vents and chimneys may already have microcracks. In this window, a minor preexisting seam or loose step flashing can become a serious leak under pressure from gusts. Proactively scan for lifted shingles, whitening sealant around vent collars, and discolored patches on ceilings in the attic or top floor. If you notice a pattern of small damp spots after windy rain events, treat it as a warning, not a nuisance.
Spring brings multiple rounds of steady rain that test every sealant and joint. When underlayment has already sustained wind-driven strikes over winter, a single storm can push water into the roof deck through compromised pipe boots, chimney flashing, or vent stacks. Look for rust around metal flashings, tar lines that have cracked, or any soft spots on the roof that waver under foot. The risk compounds when gutters clog and water backs up to fascia boards, forcing additional water entry at the roofer's weak points. If inflammatory spring showers coincide with attic condensation or musty odors, investigate immediately.
Start with the flashing around chimneys, dormers, pipes, and along the ridge line. West-facing slopes often bear the brunt of persistent sea breeze, so inspect those seams first. Examine edges of shingles for buckling or cupping, particularly near drip edges and eaves where wind-driven rain can infiltrate. In the attic, light peeking through the decking or damp plywood indicates a leak path that needs sealing and reinforcement. If you didn't get a chance to replace aging flashing after last season, assume the worst and plan for targeted resealing.
If a roof leak is suspected after a storm, mitigate further damage by tarping the exposed area only if it's safe and you can reach it without climbing onto a slick surface. Keep interior disruption to a minimum: move valuables from affected areas, place buckets to catch drips, and document the damage with photos for insurance or follow-up work. Schedule a prompt inspection by a local roofer who knows coastal conditions and the typical stock in older coastal homes. A quick, precise assessment often reveals whether flashing needs resealing, a shingle edge re-seating, or a more thorough deck and underlayment repair.
Develop a seasonal inspection habit that emphasizes wind-driven rain vulnerabilities. After autumn storms, recheck sealants around vents and chimneys; in spring, verify underlayment integrity and a clean drainage path from gutters to downspouts. Keep the roof surface clear of debris to reduce water pooling, and consider reinforcing vulnerable flashing with corrosion-resistant materials suited to salt exposure. Regular checks now prevent the drip, drip, drip that can escalate into costly repairs later.
West Haven's cold winters create repeated freeze-thaw cycling that can open small gaps around flashing, fasteners, and shingle tabs over time. Those micro-movements aren't dramatic on a single day, but they accumulate year after year, especially on older roofs with marginal edge details. When the sun returns and the air warms, that tiny seepage can become a real leak channel during the next storm. The practical consequence is a slow, creeping moisture problem that undermines attic ventilation, so you end up chasing damp patches rather than stopping water at the source. A roof left unchecked through a sequence of freeze-thaw cycles often develops a chain reaction: rivulets along gaps, damp insulation, and increased indoor humidity as heat loss climbs. The takeaway is simple: inspect edges, flashing, and fasteners after a bitter stretch of cold, and treat any widened gaps as a warning sign rather than a lucky break.
Ice dams are a practical local issue after coastal winter storms because meltwater can back up at eaves and enter older roof systems with marginal ventilation or underlayment. When snow rests on the roof, meltwater has a stubborn habit of finding its way to the lowest point first-the eaves-and then refreezing into a dam that traps additional meltwater behind it. If the attic is inadequately vented or the underlayment is aged, that trapped water can seep through joints, nail heads, or shingle intersections. The consequence isn't always dramatic, but repeated episodes lead to staining, ceiling leaks, and weakened roof deck areas. In homes with shallow attic spaces or long roof runs, icy backflow can compromise the soffit venting, creating a cycle of moisture buildup that feeds on itself. The practical action is proactive: peek at attic vents after a storm cycle, and address any signs of moisture intrusion promptly before interior damage escalates.
Homes near the shore can see mixed winter moisture conditions where snow, sleet, and cold rain all stress roof edges and gutter lines differently than a simple dry-snow climate. Snow may compact and insulate in one area while sleet burns through another, creating a mosaic of thermal expansion and contraction around flashing, drip edges, and gutter connections. Gutter lines can ice over, pull away from fascia, or develop small leaks where they meet roof planes. Over time, those variations create micro-failures that let water seek slow entry paths. The result is uneven aging along the eaves, with some sections deteriorating faster than others. The practical safeguard is targeted edge care: clear gutters when safe to do so, monitor flashing seams for misalignment after storms, and consider upgrading edge details to more robust metal flashing in high-risk zones if ice remains a recurring problem.
In this coastal climate, preventive checks matter more than reactive fixes. Start with a post-winter inspection focused on flashing seams, fastener heads, and shingle tabs near the eaves and roof edges. If a persistent ice dam pattern emerges, address it with a combination of enhanced ventilation, improved attic insulation, and carefully chosen edge materials that resist ice buildup. Even small improvements can reduce the frequency of leaks and slow the progression of damage. Before the next winter set, map out the areas that tend to stay damp longer after storms and plan a targeted maintenance plan rather than a broad, generic approach. The goal is to keep meltwater moving off the roof and away from vulnerable joints, rather than letting it linger where small cracks become bigger problems.
Asphalt shingles remain the practical baseline for most houses in this coastal area. In summers, the sun beats down on roofs exposed to the Long Island Sound, and with UV exposure, shingle life can shorten if attic ventilation is not up to the job. A common scenario in older homes is a fairly shallow attic rafter space and limited venting, which heats roof decks and accelerates edge wear. For many crews, the simplest path to reliable protection is a good two-part approach: address ventilation first, then choose shingles with a longer UV and wind performance profile. This city's winter conditions also demand attention to ice dam risk, so any shingle system should pair with appropriate attic temperature management and effective drip edge details.
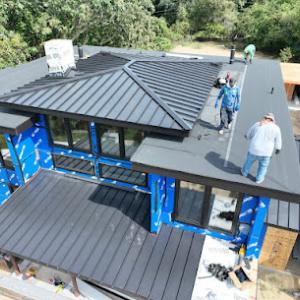
Metal roofing has a meaningful niche because homeowners weighing longevity against coastal weather exposure often compare it directly with premium architectural shingles. In practice, metal shines where wind-driven rain, salt spray, and rapid temperature swings are a concern, or where a homeowner wants a longer-lasting, low-maintenance solution. For West Haven homes, the key is to select a metal profile that looks compatible with the existing roofline and structure, and to secure it on a deck or framing that can handle the weight and the coastal wind loads. A common and practical match is a metal panel or standing-seam system paired with proper underlayment and a ventilated roof deck to help manage condensation and heat buildup, especially during hot Connecticut summers.
Clay tile, concrete tile, wood shakes, and synthetic products exist in the market, but they are less common choices and need to be evaluated against the structural realities of older West Haven homes. Clay and concrete tiles bring long lifespan and a distinctive look, yet their weight requires structural reinforcement in many older structures. Wood shakes offer a traditional aesthetic but can suffer from moisture, mold, and maintenance demands in this climate. Synthetic shingles provide a midrange compromise, combining some resilience with lighter weight, yet performance under extreme coastal exposure should be verified with the installer. In all cases, confirm that the chosen system can tolerate coastal wind-driven rain and the seasonal freeze-thaw cycles, and that the fastener patterns align with older roof framing.
When comparing options, focus on ventilation, underlayment quality, and wind resistance ratings rather than aesthetics alone. West Haven roofs benefit from a coordinated package: attic air intake and exhaust balanced to minimize ice dam risk and heat buildup; a high-quality underlayment rated for exposure; and edge protection and flashing that resist salt corrosion. If unsure about compatibility with an older home's structure, consult a local roofer who has experience with coastal repairs and the way an upgrade to a sturdier system will ride with the existing framing. The goal is a predictable, weather-ready roof that preserves interior comfort without overloading the existing structure.
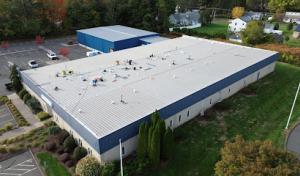
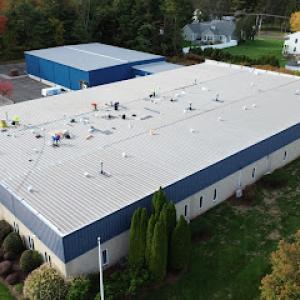
West Haven's contractor market shows meaningful flat-roof demand, reflecting the city's mix of residential additions, porches, multifamily buildings, and commercial structures. Flat or low-slope sections tend to collect water after spring rains, and even small ponding can push seam failures or minor drainage issues into interior leaks fast. In coastal neighborhoods, wind-driven rain and salt exposure can accelerate aging of membranes and flashings, so addressing these pockets early saves stress later on.
Many older homes and multifamily properties in town feature mixed rooflines where steep shingles meet low-slope membranes. Start with the transition areas: where a porch roof ties into a main dwelling, or where a dormer or exterior stairwell sits atop a low-slope deck. Look for standing water after a heavy spring shower, softened or lifted seam tapes, and any edge flashing that feels loose or shows signs of grit wear. These are the pockets where problems tend to begin and spread.
Set up a simple seasonal check focusing on drainage, seams, and flashings. In late winter or early spring, clear debris from gutters and scuppers, ensuring water can move away from ceilings and into proper downspouts. After the first major rain, run a visual walkaround to spot pooling patterns on flat sections and note any newly darkened membranes or wrinkling. For mixed roofs, give extra attention to the interface between the steep shingles and the low-slope membrane; this junction is a common leak path and should be monitored closely during inspection cycles.
When a single project covers both steep-slope shingles and low-slope membrane areas, plan for a coordinated repair to avoid patchwork that shifts water elsewhere. Use compatible flashing details at transitions and ensure fasteners are sealed against wind-driven rain. If a portion of the membrane shows edges lifting or seam tapes appear exposed, treat as a ready-to-address hotspot rather than a cosmetic flaw. A tiny crack here can become a damp bite into an interior ceiling in a matter of weeks after heavy precipitation.
Flat pockets benefit from durable, weather-suited materials that resist salt spray and wind scour. In mixed roof layouts, selecting a unified waterproofing strategy across both roof types helps prevent future misalignment and leakage. Maintain control of ventilation and ensure attic or subroof spaces above these pockets stay dry, as trapped moisture compounds aging and shortens the life of both shingles and membranes. Regular upkeep saves not only roof life but interior peace of mind after coastal storms.
Find specialists in TPO, EPDM, and built-up flat roofing systems for residential and commercial properties.
Solid Rock Roofing
(475) 301-4540 solidrockroofingllc.net
445 Front Ave, West Haven, Connecticut
4.8 from 44 reviews

Pinnacle Roofing | commercial industrial, & residential roofing services
(203) 214-2135 www.pinnacleroofingct.com
14 Valleybrook Rd, West Haven, Connecticut
4.8 from 41 reviews

Quality Roofing Services
(203) 931-7663 www.qualityroofing.com
599 Island Ln, West Haven, Connecticut
4.9 from 12 reviews
For West Haven homeowners, material pricing tends to follow the local ranges, with asphalt generally serving as the entry point and tile systems at the top end of the market. Asphalt shingles are typically the most common choice for established coastal homes, balancing upfront cost with decent long-term performance in a climate that sees wind-driven rain and occasional ice. If clay or concrete tile is chosen, expect the higher end of the spectrum, reflecting heavier weight, stricter installation requirements, and more intensive surface preparation. These price bands align with the practical realities of the harbor-side environment, where aging stock may demand more robust underlayment and careful detailing at eaves, hips, and valleys.
Costs can rise locally when older homes require multiple tear-off layers, decking repairs, chimney flashing work, or coordination around mixed roof sections common in established neighborhoods. A typical re-roof in a multi-layer scenario can add labor and disposal fees that push the project into the upper half of the listed ranges for the chosen material. Decking damage from years of moisture exposure and winter ice can necessitate replacement or reinforcement, which adds material and labor time. Chimney flashing, especially on brick columns versus stucco neighbors, requires meticulous sealing to prevent future leaks and can be a notable cost driver. On homes with varied roof planes or where transitions between different roof types exist, the complexity of the install increases, often reflecting in higher per-square pricing and longer project timelines.
Peak-season demand from late spring through early fall can affect scheduling and pricing in West Haven because that is the most practical local installation window and permit inspections can back up. In practice, that means more competition for crews, potential delays between ordering and delivery of specialty materials, and tighter turnaround for weather-sensitive work. If scheduling slips into shoulder seasons, you may find slightly lower sums but the risk of weather-related interruptions rises. Asphalt typically remains the most predictable for coastal schedules, while tile systems may require additional coordination around heavy roof sections and more exacting underlayment requirements to handle salt air and freeze-thaw cycles.
Synthetic or composite shingles offer a middle ground, often cited as a practical compromise between cost and longevity in this market. Synthetic options may perform well against wind-driven rain and can be lighter than tile, easing some structural concerns. Wood shingles and shakes present a more traditional coastal appearance but demand attentive maintenance in salty air, and their pricing can skew higher when longevity and maintenance cycles are factored in. Concrete and clay tiles, while premium in cost, deliver strong wind resistance and a long service life but require a solid deck and capable framing to prevent issues from seasonal temperature swings.
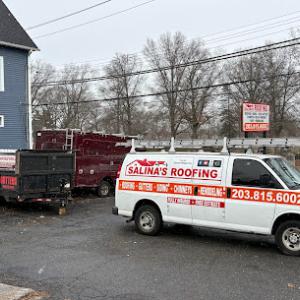
Salinas Roofing Gutters Siding Contract
(203) 815-6002 salinasroofingct.com
860 Campbell Ave, West Haven, Connecticut
4.8 from 66 reviews
Salina's Roofing Siding & Gutters offers a comprehensive suite of exterior home improvement services in West Haven, Connecticut. From roof repair and replacement to siding installation and gutter installation, they provide expert solutions to maintain and enhance your property's exterior.
Solid Rock Roofing
(475) 301-4540 solidrockroofingllc.net
445 Front Ave, West Haven, Connecticut
4.8 from 44 reviews
SOLID ROCK ROOFING offers a variety of different options. We pride ourselves with serving the community with honesty, aggressive, pricing, quality, safety, and integrity. We have over a decade of experience in providing leak free roofing solutions for our customers! Let us show you the solid rock way you got a drip. We can fix it in one trip call today.

Pinnacle Roofing | commercial industrial, & residential roofing services
(203) 214-2135 www.pinnacleroofingct.com
14 Valleybrook Rd, West Haven, Connecticut
4.8 from 41 reviews
At Pinnacle Roofing, we offer top tier roofing services in entire state of Connecticut . We work diligently to meet the needs of our customers while adhering to industry quality standards. We are committed to completing our work with diligence and extreme attention to detail. Pinnacle Roofing is your best choice when it comes to commercial roofing, flat roofs, roof coatings, E.P.D.M roof systems, & asphalt shingle roofs and more. Contact us today, our team is waiting to assist you!

Kohler Roofing Solar & Construction
(203) 339-1619 kohlerroofing.com
279 Terrace Ave, West Haven, Connecticut
5.0 from 12 reviews
Kohler Roofing Solar & Construction provides solar installation, roofing, siding, gutters, decks, and more in Milford, CT, and the surrounding area.

Quality Roofing Services
(203) 931-7663 www.qualityroofing.com
599 Island Ln, West Haven, Connecticut
4.9 from 12 reviews
Connecticut's Choice for Commercial Roofs
About Time Home Improvement
(203) 209-4007 www.athisolutions.com
11 Park St, West Haven, Connecticut
5.0 from 9 reviews
About Time Home Improvement (ATHI Solutions) is a family-owned and locally operated business based in West Haven, CT, specializing in roofing, exteriors, and home expansions. With certified expertise, honest pricing, and no money down financing options, we make it easy to improve your home with confidence. From roof replacements and siding to custom additions, we deliver reliable craftsmanship and personalized service on every project. Trust ATHI Solutions for quality work and a hassle-free experience start to finish.

Nations Roof
(203) 335-8949 nationsroof.com
420 Frontage Rd, West Haven, Connecticut
5.0 from 4 reviews
Nations Roof delivers commercial roofing services with the scale of a national provider and the care of a local partner. Serving West Haven and surrounding areas, we offer preventive maintenance, repairs, replacements, and emergency service. Our certified crews work on all roof systems without voiding manufacturer warranties. With 24/7/365 support from our National Service Center and a proven safety culture backed by a 0.47 EMR, we help protect your people, property, and peace of mind. Call our 800 line for emergencies!

Connecticut Roofcrafters
(888) 612-0798 ctroofcrafters.com
599 Island Ln Box 524, West Haven, Connecticut
4.1 from 15 reviews
Connecticut Roofcrafters specifies and installs new and replacement roofs for residences, businesses and apartment/condo complexes across Connecticut. We specialize in Slate, Tile, Metal and Wooden roofs but bring the same level of craftsmanship necessary for these types of roofs to architectural and standard asphalt roofs. In addition to roofing, we also do chimney work, emergency repair work as well as installing vinyl and wood siding.

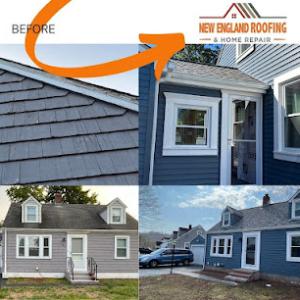
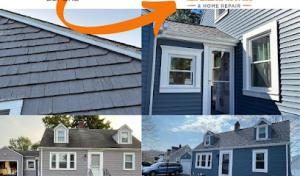
New England Roofing & Home Repair
(203) 795-3947 newenglandroofingct.com
Serving
4.8 from 110 reviews
New England Roofing & Home Repair is a leading provider of roofing services and home repair in our community. Our commitment is evident in our unparalleled customer care, use of the finest materials, and expertise of experienced professionals. Whether you're looking for reliable roof repair, re-roofing, or maintenance services, whether you need doors and windows installed or your siding repaired, we have what you need. We have years of experience in the industry and are committed to delivering exceptional value on every project. Rely on us, your local specialists, for top-notch service, every time
REVMA Roofing
Serving
5.0 from 56 reviews
REVMA is a premier roofing company located in Queens, NY. We specialize in various roof replacements such as asphalt shingles, slate, cedar, composite, metal, and flat roofs. Our installation and replacement services further extend to aluminum gutters, copper gutters, and skylights. Our customer service is second to none and our quality of work is what sets us apart from the rest. Our philosophy is simple, do it right the first time!
1 800 New Roof CT
(475) 264-6082 1800newroofct.com
Serving
5.0 from 22 reviews
1 800 New Roof CT is a locally trusted roofing company serving Orange, CT and surrounding communities with professional roof replacement and related exterior services. As an experienced roofing contractor, we handle roof repairs, full replacements, and detailed inspections designed to address Connecticut’s harsh winters, heavy rain, and seasonal storm damage. Our team also provides siding and gutter services to help protect homes and businesses from moisture issues and long-term wear. With over 20 years of experience serving the local Connecticut community, we focus on dependable service, fair pricing, and quality craftsmanship.
A building permit is commonly required in West Haven for a full re-roof rather than being treated as a purely informal maintenance job. Before any screws turn, you or your contractor should confirm permit needs with the City of West Haven's building department. The process moves faster when the application clearly shows the project scope, the roofing material description, and the contractor license number. This upfront precision helps prevent surprises once the crew arrives and weather windows tighten.
To streamline approval, prepare a concise description of the planned work, including whether underlayment upgrades, flashing replacements, or vent fixes accompany the re-roof. The roofing material type must be specified, since different crews and schedules hinge on product-specific details. The license number verifies that the person on the job is authorized to perform roofing work in this coastal town with its unique winter stressors. Keeping a ready, public-facing summary of the project helps inspectors track progress and reduces back-and-forth during busy periods.
West Haven inspections are commonly scheduled at initial installation or underlayment and again at final completion. The seasonal calendar matters: inspector capacity tends to tighten in late fall and after major storms, so delays can occur when the volume of homes needing review spikes. If weather turns abruptly, crews may pause pending inspection clearance to avoid rework under a snapshot of wind-driven rain and ice concerns. Plan ahead for a coordinated window where weather, permit review, and material delivery align, and avoid gaps that could expose the roof deck to winter exposure.
Coordinate with the contractor to submit the permit package several days before off-season starts, and confirm whether the inspection notice will specify appointment windows. Maintain open lines with the building department during the permit phase, especially if the project scope shifts or if coastal storm risks require adjusted underlayment or drip-edge details.
Insurers in Connecticut keep a steady hand, but adjusters in this coastal area will scrutinize whether damage comes from wind or hail or is simply aging wear. The salty exposure, frequent winter cold snaps, and summer storms can blur the line between new impact and preexisting deterioration. When a claim is filed after a storm, expect questions about recent wind-driven events, tree strikes, and the roof's current condition. A clear narrative that pins damage to specific storms helps, especially if some shingles or flashing show isolated impact rather than a uniform aging pattern across the roof plane.
Before-and-after photo documentation is especially important locally because coastal storms can create scattered damage patterns that are easy to dispute if records are weak. Take comprehensive photos from multiple angles and at different times of day to show board lines, vents, chimneys, and edge details. If you have any professional inspections or maintenance records-especially from recent years-keep those handy. In this climate, wind can lift a corner here or a granule loss there, and a detailed album helps separate storm-caused issues from preexisting wear.
Coverage expectations can tighten after significant weather events, so West Haven homeowners should review roof age, exclusions, and deductible terms before storm season rather than after a leak appears. The sequence matters: document the scene promptly, contact the insurer in a timely fashion, and avoid delaying temporary fixes that protect interior spaces. Be mindful that coastal patterns-scattered impacts, wind-driven edge damage, and intermittent leaks-may require a staged inspection plan. If the first adjuster visit seems inconclusive, you may request a follow-up assessment, ideally with a clear map of the damaged components and their dates of concern.
Keep a simple, written log of storm dates, hail sizes if observed, and the locations of any new leaks. Note any nearby trees or branches that could have contributed to impact. When possible, coordinate with a local roofer who understands the typical West Haven roof lines, common aging issues in coastal stock, and the seasonal inspection bottlenecks that can slow responder timelines. A well-documented, neighbor-informed claim tends to move through the process with fewer friction points.
Connect with contractors who help homeowners navigate the claims process from damage assessment to final approval.

Kohler Roofing Solar & Construction
(203) 339-1619 kohlerroofing.com
279 Terrace Ave, West Haven, Connecticut
5.0 from 12 reviews

About Time Home Improvement
(203) 209-4007 www.athisolutions.com
11 Park St, West Haven, Connecticut
5.0 from 9 reviews
New England Roofing & Home Repair
(203) 795-3947 newenglandroofingct.com
Serving
4.8 from 110 reviews
Chimney-related work is unusually prominent in the local contractor market, fitting older coastal homes where masonry intersections are a common leak point. The Sea Sound exposure, winter ice, and seasonal wind-driven rain mean flashing around chimneys and skylights endures more freeze-thaw cycles than typical rooves. In practice, failures show up first at the chimney's base, along step flashing, and where mortar joints have begun to crumble. Expect that curb flashing on skylights and nearby transitions will be a recurring concern on aging structures.
On older roofs, the most persistent leak sources are often transitions and penetrations rather than the field shingles alone. Look closely at the chimney chase where brick or stone meets shingles or metal flashing. If a pebble-like granule wash is visible on the ground near the chimney, that's a sign of deteriorating shingles near the goalpost of the roof- wall intersection. Skylight service is also a meaningful specialty locally, suggesting failed curb flashing or aging seals can mimic chimney leaks. Inspect the skylight flange for any oxidation, wrinkling, or gaps that invite water seepage when rain piles up on a windy day.
Begin with a visual walk along the chimney flue line during daylight with a flashlight overhead. Look for gaps in mortar, rusted nails, or loose step flashing where the chimney meets the roof. Check the skylight curb: verify the sealant is intact, and that the curb is secure to the deck. If you see staining around the masonry or damp patches along the interior ceiling near the chimney or skylight, don't delay a professional assessment. A proper roof movement can loosen flashing over years, so plan a targeted check of the entire transition area rather than only the visible field shingles.
If you encounter repeated damp spots after heavy rains or wind-driven storms, arrange a chimney and skylight flashing inspection before the next season's ice forms. A local roofer with experience in older stock and masonry intersections will be best positioned to identify whether flashing needs resealing, replacement, or reseating to restore a dry attic and living spaces.
Find contractors experienced in skylight installation, flashing, and leak repairs to bring natural light into your home.
Pinnacle Roofing | commercial industrial, & residential roofing services
(203) 214-2135 www.pinnacleroofingct.com
14 Valleybrook Rd, West Haven, Connecticut
4.8 from 41 reviews

Connecticut Roofcrafters
(888) 612-0798 ctroofcrafters.com
599 Island Ln Box 524, West Haven, Connecticut
4.1 from 15 reviews
Late spring through early fall is the most practical roofing window in West Haven because winter cold, snow, and freeze-thaw conditions complicate installation quality and scheduling. Favorable temperatures reduce shingle curling, sealant failure, and ladder exposure during coastal gusts, and they align with the peak season for inspections and material deliveries before the first Nor'easter of late fall. If a roof project can be planned for May or June, and finished before the heavy winds of late summer begin, you reduce the risk of weather-induced delays and rework.
Spring is a high-risk inspection period for hidden leaks in this coastal climate because winter damage often becomes visible only once sustained rain returns. A careful post-winter scan should look behind attic vents, along chimney flashings, and at seam intersections that may have developed micro-leaks during cold snaps. If you notice damp wood, musty odors, or fresh staining after a spring shower, schedule a professional roof inspection promptly. Early detection matters for coastal homes where salt and humidity accelerate corrosion around fasteners and metal flashings.
Homeowners who wait until storm-heavy autumn may face tighter contractor availability and slower inspection turnaround than those booking earlier in the season. Autumn winds push debris and surf spray into gutters and valleys, which can mask underlying damage. Having a plan in place for a potential re-roof or repairs before September helps keep priority slots, minimizes the risk of weather-driven gaps, and supports a safer winter seal. Coordinate timing with any interior work such as attic insulation checks that go hand in hand with roof work.
Seasonal precautions you can take now include trimming overhanging branches, clearing debris from gutters, and inspecting visible flashing from ground level after storms. Keep an eye on ridge lines for unusual shingle lift, and note any areas where ice dams formed last winter, even if temperatures have since warmed. For storm readiness, create a short maintenance log so when the first forecast of a heavy rain arrives, you can prioritize the most vulnerable sections and avoid last-minute scrambling.
In this harbor-adjacent town, the roofing market can feel crowded with re-roofing and repair firms. The emphasis should not be on a flashy pitch, but on who actually handles tear-off, cleanup, and flashing details. Local homeowners know that storm season brings tightened schedules and bottlenecks, so choosing a company with a grounded, practical approach to project logistics earns real value.
When reviewing bids, confirm that the contractor will perform a full tear-off if needed, not just overlay an old roof. Ask who will seal and integrate flashing around vents, skylights, and especially chimneys, where wind-driven rain often seeks entry. Require a clearly defined cleanup plan that includes debris removal, tarping of nearby landscaping, and protection of finished exterior surfaces. This region rewards worksites that stay tidy and safe from day one.
Quick response is a strong local hiring signal, as is a cleanup-included promise after each visit. In practice, a contractor who can show up for an urgent leak, secure temporary protection, and schedule a full repair promptly earns trust. In this market, reputation around residential work matters more than aggressive sales language, so listen for steady, practical communication and a plan that prioritizes the home's daily use.
Many homes in this area rely on chimneys as focal points and water entry spots. Favor firms with demonstrable experience integrating flashing and siding around chimneys without creating cold or damp seams. Ask for photos or references from projects with similar chimney configurations, and ensure the crew will check attic access and roof-to-wall transitions as part of the job.
Speed and site protection matter most after leaks or storm events. Choose a crew that can mobilize quickly, cover exposed roof lines, and maintain debris containment during the repair. A team that communicates arrival windows and completes cleanup the same day often preserves interior comfort and minimizes additional weather exposure.