Last updated: Apr 19, 2026
In Trumbull, cold winters unleash repeated freeze-thaw cycling that can open vulnerable roof details and shorten service life on aging materials. That means as overnight freezes repeat or the day warms, water trapped in shingles, roof seams, and flashing expands and contracts, slowly widening gaps that were once barely noticeable. You'll notice hairline cracks in shingles, loose granules, and edges chipping away first on valleys and around vent collars. If your roof is already showing signs of wear-curling shingles, lifted edges, or rusting flashings-freeze-thaw cycles accelerate failure and can prompt late-season leaks you can't ignore. The practical response is frequent, targeted checks after severe cold snaps or thaws: walk the attic with a flashlight to identify moisture staining or frost on underside of decking, inspect the rake edges and soffits for gaps, and look at flashings around chimneys and vents for compromised sealant. Replace or reseal suspect flashing promptly, and consider upgrading aging components before another round of winter hits. If you detect consistent water staining that appears without a visible source from the attic, don't delay a professional evaluation-a small issue left untreated grows quickly when cold snaps return.
Snow load is a practical concern in this area because full-season winter accumulation adds weight stress before spring thaw exposes leaks. A roof that is already carrying a heavier-than-ideal snow blanket can sag slightly or develop creaks in response to wind-driven shifts. The danger isn't only from the weight; packed snow can hide weak spots where ice damming forms along eaves, pushing meltwater back under shingles and underlayment. In practical terms, you should clear critical exits and porches from overhanging trees and ensure gutters and downspouts are clear so meltwater has a path to exit. After major storms, perform a cautious exterior inspection from the ground or with a ladder, paying attention to any soft spots in the decking, displaced shingles, or visible damage at rake lines and eaves. If you see ice dams forming at the gutters, or you note thaw water soaking into walls near the attic, call a local roofer for a rapid assessment. Don't wait for a visible drip to start addressing weight-induced stress; preventative maintenance now wards off mid-winter collapse risks and expensive repairs later.
Spring in Trumbull commonly shifts from winter conditions into wind-driven rain events, making late-winter damage show up as interior leaks and shingle loss. That transition can catch homeowners off guard when warm days are followed by sudden squalls that push rain through compromised seams and around flashing. The telltale signs are interior damp spots on ceilings that follow storm lines, stained attic rafters, and the quiet hiss of wind-driven rain under loose shingles. When you notice a leak in the ceiling after a late-winter rain, the safest move is to limit use of the affected area to prevent further water intrusion, place a tarp over exposed roof areas if you can access safely, and call for a timely inspection. Prioritize shingles with curling, punctures, or missing granules, and check the condition of valleys and step flashing where two roof planes meet. A late-winter assessment that targets wind-driven leak pathways can catch damage before it migrates to insulation and interior finish work. Early intervention saves fear and expense when spring storms arrive with renewed force.

HGC Roofing & Siding
55 Merritt Blvd, Trumbull, Connecticut
4.9 from 31 reviews
Helio General Contracting is a local Connecticut based general contractor focused on residential and commercial roofing, gutters, siding, and window installations primarily.

Preference Construction, Roofing & Home Improvement
(203) 685-3725 preferenceconstruction.com
Serving
4.9 from 85 reviews
Preference Construction, Roofing and Home Improvement is a full service home construction and remodeling company specializing in Roofing, Kitchen and Bathroom remodel, Window Replacement, Deck & Fence, Additions, Flooring, and much more in the New Haven & Fairfield County Connecticut area. Preference Construction, Roofing and Home Improvement offers New Home Construction, Home Improvement, Roofing, Siding, Gutters, Decks, Chimney Cleaning and Repair, Chimney Flashing, Copper Chimney, New Kitchens, Sheet Rock Repair, Taping, Painting, Interior Trim, Lock Sets, Dead Bolts, Storm Door Installs, Concrete Repair, Stone, Slate, Professional Caulking, Ceramic Tile, Carpentry, Replacement Windows, Door Replacement and more!
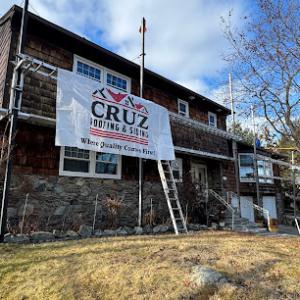
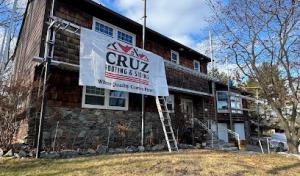
Cruz Roofing & Siding
(203) 685-2548 www.cruzroofingandsiding.com
Serving
4.9 from 166 reviews
Anything extraordinary starts as a single idea. And that's exactly how our story begins. Cruz Roofing & Siding was built from a dream to provide trustworthy home improvement services at an affordable price. That is exactly what we have achieved. We started with roof replacement and today we have a fleet completing exteriors renovations from foundation to roof. Our team of the Roofing industry’s top professionals can help bring your next home improvement project to life. We value Affordability and Expertise above anything else. GET IN TOUCH to learn more about how we can help. We look forward to partnering with you.
Kellner Home Improvement
(203) 254-4447 kellnerroofing.com
Serving
4.9 from 92 reviews
We have been serving Stratford Connecticut and the surrounding area with Quality Residential & Commercial Roofing & Roof Repair Services For Over 26 Years. Family owned and operated by Saul Robles, Kellner has carefully established a reputation for providing quality workmanship on their roofing, re-roofing, roof installation and roof maintenance programs. We are regarded as one of the best roofing contractors in Fairfield & New Haven Counties. Whether it's a new asphalt shingles, wood shingles or even a new copper roof for your home consider us as your preferred Stratford roofer. Or if you need a simple roofing repair, emergency roof repair or have recent storm damage our licensed Stratford roofing company is the one to call.
O.C. Roofing & Siding
Serving
5.0 from 12 reviews
O.C. Roofing and Siding provides roofing, siding, chimney, and gutter services to the Fairfield, CT area.
Integrity Home Services
(203) 922-2408 www.integrity-home-services.com
Serving
5.0 from 13 reviews
Integrity Home Services has become a trusted and respected name in Southern Connecticuts residential roofing industry.IHS was established in 1991 and is located in Stratford CT.We service all of Fairfield and New Haven Counties. We are fully licensed and insured. IHS offers a full line of roofing products and services. Roof replacement, roof repairs, gutters, skylights, flashings and roof ventilation to name a few.We also offer roof inspections.All our work is performed with a personal call to integrity, excellance and customer satisfaction. With a focus on timely completion of contracts. Quality craftsmanship in all installation procedures and clear, open, honest communication with each of our clients. Ask about our financing options.
Sp Roofing
(203) 898-1218 sproofingllc.com
Serving
4.8 from 65 reviews
Roofing,contractors siding painting gutters

Kerigan's Roofing
(203) 296-9697 keriganroofing.com
Serving
4.9 from 35 reviews
Kerigan's is a Connecticut Family name in business for over 30 years. We take pride in our work and strive to give the best price possible. We are Fast to return customers calls and Reliable to complete your job in a clean and neat manner.

Cedar & Copper
Serving
5.0 from 12 reviews
We are Connecticuts premier cedar roofing contractor, with over 20 years of experience in the roofing industry. We also offer siding, gutters, architectural sheet metal work, and many more services. We offer free quotes, are dedicated to what we do, & guarantee beautiful craftsmanship.
Rodyben7 Construction LLC- Roofing & Siding
(203) 309-9656 www.rodyben7builders.com
Serving
4.8 from 61 reviews
Rodyben7 Construction commitment has always been to deliver the highest quality workmanship through integrity and hard work ethic, as we add significant value to our client's home for the most affordable market rates. Our client's satisfaction and smiles at the delivery of our final work is our inspiration and reward. We can help you with any project you have in mind. With more than 10 years of experience, our crew is ready to handle all aspects of home improvement. We can handle all aspects of home improvement; interior and exterior, residential and commercial.

T&C Roofing & Construction
(203) 727-0858 tcroofingconstruction.com
Serving
4.8 from 39 reviews
Looking for an affordable, yet professional, Bridgeport roofing company? T&C Roofing & Construction provides expert roofing services throughout Fairfield County for both residential and commercial customers. In addition to our roofing services, we’re a full-service team that can help you repair, or install, skylights, chimneys, gutters and vinyl siding – we also offer power washing services. No matter the size or layout of your roof, let our Bridgeport roofing company take on your roof repair or roof replacement needs. Call today to schedule a free estimate!
Valley Iron Roofing
Serving
5.0 from 8 reviews
Affordable roofing excellence in Westlake Village and nearby communities - Valley Iron Roofing. Quality doesn t have to break the bank. Expert roof repairs, replacements, installations at fair prices. Licensed contractor with financing options, manufacturer warranties, and commitment to your satisfaction throughout Westlake Village.
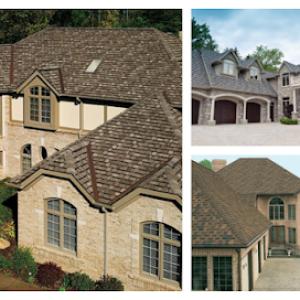
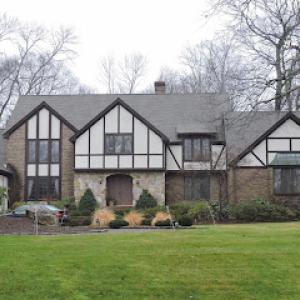
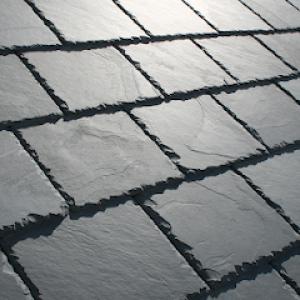
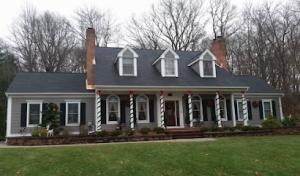
Asphalt shingles dominate the local market because they fit the large stock of pitched suburban homes and offer reliable performance for the typical Trumbull roof size and span. They handle freeze-thaw cycles well when installed with proper underlayment and ventilation, and they're familiar to local crews who understand common detailing around soffits, chimneys, and vent stacks. If your home has a standard gable or hip roof with moderate slope, asphalt shingles deliver easy maintenance, straightforward repairs, and a broad selection of colors that blend with neighborhood streetscapes. This option also tends to be the most cost-effective choice for replacing large roof areas without compromising long-term durability.
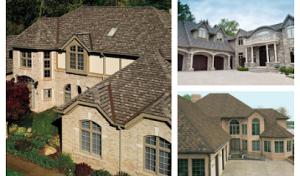
Metal roofing is active in the area but remains a premium option compared with asphalt, typically chosen for longevity and snow-shedding performance. In a climate with heavy winter loading and persistent wind-driven storms, metal can offer superior resistance to membrane punctures, reduced maintenance after storms, and faster installation in some cases. However, metal requires careful detailing at eaves, valleys, and transitions to avoid ice dam problems and leaks in areas where the roof meets walls or overhangs. Consider metal when the roof is visible from the street, when a long service life is prioritized, or when recent experiences with heavy snow loads suggest a need for improved shedding and resilience beyond standard asphalt.
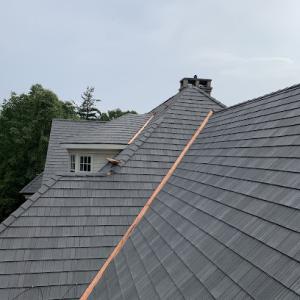
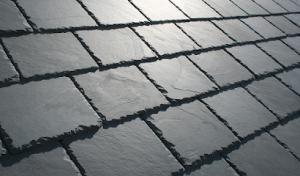
Clay tile and concrete tile provide distinctive curb appeal and long lifespans, but they demand careful assessment of structural load and roof framing. In Trumbull neighborhoods with older homes or shake-style accents, tile can be a good fit if the underlying structure is reinforced to carry the added weight. Wood shakes and synthetic products offer a traditional look but require vigilance for moisture absorption, surface cracking, and edge detailing that holds up to freeze-thaw cycles. Synthetic options can provide a balance of appearance and weight, but still require appropriate underlayment and ventilation to prevent moisture buildup under the cladding. When considering these materials, ensure the roof deck and trusses can carry the load, and discuss with a local contractor how the detailing around chimneys, skylights, and penetrations will be handled to minimize potential leaks.
Across all options, the key is thoughtful detailing in joints, fasteners, and transitions, especially where the roof meets venting, dormers, or wall intersections. In Trumbull's mixed neighborhoods, a consistent approach to attic ventilation, drip edges, and proper downspout placement matters as much as the material choice itself. Consider how debris from surrounding trees and seasonal shading affect the roof over time, and plan for proactive inspections after winter and after major storms to catch issues before they advance. This practical, season-aware mindset helps ensure the selected roof type provides reliable protection through the town's characteristic freeze-thaw cycles and snow events.
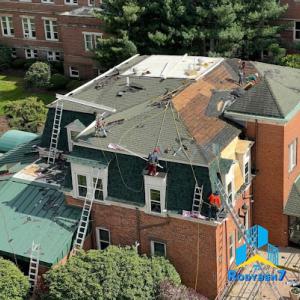
Replacing a roof in this part of Fairfield County comes with a practical tilt toward sturdy, longer-lasting materials and careful attention to seasonal timing. In Trumbull, you'll typically see asphalt shingles priced around $350-$650 per square, metal around $700-$1200 per square, clay tile $1000-$1800 per square, concrete tile $900-$1600 per square, and wood shake or synthetic/composite roofing $500-$900 per square. Those ranges reflect the local market where steep rooflines, chimney flashing work, and the expectations for debris protection and cleanup in established suburban neighborhoods push pricing upward compared to flatter, newer construction districts. Weather and scheduling realities also matter, because spring and early fall are favored installation windows, while winter conditions and post-storm demand can tighten labor availability.
The choice of material drives the bulk of the budget in a Trumbull project. Asphalt shingles remain the most common and cost-efficient option, yet the long-term performance under freeze-thaw cycles and snow loads should be weighed against higher upfront costs for tile or metal. Clay and concrete tiles bring notable durability but require a stronger roof deck, better underlayment, and more precise flashing details-costing more per square but potentially extending life in a climate with freeze-thaw stress. Wood shakes offer a traditional look but demand meticulous maintenance and can be less forgiving in wet springs. Synthetic or composite shingles deliver a middle ground, blending resilience with moderate pricing. If the roof is prominently pitched or has complex geometry, expect labor to rise even before material costs, because skilled installation becomes more time-consuming and the risk of leaks during storm events increases.
Steep residential rooflines are common here and translate directly to more hours on the job and higher material waste protection costs. Chimney flashing-especially around older brickwork-adds another layer of complexity and expense, since proper flashing must accommodate movement from freeze-thaw cycles and seasonal shifts. Debris protection and cleanup are a regular expectation in tree-rich neighborhoods; contractors often include tarping, daily cleanup, and haul-away in the price, which can elevate the final bill by a meaningful margin relative to flatter lots. Finally, scheduling can swing costs: a bid in spring or early fall may come in lower due to steadier labor flow, while winter bids can spike from limited crews and the urgency after storms.
If timing is flexible, align the project with the preferred windows to avoid premium surge pricing. Weather holds most of the variables, but setting a realistic start date during a low-demand period helps keep the quote closer to the base ranges. When storms hit, be prepared for faster turnarounds but possible higher labor rates and expedited material sourcing. Planning ahead for debris protection, access routes, and working around attic vents or skylights minimizes surprises in the field and stabilizes the overall project cost.
Get a clear picture of your project costs upfront - no commitment required.


A full re-roof in Trumbull typically requires a building permit through the Town of Trumbull Building Department. The permit process is not something to treat lightly, because missing or delayed approvals can stall work, trigger rework, or complicate insurance coverage. In many cases, the roofing contractor will submit the permit application on the homeowner's behalf before tear-off and replacement begin. That arrangement can be convenient, but it also puts you in a position to double-check that all required documents-plans, notices, and any neighborhood or HOA forms-are accurate and complete before work starts. If you oversee the project yourself, be prepared for additional coordination with the Building Department to avoid gaps that could halt progress.
In practice, the roofing contractor often handles the initial permit submission and coordination. This can streamline scheduling, especially when you're juggling fall debris, winterized systems, and the seasonal constraints of a freeze-thaw climate. However, because the permit ties into safety and code compliance, you should keep a close eye on what's submitted and how any changes are documented. If the scope shifts during tear-off, an updated permit or amendment may be required to reflect new materials, underlayment, or fastening methods. Clear communication with the contractor and timely documentation can prevent last-minute surprises that delay inspections.
Town inspections are typically scheduled during and after the project in Trumbull to verify installation and code compliance. Inspections cover underlayment, flashing detail, fastener patterns, and proper venting as they relate to the local freeze-thaw cycle and snow load considerations. Some neighborhoods or HOAs may add their own review layer, which can introduce additional timing and documentation requirements. Plan for inspection windows and keep access clear for inspectors. If anything doesn't align with code or HOA expectations, address it promptly to avoid re-inspection fees or multiple visits.
Failing to secure proper permits or to pass inspections can lead to fines, required corrections, or even removal of work in progress. In a heavily tree-lined suburban area, a rushed or under-inspected installation is especially risky during rapid weather shifts or heavy winter snow. Staying ahead with permits, accurate paperwork, and responsive communication with your contractor and inspectors is the prudent path to a reliable, code-compliant re-roof.
Trumbull sits in Connecticut's standard storm-claim environment, not a broad insurer pullback market. In practice, coverage decisions often hinge on documentation quality rather than market withdrawal. When a wind or hail event hits, insurers expect a clear trail: photos of actual damage, records of the roof's condition before the event, and a detailed scope of work that matches the repair or replacement plan. The better the file at submission, the smoother the claim review tends to be.
After a storm, prepare a photo log that covers every roof surface and surrounding areas that could show impact or debris drive-throughs. Include close-ups of damaged shingles, granule loss, flashing, vents, and penetrations. Document nearby trees and branches that could have contributed to damage or debris loading. Gather prior-condition records: recent inspections, notes from past repairs, and any warranties or service histories. A detailed scope of work should map each repair or replacement item to an observed condition, with a logical sequence that aligns with how a contractor would execute the project.
Adjusters reviewing Trumbull-area claims commonly scrutinize material specifications and installation methods. Have the contractor supply product data sheets for the chosen roofing system, including shingle or panel type, underlayment, flashing details, and fastener specifications. Include installation method notes that show adherence to the manufacturer's recommendations and to the local roof pitch constraints typical of the neighborhood. If a storm damages multiple sections, the scope should indicate whether full replacement or targeted repairs are used, and how each section ties together to restore performance against freeze-thaw cycles and seasonal snow loads.
Start with a dated gallery that clearly associates each image with a specific roof zone, eave line, and deck surface. Add a concise narrative for each area describing observed damage and its likely cause. Attach a before-condition summary from a recent inspection or service call, and pair it with a post-event assessment. Include the contractor's written scope of work, tying every line item to observed conditions, product specs, and installation methods. Finally, keep communications organized: retain all emails, letters, and notes from the insurer, contractor, and any third-party adjusters in one easy-to-find folder. This approach tends to align with how adjusters evaluate material specs and installation methods after wind or hail events.
Connect with contractors who help homeowners navigate the claims process from damage assessment to final approval.
Chimneys are a persistent source of roof trouble in your area, where seasonal shifts stress flashing, hearth collars, and chimney crickets that drain away from the brickwork. You'll notice gaps, rusted or lifted step flashing, and deteriorated sealant around the base long after the last leaf has fallen. When a contractor talks about chimney work, expect targeted attention to the flashing and counter-flashing as well as the transition from the brick veneer to the roofing material. If you're planning any masonry or vent work, insist on a full edge-to-edge plan that includes proper kick-out flashing and a solid seal at the chimney crickets to avoid seepage during spring thaws.
Skylight leaks tend to reveal themselves most clearly during snowmelt and the first spring rain, when temperature swings expose vulnerabilities in flashing, curb sealants, and the seal between the skylight flange and the roof planes. A common trap in this climate is choosing a skylight with a flashing design that isn't forgiving of heavy snow load or repeated freeze-thaw cycles. Pay attention to the drip edge and the boot around any vent portions near the skylight, and consider upgrading to more robust flashing that tolerates seasonal expansion and contraction without losing its grip.
Although the market is predominantly pitched, you'll still encounter flat or low-slope additions, porches, and some commercial structures tucked behind suburban streets. Those sections demand careful attention to drainage and membrane durability, because even a small misstep here can trap moisture and slow the dry-out after a storm. Align the roof sleeve details, ensure positive drainage toward scuppers or internal drains, and verify that transitions from the steep main roof to low-slope areas are sealed with continuous, compatible flashing. In cold winters, keep a closer eye on these junctions after heavy snows melt; those are the points most likely to reveal hidden leaks.
Find contractors experienced in skylight installation, flashing, and leak repairs to bring natural light into your home.
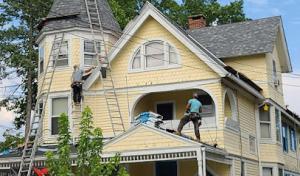
Spring and early fall are the seasons that line up best with Trumbull's climate for a full roof replacement or major repair. After the harshest winter moves through, there's less exposure to freezing cycles during installation, which helps sealants and underlayment set correctly and minimizes the risk of cold-weather setbacks. Early fall brings milder temperatures and typically drier days, allowing crews to complete work with fewer weather-related delays. If you're eyeing a replacement, aligning the schedule with these windows reduces the chance of weather-driven leaks during the project and supports a smoother sequence from tear-off through final inspection. Homeowners in mature, tree-lined neighborhoods often find spring or autumn calendars fill quickly, so a heads-up with the contractor early in the season is wise.
Heat in the warmer months can accelerate some asphalt components and affect sealants, so timing and crew practices matter on hot-weather installs. Scheduling during stretches of cooler, consistent days helps protect roof materials from unnecessary expansion and contraction. It's practical to plan work for mornings when temperatures are lower and to confirm that crews are using shade covers and proper hydration. If a summer replacement is unavoidable, expect more attention to roof venting, wind protection, and afternoon shutdowns to preserve material integrity. For homes with vents or skylights, coordinate with the contractor to minimize daytime interior heat gain and keep interior spaces comfortable during the job.
Autumn in this area brings stronger winds and an uptick in falling branches and leaves. Debris can clog gutters and downspouts, which conceals roof issues that might otherwise be spotted earlier. A late-fall inspection is especially useful to catch wind-driven shingle lift, flashing damage, or sagging areas before winter storms set in. When planning an autumn project, set aside time for a thorough pre-installation gutter and debris sweep, and arrange for a post-install follow-up to ensure there are no hidden vulnerabilities after leaf fall. This approach helps ensure the roof remains watertight through the winter months.
When a claim or final inspection happens after a roof project, insurers and building inspectors will scrutinize how the installation was done. In this market, a clear warranty discussion upfront helps set expectations about performance, especially after freeze-thaw cycles and heavy snow events. You should confirm what is covered for workmanship, labor adjustments, and any exclusions tied to common weather-induced issues. Document who is responsible for repairing incidental interior damage caused by a roof failure, and how long the coverage lasts after completion.
Manufacturer-backed systems carry particular weight when replacing asphalt or metal roofs, given Trumbull's seasonal temperature swings. If you choose a branded system, ask how the manufacturer's limits interact with local climate realities like ice dam risk, wind uplift, and paint or coating failure after freezes. For metal or asphalt replacements, verify that fasteners, underlayment, and drip edges meet the manufacturer's installation guidelines and are compatible with the chosen roof profile. A properly aligned system reduces quiet failures during thaw cycles and helps inspectors see consistent, code-adherent workmanship.
In this competitive market, expect written scope of work, cleanup duties, and workmanship guarantees rather than relying on verbal promises. The document should outline all components included in the project, the exact areas to be cleaned, and the standard of finish for visible surfaces. Ensure the agreement specifies who handles debris removal after each storm and how protection is maintained during construction. A detailed, signed plan helps prevent miscommunications if a weather-related issue arises later.
Keep copies of manufacturer installation instructions, product data sheets, and warranty cards linked to the specific materials used. Note site conditions, a sequence timeline, and any field alterations agreed with the contractor. After completion, obtain a written confirmation that the roof is ready for inspection, with contact information for the installer's service line. This paper trail supports both claim responses and final inspections.