Last updated: Apr 19, 2026
Baldwin sits on Long Island's South Shore, so roof claims are often tied to coastal storm systems and wind-driven rain rather than inland hail-driven loss patterns. When a storm rolls in and you hear wind gusts howl or feel rain driving under the eaves, your first move is to inventory what's visibly compromised: missing shingles, lifted underlayment, fascia loosening, and any interior staining or active leaks. If you see daylight through the roof deck or hear dripping into the attic, act as if the house is actively flooding-because it is. The goal in those first hours is to stop the water from penetrating deeper, not to chase permanent repairs. Place sturdy tarps or heavy-duty plastic over the most exposed areas and secure with roofing nails or boards so they won't blow away in gusts. Keep a constant eye on wind shifts and avoid climbing onto a damaged roof yourself; the risk of a fall or sudden collapse is real, especially after a heavy storm cycle.
Long Island insurers commonly ask Baldwin homeowners for pre-damage photos, prompt storm reporting, and contractor estimates before moving a roof claim forward. If you have a camera or access to cloud storage, pull together recent photos of the roof from multiple angles-especially around eaves, valleys, and any prior repairs. After a storm, take fresh pictures showing the current state of the roof and interior leaks, including dates. Make sure emergency tarps are dated and show the exact area they cover. When reporting the event, include a concise narrative: when the storm occurred, what parts of the roof were affected, and any interior signs of water intrusion. Obtain written, itemized estimates from a licensed local contractor for temporary stabilization (tarps, leak containment) and for the most critical permanent repairs that must be done to prevent further damage. If the insurer requests, provide these documents promptly, clearly labeled and organized, to avoid delays caused by missing information.
Active leak containment is a major homeowner priority in this region. If water is entering living spaces, place buckets or containment systems under the leaks and move valuables away from water paths. Document every leak by timestamp and location, and keep a log for your adjuster. Contact a trusted local contractor early to secure fast tarping and emergency repair services; the demand for these services is unusually strong after coastal events, so speed matters to minimize further damage. Ask the contractor to provide a written plan for temporary stabilization and a proposed timeline for permanent repairs. If shingles or flashing are exposed, request temporary sealing that reduces wind-driven water intrusion until a full repair can be scheduled. Maintain copies of all communications with insurers and contractors, and store them with your roof-related documents for easy access.
After a coastal weather event, insurers will often want to verify the extent of storm-related damage before approving substantial work. Maintain a calm line of communication and provide the requested documentation in a timely fashion to keep the claim moving. When talking with a contractor, insist on a clear scope that distinguishes emergency stabilization from permanent repair, and request a written estimate that itemizes materials and labor for each phase. In this market, the quickest path to a solid, compliant repair is a tightly coordinated effort: you, your insurer, and the contractor aligned on what happened, what's immediately needed, and what standard of repair will restore the roof to its prior condition and resilience against the next coastal event.
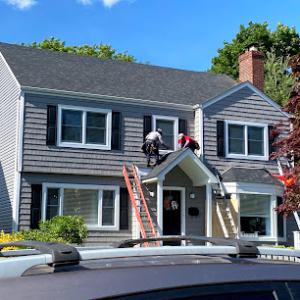
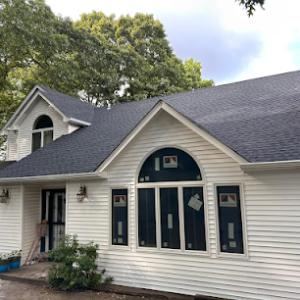
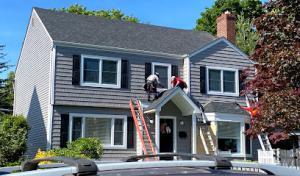
Baldwin homeowners choose across a wider-than-average mix of asphalt shingles, clay tile, synthetic/composite shingles, slate, standing seam metal, and cedar shakes, so material selection is a bigger decision here than in markets dominated by one roof type. That variety means your roof plan should start with the house's orientation, attic ventilation, and typical exposure to coastal humidity and winter moisture. If you're replacing after a storm or in the wake of insurance work, coordinate material choices with the visible detailing-roof edges, chimneys, skylights, and vents-to guarantee a cohesive look and consistent performance across the surface. In practice, team up with a local contractor who can map a phased replacement if you're transitioning between materials that have different nailing patterns or flashing requirements.
Freeze-thaw cycling in Baldwin winters is especially relevant for heavier and more brittle systems like slate and clay tile, where flashing details and replacement matching matter more than on basic shingle roofs. Before ordering, verify that each flashing detail around chimneys, vents, and transitions is compatible with the selected material, and plan for precise color and texture matching to minimize patchwork after a storm. This is not a place to improvise: a cracking seam or mismatched flashing can become the weak line during a deep freeze or sudden warm spell. If you're choosing slate or tile, discuss underlayment redundancy and eave overhang adjustments with the contractor to reduce perched ice risk and wind-driven water intrusion.
Warm, humid summers on Long Island can accelerate heat-related aging in asphalt products and moisture-related issues in wood-based roofing such as cedar shakes if ventilation and drying are poor. Ensure attic spaces are vented adequately and that soffit, ridge, and gable vents are clean and unobstructed. For cedar, pay special attention to staining and sealant cycles that respond to high humidity; untreated areas can wick moisture and deform in heat, while well-ventilated decks and ridges help maintain wood stability. If cedar is chosen, discuss stain longevity and maintenance intervals with a Baldwin tradesperson who has seen the local humidity patterns.
Coastal storms and salty air can accelerate corrosion on metal systems and wear on sealants. Standing seam metal and, to a lesser extent, clay tile require precise installation to resist wind uplift and salt-laden moisture intrusion. Verify that sealant joints are double-dapped or reinforced where relevant, and that the contractor uses weather-appropriate fasteners compatible with the chosen material. For mixed-material roofs, plan the transition zones carefully-metal-to-shingle interfaces, tile-to-composite intersections, and cedar-to-ceramic transitions all benefit from continuity in flashing and color-matched sealants. This approach reduces potential leak points and simplifies future inspections after coastal events.
In this South Shore market, replacement pricing for asphalt shingles, clay tile, synthetic/composite shingles, slate, standing seam metal, and cedar shakes follows the local ranges you'll see across Baldwin's neighborhoods. Asphalt shingles typically run from 350 to 650 USD per square, clay tile from 850 to 1600 USD per square, synthetic/composite shingles from 450 to 900 USD per square, slate from 1100 to 2100 USD per square, standing seam metal from 650 to 1200 USD per square, and cedar shakes from 600 to 1000 USD per square. Those figures reflect the mix of older homes with ductile roofs, newer coastal designs, and everything in between that this market handles regularly.
Storm events on the South Shore drive costs higher in Baldwin when emergency demand surges and scheduling tightens across nearby communities. After a major Long Island storm, you can expect a tighter window for material deliveries, crew availability, and coordination with insurers, which tends to push both labor and material charges upward in the short term. If a claim is involved, the final price may hinge on how quickly a reputable contractor can mobilize crews and secure the necessary materials in a stressed supply chain.
For homeowners, the practical impact is this: the material you choose sets the ceiling on your replacement bill, but the local storm dynamics can push estimates upward during peak demand. If you already know a storm is forecast, you may see price dips in the lull after the immediate aftermath as crews re-balance schedules, but those windows can close quickly. In Baldwin, it's common to see tighter timelines and higher-season pricing compared to calmer periods, especially for premium materials like slate or standing seam metal.
When you're evaluating bids, ask each contractor to break down the quote by material and by major line item (underlayment, flashing, drip edge, ventilation, and disposal). Because this market already contends with humid summers and winter ice-dam risk, confirm the plan includes adequate ventilation and proper ice-dam mitigation measures for your attic and eaves. Documentation that ties the chosen material to local climate performance-such as warranty specifics for coastal exposure and proven performance under Long Island snow loads-will help you compare apples to apples across different bids.
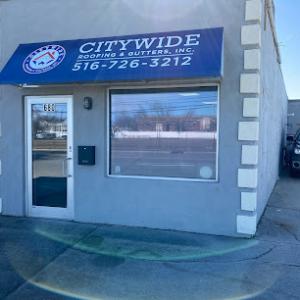
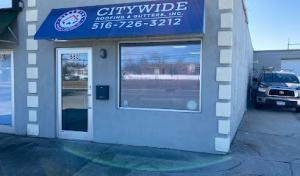
Citywide Roofing & Gutters
(516) 726-3212 www.citywideroofingny.com
680 Atlantic Ave, Baldwin, New York
4.8 from 46 reviews
We are a full-service roofing contractor specializing in residential and commercial roofing solutions. Our scope of work includes complete roof replacements, repairs, leak investigations, preventative maintenance, and roof inspections. We work with a variety of roofing systems such as modified bitumen, EPDM, asphalt shingles, and other flat and low-slope applications. Our team is committed to quality craftsmanship, safety, and project efficiency. We take pride in providing honest assessments, durable roofing solutions, and professional service from project planning through completion. Our goal is to protect our clients’ properties while delivering long-term value and peace of mind.
Responsible Remodeling
(516) 481-1723 www.responsibleremodeling.com
560 Merrick Rd, Baldwin, New York
4.7 from 62 reviews
Responsible Remodeling provides roofing, siding, gutters, windows, doors, and decks to Baldwin, NY and surrounding areas.
All Island Renovators
(516) 232-5116 www.allislandrenovators.com
Serving
4.8 from 24 reviews
All Island Renovators is a family owned roofing and siding business. We have over 10+ years of experience. we specialize in residential roofs as well as flat roofs. Using only the best roofing brands there is on the market. We also do small roof leak repairs. Siding is also key to a beautiful house renovation. We use everything from vinyl siding, to azek trim and Hardie boards. Servicing all of Long Island NY.
Mk Best Roofing
(516) 615-1791 mkbestroofing.com
Serving
4.9 from 57 reviews
MK Best Roofing is a trusted GAF certified roofing company based in Roosevelt, NY. Since 1998, we have proudly served all of Long Island, especially Nassau County, along with nearby neighborhoods such as Merrick, North Merrick, South Hempstead, Freeport, and Uniondale. Whether residential or commercial, we handle every roofing need such as installation, repair, maintenance, and replacement. Our roofing options range from metal, flat, and shingle to solar and cedar roofs. We are also specialize in providing professional siding and gutter installation for your house. All of our work is fully licensed, insured, and backed with 100% financing options. LICENSED & INSURED
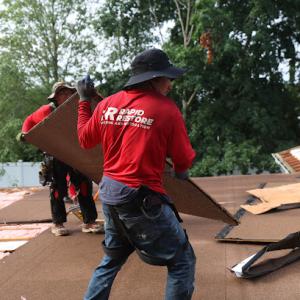
Rapid Roofing
(631) 801-4827 www.rapidrestoreny.com
Serving
5.0 from 81 reviews
Getting a new roof or roof repair shouldn’t be a headache – that’s why at Rapid Roofing, we make it easy. As a roofing company built on trust, our expert roofer contractors deliver seamless roofing services with zero hassle and no shortcuts. Whether it’s routine maintenance or emergency roof repair, our residential and local roofers get the job done right – every time. We don’t just claim to be the best roofers, we prove it! From affordable roofing solutions to BBB-accredited roofing contractors, we’re the good roofing company homeowners rely on. A roofing business that stands behind its work, delivers results, and redefines what it means to hire top-rated roofers.
John G Hubler & Sons
(516) 764-6437 johnghubler.com
Serving
4.8 from 68 reviews
Founded by John G. Hubler Sr. in 1973, we have over 45 years of experience. Our family is from Rockville Centre and we proudly operate our home office on North Park Avenue We strive to run a business that does truly care for our customers by offering professional service throughout every step of every project. Our team’s experience makes us the right choice for your home makeover. From full roof replacements to roof repairs, we are your local GAF Master Elite Roofer. Our family and roots are based in Rockville Centre, New York but our service area extends beyond the village. We are licensed in Nassau County, Suffolk County, Queens, and the Hamptons.
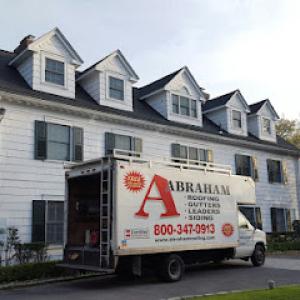
Abraham Roofing
(516) 990-6548 www.abrahamroofing.com
Serving
4.7 from 112 reviews
Located at 23 Blake Ave in Lynbrook, Abraham Roofing serves Nassau County and Queens with over two decades of expert roofing and siding services. Specializing in roof replacement, repair, installation, and more, our certified team provides top-notch solutions for "roofing and siding companies near me" searches. From tackling "roof leak repair long island" to "vinyl siding installation," we emphasize quality, safety, and customer satisfaction. As a GAF Master Elite® Contractor, we offer exceptional roof service repair and leader system installations. For prompt and professional "roofing in New York," choose Abraham Roofing—where your needs always come first.
R&M Roofers
(516) 233-9506 rnmroofersllc.com
Serving
4.8 from 24 reviews
At R&M Roofers, we’ve proudly served Hempstead, NY and surrounding areas since 2007 with reliable roofing services and top-notch craftsmanship. From roof repairs to full roof replacements, our experienced team uses durable materials that stand the test of time. We also offer expert gutter installations and siding solutions to protect and enhance your home. Based in Hempstead, we serve nearby communities including Uniondale, Garden City, West Hempstead, Freeport, Baldwin, Rockville Centre, Valley Stream, Elmont, Franklin Square, and Lynbrook, as well as across Nassau and western Suffolk County. Whether you’re in Long Beach, Oceanside, Massapequa, or East Meadow, we’re committed to keeping your home safe, beautiful, and built to last.
Roof Eval
Serving
5.0 from 23 reviews
Roof Eval delivers professional roof inspection services based in East Rockaway and serving the whole of Long Island. With a focus on Nassau County, Specially East Rockaway and other neighborhood areas such as Bay Park, Oceanside, Hewlett, Hewlett Harbor, and Lynbrook. We are Infrared Certified, NRCIA, and CCPIA certified, bringing top expertise to residential and commercial properties. Our inspections cover forensic analysis, leak-free assurance, installation oversight, building condition checks, leak detection, and solar panel evaluation. We also offer HVAC mapping, thermal imaging, and moisture scanning for complete roof health assessments. Scheduled your virtual or in person consultations now to insure your roofing safety with us.
Long Island Roofing
Serving
4.9 from 369 reviews
Long Island Roofing is an award winning roofing contractor that provides residential, commercial, and industrial roofing installation and around-the-clock emergency repairs in Long Island, Queens, Brooklyn, New Jersey, and Connecticut. With over three decades of experience, they specialize in roof removals and installations completed within a day, as well as custom copper and metalwork, gutters, downspouts, skylights, and all roof repairs, making them a trusted choice for all your roofing needs.
Island Roofing
(516) 303-7663 www.islandroofingus.com
Serving
5.0 from 190 reviews
With over 25 years of proven expertise, Island Roofing is a roofing company delivering top-tier solutions for commercial, industrial, and residential projects. We serve Long Island, New York, and 30 other states in the Eastern U.S. As a reliable roofing contractor, we’re known for our use of top-grade materials, expert craftsmanship, and honest service. We handle it all, from residential roofing, commercial roofing, multi-family roofing, and preventative roof maintenance to leak repairs and emergency service. We also provide gutter installation, gutter cleaning, and gutter maintenance, all with precision and care. What sets us apart is our commitment to customer satisfaction and our relentless focus on excellence in everything we do.
Prodigy Contracting
(516) 318-0105 www.prodigycontracting.net
Serving
4.9 from 38 reviews
Prodigy Contracting is a Veteran owned business servicing Long Island, New York since 2005. As a GAF Presidential Master Elite Roofer, we offer our clients exceptional quality and a lifetime warranty. Our siding designs feature innovative looks, with rustic contemporary touches and attention to detail service. We use Drone Technology to provide a 360 degree rendering of your project before and highlight your beautiful results after. We look forward to meeting you. Let us transform your home into you Dream Home
Most Baldwin homes require a building permit for a full roof replacement because the village is governed through the Town of Hempstead permitting structure. That means the самого project must pass through the town's oversight, not as a purely local, stand-alone clearance. The permit is not a one-and-done form; it anchors the entire replacement timeline and paperwork trail-from design review to final signoff. The town's framework emphasizes ensuring critical details like roof deck condition, venting, snowfall load considerations for Long Island winters, and proper underlayment are addressed up front. This is particularly relevant after coastal storms or heavy ice events, when insurers and building departments scrutinize workmanship for long-term durability.
In Baldwin, plan review is the first practical hurdle. The plan review process looks at specifics such as roofing material selection, flashing details around chimneys and dormers, and any deck repairs that may be needed as part of the replacement. Since the Town of Hempstead requires coordination across different permit lines, expect requests for clarifications or additional drawings that demonstrate roof geometry and attic ventilation compliance. Buckling under pressure from seasonal storms can happen if a roof upgrade is rushed; the plan reviewer will want to see a coherent strategy for drainage, especially in areas prone to heavy rain and storm surges. Working with a contractor who keeps a detailed, orderly packet-submission checklists, material spec sheets, and site-specific notes-helps keep the plan review moving smoothly.
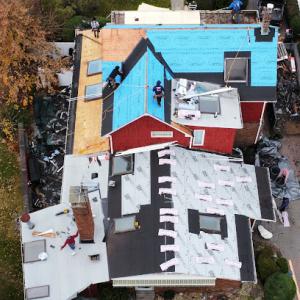
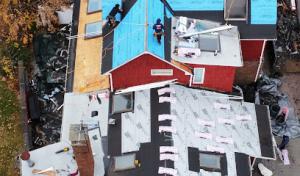
Baldwin replacements typically follow a staged inspection pattern rather than a single inspection at the end. The building department schedules inspections at key milestones, such as after roof deck removal, after underlayment installation, after the roof covering is installed, and finally at completion. The staged approach provides opportunities to catch and correct issues early-reducing the risk of leaks or ice-dam vulnerabilities in future winters. It also aligns with how insurers increasingly view documentation after coastal weather events, where proof of proper installation practices matters for claim resilience. The inspector will verify venting, insulation interface, drip edge placement, and appropriate flashing around penetrations. Expect to see a clear list of deficiencies if anything differs from the approved plan, with a defined window to address each item.
In practice, Baldwin homeowners usually rely on the roofing contractor to submit permit paperwork and coordinate inspection timing with the building department. Your contractor should serve as the central point of contact for the permit package, scheduling inspections, and ensuring that any required amendments are prepared in advance of the next inspection. It's prudent to confirm with the contractor that they have, and will maintain, the permit set on site throughout the project-especially during material deliveries and staging work. Clear communication reduces delays, helps align the work with the town's sequencing, and ensures that the final signoff happens without avoidable hold-ups.
In a four-season climate, winter ice dams form when meltwater refreezes at the eaves, pushing moisture under shingles and into sheathing. Freeze-thaw cycles stress the decking, creating small gaps that rarely look serious until spring. Hidden damage can accumulate under the snow cover, especially on older roofs with compromised underlayment. You'll notice higher attic heat loss as icicles lengthen and drip lines form along the fascia, signaling potential water entry that can show up later as stains inside ceilings. Attic access and insulation matter, since warm attic air worsens melt rates. A quick inspection of attic sheathing for staining after thaw can catch trouble early. Leaves also trap moisture against the underlayment, inviting mildew and rot where shingles already lift. Upgrade attic baffles and ensure soffit-to-ridge ventilation to slow melt pools, and consider heat cables only where necessary.
Fall leaf accumulation hides the roof edge and valleys, making it easy to miss flashing problems or gutter blockages. When leaves clog drainage, water backs up to the edges, accelerating wear on shingles and increasing ice-dam risk next winter. Clear gutters before storms, but beware that leaf debris can also clog attic vents, contributing to moisture buildup in the decking and rising mold risk. Install a basic gutter screen and schedule leaf cleanup in late summer to reduce debris backups.
Spring storm periods can delay repairs and replacements, so the window to address winter damage closes quickly as the weather shifts. That bottleneck makes late-fall or early-summer planning essential for avoiding weather-driven delays. Coordinating tarp protection and temporary repairs during storm season helps minimize interior damage if a leak is detected. Create a weather calendar with fall inspections, winterized tarps, and pre-storm repair windows tied to local storms.
Summer heat and humidity can worsen decking moisture issues and accelerate shingle wear, especially when roofs carry prior winter or spring damage. Heat expands metals in flashing and can reveal seam gaps. Inspect after heavy rain to catch soft spots, curling shingles, or dark staining that indicates moisture intrusion behind the drip edge. If moisture signs appear, track them with a simple diary and plan a professional evaluation before next season. Hidden damage rarely corrects on its own.
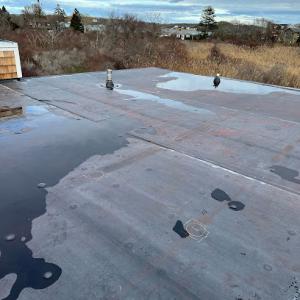
A local pattern shows meaningful specialization in flat roofs, so if a home has low-slope sections, porches, additions, or mixed-roof configurations, treat them as distinct projects rather than an afterthought. When inspecting a flat roof, start with the edge detailing where a lot of leaks begin, then move to penetrations and transitions. In Baldwin, it's common for moisture to linger around parapets and scuppers, so check for rust, white mineral deposits, and edge flashing wear. If a flat section sits under a higher roof slope, examine the interface closely for improper termination or failed sealant. Document all suspect seams and note if any ponding exists after several days of rain.
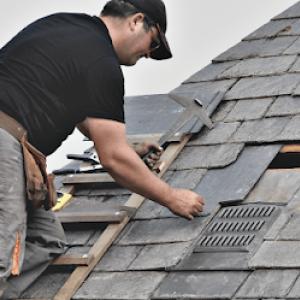
Skylight repair is a recurring local specialty, so leak tracing around penetrations is a practical concern rather than a rare edge case. Start by testing interior ceilings for damp spots near the skylight flange, then go outside to inspect the flashing, curb, and shingle-to-flash transition. Look for hairline gaps at the curb, loose or missing flashing, and degraded boot seals around any venting components. If sealant has become brittle or discolored, plan for targeted resealing or flashing replacement rather than broad roofing overhaul. In Baldwin conditions, ensure any skylight replacement accounts for seasonal expansion and contraction, which can stress the seal over time.
Chimney-related work appears frequently in the local contractor market, which matters in Baldwin because roof leaks are often tied to flashing transitions rather than field shingles alone. Inspect the chimney flashing where it meets the roof deck, paying attention to step flashing along brick or stone faces and the presence of any counter-flashing. Look for cracked or missing mortar at the chase line, and verify that sealants around the flashing have not pulled away. If a chimney cap is damaged or missing, address it promptly to prevent ice dam-related intrusion during winter. Track whether leaks appear after heavy wind-driven rain, which can reveal flashing weaknesses rather than shingles failing independently.
Find specialists in TPO, EPDM, and built-up flat roofing systems for residential and commercial properties.
Citywide Roofing & Gutters
(516) 726-3212 www.citywideroofingny.com
680 Atlantic Ave, Baldwin, New York
4.8 from 46 reviews
Responsible Remodeling
(516) 481-1723 www.responsibleremodeling.com
560 Merrick Rd, Baldwin, New York
4.7 from 62 reviews
Baldwin homeowners operate in a Long Island insurance environment where coastal weather exposure can affect underwriting and claim scrutiny. The tighter the file you build before a storm, the less room there is for dispute after shingles lift or ice dam damage appears. Start a practical, dated log that covers your roof's visible condition, plus attic and eave details that matter to insurers. Photograph each plane of the roof from multiple angles, then back those images with dated notes about sagging decking, loose flashing, or failing seals around vents. Store these files in a simple, accessible system: a labeled folder on a drive or a cloud folder you can share with an adjuster if needed. When conditions look unsettled, consider a quick professional assessment to establish a baseline you can reference later. A clear baseline reduces questions about what existed before the event and speeds the review.
Insurers in this region often want evidence of the roof's condition before the storm, plus dated photos, inspection notes, and repair estimates after the event. After a coastal weather event, document new damage meticulously: date-stamped photos of every impacted area, notes on observed leaks, moisture in the attic, and any water intrusion tracking down walls. If interior damage follows roof issues, photograph those spaces promptly and keep receipts for any temporary protections you install. Report the claim promptly, and describe the sequence of events you observed, including wind directions, hail, or heavy rain patterns that coincide with observed damage. A well-organized packet can shorten the time between claim submission and approval.
Adjusters serving Baldwin may request independent inspections or competing contractor quotes after major weather events, so organized documentation can directly affect claim speed. Prepare by having two or three local contractor contact options ready, with both their preliminary assessments and notes about recommended repairs. If an independent inspection is conducted, ensure the inspector's report references your pre-storm baseline photos and the new evidence you've gathered. Clear, consistent records reduce back-and-forth and help maintain a steady claim timeline.